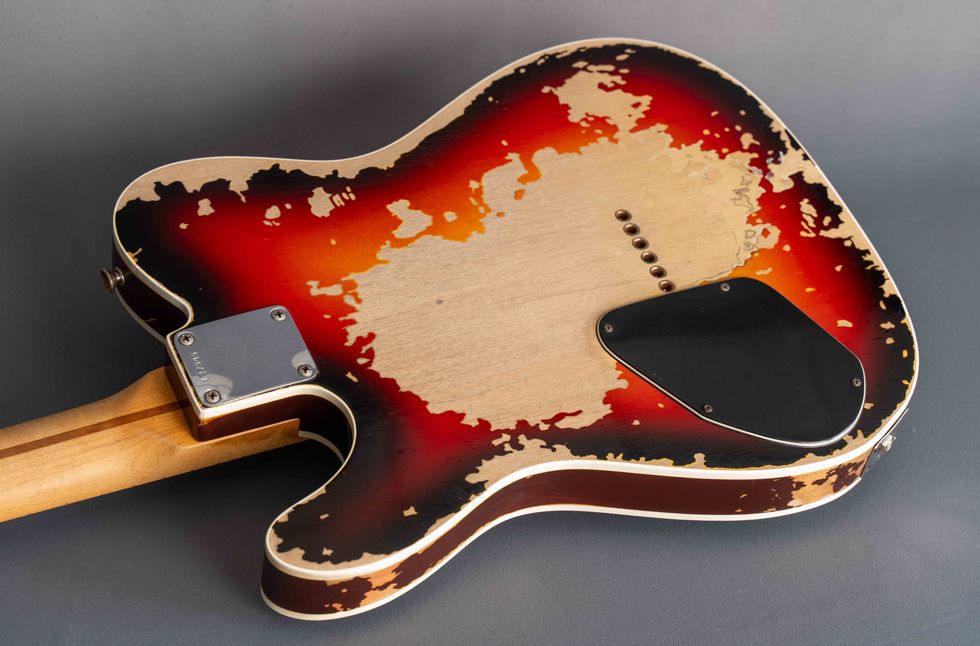
When aging a project guitar, it’s best to take it apart and start small. First, we focus on the metal.
This month, we'll discuss some basics about DIY aging/relic'ing and I'll explain a project I recently did. I chose a budget electric guitar that retails at €199 including shipping (about $217 USD). A guitar in this price range is perfect for a beginner relic'ing project, because if it's not perfect or you ruin something by accident, it's not the end of the world. Besides this, I was curious about the build quality of such a guitar, plus it gives us a perfect base to enhance and make more individual.
I decided on a Les Paul Junior Double Cut copy, a guitar design that Gibson released in 1958 and that's still in production today. It's a basic design: a single P-90 pickup placed above the wraparound bridge, with a Telecaster-like master volume/master tone configuration. This model is called DC-Junior TV Yellow and is made by Harley Benton, which is the home brand of the German-based Thomann company, one of the biggest guitar retailers in Europe.
A guitar in this price range is perfect for a beginner relic'ing project, because if it's not perfect or you ruin something by accident, it's not the end of the world.
The guitar offers good basic parameters: a solid mahogany body with a glued-in mahogany neck, a dark-stained amaranth (peltogyne) fretboard, aka purpleheart, instead of the classic rosewood material. The rest of the specs are close to vintage. We'll discuss single parts and aging them one by one, and replacing some of them for optical or performance reasons, as part of this project.
When the guitar arrived, I was more than surprised about the overall quality and craftsmanship. I brought it up to tune, plugged it in, and could instantly rock. Fret job, paint job, intonation, and action were excellent. The pickup sounds really good. What else could one expect for this price? Especially the fret job and the use of factory D'Addario strings (.010–.046) are remarkable in this price range.
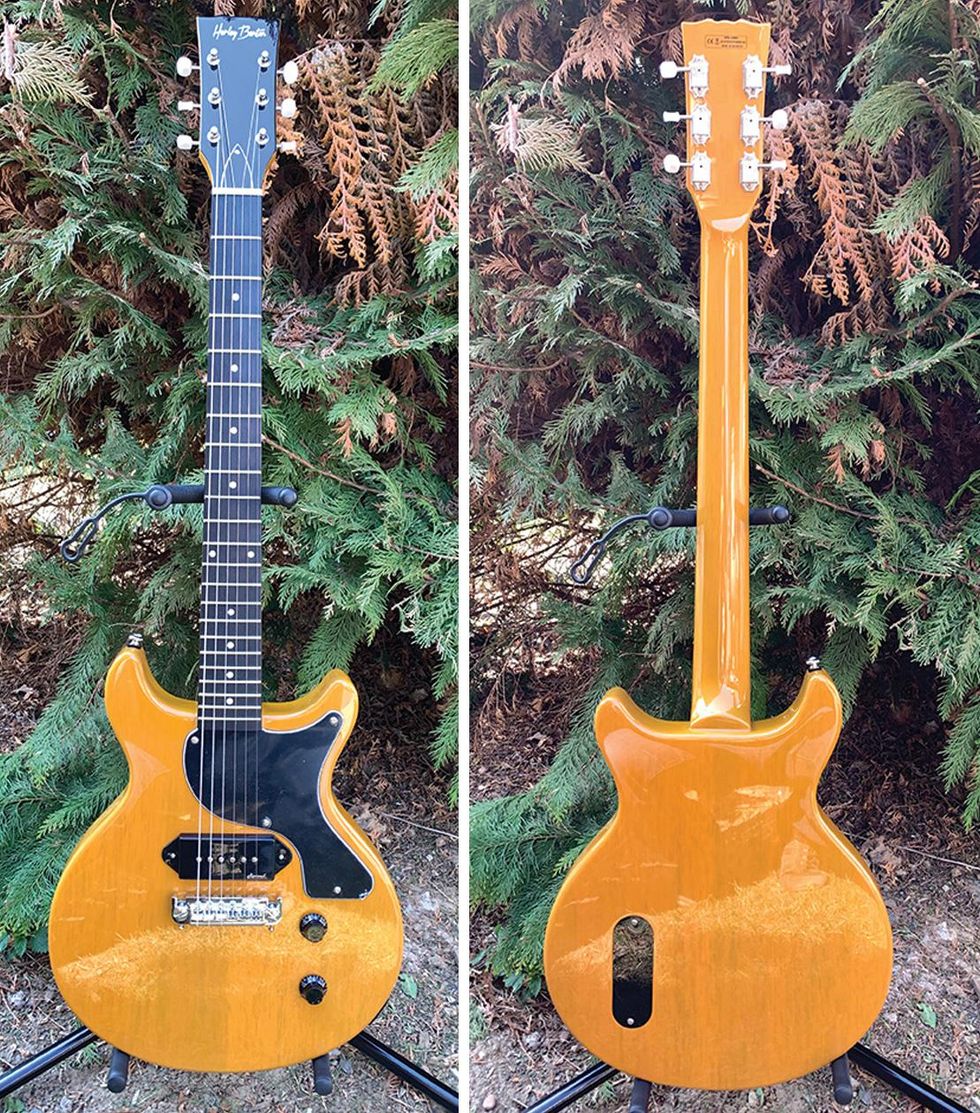
Images 1 (left) and 2 (right)
Courtesy of singlecoil.com
Images 1 and 2 show the guitar as received, so you have a first impression of what I'm talking about. It's not a real TV yellow, and more of a butterscotch/caramel/mustard color, but with a nice transparency so you can see the grain of the wood. We'll come back to this later in the project.
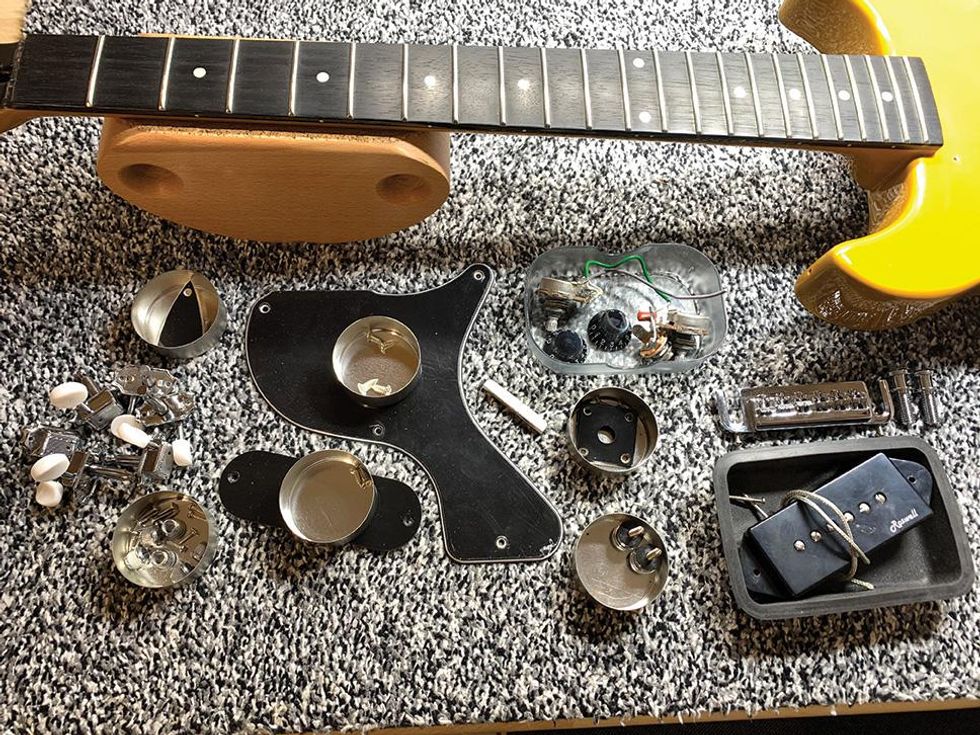
Photo 3
Courtesy of singlecoil.com
The first step is to completely disassemble your guitar, as I did, which you can see in Image 3. It's helpful to separate and label all small parts so you don't have any difficulties putting them back together. Take photos of the whole guitar and the details before you take it apart, and get some small containers (empty cans, boxes, cups, or whatever) to store all parts during the project. Store the screws together with the corresponding hardware, i.e. the screws from the pickguard taped on the back of it ... you get the idea. Also, as the proud owner of several cats and a dog, I speak from experience when I highly recommend using containers with a lid so you can close them, at least when your furry buddies have access to your working space.
I completely took the guitar apart except the bushings (aka "inserts" or "anchors"), because it was obvious that glue was used additionally to secure them. It's not difficult to get them out with the right tools, but in the process you could end up damaging the wood, having to repair the damage by re-drilling the hole and filling it with a wooden plug. There's a lot of debate on the possible tonal influence of the bushings, but my experience is that it's very, very little (if any) as long as it sits tight and can't move. I decided to leave them alone, but it's also possible to slightly age the visible part of the bushings so they won't stand out from the rest.
Let's proceed with an easy-yet-effective aging procedure. We will start with all the screws, followed by the rest of the metal parts.
Your shopping list for this is very small. Here we go:
- Goggles, gloves, surgical mask, and a shop apron to protect yourself. (We'll need this all through this series: safety first!)
- Old newspapers to protect your working space.
- A soft piece of wood like spruce, pine, fir, etc.
- Some Q-tips and paper towels.
- An old cup filled with cold water.
- Steel wool (preferably 0000 grade) or sanding pads (e.g. Micro-Mesh).
- Iron (III) oxide (ferric oxide) liquid.
You don't need much of the ferric oxide; a small bottle will do. This chemical is often used for etching printed circuit boards, so it should be easy to find. Be careful with this stuff! Chemicals can do harm if not used properly. Only use them in well-ventilated areas, always wear goggles, gloves, apron, and a surgical mask—and don't forget to protect your working space with old newspapers.
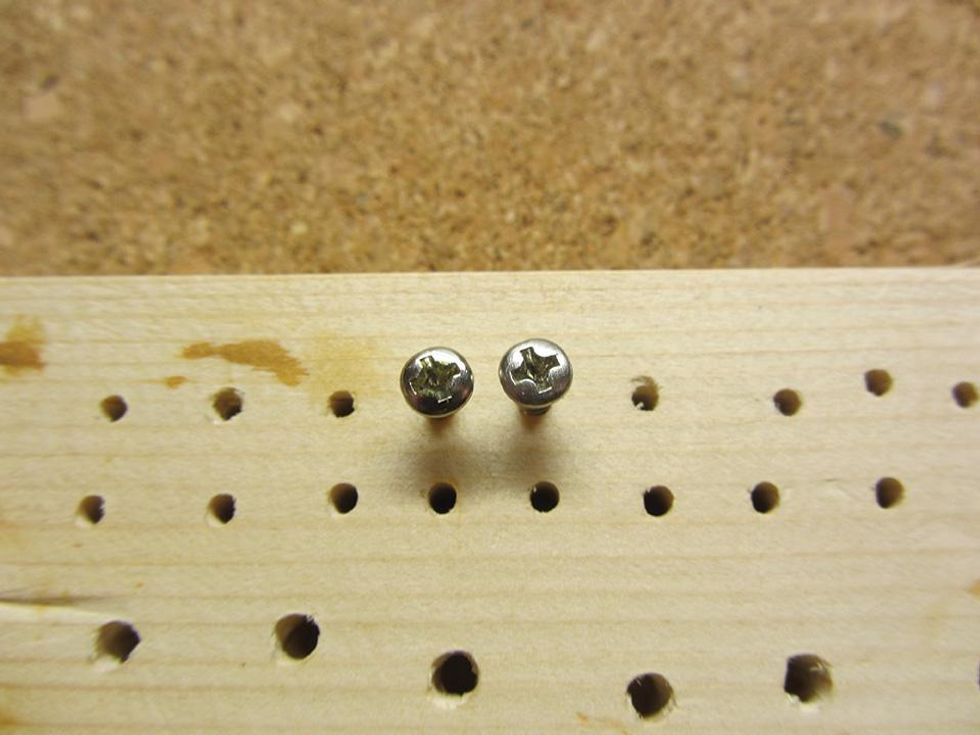
Photo 4
Courtesy of singlecoil.com
So here we go. Remember basic rule #1: break the shine! All screws on this guitar are nickel plated and very shiny. First, lightly rub them with steel wool or a fine-sanding pad until the glossy shine is gone and the color is dulled. Don't forget the edges of the screws. Image 4 is a before/after photo of this process. I used a flexible Micro-Mesh pad with 400 grid.
A lot of people are happy with the optical results after this simple treatment, but for more effect, we'll add some light signs of corrosion in the next step.
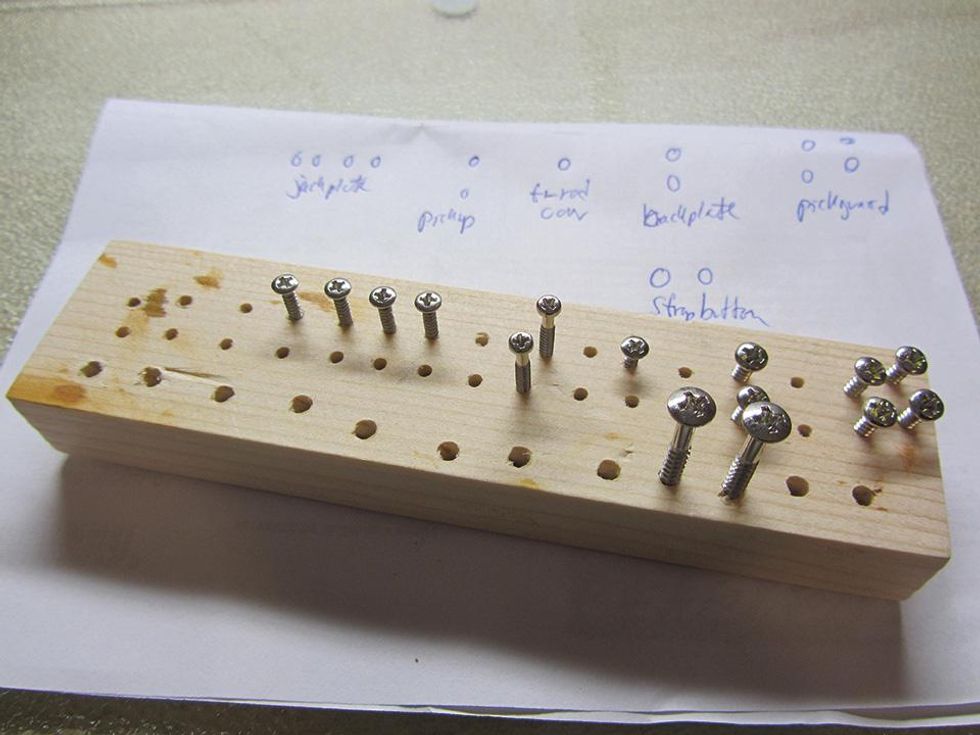
Photo 5
Courtesy of singlecoil.com
Take a piece of soft wood and screw in all of the screws with a screwdriver that matches the head type and size on your screws (Image 5). You don't need to screw them all the way in—just until they can't move or tip over. To keep the overview, arrange them in groups and make a kind of roadmap of what goes where. This way you won't mistake any of the screws as you reassemble the guitar.
Place the wooden piece with the screws on an even surface covered with old newspapers in a ventilated area. Place a cup with cold water within reach. Now dip a Q-tip into the ferric oxide liquid, but remember to use gloves, goggles, etc. to protect yourself. Place the Q-tip on the head of the screws to apply the ferric oxide. The oxidation process will start immediately. Depending on the metal of the screws and your personal taste, this process can range from seconds up to a minute, so it's a good idea to get a feeling for this by first testing it out on a few extra screws. To stop the process, simply dip the screw into the glass of cold water near you and rub it instantly with a piece of paper towel. Caution: Ferric oxide can color the coating of your sink. That's why a cup of water is advised here instead of rinsing screws with running water under a faucet.
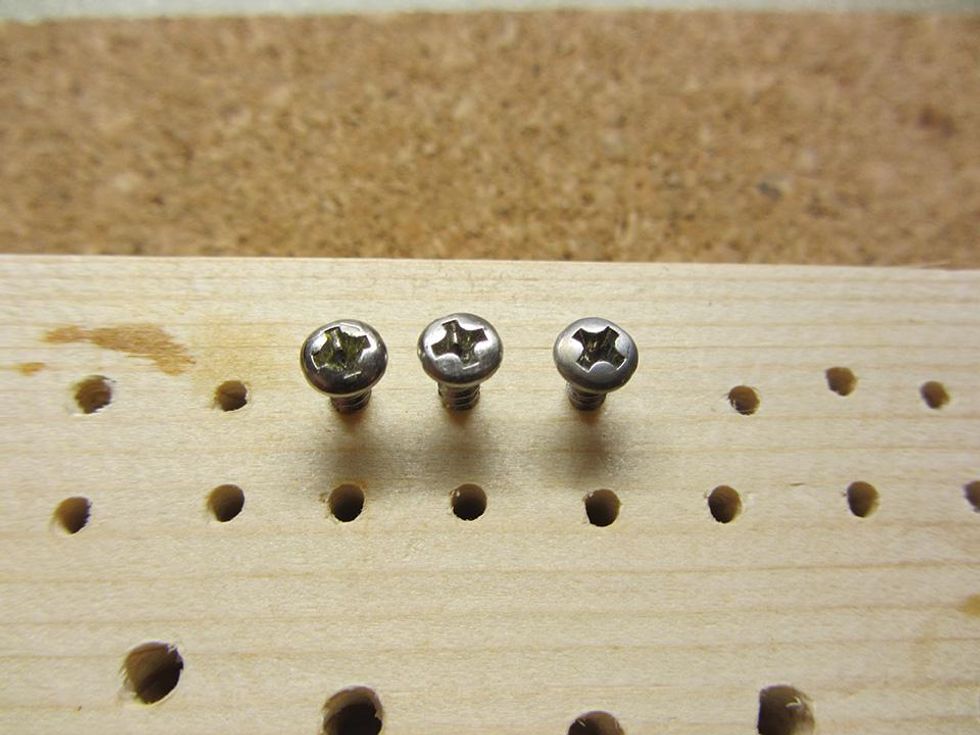
Photo 6
Courtesy of singlecoil.com
You can see the process and all three stages side by side in Image 6. If you feel the oxidation process was too much and you don't like the look, you can use steel wool or a Mesh pad to remove some of the oxidation.
Don't overdo it. I've never seen any rusty screws on a vintage guitar. They're usually a little bit dull, showing some light corrosion, if any. Perhaps breaking the shine will be enough without adding any of the ferric oxide. Simply test it on some extra screws and see what you prefer.
Next month we'll perform a different guitar mod before we return to age more metal parts: the bridge, strap buttons, and the tuners. For this, I'll leave you with a little homework to prepare: Get yourself a small bucket with a lid (larger yogurt buckets work perfectly) and collect a nice mixture of funny things like rusty nails, broken glass, gravel, sand, little stones, basalt, etc. to put in your bucket. Until then ... keep on modding!
[Updated 7/26/2021]
- Last Call: Someday You'll Regret That Relic Job - Premier Guitar ›
- The DIY Relic Job—Fantasy or Reality? - Premier Guitar ›
- Paranormal Guitar Mods That’ll Rock Your DIY World - Premier Guitar | The best guitar and bass reviews, videos, and interviews on the web. ›
- The DIY Relic Job—Fantasy or Reality? - Premier Guitar ›
- DIY Relic’ing: Hardware Continued - Premier Guitar ›
- DIY Relic’ing: Neck Treatment - Premier Guitar ›
- Chibson Announce The Priority Delay Pedal ›
Some of these are deep cuts—get ready for some instrumental bonus tracks and Van Halen III mentions—and some are among the biggest radio hits of their time. Just because their hits, though, doesn’t mean we don’t have more to add to the conversation.
Naturally, every recording Eddie Van Halen ever played on has been pored over by legions of guitar players of all styles. It might seem funny, then, to consider EVH solos that might require more attention. But your 100 Guitarists hosts have their picks of solos that they feel merit a little discussion. Some of these are deep cuts—get ready for some instrumental bonus tracks and Van Halen III mentions—and some are among the biggest radio hits of their time. Just because their hits, though, doesn’t mean we don’t have more to add to the conversation.
We can’t cover everything EVH—Jason has already tried while producing the Runnin’ With the Dweezil podcast. But we cover as much as we can in our longest episode yet. And in the second installment of our current listening segment, we’re talking about new-ish music from Oz Noy and Bill Orcutt.
“Sometimes, I’d like very much for my guitar to sound exactly like a supa cobra.”
Luthier Creston Lea tells us about his favorite dirt pedal—an Athens, Georgia-made stomp that lets his guitar be a hero.
Let’s face it: Nobody can tell what overdrive pedal you’re using. Whether you’re in a carpeted suburban basement accompanying the hired clown at your nephew’s fifth birthday party or standing on the spot-lit monitor at Wembley, not one person knows whether the pedal at your feet cost $17 or $700, has true bypass, or has an internal DIP switch. Nobody leaning against the barn-dance corncrib or staunching a nosebleed up in the stadium’s cheap seats is thinking, “Heavens yes!! THAT is the sound of a silicone diode!”
So, why buy another overdrive pedal? Or six more? Are they different? (I’m asking myself.) Of course they’re different. (I’m telling myself.) A Turbo Rat is not aKlon. ATube Screamer is not a DS-1. Or is it? I can’t keep track. Why? Because it’s fun to see what the talented manufacturers of the world have to offer. And because any reader who picks up a guitar magazine for any reason other than to swat a fly is curious about what’s new and what other players are using to good effect. You can blow your savings on a guitar—I’d be happy to build you one—or an amp (or vacation or college or discount merlot or a regrettable whole-back tattoo), or you can spend $100 to $300 to satisfy your curiosity. Will anybody in the audience notice? Unlikely. Will you feel better for five minutes or the rest of your life? Maybe. Seems worth rolling the dice from time to time. Nobody gets hurt. And sometimes you’ll find a pedal that pulls something good out of your playing simply by responding to the way you play … which makes you play in new ways, etc., etc., in an infinite loop of delight. Or at least infinite till the next pedal comes along. It feels good. In a troubled and imperfect world, is it so wrong to feel good?
I bought my first overdrive pedal, a well-usedMXR Distortion+, for $25 in 1991. Surely, I could have stopped there. But many others have come and gone in the years since. Have I bought a pedal, sold it, bought it again, sold it again? More than once.
I’ve mostly, finally outgrown the desire for new pedals, but I’m not immune to the occasional itch. Sometimes a trusted brand introduces something I just haveto hear for myself. That’s particularly true in the case of smaller-scale builders whose ears I’ve learned to trust. I’m going to like everythingChris Benson of Benson Amps or Brian Mena of Menatone ever makes, for example, so why not hear it all? Sometimes it’s alluring copywriting that makes me reach for my wallet. Sometimes they just look cool.
Maybe in my case, I just can’t resist a name like Supa Cobra. Sometimes, I’d like very much for my guitar to sound exactly like a supa cobra. When Greer Amps first introduced their Supa Cobra six years ago—described as delivering “chewy medium gain overdrive to awesome crunchy grind!”—I was immediately intrigued.
Oh, how I love the Supa Cobra—a woefully underappreciated pedal now only available from Greer by special request. I’m sure there are smart players who have discovered the joys of its lower-gain settings, but for me it’s perfect for punching through sonic mud and letting my guitar be heard. It lets my guitar be a hero.
I like it best with its 3-way clipping switch set to the middle position, which, according to Greer, bypasses the other modes’ clipping diodes and lets the op amp’s natural drive come through. I can’t say I know exactly what that means, but I know it’s loud and clear and compressed in just the right way to let sustained notes really sing out in a natural, power amp-y manner.
The Supa Cobra’s greatest feature may be the body control that dials in low-end presence without adding any murk. At higher body settings, the notes push on my chest in a way that I find thrilling. I like it around 60 percent with the gain knob turned nearly full up. Perhaps excessive, but life is short. When it’s time to sound big, it’s the biggest-sounding pedal I’ve found. Lots of overtones, but not at the expense of clarity. It’s quick to jump into harmonic feedback at the gain-y settings I like best, but in a beautifully controlled way.
As a matter of fact, I think people do notice what overdrive pedal I’m using. Not that they know it’s a Supa Cobra, but it makes my guitar leap out in a way that so many other pedals have not. To borrow a word from Greer’s Lightspeed Organic Overdrive (also fantastic), it sounds organic. Or, very much unlike a wasp in a tuna can. I think it sounds like music. Loud music.A dual-channel tube preamp and overdrive pedal inspired by the Top Boost channel of vintage VOX amps.
ROY is designed to deliver sweet, ringing cleans and the "shattered" upper-mid breakup tones without sounding harsh or brittle. It is built around a 12AX7 tube that operates internally at 260VDC, providing natural tube compression and a slightly "spongy" amp-like response.
ROY features two identical channels, each with separate gain and volume controls. This design allows you to switch from clean to overdrive with the press of a footswitch while maintaining control over the volume level. It's like having two separate preamps dialed in for clean and overdrive tones.
Much like the old amplifier, ROY includes a classic dual-band tone stack. This unique EQ features interactive Treble and Bass controls that inversely affect the Mids. Both channels share the EQ section.
Another notable feature of this circuit is the Tone Cut control: a master treble roll-off after the EQ. You can shape your tone using the EQ and then adjust the Tone Cut to reduce harshness in the top end while keeping your core sound.
ROY works well with other pedals and can serve as a clean tube platform at the end of your signal chain. It’s a simple and effective way to add a vintage British voice to any amp or direct rig setup.
ROY offers external channel switching and the option to turn the pedal on/off via a 3.5mm jack. The preamp comes with a wall-mount power supply and a country-specific plug.
Street price is 299 USD. It is available at select retailers and can also be purchased directly from the Tubesteader online store at www.tubesteader.com.
The compact offspring of the Roland SDE-3000 rack unit is simple, flexible, and capable of a few cool new tricks of its own.
Tonalities bridge analog and digital characteristics. Cool polyrhythmic textures and easy-to-access, more-common echo subdivisions. Useful panning and stereo-routing options.
Interactivity among controls can yield some chaos and difficult-to-duplicate sounds.
$219
Boss SDE-3 Dual Digital Delay
boss.info
Though my affection for analog echo dwarfs my sentiments for digital delay, I don’t get doctrinaire about it. If the sound works, I’ll use it. Boss digital delays have been instructive in this way to me before: I used a Boss DD-5 in a A/B amp rig with an Echoplex for a long time, blending the slur and stretch of the reverse echo with the hazy, wobbly tape delay. It was delicious, deep, and complex. And the DD-5 still lives here just in case I get the urge to revisit that place.
Tinkering with theSDE-3 Dual Digital Delay suggested a similar, possibly enduring appeal. As an evolution of the Roland SDE-3000rack unit from the 1980s, it’s a texture machine, bubbling with subtle-to-odd triangle LFO modulations and enhanced dual-delay patterns that make tone mazes from dopey-simple melodies. And with the capacity to use it with two amps in stereo or in panning capacity, it can be much more dimensional. But while the SDE-3 will become indispensable to some for its most complex echo textures, its basic voice possesses warmth that lends personality in pedestrian applications too.
Tapping Into the Source
Some interest in the original SDE-3000 is in its association with Eddie Van Halen, who ran two of them in a wet-dry-wet configuration, using different delay rates and modulation to thicken and lend dimension to solos. But while EVH’s de facto endorsement prompted reissues of the effect as far back as the ’90s, part of the appeal was down to the 3000’s intrinsic elegance and simplicity.
In fact, the original rack unit’s features don’t differ much from what you would find on modern, inexpensive stompbox echoes. But the SDE-3000’s simplicity and reliable predictability made it conducive to fast workflow in the studio. Critically, it also avoided the lo-fi and sterility shortcomings that plagued some lesser rivals—an attribute designer Yoshi Ikegami chalks up to analog components elsewhere in the circuit and a fortuitous clock imprecision that lends organic essence to the repeats.
Evolved Echo Animal
Though the SDE-3 traces a line back to the SDE-3000 in sound and function, it is a very evolved riff on a theme. I don’t have an original SDE-3000 on hand for comparison, but it’s easy to hear how the SDE-3 bridges a gap between analog haze and more clinical, surgical digital sounds in the way that made the original famous. Thanks to the hi-cut control, the SDE-3’s voice can be shaped to enhance the angular aspect of the echoes, or blunt sharp edges. There’s also a lot of leeway to toy with varied EQ settings without sacrificing the ample definition in the repeats. That also means you can take advantage of the polyrhythmic effects that are arguably its greatest asset.
“There’s a lot of leeway to toy with varied EQ settings without sacrificing the ample definition in the repeats.”
The SDE-3’s offset control, which generates these polyrhythmic echoes, is its heart. The most practical and familiar echos, like quarter, eighth, and dotted-eighth patterns, are easy to access in the second half of the offset knobs range. In the first half of the knob’s throw, however, the offset delays often clang about at less-regular intervals, producing complex polyrhythms that are also cool multipliers of the modulation and EQ effects. For example, when emphasizing top end in repeats, using aggressive effects mixes and pitch-wobble modulation generates eerie ghost notes that swim through and around patterns, adding rhythmic interest and texture without derailing the drive behind a groove. Even at modest settings, these are great alternatives to more staid, regular subdivision patterns. Many of the coolest sounds tend toward the foggy reverb spectrum. Removing high end, piling on feedback, and adding the woozy, drunken drift from modulation creates fascinating backdrops for slow, sparse chord melodies. Faster modulations throb and swirl like old BBC Radiophonic Workshop sci-fi sound designs.
By themselves, the modulations have their own broad appeal. Chorus tones are rarely the archetypal Roland Jazz Chorus or CE type—tending to be a bit darker and mistier. But they do a nice job suggesting that texture without lapsing into caricature. There are also really cool rotary-speaker-like textures and vibrato sounds that offer alternatives to go-to industry standards.
The Verdict
The SDE-3’s many available sounds and textures would be appealing at $219—even without the stereo and panning connectivity options, a useful hold function, and expression pedal control that opens up additional options. The panning capabilities, in particular, sparked all kinds of thoughts about studio applications. Mastering the SDE-3 takes just a little study—certain polyrhythms can be dramatically reshaped by the interactivity of other controls and you need to take care to achieve identical results twice. But this is a pedal that, by virtue of its relative simplicity and richness and breadth of sounds, exceeds the utility of some similarly priced rivals, all while opening up possibilities well outside the simple echo realm