
Finding the height at which each pickup sounds best by itself.
Last month we began exploring the fine art of tweaking a Stratocaster's pickups ["
Adjusting Stratocaster Pickup Height, Pt.1," June 2011]. If you experimented with the specs we covered, I'll bet you're still surprised and amazed with the results. Hopefully, your Strat never sounded better. Who knew you could mod it by simply turning six screws?
As I mentioned last month, if you're tonally satisfied after making these adjustments, leave the new settings alone and have a good BBQ. If you feel that it sounds better than before but you still miss that certain something, read on for some good sweet-spotting fun.
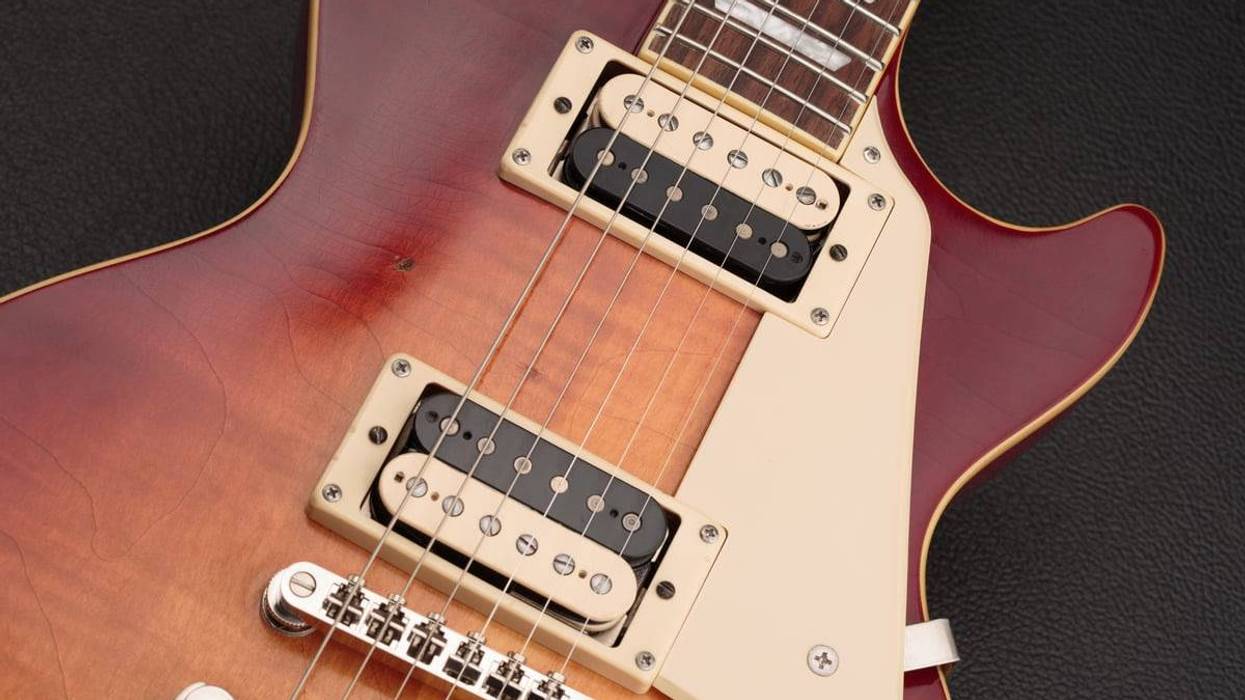
After following last month's instructions, when you look along the strings from the bridge toward the neck, your pickups should look something like the image above.
Before we get out the screwdriver again, let's define "sweet spot." For me, this is the height at which each pickup sounds best by itself. So sweet-spotting is the process of finding this magical place. I don't know who came up with this term or when it was introduced, but today you'll hear it whenever guitarists gather to share nuts-and-bolts Strat lore. (One of my customers from Italy calls it "the electrical G-spot.")
The sweet spot is very small—a quarter-turn of the screws can spell victory or defeat. Here are some tips on how to prepare for and then initiate the sweet-spotting procedure. (Note: Always sweet-spot with your guitar in regular playing position—not on a table or workbench.)
The first step is to play your Strat for a few days after doing the basic adjustments we covered in Pt.1. This is crucial, because it makes it much easier to recognize subtle sonic differences when adjusting the height. The second step can't be done in a hurry or when you're stressed—you and your ears should be fresh and rested: Put a set of new strings on and tune up. Then, using a short, high-quality cable, plug into your amp's clean channel. Switch off the reverb and tremolo, and don't use any pedals or effects.
Once you've made these preparations, it's time to begin. Essentially, there are three different ways to sweet-spot a guitar, although you can also combine them to find your own tonal heaven. Regardless of the method, always start with the bridge pickup and work toward the neck unit.
Sweet-spotting for a specific function.
This is the easiest and least time-consuming approach, but still very effective. And it's logical: If you want more output, raise it closer to the strings. But don't overdo it! Raising it too much will cause its magnetic field to pull too hard on the strings, resulting in a weird sound and tuning problems that some guitarists call "Strat-itis." If you need more output than you can get before the onset of Strat-itis, you'll need a hotter pickup.
If you want a softer, more mellow sound, lower the pickup. Don't overdo it here, either. Lowering it too far degenerates sound quality and vibrancy.
Want a little more oomph? Raise the bass side and lower the treble side. If you want more treble, do the opposite.
Sweet-spotting to compensate for pickup volume.
A lot of players want even output between all three pickups so there isn't a volume drop when flipping from one pickup to another or when using the "in-between" settings.
Pickups deliver a slightly different volume depending on their position. This is because there's minimal string movement close to the bridge, and it increases as you move toward the neck. The greater the string movement, the greater the volume and output. If you don't compensate for this, you'll get weak output from the bridge pickup and too much from the neck pickup. This is why the bridge unit should be closest to the strings.
As always, start with the bridge pickup. Once it sounds right, flip to the middle pickup and compare its volume. If the middle pickup is too loud, lower it slightly, checking its volume against the bridge pickup. Do the same with the neck pickup, alternately comparing it with the bridge and middle pickups. If you're satisfied, take a short break and then fine-tune the dual positions (bridge-plus-middle, middle-plus-neck).
Trust your ears. There are no absolute rules, and if you like a slightly unbalanced combined pickup sound, go for it—it's your tone! Keep in mind that getting the pickups to sound great alone and in combination will always be a compromise.
Sweet-spotting for maximum tone.
This is the supreme discipline of sweet-spotting. You need plenty of time to do it right, and you'll have to redo it if you change your string gauge or action. Again, the sweet spot is very small. Sometimes you'll hit it with less than a quarter turn of the screw. Here's the most common method: Raise the pickup until you hear signs of the aforementioned Strat-itis. Next, lower the pickup until the unpleasant qualities disappear and your Strat sounds normal. Fine-tune the rest by ear, carefully moving the adjustment screws a micro-turn at a time. On a lot of guitars, you'll suddenly hear a sort of natural vibrato when you find the sweet spot. This can be an indicator that you're close to—or already at—the sweet spot. Move out of the sweet spot, and you'll lose some of the desirable tone, transparency, string separation, and touch sensitivity.
Don't get frustrated if you don't find the sweet spot immediately—this specialized work takes time and practice. If you aren't successful, try again a few days later. Remember, all guitars are different, and so much depends on your guitar's pickups, strings, and action. Ultimately, your individual taste is the most important factor in this tone quest.
Happy modding!
[Updated 8/10/21]
- How to Balance Pickups on Strats and Teles - Premier Guitar ›
- Mod Garage: Humbucker Height Adjustment - Premier Guitar ›
- Adjusting Stratocaster Pickup Height, Pt.1 - Premier Guitar ›
- How to Balance Pickups on Strats and Teles - Premier Guitar ›
Get ready to rock with the guitar that’s turning heads! For the next 30 days, you have the chance to win the iconic Billy Corgan Signature Drop Z from Reverend Guitars.
Reverend Billy Corgan Drop Z Signature Electric Guitar - Pearl White
The Reverend Billy Corgan Drop Z combines the aesthetic features of his Z-One signature model and a longer 24-fret, 26.25″ scale neck designed for drop tunings. The long scale neck provides appropriate string tension for down-tuning, so the tone is deep and full, yet still stays punchy and clear. The Alder solid body paired with Railhammer Billy Corgan Z-One Pickups delivers a heightened output and a velvety treble for a rich, weighty rock tone. The roasted Maple neck, fingerboard, and medium oval profile are comfortable to play, even with the slightly longer scale length.
Neil’s brother-in-law Billy’s Ovation, before Neil’s repairs.
Reader: Neil Crump
Hometown: Austin, Texas
Guitar: King of the Road
When his brother-in-law passed away, this reader made it his mission to repair his old damaged Ovation guitar as a gift to his niece.
My brother-in-law passed away in March. He was a talented keyboardist and, in his heyday, played in bands that toured internationally. As a musician, he naturally had a guitar—a 1974 Ovation—and a “friend” put an unauthorized abstract paint job on it. That guitar had an extremely hard life: Its top was broken and the frets were completely worn out. As an aspiring luthier, I took the guitar to repair it then pass it on to his daughter. This proved to be a challenging task as I had never done anything more complicated than a basic setup before and I had few luthier tools.
A heat gun and thin spatula knife worked fine to remove the top and the bridge. I did my best to glue the new top halves together—but that left a visible seam, so I put a herringbone center strip over it (to match the purfling I would install later). I had no radius board, so I just clamped the pre-radiused braces I bought and was quite pleased that the new top did have a radius! Once I felt the bridge was sanded perfectly, I glued it down. I then replaced the plastic nut and saddle with bone. A hot soldering iron got the old frets out without damaging the fingerboard. (That said, next time I will clean those slots out better before installing new frets!)
“This proved to be a challenging task as I had never done anything more complicated than a basic setup before and I had few luthier tools.”
I was happy with my progress until I started routing the purfling channel. I had no workbench, and the concave Ovation body made things a bit awkward. While basically “bear hugging” the body with one arm and holding the router with the other, I heard a faint “pop.” The edge of an X-brace had come loose. I was able to squirt glue into the void with a syringe, but the concave guitar body made a brace jack useless (without fabricating a complicated caul). I removed the phono jack and jammed a pencil into the brace, keeping pressure on it with a rubber band. It worked!
Neil gave the Ovation a new lease on life with his extensive repairs, the end result of which can be seen here.
I also learned the importance of channel depth with purfling—I did lots of scraping to get everything flush. I am pleased with the finished product and my niece is so happy! I also put a new label inside the guitar body, with a dedication to her father on it.
Overall, there are multiple wins on this project. I gave tribute to my brother-in-law, made his daughter happy, and learned enough to build a guitar from scratch.
Two horns? It must be a Bison!
Our columnist links a few memories together to lead us to another obscure guitar model—one he remembers from his childhood and came to acquire as an adult.
Do you have any “click and stick” movies that you love? Like when you are channel surfing and see a movie that you’ve watched a lot, and then just watch it again? Lately, for me, it’s been the 2015 movie The Revenant. It’s a truly brutal tale of survival set in 1820s frontier America. My gosh, that movie just draws me in every time. There’s one scene where the main character goes flying off a cliff while riding a horse! He just sort of falls/rolls through a pine tree and lands in the snow … and he still survives! It’s crazy!
It makes me think about an old childhood friend who lived up the street from me. Jerry and his parents lived in an old house on their grandparents’ large plot of land. On one part of the land there was an old orchard filled with all types of fruit trees and pines, and I remember how we would climb to the top of the pines and just roll ourselves down the side, Revenant style! If you fell the right way, the branches would kind of gently let you down to the next, but if you hit it wrong and got in between the branches, you’d be wrecked. It’s like we enjoyed getting hurt, and, of course, when you’re young, you can snap right back. Ah, the days when pain really didn’t hurt. Now I wake up with injuries, for real.
“The action was way high and the fret ends were sharp. It was basically a painful affair.”
So why am I talking about my click-and-stick movie and stupid childhood escapades? Well, let’s get back to memories of my old friend Jerry. First, the house he lived in was so old that it had real wooden siding, but it hadn’t been painted in forever so the exterior took on a worn, faded, haunted house vibe. Second, his carpet was so tattered that it was being held together with duct tape. Lastly, I remember his dad had a cool, old electric guitar in the living room. His dad would let me play it sometimes, and I remember that it actually hurt to play! The action was way high and the fret ends were sharp. It was basically a painful affair. Not falling-out-of-a-tree painful, but as bad as it comes with guitars. It had the label “Conrad,” and young Frank didn’t realize that he’d be looking for that guitar again one day. I mean, it did have four pickups and lots of knobs and switches!
Made at the old Japanese Matsumoko factory in the ’60s, this Conrad Bison 1233 has four pickups and a 27" scale.
Years later, I would discover that his was a Conrad Bison guitar. The model came in a few different configurations, but the four-pickup design was designated as the 1233. Primarily featuring a lovely sunburst, these Bisons were made at the amazing old Matsumoku factory in Japan and were imported by the David Wexler Company that was based in Chicago. Matsumoku always had a good supply of aged wood, and many of the guitars made there are resonant and built well. The Bisons first appeared around 1966 and had a rather good run into the early ’70s.
Simple volume/tone knobs are paired with preset solo/rhythm switches that power alnico magnets. There’s an on/off switch for each pickup, and the sound really covers all the bases. Thumpy lows and crisp highs are all there. And, the pickups handle fuzz and distortion with ease. The Bisons also came in one- and two-pickup configurations with a normal scale, but the four-pickup ones have a longer, 27" scale, which is common for Matsumoku-made electrics.
So there it is: pain, survival, American frontier, Bison, haunted houses. It all sticks together like a duct-taped carpet. Click and stick, baby!
A 1000-watt speaker cabinet crafted for musicians who demand power and precision. Sunn Amps intends to reinvent the standard 4x12 configuration with the introduction of this new cabinet.
The Sunn Amps DoomBox is built to accommodate both guitar and bass, offering an impressive 1000-watt handling capacity—making it the first commercially available 4x12 cabinet with such high power handling. With four specially designed 12” drivers rated at 250 watts each, this cabinet provides clean, unrestrained sound levels that can maintain power integrity across all frequencies, ideal for high-volume performances.
Inspired and developed using feedback from artists and bands who rely on the depth of lower tunings and high volume genres, the DoomBox was engineered to meet the unique demands of professional musicians looking for a robust, high-efficiency cab that can translate the raw power of their sound without compromise.
Premium Craftsmanship and Materials
The Doom Box cabinet is crafted from solid finger-jointed Baltic Birch plywood, ensuring both durability and tonal clarity. Each cabinet is constructed by hand in the U.S.A. using original 1930s machinery, the DoomBox reflects Sunn’s historic commitment to quality, contrasting with some of the mass-produced, MDF-based cabinets on the market today. The cabinet’s aluminum basket, ferrite magnet, and custom Sunn weave Tolex with a custom grill design complete its professional-grade build.
Technical Specifications:
• Power Handling: 1000W
• Inputs: 1 x ¼”
• Impedance: 8 Ohm
• Drivers: 4 x Sunn 12S250
• Construction: Marine Grade Baltic Birch
• Dimensions: 29.25” X 30” X 14”
• Weight: 107 lbs
• Price: $2399.00
With clear low-end punch, even sound response, and ample air movement, the Doom Box ensures that every note reaches the audience with clarity and power. This cabinet is a game-changer for musicians who need high-performance, road-ready equipment that enhances their unique sound.