
Image 1
How you connect the tone cap and potentiometer to the volume control has a huge effect on your sound.
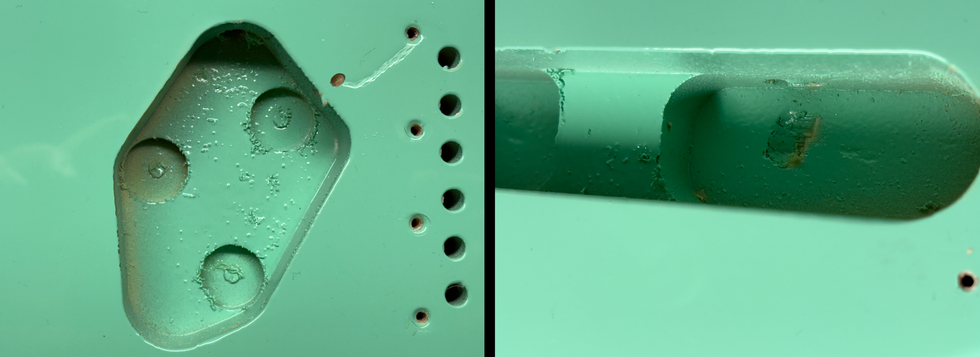
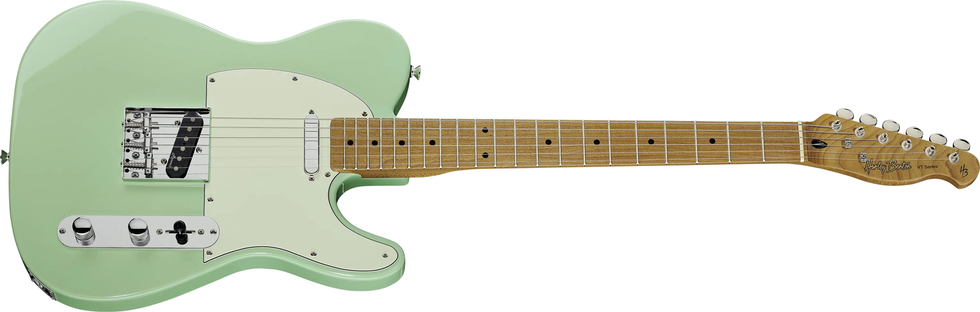
There are three different ways to configure the volume and tone controls in an electric guitar. Typically referred to as “modern," “'60s," and “'50s wiring," they perform differently and are a subject of great debate amongst tone fanatics. These wirings are often discussed in the context of a Les Paul, but the schemes apply to any guitar with a volume and tone control—whether it's a master-volume-plus-master-tone configuration, as with a Telecaster, or a guitar with individual volume and tone controls for each pickup, such as a Les Paul, ES-335, SG, and so on.
Let's examine these three systems and see how they differ. But first, some background: In a standard electric guitar, the potentiometers are used as variable resistors. We use two of the three lugs on each pot, and the tone cap is connected between the volume and tone controls. To keep it simple, we'll say each pot has an input lug, an output lug, and a third lug connected to ground.
As you close the pot—i.e., turn it counterclockwise—the wiper moves towards the grounded lug, sending more and more of your signal to ground. With the pot completely closed, all of the signal is sent to ground. In the case of a volume control, this results in silence. For the tone control, this yields the darkest tone. How dark depends on the capacitance of the connected tone cap.
With the pot completely open (turned fully clockwise), essentially the input and output are directly connected. This allows all the signal to pass through the output, which means you get full volume and, in the case of the tone control, maximum high-end chime because the tone cap has almost no influence on the sound.
On a tone pot, instead of sending the complete signal to ground, the capacitor only sends a part of the signal to ground. The capacitance of the tone cap determines the cut-off point of the high frequencies. A low-capacitance tone cap—3300 pF, for example—will pass the least amounts of high-end chime to ground. Thus, when you roll the pot completely back, you'll hear only a subtle change in the high end. This value keeps your sound alive and vital, creating something I like to call a "warmth control." A higher capacitance value, like 0.022 µF, will roll off much more of your high end, creating a darker tone. With capacitances of 0.1 µF or even higher, your tone will be close to clinically dead with the tone pot fully closed.
Okay, now that we've done our homework, it's time to compare the three wiring schemes. We'll begin with the configuration that's so commonly used in today's production guitars that it has become a quasi-standard.
Modern Wiring
As shown in Image 1, in this wiring scheme the tone cap is connected between the volume pot's input and the tone pot's middle lug (aka wiper), which in this case is also the output. This configuration yields the behavior we've come to expect from a passive guitar. When you turn down the volume (even just a bit), the treble loss is disproportionate to the drop in volume. In other words, a small cut in volume creates a far greater loss in your guitar's treble response. That's the nature of the beast—something we all know well. There is only one real solution to combat this "volume-versus-tone" problem: active electronics. All other solutions are just a compromise … but as is often the case, some compromising can make things much better.
This natural behavior in passive electronics is not an issue for all players. Many guitarists aren't bothered by it because they've gotten used to it over the years. Others really like this effect because it gives them a second tonal color from the same pickup. "Cool—I simply roll back the volume to fatten up the tone."
That said, many players prefer to have a consistent amount of treble at any volume setting. If that describes you, putting a carefully calculated treble-bleed network on all volume pots can be a good compromise. I explain how to do this in "Diving Deep into Treble-Bleed Networks."
There's one other thing to consider: How a control responds depends a lot on the pot's taper and ratio. Today, typical audio (aka logarithmic) pots have a 90:10 ratio, which results in a more or less "on-off" effect early in the rotation, rather than a useable range of control. Our human hearing simply doesn't work like this. To feel and sound right, a control needs a different ratio—preferably 60:40 or at least 65:35, which was the standard in the '50s and '60s. Sadly, most modern guitars come equipped from the factory with 90:10 audio taper pots.
People often talk about the magical tone of late-'50s sunburst Les Pauls. Well, part of this mojo is due to the '50s wiring.
Linear pots have a different problem: Over almost the whole rotation, you won't hear a significant change in tone or volume, but when you reach the end of the rotation, the "on-off" effect suddenly appears. This is exactly the opposite of an audio pot with an ineffective taper. For more on this subject, read "Dialing in the Passive Tone Control."
Classic '60s Wiring
As you can see in Image 1 (middle diagram), in this configuration, the tone cap is still connected to the input of the volume pot, but on the tone pot the middle lug is now connected to ground. Electrically, the '60s wiring is completely identical to the modern wiring with the same tone, behavior, and problems. But there is one significant difference: In terms of shielding, the '60s wiring is superior to the modern wiring scheme. When electromagnetic interferences enter a guitar, they will also stray into the tone pot's unused pin and therefore into the middle lug (the wiper) in both wirings. With the wiper connected to ground, as in the '60s wiring, the interferences will stop at this point. But with the tone cap connected to the middle lug, like in the modern wiring, electromagnetic interferences will find their way through the cap and carry on.
So, compared to the modern wiring, the signal-to-noise ratio in the '60s wiring is superior. This is technical knowledge from yesteryear: The wiper of a variable resistor is connected to the low resistance part of the circuit. This knowledge was really important when designing and building tube amps, radios, and televisions, but is almost forgotten today.
So why did Gibson switch from the '60s to the modern wiring? My personal theory is that this allowed them to use pre-configured pots for both volume and tone, with the same third lug soldered to the case as the grounding point. I don't know if this is true, but if you know the reason or have another theory, please share it.
Vintage '50s Wiring
In closing, let's look at the almost legendary '50s wiring, which is by far the most discussed wiring scheme when it comes to Gibson guitars (Image 1 — bottom diagram). Here, the tone pot's middle lug is also connected to ground, like in the '60s wiring, so it also offers the benefit of superior signal-to-noise ratio. But in this case, the tone cap connects to the volume pot's output lug, rather than its input.
With the volume fully opened, the '50s wiring is identical to the modern wiring: In both versions, the tone circuit is galvanically connected to the pickup's output, so the behavior and operation are comparable. The magic starts when you turn down the volume. With the modern wiring, the tone circuit is still directly connected to the pickup, but with the '50s wiring, the tone circuit is uncoupled from the volume, which is now electrically located between the pickup and the tone circuit. Because the tone circuit can no longer react directly to the inductance of the pickup, no resonance superelevation and no resonance shift can happen at this point. With the tone pot almost closed, the bass frequencies will be relatively raised—perfect for creating the "woman tone" that's often associated with Cream-era Eric Clapton.
What's so special about the '50s wiring? It will influence the guitar's performance in three major ways:
- The overall tone gets stronger and more transparent. It's difficult to describe, but I think of it as more "in your face."
- The typical treble loss that occurs when rolling back the volume is greatly reduced, and both the volume and tone controls react more smoothly and evenly without the typical hot spots. As a side effect, it's easier to clean up an overdriven amp by simply rolling back the volume on your guitar a bit.
- The tone and volume controls interact with each other—something you may know from certain early Fender tube amps. When you change the volume, the tone also changes a little bit and vice versa. Such interaction may feel strange at first, but it only takes a few minutes to get used to.
People often talk about the magical tone of late-'50s sunburst Les Pauls. Well, part of this mojo is due to the '50s wiring. The guitar responds differently—notes seem to "bloom," as if they're opening up after leaving the guitar. Why not give it a try? You might love it.
Next time, we'll resume our exploration of different types of guitar wire and how to use and handle them, so stay tuned. Until then ... keep on modding!
[Updated 9/9/21]
- Mod Garage: The Fender Greasebucket Tone Circuit - Premier Guitar ›
- Grounding Passive Circuits, Part 2—Plus, How to Build a Solder Cage - Premier Guitar ›
- How to Install and Maintain Your Guitar's Pots - Premier Guitar ›
- Mod Garage: Four Ways to Configure a 4-Conductor Humbucker - Premier Guitar ›
- Mod Garage: The Fender Greasebucket Tone Circuit - Premier Guitar ›
- Mod Garage: Decouple Your Les Paul’s Volume Controls - Premier Guitar ›
- DIY Relic’ing: Harmony Benton DC-Junior Electronics - Premier Guitar ›
- Auditioning Tone Capacitors, Part II - Premier Guitar ›
- What Does Phase and Polarity Mean for Your Guitar’s Pickups? - Premier Guitar ›
Analog modulation guided by a digital brain willing to get weird.
Fun, fluid operation. Capable of vintage-thick textures at heavier gain settings. High headroom for accommodating other effects.
MIDI required to access more than one preset—which you’ll probably long for, given the breadth of voices.
$369
Kernom Elipse
If you love modulation—and lots of it—you can eat up a lot of pedalboard space fast. Modulation effects can be super-idiosyncratic and specialized, which leads to keeping many around, particularly if you favor the analog domain. TheKernom Elipse multi-modulator is pretty big and, at a glance, might not seem the best solution for real estate scarcity. Yet the Elipse is only about 1 1/4" wider than two standard-sized Boss pedals side by side. And by combining an analog signal path with digital control, it makes impressive, efficient use of its size—stuffing fine-sounding harmonic tremolo, phaser, rotary-style, chorus, vibrato, flanger, and Uni-Vibe-style effects into a single hefty enclosure. Many of the effects can also be blended and morphed into one another using a rotary control aptly called “mood.” The Elipse, most certainly, has many of those.
Modulator With Many Masks
Anywhere pedal hounds meet and chat you’ll encounter spirited talk about the way pedals sound relative to a certain gold standard. It makes sense. Benchmarks are useful for understanding anything. But one of the things I like best about the Kernom Elipse is how it eludes easy comparison to such standards, and how the fluidity of its controls make it sound unique. As with any review, I compared the Elipse to as many pedals as I have that are relevant. Here, that included an Ibanez analog chorus, Phase 90 and Small Stone phasers, an optical Uni-Vibe-style pedal, a Boss BF-2,Mu-Tron Phasor II clone, and more. But what made the Elipse stand out in this company was function as much as sound. Operating the Elipse with an open mind, rather than a quest to replicate another pedal’s sound, leads to intriguing, unique, and unusual tones more specialized modulators don’t always offer.
“The Elipse is pretty ambitious for an analog modulator, but doesn’t spread itself too thin.”
Three of the Elipse’s controls—speed, mix, and depth—function predictably. The latter two controls, however, change function depending on the pedal’s mood (or mode). In tremolo mode, setting the mix at noon generates complex, warbly, and elastic harmonic tremolo-like textures. At maximum, it shifts to a more binary, on/off sound akin to optical or bias tremolo. In chorus/vibrato mode, the noon position marks a 50/50 wet/dry mix of pitch shift and dry signal—the ingredients for any chorus. At maximum, the signal is 100 percent wet, yielding pure pitch-shift vibrato. The shape control, meanwhile, adjusts the LFO waveform. In tremolo mode that means moving between triangle- and sine-wave pulses. The swirl control is the wild card of the bunch. It adds big-time dimension to the Elipse in all modes. Through most of its range, it slathers slow phase on whatever modulation is already bubbling and burbling. In the latter third of its range, though, it also adds gain, and by the time you reach maximum, the output is discernibly thickened in the low-midrange zone. The gain and low-mid bump helps compensate for the perceived volume loss intrinsic to modulation. But they also excite different segments of the harmonic spectrum as you manipulate other modulation-shaping parameters—adding expansiveness as well as the thickness you might miss from vintage modulators.
Enunciation Modulation
Compared to many of the modulation pedals I used for contrast, the Elipse has a high-mid-forward voice. This frequency bias has advantages. It lends most of the Elipse’s modulation textures a clear, airy essence that keeps their character present when adding fuzz or big delay and reverb effects. It makes some modulations less chewy, but it’s also easy to imagine such textures slotting easily into a mix where some thicker analog modulators would gobble up harmonic space.
The basic EQ profile also makes it easier to probe the nuances in the “in-between” voices, living in the liminal spaces between pedal moods. When you start to play with these blended textures and various blends of drive, shape, mix, and depth, you encounter many sounds that veer from vintage templates in cool ways. Lathering on gain from the swirl control and lazy depth rates made the hybrid chorus/flange intense, dreamy, and enveloping. Similar blends of slow, heavy harmonic tremolo and rotary speaker sounded massive too.
The Verdict
The Elipse is pretty ambitious for an analog modulator, but doesn’t spread itself too thin. Players looking for one or two very specific modulation sounds might find the interrelationships between the Elipse’s controls too complex. The inability to save more than a single onboard preset without a MIDI switcher might frustrate guitarists used to all-digital pedals’ preset capabilities. Players that already have MIDI switchers in their rigs, however, could fall hard for the ability to switch between Elipse’s myriad, complex, analog-colored textures. With or without MIDI, it is an excellent analog modulator that offers colors galore.
Advanced
Intermediate
- Learn how to incorporate open strings all the way up the fretboard.
- Build velocity in your playing without practicing speed exercises.
- Discover an easy way to steal licks from the pros using YouTube.
It’s universally known in the guitar community that Brad Paisley isn’t just some guy that strums a guitar and sings country songs. He’s widely respected as one of the best players in the country music scene and takes an unusual approach to achieve the sonic insanity that spills out of his guitar. From Telecasters, G-benders, and cranked Dr. Z amps to instrumental records and wild guitar solos getting mainstream country radio airtime, Paisley has solidified his place in the discussion of all-time greats, and not just in the country world. In this lesson, we’ll dive into one of the cornerstones of Brad’s playing that makes him so unique: open strings.
A couple of prefaces:
Most of the licks in this lesson are exponentially easier when hybrid picked.
And in case you didn’t know, YouTube allows you to alter the speed of videos. This is a massive tool to take advantage of when learning licks, practicing them, and getting them up to speed. Simply click the Settings button in the bottom right corner of the video player and select Playback Speed. This will allow you to speed up or slow down the video to your liking without any changes to pitch. Transients will become an issue the farther away from the original speed you go, but not enough to keep you from slowing a solo down 50 percent to really learn and nail the nuances.
We’ll start by just dipping a toe in the water for Ex. 1, looking at a small part of the solo from Brad’s song “Ticks.” This section is found at the 3:06 mark of the video below. Brad really likes to use open strings to provide color to licks, usually with the note falling outside of the established scale. This little nugget is entirely in the E major scale (E–F#–G#–A–B–C#–D#) with exception of the open 3rd string. The use of the open string throws a b3 into the mix, while making it feel faster with little added effort. If you were to play this lick at half speed, the open G string does not sound great—but that’s the whole idea behind what Brad is able to do with open string licks. At tempo, the open string sounds like a natural inflection and the lick has more velocity than if it were omitted.
Ex. 1
Ticks
In Ex. 2 we’re still looking at the “Ticks” solo but focusing on the back half. This entire section of the solo is a smorgasbord of open strings. The first phrase uses sliding and open strings to create an almost bouncy and circus feel. The use of the open G string allows Brad to travel up the fretboard with some very interesting flair. Then he uses the open 1st string in measure 2 to create momentum again, but in this instance, the open-string pull-offs fall inside the E major scale rather than acting as color tones. It’s much easier to connect this section of the lick to the previous by using the third finger to execute the bend and the fourth finger to start the new descending phrase. Lastly, Brad takes the solo home with a simple descending three-note-per-string pull-off lick that combines inside and outside notes.
Ex. 2
If you’ve ever listened to Paisley’s “Time Warp,” you know that it’s a gold mine of licks to steal. In Ex. 3, I’m focusing on a lick Brad plays on the “Live on Letterman” version, which occurs after the piano solo at the 1:23 mark in the video below. It’s worth noting that this is not the same line featured on the album version from Time Well Wasted. This lick is a perfect example of how Brad uses open strings to create velocity and really get going downhill at breakneck speeds. The lick is not overly complicated, but it is extremely fast, especially if you are new to hybrid picking. I’m playing it at roughly 75 percent speed so that the notes are intelligible and not just a blur. The lick is mostly based in the A Aeolian mode (A–B–C–D–E–F–G), with flatted second being the exception.
Ex. 3
Brad Paisley - Time Warp (Live on Letterman)
In this example (Ex. 4), we tackle a fantastic phrase from the solo to “Water.” The lick I’m breaking down falls around the 1:43 mark in the YouTube video. What’s so interesting is that while the song is in F major, Brad utilizes the open A, D, and G strings to navigate the fretboard vertically and create energy. My favorite thing about the descending pull-off section of this lick is that it’s a tame bluegrass-style lick in G, but it’s the placement of the lick over the chord changes that makes it sound interesting.
Ex. 4
Brad Paisley - Water
Ex. 5 is where things get really exciting. It’s from a live performance of “Water” during the 2010 ACM awards. At the 3:40 mark Brad uses an open-string lick to build tension and work his way up the fretboard that caught my attention. As before, it sounds monstrous at tempo but really doesn’t make a ton of sense when slowed down. It’s a fairly simple pull-off lick that isn’t too difficult if you’re already used to hybrid picking, but it creates a ton of movement and excitement when sped up. I’m guilty of stealing both this lick and the idea behind it for “wow” moments in solos.
Ex. 5
Brad Paisley - Water (live ACM Awards 2010)
It’s undeniable how freakishly good of a guitar player Brad Paisley is (try grabbing some of the monster licks from the outro of “Water”). Because of how many tricks he has up his sleeve, he’s nearly impossible to replicate, but that doesn’t mean there isn’t something that everyone can take from Paisley’s bag of tricks. Use this concept of using open strings in unconventional places to add spice, speed, and mystique to your playing.
An easy guide to re-anchoring a loose tuning machine, restoring a “lost” input jack, refinishing dinged frets, and staunching a dinged surface. Result: no repair fees!
Unleash your inner metal icon with the Jackson Lee Malia LM-87, a high-performance shred-ready axe designed in collaboration with Bring Me The Horizon guitarist Lee Malia. Featuring custom Jackson signature pickups, a fast D-profile neck, and a TOM-style bridge for rock-solid stability, this signature model is a must-have for commanding metal tone and smooth playability.
British metal icon and Bring Me The Horizon guitarist Lee Malia has partnered with Jackson to create his signature LM-87, a shred-ready axe built for heavy riffing and alternative modern metal. As a founding member and lead guitarist of the Grammy-nominated band, Malia is renowned for his aggressive playing style and intricate solos. This high-performance guitar matches his demanding musicality.
With its offset Surfcaster™ body shape and vintage appeal, the LM-87 melds classic design with modern appointments. The thin open pore finish on the bound Okoume body and neck exudes organic style, while the unique 3-ply pickguard and chrome hardware add striking accents. The fast D-profile 3- piece okoume neck allows smooth riffing across the bound amaranth fingerboard.
Custom Jackson signature pickups, including a bridge humbucker with push-pull coil-split, equip the LM-87 with versatile tone-shaping options to fulfill Malia's sonic vision. The TOM-style bridge with anchored tailpiece and fine tuners provides rock-solid stability for low tunings and heavy picking.
Designed in close collaboration with the legendary guitarist, the Jackson Lee Malia LM-87 is built for shredding. Its blend of vintage vibe and high-performance features make this signature model a must-have for players who value commanding metal tone and smooth playability.
The Tune-o-matic bridge with an anchored tailpiece and fine tuners offers enhanced tuning stability and precise, incremental adjustments. This setup ensures consistent pitch control, improved sustain, and easier fine-tuning without affecting overall string tension.
The guitar’s three-piece set-neck guitar with graphite reinforcement offers exceptional strength, stability, and resistance to warping. The multi-piece construction enhances sustain and tonal clarity, while the graphite reinforcement adds extra durability and prevents neck shifting due to humidity or temperature changes. This design ensures a solid, reliable performance with improved resonance and longevity.
Features Include:
- Okoume body
- Three-piece okoume set neck construction with graphite reinforcement
- 12"-16" compound radius amaranth fingerboard
- 3-ply pickguard
- Chrome hardware
- Custom wound Jackson LM-87 pickups
- Volume with push-pull coil-split and tone control
- TOM-style bridge with anchored tailpiece and fine tuners
- Gig bag included
The Jackson LM-87 carries a street price of $899.99.
For more information, please visit jacksonguitars.com.