StewMac tech guru Erick Coleman on how to give your instrument a sweet new look in five easy steps—sans fancy tools.
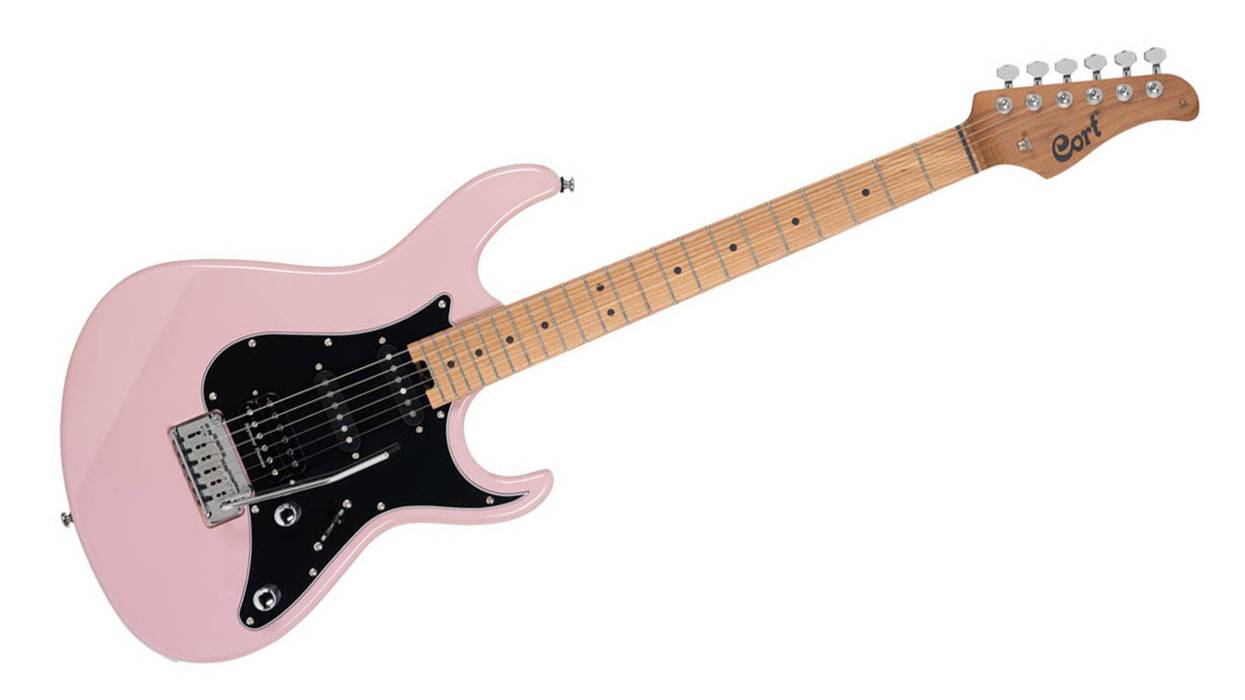
You love your guitar. You've been playing it for years, but the time has come to give it a makeover. The color was cool when you bought it (Photo 1), but now you'd like a change.
It's not too difficult to refinish a guitar. More than anything, it's a matter of patience. Taking the time to properly prep the wood and allow appropriate cure times can yield excellent results, even for the first-timer.
There are several types of finish used for guitars. Traditional nitrocellulose finishes are found on many high-end instruments as well as production guitars by Gibson and Martin, just to name a few manufacturers. Harder polyurethane finishes can be found on millions of guitars, including most Fender, Ibanez, and Epiphone models. Some manufacturers are now also using environmentally friendly waterborne finishes that are safer to handle.
For this project, we will be removing an existing polyurethane finish and refinishing the guitar with nitrocellulose lacquer in aerosol cans, for convenience. In addition to changing the appearance, this refin will likely result in a better-sounding instrument as well.
Use warm lacquer, not cold. Pro finishers spray heated lacquer because cold lacquer spatters, requiring extra work to get a level finish.
A guitar with a thin nitro finish will resonate better than one with a hard poly. But nitrocellulose is flammable and hazardous to inhale, so make sure you have a well-ventilated work area and use proper safety precautions, like wearing a respirator mask.
First you'll need to solder together and tape off the north coil finish and south coil finish (this is the series link). Then, here's a list of the items needed along with the StewMac parts numbers and amounts of the products we'll use:
- Hair dryer or heat gun to remove existing finish.
- Putty knife (#4464 and #1287).
- Sandpaper in a variety of grits for wood prep and finish work (#5562).
- Aerosol lacquer (#5886 Sonic Blue x 1, #3881 gloss clear x 3).
- Polishing cloth (#1815 x 2).
- Liquid polishing compounds (#1845 medium, #1846 fine).
- Respirator mask (#5885).
Step 1: Disassemble the guitar
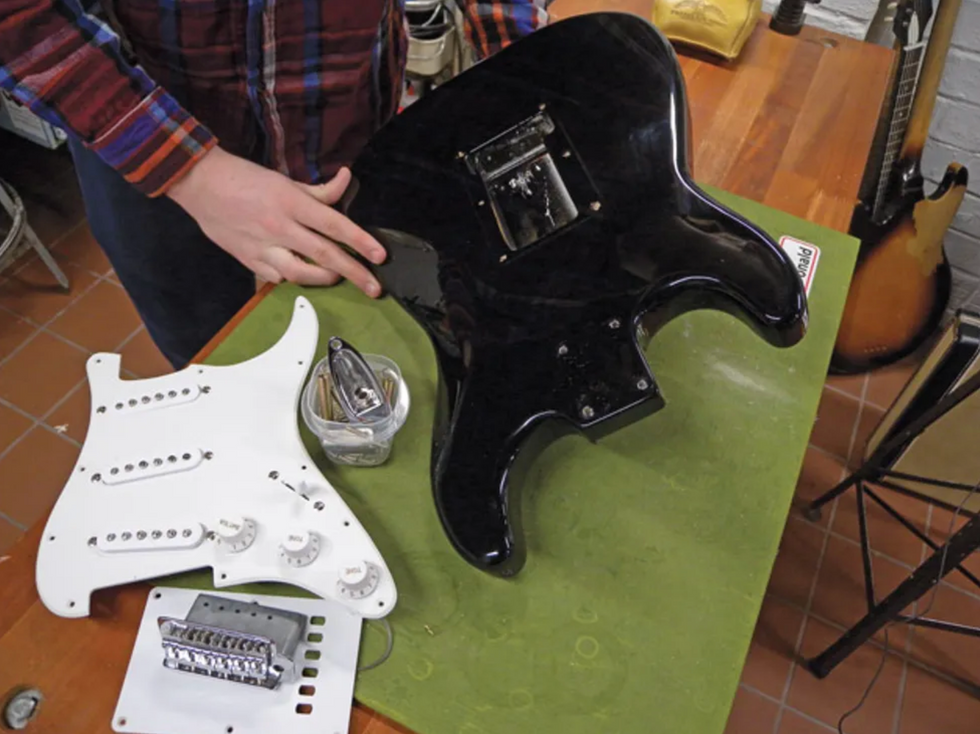
Photo 2
The first step is to take the instrument completely apart, removing all hardware and electronics (Photo 2). Keep all the parts in one place as you remove them so you don't have to hunt them down when you are ready to reassemble the guitar.
Step 2: Strip the existing finish
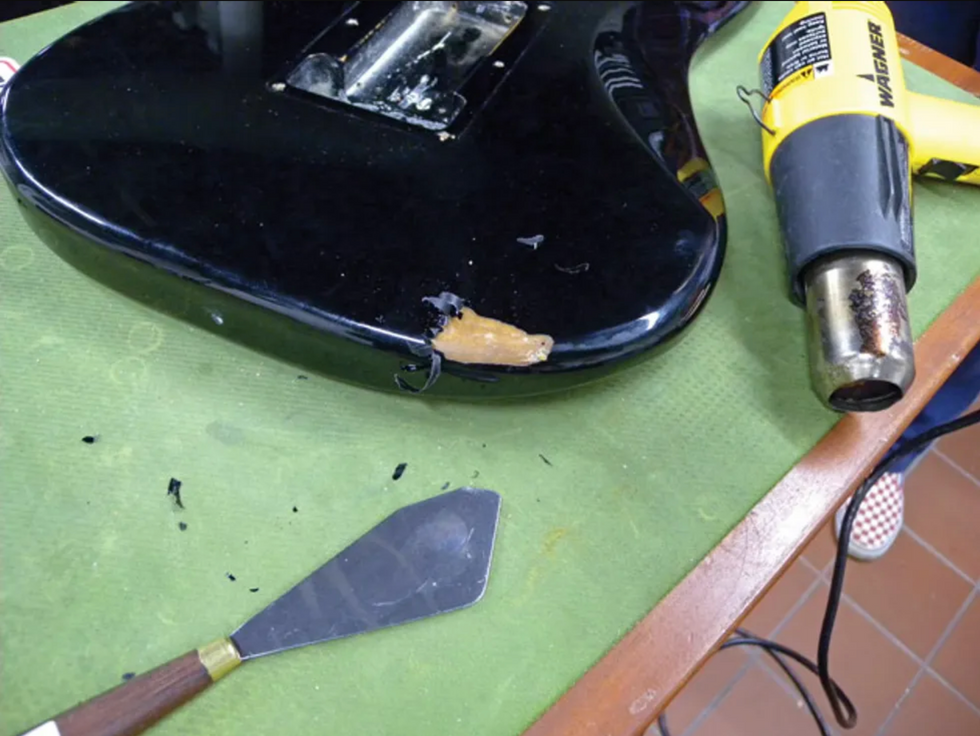
Photo 3
There are a few different ways to strip a finish. Simply sanding a finish off can be very time-consuming and dirty, and using chemical strippers can be very toxic and messy. I've found the best way to cleanly and easily strip polyurethane finish of this type is to use a hair dryer or heat gun and a flexible putty knife (Photo 3).
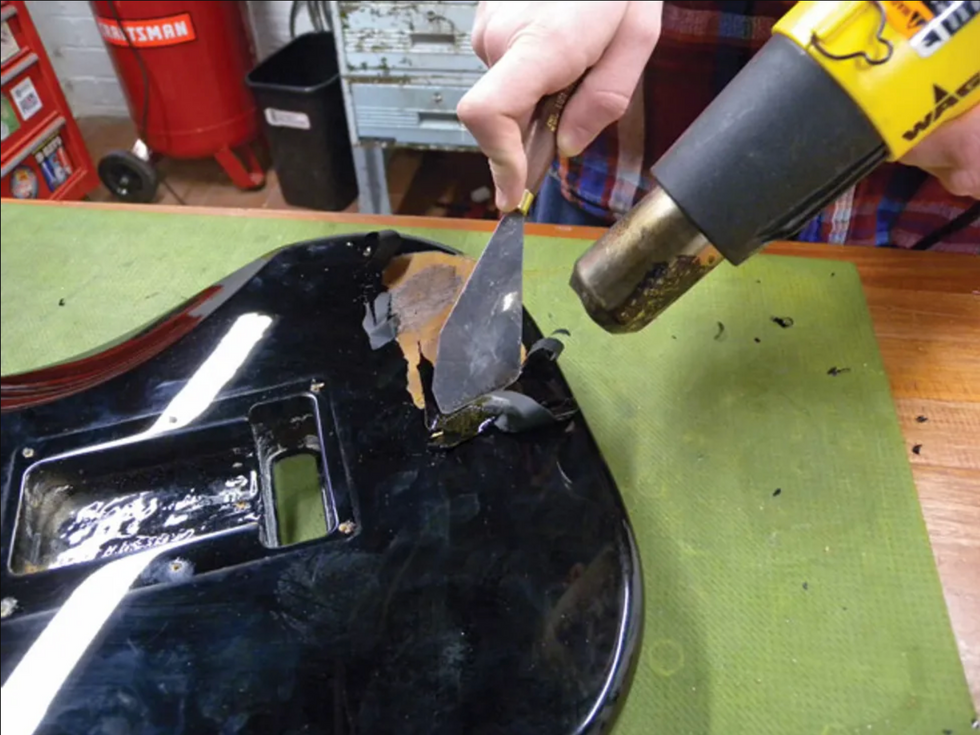
Photo 4
Lightly scoring a starting point in the finish with a sharp putty knife will give you a good entry point once the finish is heated. The idea is to soften and lift the finish without burning it, so it is important to keep the gun moving while heating. With the gun set on the lowest setting, start warming up the scored area on the guitar. When you see the finish starting to lift, work the knife underneath it and start removing it (Photo 4).
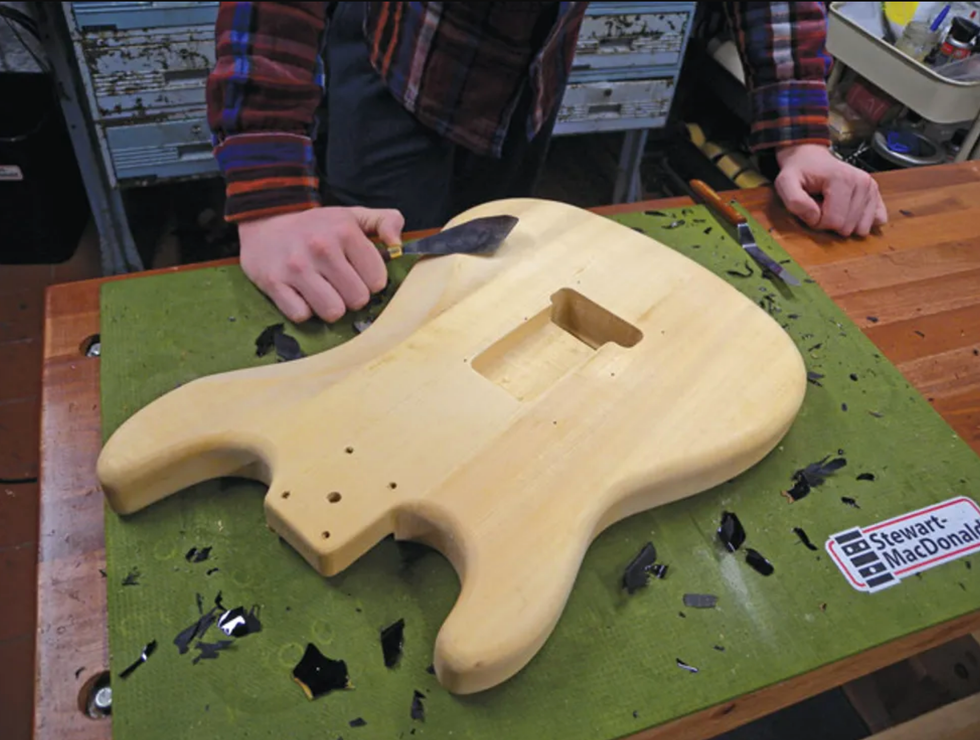
Photo 5
Once you get under the finish, the rest of the job goes pretty fast. Use care not to damage the wood with the knife or scorch it with your heat source. Remove as much of the finish as possible, including that in the cavities (Photo 5).
Step 3: Prepare the body
When all the finish is removed, it's time to prepare the body for refinishing. Inspect the body and neck for any dings, chips, or other imperfections. Small dents can be steamed out by placing a damp cloth over the dent and applying heat with a soldering iron. (For instructions on steaming out dents, see "Steaming Out Dents in a '71 Medallion Flying V.") Chips will need to be filled.
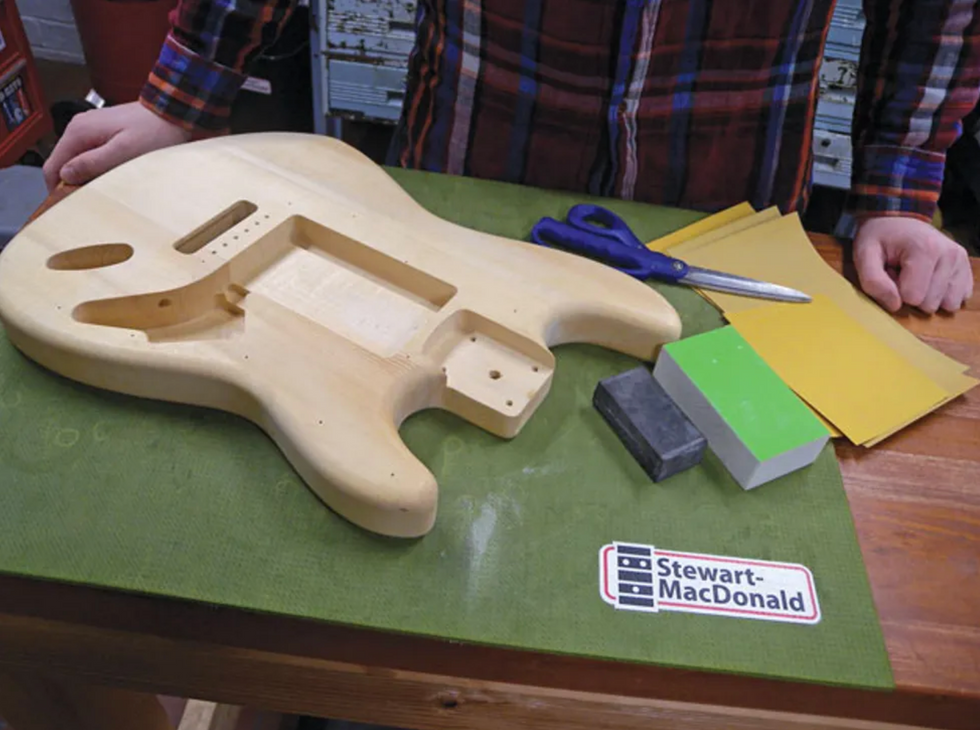
Photo 6
Once you've inspected the body and checked it for dings and chips, it's time to gather your sandpaper and sanding blocks (Photo 6).
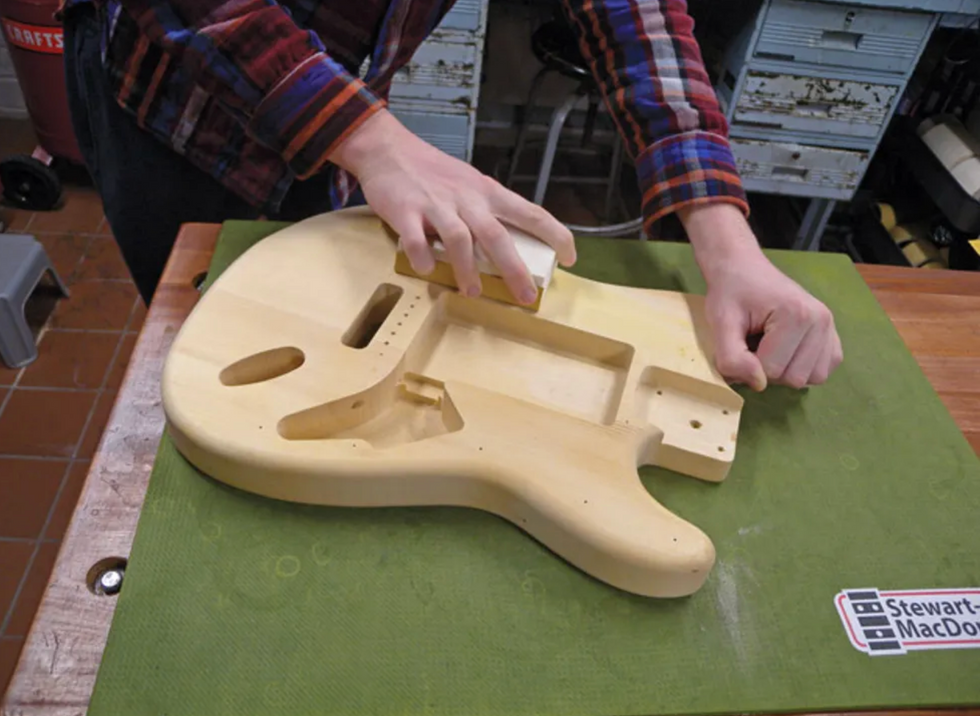
Photo 7
Using a flat backing pad and starting with 120-grit sandpaper, sand the entire body working only in the direction of the grain (Photo 7). Inspect the body to make sure you are removing any traces of finish or sealer left over from the original paint job. After a complete sanding, wipe down the body with a damp cloth to raise the grain. Let it dry, then sand with 220-grit sandpaper. Raise the grain with a damp cloth again and sand a third time, using 320-grit sandpaper. Take your time and do a thorough job during these steps to insure you get a nice flat surface to build your finish on. When you've finished sanding, wipe the body with a naphtha-dampened rag to remove any oils or grease left by your hands. From this point on, wear clean gloves so you won't contaminate the wood.
Step 4: Spraying
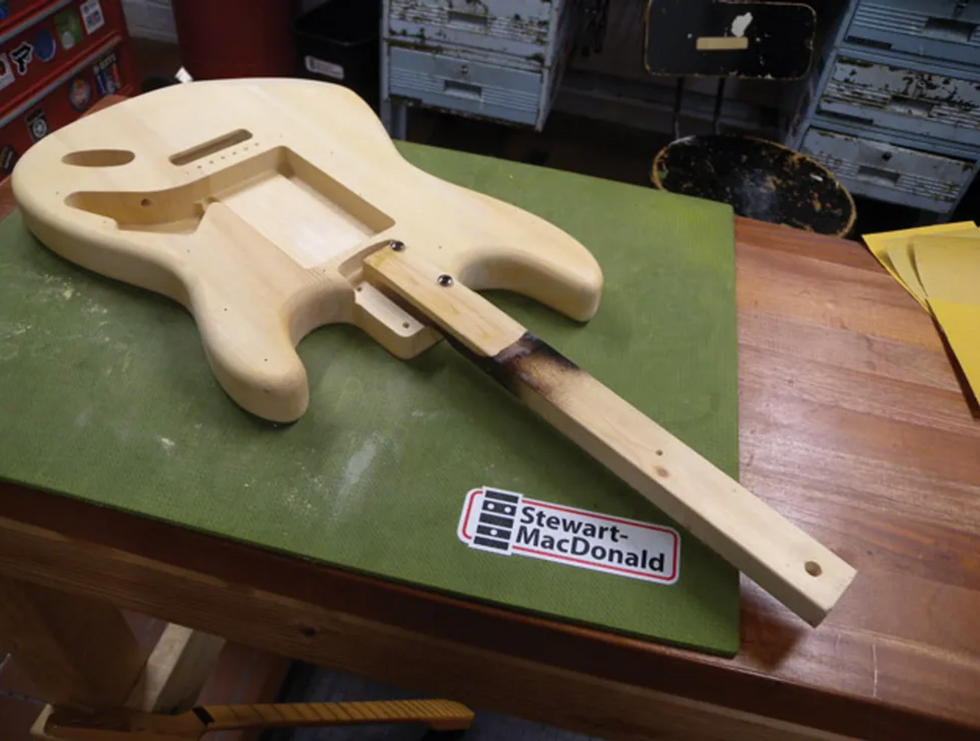
Photo 8
It's now time to spray your finish. For this you will need some kind of handle for holding your guitar and a place to hang it to dry. Pieces of scrap wood make good handles for holding the body while you spray (Photo 8). They also give you a way to hang the body while it cures. Here's where being especially patient will pay off. A professional nitrocellulose finishing job takes weeks to complete, but the end result is something you can be proud of!
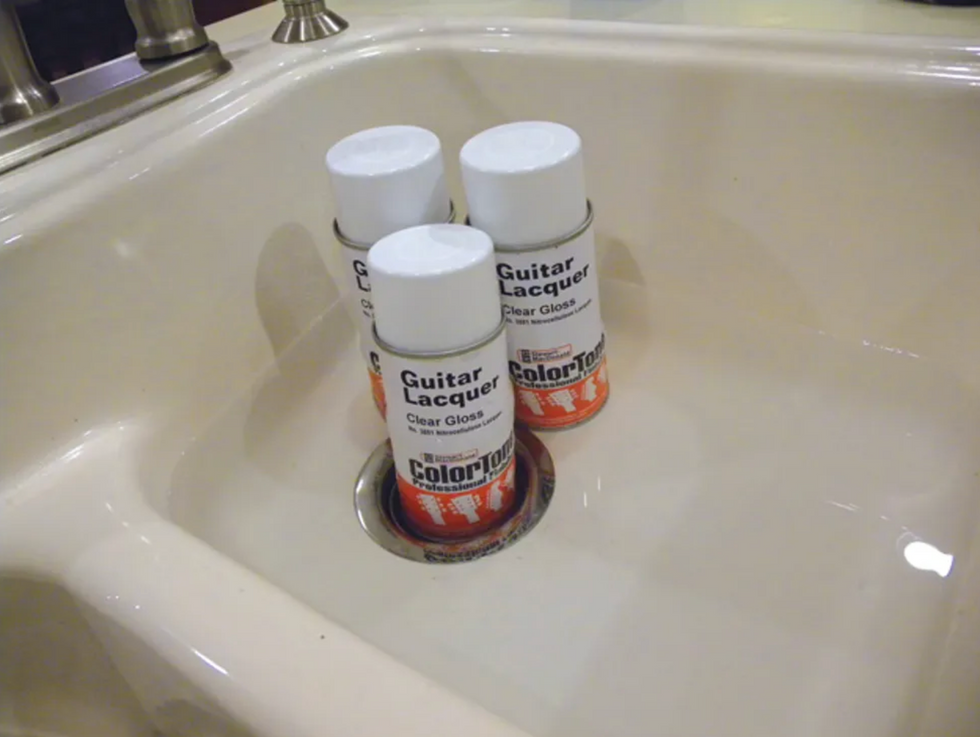
Photo 9
Tip: Use warm lacquer, not cold. Pro finishers spray heated lacquer because cold lacquer spatters, requiring extra work to get a level finish. For best results, heat your cans in a sink of warm water before spraying (Photo 9).
Day One
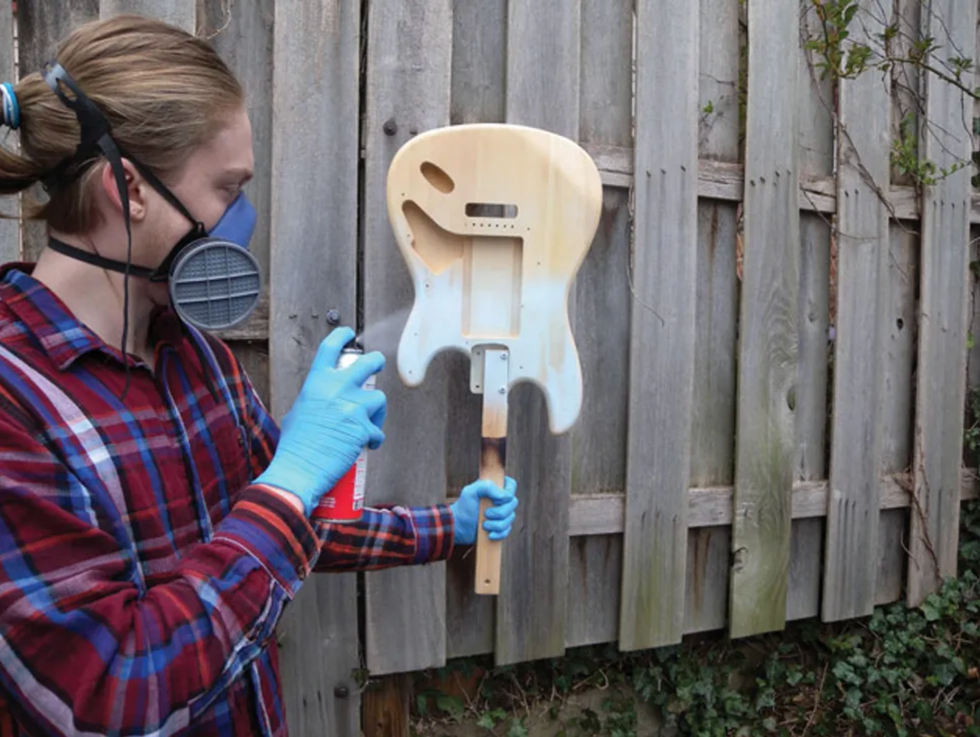
Photo 10
Day one. Spray an initial light misting or tack coat (Photo 10), followed several minutes later by a heavier wet coat. The tack coat gives the wet coat better adherence and lessens the chance of a run in the finish. Spray two to three wet coats (but not runny, thick coats) on the body, 90 minutes apart, and let them dry overnight.
Day Two
Using a backing pad on the flat areas, lightly scuff-sand the body with 320-grit sandpaper to knock off the high spots in the finish. Sand just enough to open the finish—don't try to sand out every shiny spot or sunken area in the lacquer at this stage. Clean off all the sanding residue. Spray two to three uniform color coats for complete coverage, allowing 90 minutes between coats.
Day Three
Lightly scuff-sand the finish with 320-grit paper using care not to sand through your color coats, and clean off all the residue. Spray four uniform coats of clear lacquer, one hour between coats. Let the guitar dry overnight.
Tip: If you get a run or drip in the finish, let the surface dry for 24 hours and level-sand the problem area. If you touch wet lacquer, you'll leave a deep impression that will be much more difficult to fix.
Day Four
Lightly scuff-sand the finish with 320-grit paper, leveling out any imperfections in the process, and clean off all the residue. Don't try to sand out all the shiny spots yet. Be particularly careful on the curves of the body. It's easy to sand through the edges. Once again, spray four more coats of clear, 90 minutes apart. The guitar now has six to eight topcoats of clear lacquer. Let the finish dry overnight.
If you get a run or drip in the finish, let the surface dry for 24 hours and level-sand the problem area.
Day Five
Scuff-sand the finish with 320-grit again. This time most of the shiny spots will disappear, leaving a uniformly dull look. Spray four more clear coats, 90 minutes apart, and let dry overnight.
Day Six
Lightly scuff-sand the finish with 600-grit sandpaper, to help the solvent escape. The body should now be left in a warm and dry location for two weeks to let the finish cure.
Step 5: Fine sanding and buffing
Dry-sand the body to a flat, dull sheen with 800-grit sandpaper. Clean the residue from the paper often. Orange-peel texture caused by lacquer shrinkage as the solvents cure out of the finish should be removed, but don't over sand. When all the little shiny low spots in the lacquer have been removed, you're ready to go to the next step, which is wet-sanding.
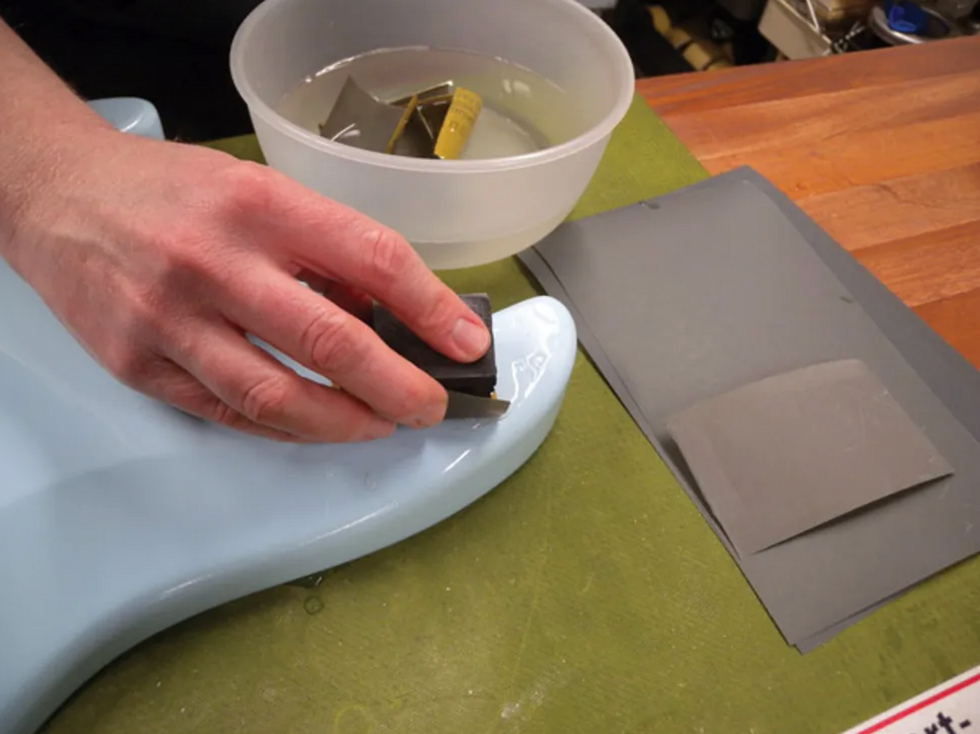
Photo 11
To bring the finish to a smooth satin surface that's ready for final polishing, wet-sand with 1200-grit micro-finishing paper and water (Photo 11). Excess water and residue should be wiped off the finish with a clean dry soft cloth as you work. Frequently rinse the sandpaper in soapy water to remove hard specks that can scratch the finish.
Tip: Soak the micro-finishing paper in water overnight before use. It will scratch less and last longer. Always keep it wet from then on.
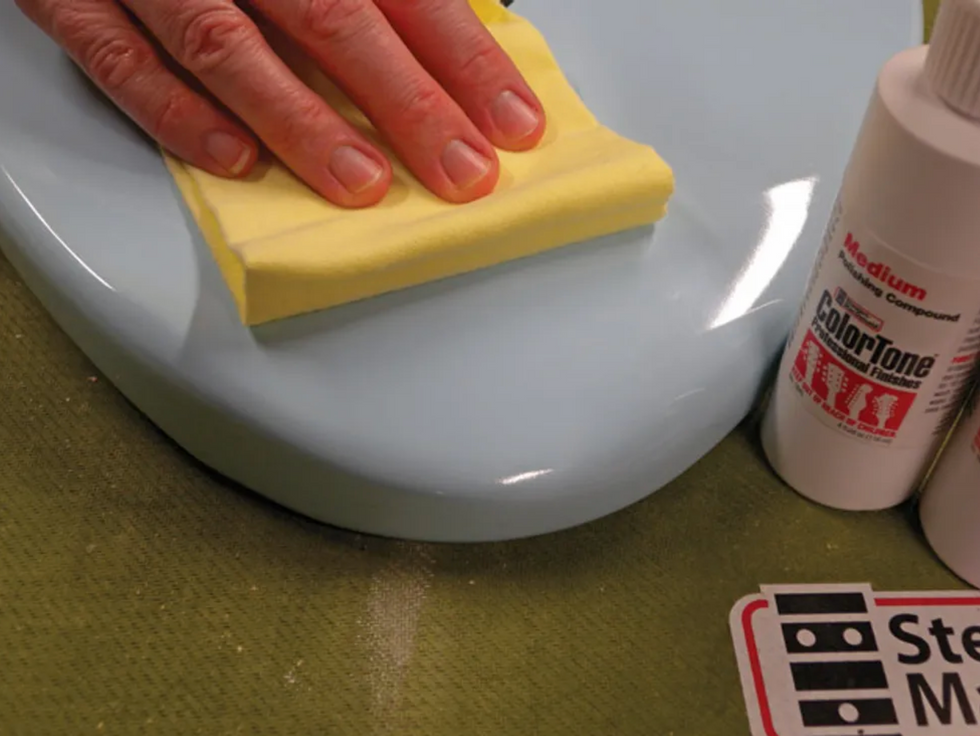
Photo 12
Using soft cloths—a different one for each compound—polish out the fine wet-sanding scratches to a final gloss with medium and then fine liquid polishing compounds (Photo 12).
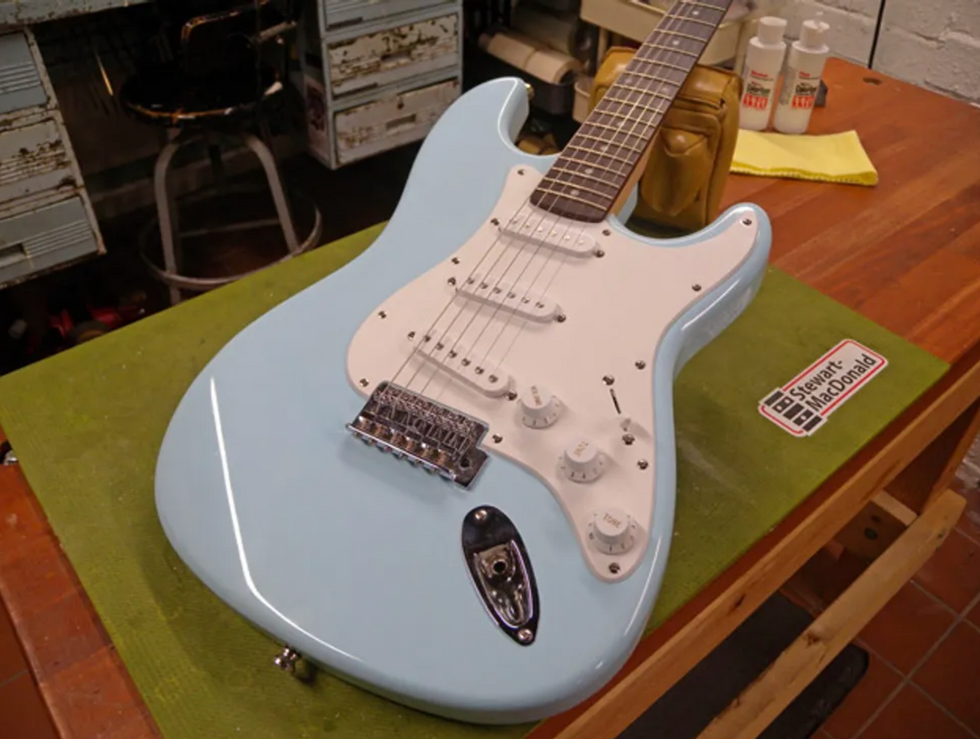
Photo 13
Once you've polished the body to a high gloss, reassemble your guitar (Photo 13) and get it back in action!
[Updated 9/10/21]
- Guitar Shop 101: How to Shim a Bolt-On Neck - Premier Guitar ›
- Guitar Shop 101: The ABCs of Output Jacks - Premier Guitar ›
- Guitar Shop 101: Curing Sticky-Neck Syndrome - Premier Guitar ›
- Paranormal Guitar Mods That’ll Rock Your DIY World - Premier Guitar | The best guitar and bass reviews, videos, and interviews on the web. ›
- Sanding Your Guitar Neck for a Smoother Feel - Premier Guitar ›
- Reader Guitar of the Month—Pickups and Finishes - Premier Guitar ›
- DIY Guitar: 7 Cool Reader Mods - Premier Guitar ›
- Squier Paranormal Super-Sonic Review - Premier Guitar ›
Grez Guitars has introduced the Grez GrandTour Bass, a short scale semi-hollow carve-top instrument available in 4-string format.
The Grez Grand Tour Bass, designed in collaboration with bass powerhouse Ian MartinAllison is, like all Grez instruments, a modern sleek interpretation of the classic instruments from the 50’s and 60’s.
The instruments feature a carved Spruce top, Honduran Mahogany body and neck. The 30" scale construction includes a Macassar ebony fretboard, 12” radius with 21 jumbofrets. Each bass comes equipped with a Halon bridge, Grez string anchor and LaBellaDeep Talkin’ long scale 45-105 flatwound strings. Electronics include Curtis Novak Bisonic/Darkstar pickups with coil tap.
The Grand Tour bass features a nitro finish and is available in a variety of colors(pictured here in custom Toasted Marshmallow).
Grez Grand Tour Bass with Ian Martin Allison
Barry Grzebik explains: “I love process of design instruments, marrying acoustical,electrical, visual and ergonomic engineering with industrial and artistic design. In this case creating something that artfully balances the desire for a robust acoustic voice with the need to hold up to professional touring and stadium stage volumes. One small notable detail is that although this is a short scale instrument, because of the after-length of string past the bridge, it uses standard long scale strings which dramatically increases sting options and availability.”
Ian Marin Allison shares, “I’m inspired by the unique character of vintage hollow andsemi-hollow basses, but they don’t always live up to our modern expectation of stability, playability, versatility and QUALITY. I’m proud to have helped create something that does”.
The Grez Grand Tour Bass, is available now from Grez Guitars and their dealers with astreet price starting at $5,999. Light customization is welcome with delivery times aslittle as 8 weeks.
New RAT Sound Solution Offers a Refined Evolution of Distortion
ACT Entertainment ’s iconic RAT brand has unveiledthe Sterling Vermin, a boutique distortion guitar pedal that blends heritage tone with modernrefinement. With a new take on RAT’s unmistakable sound, Sterling Vermin delivers a new levelof precision and versatility.
“The Sterling Vermin was born from a desire for something different — something refined, withthe soul of a traditional RAT pedal, but with a voice all its own,” says Shawn Wells, MarketManager—Sound, ACT Entertainment, who designed the pedal along with his colleague MattGates. “Built in small batches and hand-soldered in ACT’s Jackson, Missouri headquarters, theSterling Vermin is a work of pure beauty that honors the brand legacy while taking a bold stepforward for creativity.”
The Sterling Vermin features the LM741 Op-Amp and a pair of selectable clipping diodes.Players can toggle between the traditional RAT silicon diode configuration for a punchy, mid-range bite, or the BAT41 option for a smoother, more balanced response. The result is a pedalthat’s equally at home delivering snarling distortion or articulate, low-gain overdrive, with a wide,usable tonal range throughout the entire gain spectrum.
The pedal also features CTS pots and oversized knobs for even, responsive control that affordsa satisfying smoothness to the rotation, with just the right amount of tension. Additionally, thepolished stainless-steel enclosure with laser-annealed graphics showcases the merging of thepedal’s vintage flavor and striking design.
“From low-gain tones reminiscent of a Klon or Bluesbreaker, to high-gain settings that flirt withBig Muff territory — yet stay tight and controlled — the Sterling Vermin is a masterclass indynamic distortion,” says Gates, an ACT Entertainment Sales Representative. “With premiumcomponents, deliberate design and a focus on feel, the Sterling Vermin is more than a pedal, it’sa new chapter for RAT.”
The RAT Sterling Vermin is available immediately and retails for $349 USD. For moreinformation about this solution, visit: actentertainment.com/rat-distortion .
The Miku was introduced about 10 years ago and is based on the vocal stylings of Hatsune Miku, a virtual pop icon. But it does much more than artificial vowels and high-pitched words.
It’s tempting to think of this pedal as a joke. Don’t.
It all started a few years ago through a trade with a friend. I just wanted to help him out—he really wanted to get a fuzz pedal but didn’t have enough cash, so he offered up the Korg Miku. I had no idea then, but it turned out to be the best trade I’ve ever made.
Here’s the truth: the Korg Miku is not your typical guitar pedal. It won’t boost your mids, sculpt your gain, or serve up that warm, buttery overdrive you’ve always worshipped. Nope. This little box does something entirely different: It sings! Yes, sings in a Japanese kawaii accent that’s based on the signature voice of virtual pop icon Hatsune Miku.
At first glance, it’s tempting to dismiss this pedal as just a gimmick—a joke, a collector’s oddity, the kind of thing you buy for fun and then forget next to your Hello Kitty Strat. But here’s the twist: Some take it seriously and I’m one of those people.
I play in a punk band called Cakrux, and lately I’ve been working with a member of a Japanese idol-style girl group—yeah, it’s exactly the kind of wild mashup you’d ever imagine. Somewhere in the middle of that chaos, the Miku found its way into my setup, and weirdly enough, it stuck. It’s quirky, beautiful, occasionally maddening, and somehow … just right. After plenty of time spent in rehearsals, studio takes, and more sonic experiments than I care to admit, I’ve come to appreciate this pedal in unexpected ways. So here are a few things you probably didn’t know about this delightfully strange little box.
It’s Not Organic—and That’s OK
Most guitar pedals are chasing something real. Wah pedals mimic the human voice—or even a trumpet. Tube Screamers? They’re built to recreate the warm push of an overdriven tube amp. Cab sims aim to replicate the tone of real-world speaker setups. But the Miku? It breaks the mold. Instead of emulating reality, it channels the voice of a fictional pop icon. Hatsune Miku isn’t a person—she’s a vocaloid, a fully digital creation made of samples and synthesis. The Miku doesn’t try to sound organic, it tries to sound like her. In that sense, it might be the only pedal trying to reproduce something that never existed in the physical world. And honestly, there’s something oddly poetic about that.
A World-Class Buffer
Here’s a fun fact: I once saw a big-name Indonesian session guitarist—you know, the kind who plays in sold-out arenas—with a Miku pedal on his board. I was like, “No way this guy’s busting out vocaloid lines mid-solo.” Plot twist: He only uses it for the buffer. Yep, the man swears by it and says it’s the best-sounding buffer he’s ever plugged into. I laughed … until I tried it. And honestly? He’s not wrong. Even if you never hear Miku sing a note, this pedal still deserves a spot on your board. Just for the tone mojo alone. Wild, right?
“The Miku is one of those pedals that really shouldn’t work for your music, but somehow, it just does.”
Impossible to Tame
Most pedals are built to make your life easier. The Miku? Not so much. This thing demands patience—and maybe a little spiritual surrender. First off, the tracking can be finicky, especially if you’re using low-output pickups. Latency becomes really noticeable and your picking dynamics suddenly matter a lot more. Then there’s the golden rule I learned the hard way. Never—ever—put anything before the Miku. No fuzz, no wah, no compressor, not even a buffer! It gets confused instantly and says “What is going on here?” And don’t even think about punching in while recording. The vocal results are so unpredictable, you’ll never get the same sound twice. Mess up halfway? You’re starting from scratch. Same setup, same take, same chaotic energy. It’s like trying to recreate a fever dream. Good luck with that.
Full Range = Full Power
Sure, it’s made for guitar, but the Miku really comes to life when you run it through a keyboard amp, bass cab, or even a full-range speaker. Why? Because her voice covers way more frequency range than a regular guitar speaker can handle. Plug it into a PA system or a bass rig, and everything sounds clearer, richer, way more expressive. It’s like letting Hatsune Miku out of her cage.
The Miku is one of those pedals that really shouldn't work for your music, but somehow, it just does. Is it the best pedal out there? Nah. Is it practical? Not by a long shot. But every time I plug it in, I can’t help but smile. It’s unpredictable, a little wild, and it feels like you’re jamming in the middle of a bizarre Isekai anime scene. And honestly, that’s what makes it fun.
This thing used to go for less than $100. Now? It’s fetching many times that. Is it worth the price? That’s up to you. But for me, the Korg Miku isn’t just another pedal—it’s a strange, delightful journey I’m glad I didn’t skip. No regrets here.
Two guitars, two amps, and two people is all it takes to bring the noise.
The day before they played the coveted Blue Room at Third Man Records in Nashville, the Washington, D.C.-based garage-punk duo Teen Mortgage released their debut record, Devil Ultrasonic Dream. Not a bad couple of days for a young band.
PG’s Chris Kies caught up with guitarist and vocalist James Guile at the Blue Room to find out how he builds the band’s bombastic guitar attack.
Brought to you by D’Addario.
Devilish Dunable
Guile has been known to use Telecasters and Gretsches in the past, but this time out he’s sticking with this Dunable Cyclops DE, courtesy of Gwarsenio Hall—aka Jordan Olds of metal-themed comedy talk show Two Minutes to Late Night. Guile digs the Dunable’s lightness on his shoulders, and its balance of high and low frequencies.
Storm Warning
What does Guile like about this Squier Cyclone? Simple: its color. This one is also nice and easy on the back, and Guile picked it up from Atomic Music in Beltsville, Maryland.
Crushing It
Guile also scooped this Music Man 410-HD from Atomic, which he got just for this tour for a pretty sweet deal. It runs alongside an Orange Crush Bass 100 to rumble out the low end.
James Guile’s Pedalboard
The Electro-Harmonix Micro POG and Hiwatt Filter Fuzz MkII run to the Orange, while everything else—a DigiTech Whammy, Pro Co Lil’ RAT, and Death by Audio Echo Dream 2—runs to the Music Man. A TC Helicon Mic Mechanic is on board for vocal assistance, and a TC Electronic PolyTune 3, Morley ABY, and Voodoo Labs Pedal Power 3 Plus keep the ship afloat.