StewMac tech guru Erick Coleman on how to give your instrument a sweet new look in five easy steps—sans fancy tools.
You love your guitar. You've been playing it for years, but the time has come to give it a makeover. The color was cool when you bought it (Photo 1), but now you'd like a change.
It's not too difficult to refinish a guitar. More than anything, it's a matter of patience. Taking the time to properly prep the wood and allow appropriate cure times can yield excellent results, even for the first-timer.
There are several types of finish used for guitars. Traditional nitrocellulose finishes are found on many high-end instruments as well as production guitars by Gibson and Martin, just to name a few manufacturers. Harder polyurethane finishes can be found on millions of guitars, including most Fender, Ibanez, and Epiphone models. Some manufacturers are now also using environmentally friendly waterborne finishes that are safer to handle.
For this project, we will be removing an existing polyurethane finish and refinishing the guitar with nitrocellulose lacquer in aerosol cans, for convenience. In addition to changing the appearance, this refin will likely result in a better-sounding instrument as well.
Use warm lacquer, not cold. Pro finishers spray heated lacquer because cold lacquer spatters, requiring extra work to get a level finish.
A guitar with a thin nitro finish will resonate better than one with a hard poly. But nitrocellulose is flammable and hazardous to inhale, so make sure you have a well-ventilated work area and use proper safety precautions, like wearing a respirator mask.
First you'll need to solder together and tape off the north coil finish and south coil finish (this is the series link). Then, here's a list of the items needed along with the StewMac parts numbers and amounts of the products we'll use:
- Hair dryer or heat gun to remove existing finish.
- Putty knife (#4464 and #1287).
- Sandpaper in a variety of grits for wood prep and finish work (#5562).
- Aerosol lacquer (#5886 Sonic Blue x 1, #3881 gloss clear x 3).
- Polishing cloth (#1815 x 2).
- Liquid polishing compounds (#1845 medium, #1846 fine).
- Respirator mask (#5885).
Step 1: Disassemble the guitar
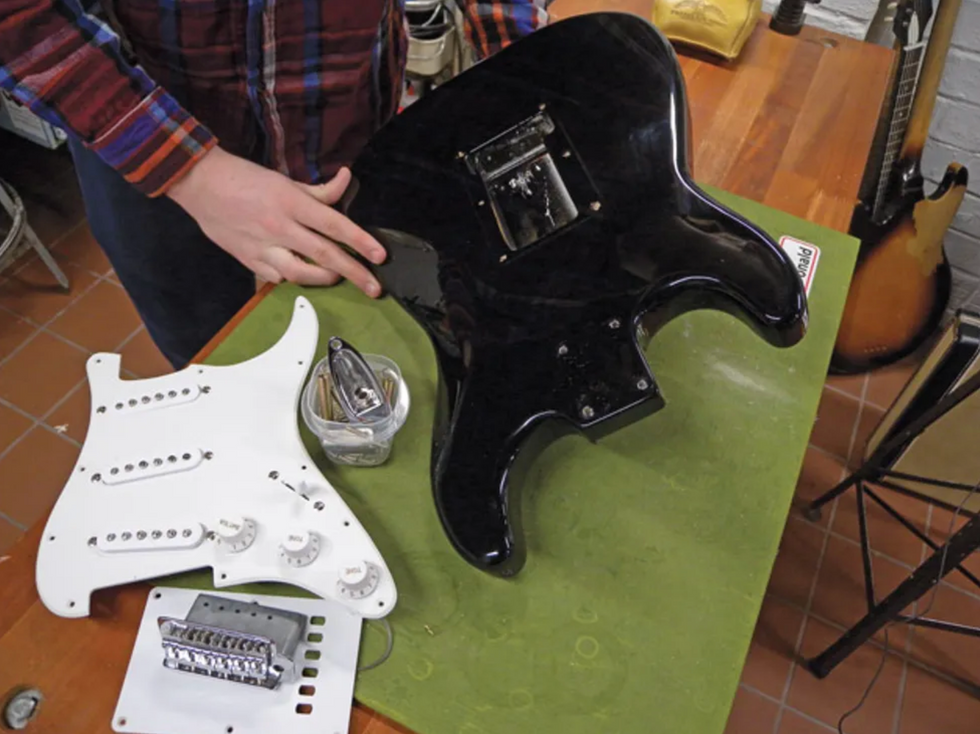
Photo 2
The first step is to take the instrument completely apart, removing all hardware and electronics (Photo 2). Keep all the parts in one place as you remove them so you don't have to hunt them down when you are ready to reassemble the guitar.
Step 2: Strip the existing finish
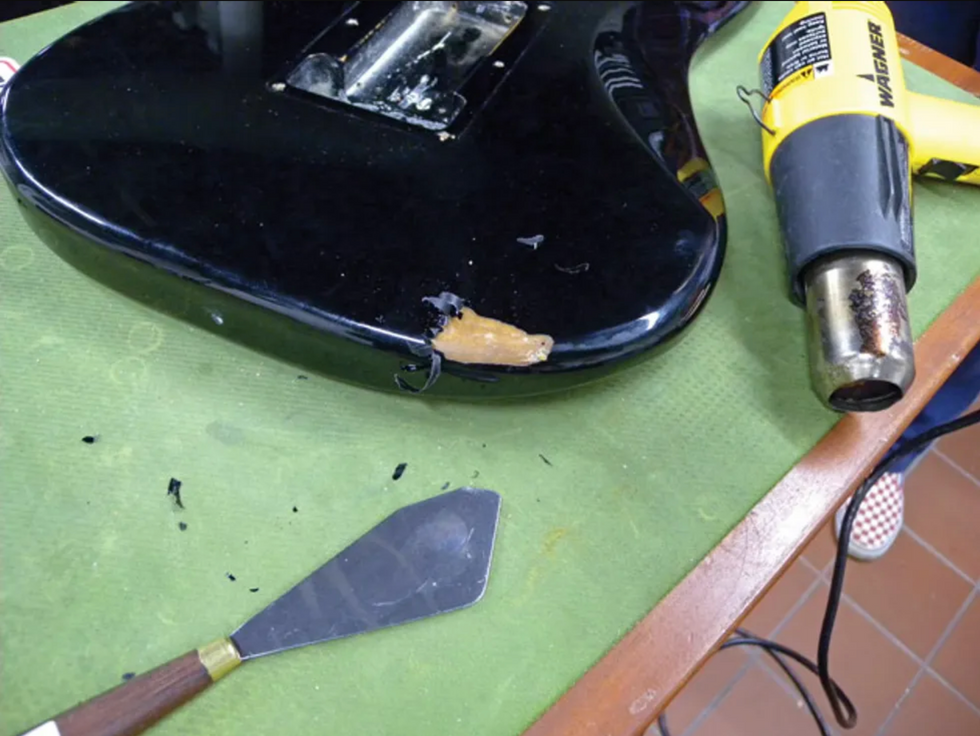
Photo 3
There are a few different ways to strip a finish. Simply sanding a finish off can be very time-consuming and dirty, and using chemical strippers can be very toxic and messy. I've found the best way to cleanly and easily strip polyurethane finish of this type is to use a hair dryer or heat gun and a flexible putty knife (Photo 3).
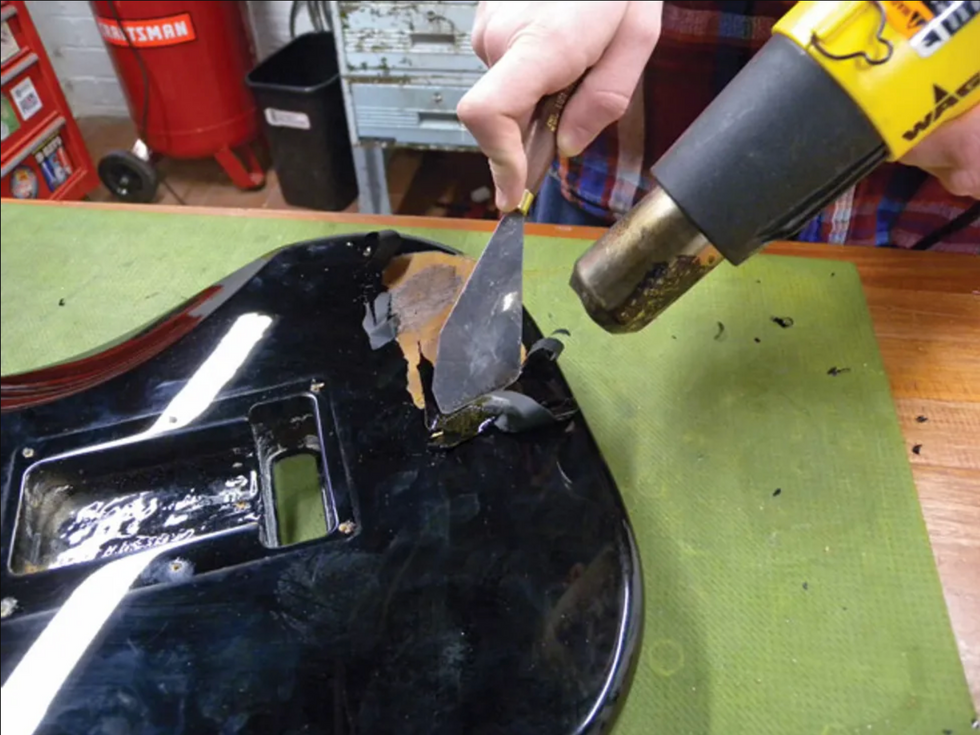
Photo 4
Lightly scoring a starting point in the finish with a sharp putty knife will give you a good entry point once the finish is heated. The idea is to soften and lift the finish without burning it, so it is important to keep the gun moving while heating. With the gun set on the lowest setting, start warming up the scored area on the guitar. When you see the finish starting to lift, work the knife underneath it and start removing it (Photo 4).
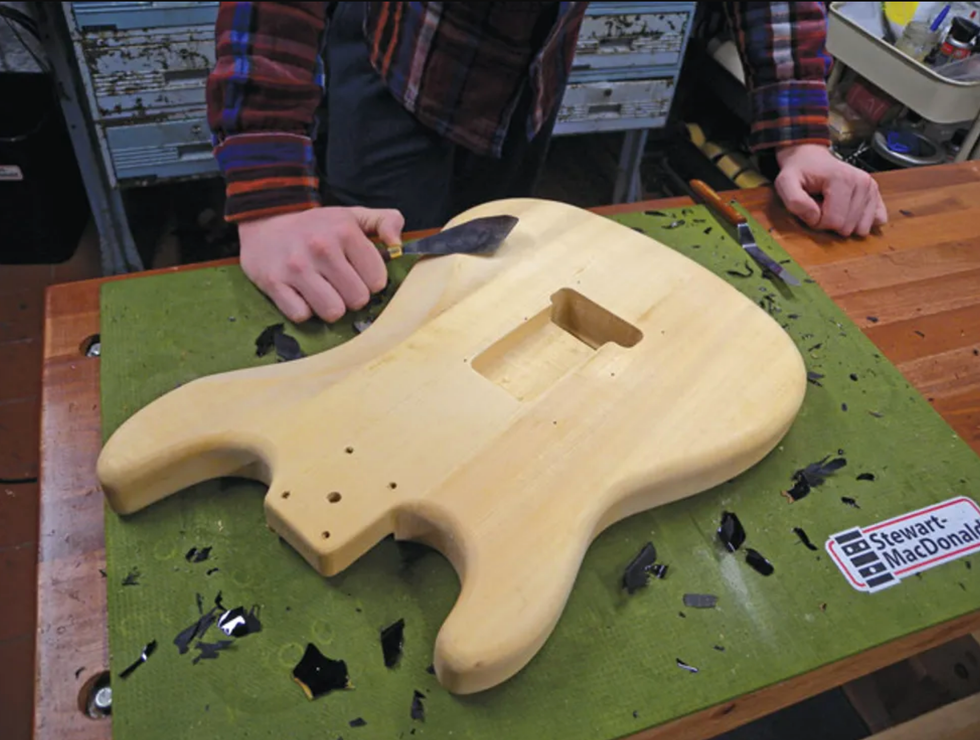
Photo 5
Once you get under the finish, the rest of the job goes pretty fast. Use care not to damage the wood with the knife or scorch it with your heat source. Remove as much of the finish as possible, including that in the cavities (Photo 5).
Step 3: Prepare the body
When all the finish is removed, it's time to prepare the body for refinishing. Inspect the body and neck for any dings, chips, or other imperfections. Small dents can be steamed out by placing a damp cloth over the dent and applying heat with a soldering iron. (For instructions on steaming out dents, see "Steaming Out Dents in a '71 Medallion Flying V.") Chips will need to be filled.
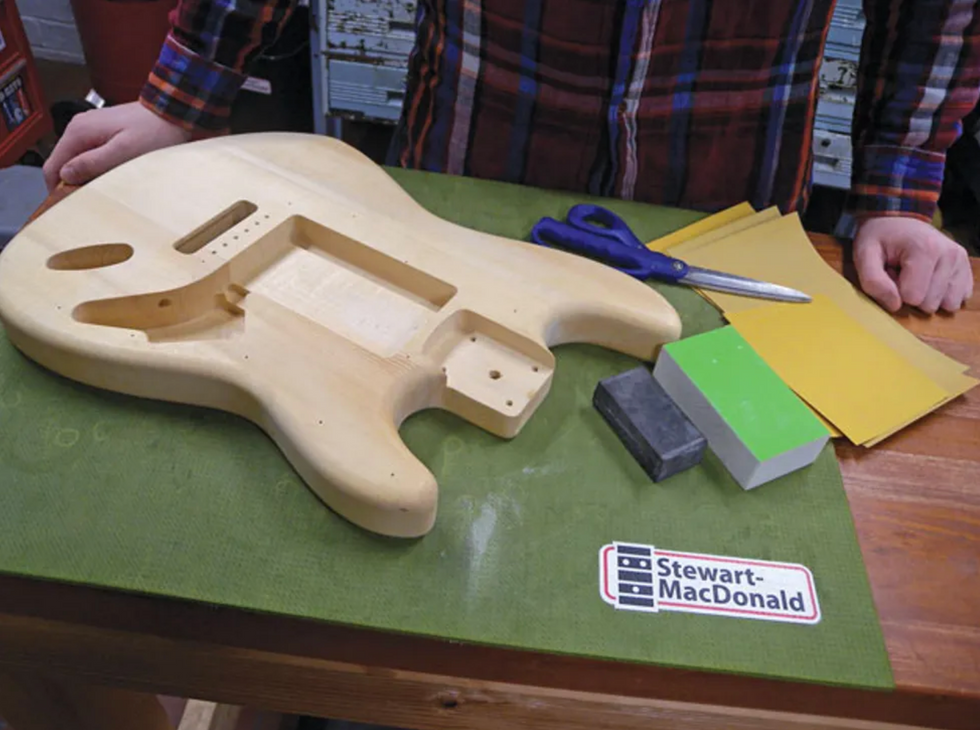
Photo 6
Once you've inspected the body and checked it for dings and chips, it's time to gather your sandpaper and sanding blocks (Photo 6).
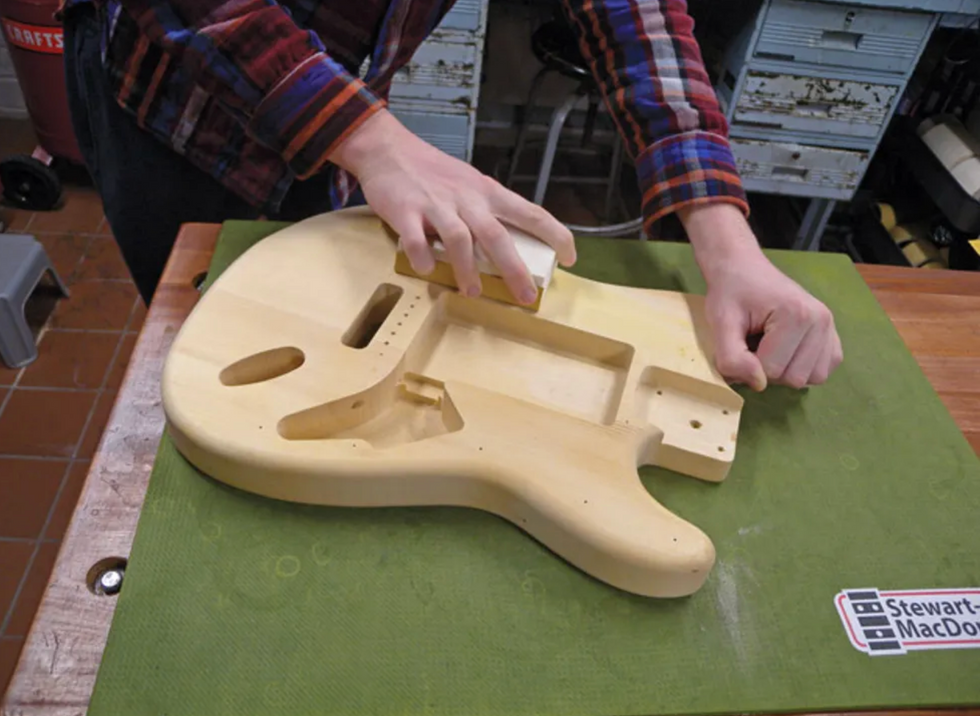
Photo 7
Using a flat backing pad and starting with 120-grit sandpaper, sand the entire body working only in the direction of the grain (Photo 7). Inspect the body to make sure you are removing any traces of finish or sealer left over from the original paint job. After a complete sanding, wipe down the body with a damp cloth to raise the grain. Let it dry, then sand with 220-grit sandpaper. Raise the grain with a damp cloth again and sand a third time, using 320-grit sandpaper. Take your time and do a thorough job during these steps to insure you get a nice flat surface to build your finish on. When you've finished sanding, wipe the body with a naphtha-dampened rag to remove any oils or grease left by your hands. From this point on, wear clean gloves so you won't contaminate the wood.
Step 4: Spraying
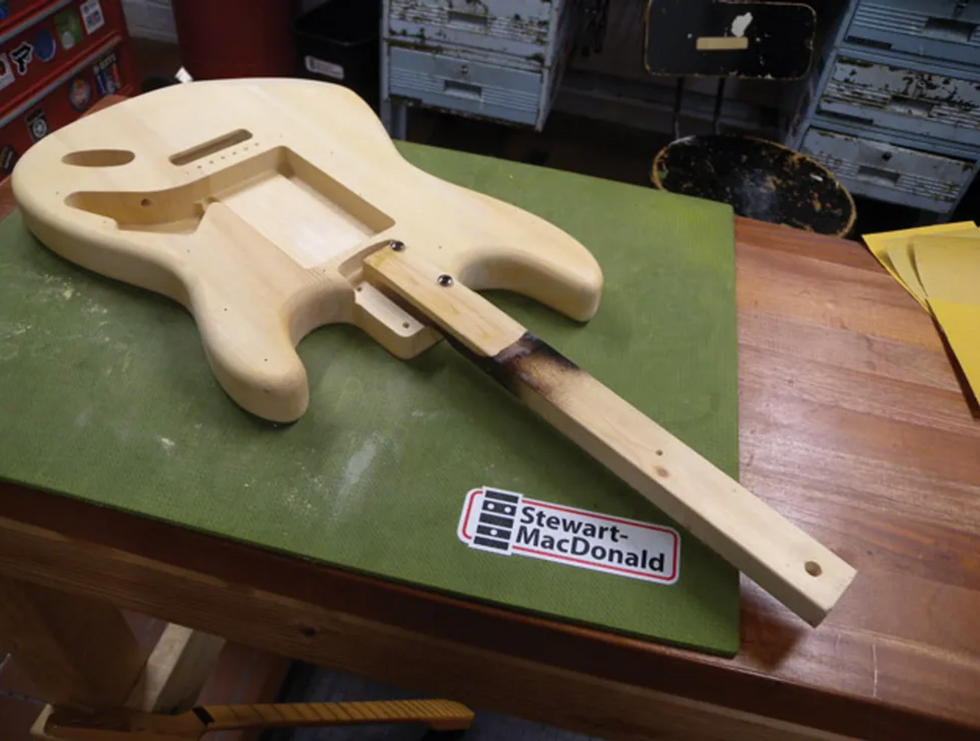
Photo 8
It's now time to spray your finish. For this you will need some kind of handle for holding your guitar and a place to hang it to dry. Pieces of scrap wood make good handles for holding the body while you spray (Photo 8). They also give you a way to hang the body while it cures. Here's where being especially patient will pay off. A professional nitrocellulose finishing job takes weeks to complete, but the end result is something you can be proud of!
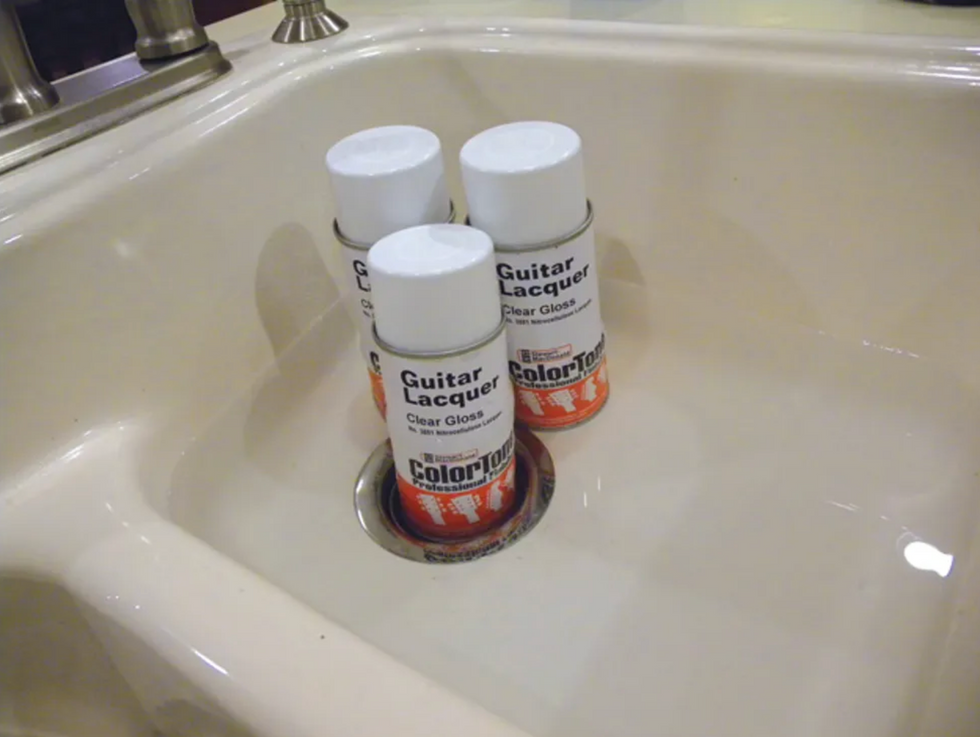
Photo 9
Tip: Use warm lacquer, not cold. Pro finishers spray heated lacquer because cold lacquer spatters, requiring extra work to get a level finish. For best results, heat your cans in a sink of warm water before spraying (Photo 9).
Day One
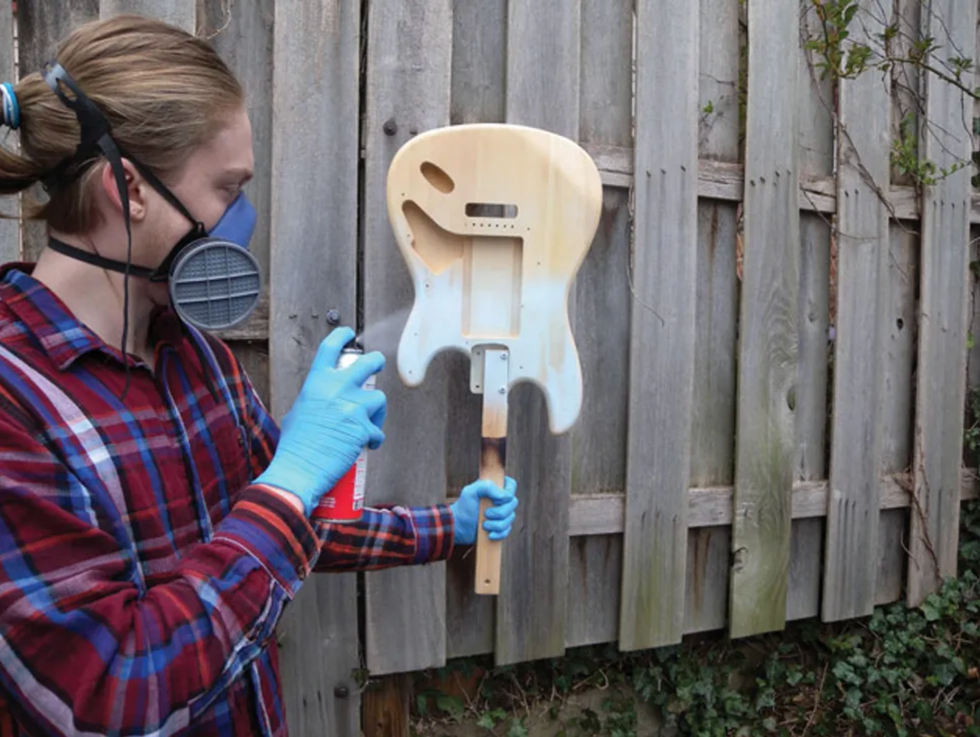
Photo 10
Day one. Spray an initial light misting or tack coat (Photo 10), followed several minutes later by a heavier wet coat. The tack coat gives the wet coat better adherence and lessens the chance of a run in the finish. Spray two to three wet coats (but not runny, thick coats) on the body, 90 minutes apart, and let them dry overnight.
Day Two
Using a backing pad on the flat areas, lightly scuff-sand the body with 320-grit sandpaper to knock off the high spots in the finish. Sand just enough to open the finish—don't try to sand out every shiny spot or sunken area in the lacquer at this stage. Clean off all the sanding residue. Spray two to three uniform color coats for complete coverage, allowing 90 minutes between coats.
Day Three
Lightly scuff-sand the finish with 320-grit paper using care not to sand through your color coats, and clean off all the residue. Spray four uniform coats of clear lacquer, one hour between coats. Let the guitar dry overnight.
Tip: If you get a run or drip in the finish, let the surface dry for 24 hours and level-sand the problem area. If you touch wet lacquer, you'll leave a deep impression that will be much more difficult to fix.
Day Four
Lightly scuff-sand the finish with 320-grit paper, leveling out any imperfections in the process, and clean off all the residue. Don't try to sand out all the shiny spots yet. Be particularly careful on the curves of the body. It's easy to sand through the edges. Once again, spray four more coats of clear, 90 minutes apart. The guitar now has six to eight topcoats of clear lacquer. Let the finish dry overnight.
If you get a run or drip in the finish, let the surface dry for 24 hours and level-sand the problem area.
Day Five
Scuff-sand the finish with 320-grit again. This time most of the shiny spots will disappear, leaving a uniformly dull look. Spray four more clear coats, 90 minutes apart, and let dry overnight.
Day Six
Lightly scuff-sand the finish with 600-grit sandpaper, to help the solvent escape. The body should now be left in a warm and dry location for two weeks to let the finish cure.
Step 5: Fine sanding and buffing
Dry-sand the body to a flat, dull sheen with 800-grit sandpaper. Clean the residue from the paper often. Orange-peel texture caused by lacquer shrinkage as the solvents cure out of the finish should be removed, but don't over sand. When all the little shiny low spots in the lacquer have been removed, you're ready to go to the next step, which is wet-sanding.
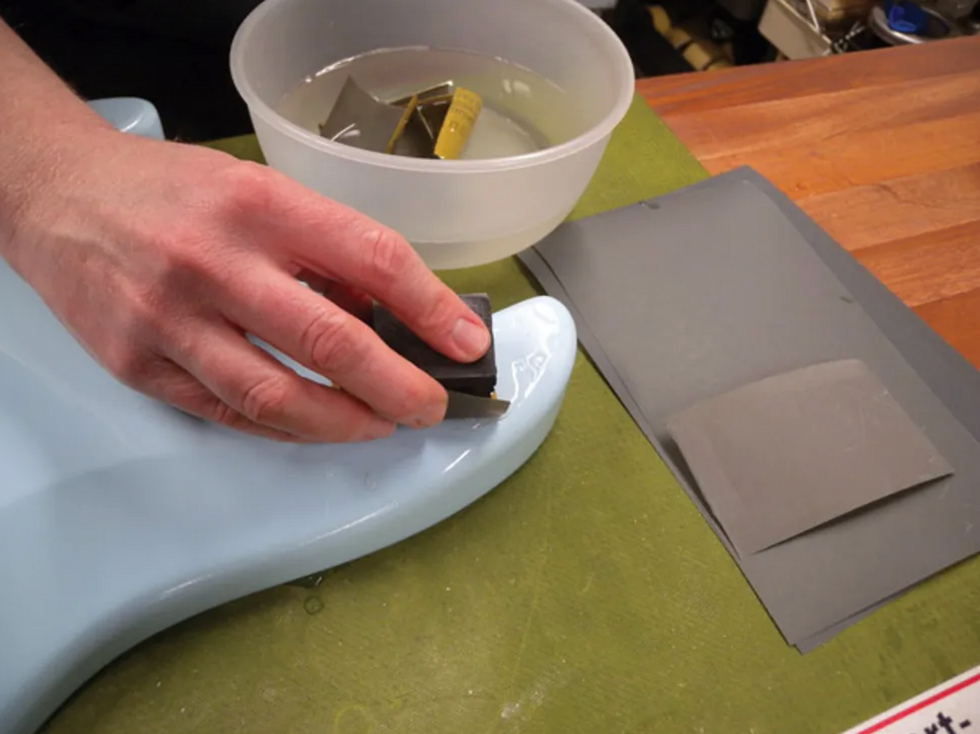
Photo 11
To bring the finish to a smooth satin surface that's ready for final polishing, wet-sand with 1200-grit micro-finishing paper and water (Photo 11). Excess water and residue should be wiped off the finish with a clean dry soft cloth as you work. Frequently rinse the sandpaper in soapy water to remove hard specks that can scratch the finish.
Tip: Soak the micro-finishing paper in water overnight before use. It will scratch less and last longer. Always keep it wet from then on.
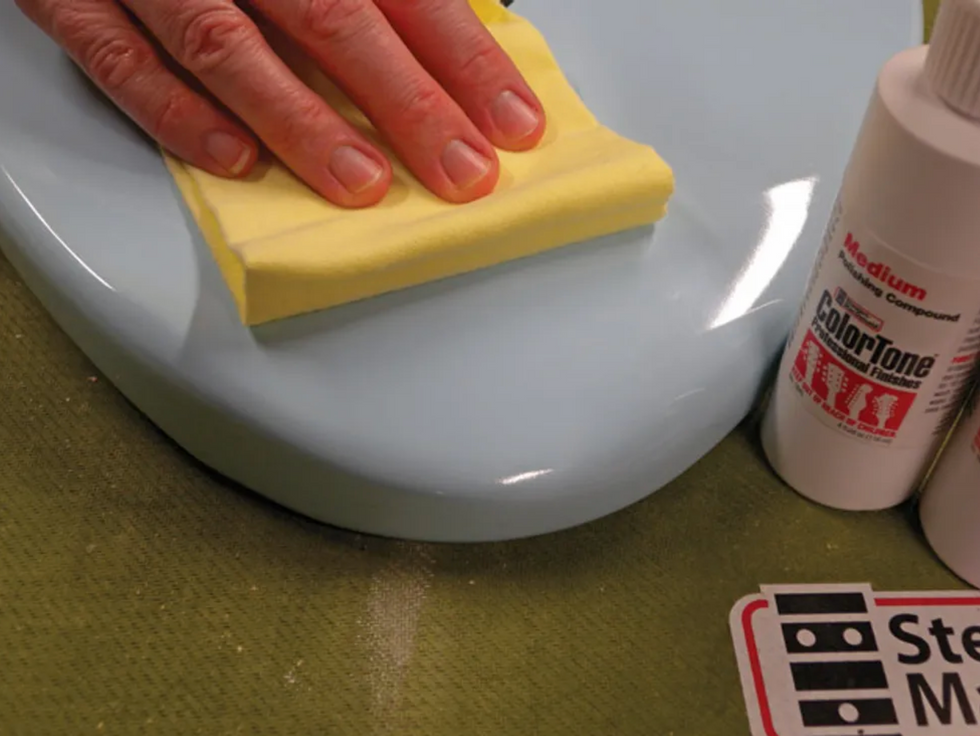
Photo 12
Using soft cloths—a different one for each compound—polish out the fine wet-sanding scratches to a final gloss with medium and then fine liquid polishing compounds (Photo 12).
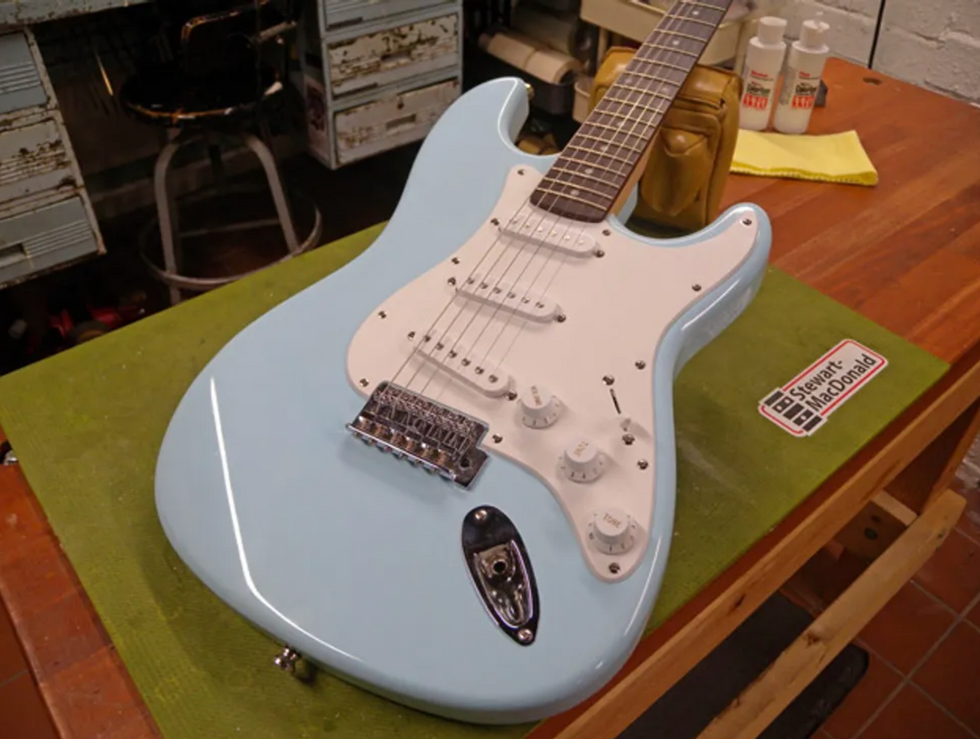
Photo 13
Once you've polished the body to a high gloss, reassemble your guitar (Photo 13) and get it back in action!
[Updated 9/10/21]
- Guitar Shop 101: How to Shim a Bolt-On Neck - Premier Guitar ›
- Guitar Shop 101: The ABCs of Output Jacks - Premier Guitar ›
- Guitar Shop 101: Curing Sticky-Neck Syndrome - Premier Guitar ›
- Paranormal Guitar Mods That’ll Rock Your DIY World - Premier Guitar | The best guitar and bass reviews, videos, and interviews on the web. ›
- Sanding Your Guitar Neck for a Smoother Feel - Premier Guitar ›
- Reader Guitar of the Month—Pickups and Finishes - Premier Guitar ›
- DIY Guitar: 7 Cool Reader Mods - Premier Guitar ›
- Squier Paranormal Super-Sonic Review - Premier Guitar ›
Nineties-style high-gain heaviness that can be surgically tailored with a powerful EQ.
Excellent variations on high-gain modern distortion tones. Powerful EQ.
Not many low- or mid-gain sounds here.
$199
JHS Hard Drive
jhspedals.com
JHS makes many great and varied overdrive stomps. Their Pack Rat is a staple on one of my boards, and I can personally attest to the quality of their builds. The new Hard Drive has been in the works since as far back as 2016, when Josh Scott and his staff were finishing off workdays by jamming on ’90s hard rock riffs.
During these sessions, Scott’s go-to pedal was the Ibanez SM7 Smash Box. He realized that JHS had never offered anything along those lines, conferred with his then lead engineer, Cliff Smith, and the wheels were set in motion. Over several years of design, the Hard Drive evolved from an SM7 homage to a unique, original circuit.
JHS’ Hardest to Date
The Hard Drive’s control panel is streamlined, consisting of knobs for volume, mid frequency, drive, bass, middle, and treble. Driven by cascading gain stages, the Hard Drive can cop a wide range of modern distorted tones. Even at the lowest drive settings, the Hard Drive simmers, delivering massive bottom end on muted power chords. Nudging the drive up very slightly transforms the Hard Drive into a roaring Marshall JCM 900. And if you bring the drive all the way up, you’re in for all out chaos. Even with an amp set just louder than bedroom levels, the Hard Drive, with its volume at just 11 o’clock, is very loud and in-your-face. You don’t have to work hard to imagine how this could sound and feel like multiple stacks raging at Madison Square Garden in the context of a recorded track.
Even at the lowest drive settings, the Hard Drive simmers, delivering massive bottom end.
Zoning the Frequencies
Unlike some heavy pedals that concern themselves with mega-gain and little else, the Hard Drive’s EQ controls are very effective and powerful. Moving the treble knob from 11 o’clock to 1 o’clock changes the pedal’s tone and response characteristics completely, opening up and transforming the naturally relatively dark sound of my Fender Super Sonic amp. Turning the treble knob all the way off with the bass and mid knobs at noon gives me a vocal lead tone that’s creamy, warm, and still immediate and responsive.
The middle and mid frequency controls work in tandem. The mid control itself works as a cut or boost. The mid frequency control, however, lets you choose the specific frequency you cut or boost. I found these controls invaluable for sculpting tones that could leverage the copious gain without being abrasive. Meanwhile, adding more high midrange lends clarity to complex chords.
The Verdict
The Hard Drive is an unapologetically heavy pedal—if you’re looking for a dirt box that can double as a clean boost, well, the Hard Drive is not that. It’s meant to slay with gain, and it performs this task well and with a vengeance. There are countless dirt boxes on the market that deliver hot rodded, ’80s-style brown sound. Fewer cater to the subsequent generations of high-gain players that used the ’80s as a mere jumping-off point. The Hard Drive is very much voiced for this strain of heavy music. If that’s your jam, the Hard Drive is hard to beat.
Tailored for Yngwie Malmsteen's signature sound, the MXR Yngwie Malmsteen Overdrive is designd to offer simple controls for maximum impact.
Working closely alongside Yngwie, the MXR design team created a circuit that delivers clarity, expressive dynamics, and rich harmonics—all perfectly tailored for his light-speed arpeggios, expressive vibrato, and big, bold riffs. The control setup is simple, with just Level and Gain knobs.
"Want to sound like Yngwie? Crank both knobs to the max."
“This pedal is the culmination of 45+ years developing a sound that’s perfect in every possible way,” Yngwie says. “I present to you: the MXR Yngwie Malmsteen Overdrive. Prepare to be amazed.”
MXR Yngwie Malmsteen Overdrive highlights:
- Perfectly tailored for Yngwie Malmsteen's signature sound and style
- Simple control setup tuned for maximum impact
- Boost every nuance with superior clarity, expressive dynamics, and rich harmonics
- Dig into light-speed arpeggios, expressive vibrato, and big, bold riffs
The MXR Yngwie Malmsteen Overdrive is available now at $129.99 street/$185.70 MSRP from your favorite retailer.
For more information, please visit jimdunlop.com.
Voltage Cable Company's new Voltage Vintage Coil 30-foot guitar cable is now protected with ISO-COAT technology to provide unsurpassed reliability.
The new coiled cables are available in four eye-grabbing retro colors – Surf Green, Electric Blue, Orange and Caramel – as well as three standard colors: Black, White and Red. There is also a CME exclusive “Chicago Cream” color on the way.
Guitarists can choose between three different connector configurations: straight/straight plugs, right angle/straight and right angle/right angle options.
The Voltage Vintage Coil offers superior sound quality and durability thanks to ISO-COAT treatment, a patent-pending hermetic seal applied to solder terminations. This first-of-its-kind airtight seal prevents corrosion and oxidization, a known factor in cable failure and degradation. ISO-COAT protected cables are for guitarists who value genuine lifetime durability and consistent tone throughout their career on stage and in the studio.
Voltage cables are hand made by qualified technical engineers using the finest components available and come with a lifetime warranty.
Voltage Vintage Coil features include:
- Lifetime guarantee, 1000+ gig durability
- ISO-COAT treatment - corrosion & oxidization resistant cable internals
- Strengthened structural integrity of solder terminations
Voltage Vintage Coils carry $89.00 USD pricing each and are available online at voltagecableco.com, as well as in select guitar stores in North America, Australia, Thailand, UK, Belgium and China.
About Voltage Cable: Established in 2021, Voltage Cable Co. is a family owned and operated guitar cable company based in Sydney, Australia. All their cables are designed to be played, and built for a lifetime. The company’s ISO-COAT is a patent pending hermetic seal applied to solder terminations.
Featuring dual-engine processing, dynamic room modeling, and classic mic/speaker pairings, this pedal delivers complete album-ready tones for rock and metal players.
Built on powerful dual‑engine processing and world‑class UAD modeling, ANTI 1992 High Gain Amp gives guitarists the unmistakable sound of an original "block letter" Peavey 5150 amplifier* – the notorious 120‑watt tube amp monster that fueled more than three decades of modern metal music, from Thrash and Death Metal, to Grunge, Black Metal, and more.
"With UAFX Dream, Ruby, Woodrow, and Lion amp emulators, we recreated four of the most famous guitar amps ever made," says UA Sr. Product Manager Tore Mogensen. "Now with ANTI, we're giving rock and metal players an authentic emulation of this punishing high gain amp – with the exact mic/speaker pairings and boost/noise gate effects that were responsible for some of the most groundbreaking modern metal tones ever captured."
Key Features:
- A complete emulation of the early '90s 120‑watt tone monster that defined new genres of modern metal
- Powerful UAFX dual-engine delivers the most authentic emulation of the amp ever placed in a stompbox
- Complete album‑ready sounds with built‑in noise gate, TS‑style overdrive, and TC‑style preamp boost
- Groundbreaking Dynamic Room Modeling derived from UA's award-winning OX Amp Top Box
- Six classic mic/speaker pairings used on decades of iconic metal and hard rock records
- Professional presets designed by the guitarists of Tetrarch, Jeff Loomis, and The Black Dahlia Murder
- UAFX mobile app lets you access hidden amp tweaks and mods, choose overdrive/boost, tweak noise gate, recall and archive your presets, download artist presets, and more
- Timeless UA design and craftsmanship, built to last decades
For more information, please visit uaudio.com.