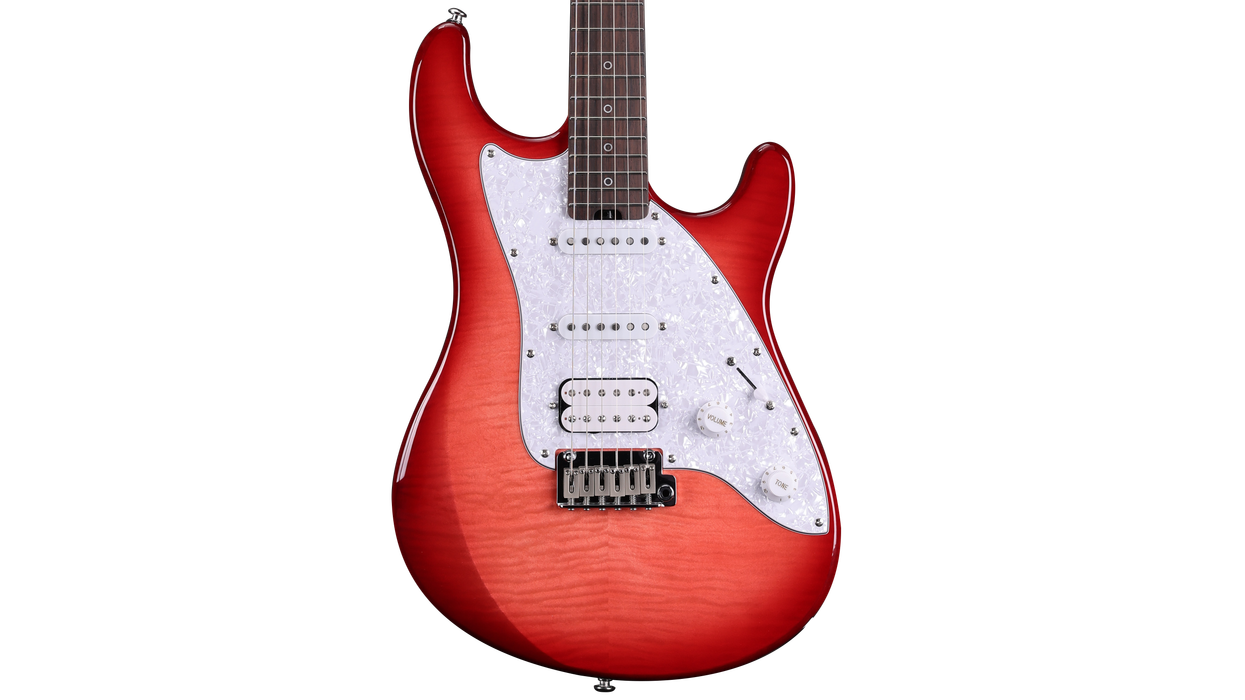
A lot of you have been waiting for this penultimate step of our guitar aging project, so let’s do some damage!
Welcome back to Mod Garage. Today we’ll continue to work on our aging project, and some of you might be wondering why there was such a long break. The reason is simple: suboptimal timing from my side. The last part of this column was in the middle of autumn, and I wanted you to do the following steps outside (if possible) and not on the kitchen table. Wintertime is not the best time for such a challenge but now is a good starting point, so let’s go!
We’re almost done with our project, can you believe it? In this installment, we’ll take care of the color, talk about fading, and we’ll crack the lacquer—something a lot of you have been waiting for—before we add some dings and dongs in the last part of this series, which is the final touch before we put it all together again.a
We also have an advice column on aging from my friend and colleague Matthias “Matti” Meyer, from the German-based Bassart Guitars. Matti is one of the best pro agers I know. Please follow his advice and recipe for aging wood at the end of this column—we will need these tools in the next and final part of this project.
Aging the Color
Over time, the colors on guitar bodies start to fade, and depending on the type of color and the paint-job method itself, discolorations can show up. The two main factors are if the guitar was exposed to ultraviolet light and if the paint job is all intact. A famous example is the Gibson Les Paul goldtop guitars with the golden color turning greenish, or the Gibson sunburst Les Pauls losing the red color of the sunburst spray job over time. But Fender guitars also suffer similar problems.
What we want to mimic is an old nitro lacquer, but with our Harley Benton guitar we have two problems:
- The mustard color is not a real TV yellow, as discussed before. TV yellow is much lighter, so even when we find a way to fade the color, it won’t look like a faded TV yellow, but a faded mustard yellow. We can’t change this easily, so we must work with what we have and love it for what it is rather than hating it for what it’s not.
- It’s not nitro lacquer on our Harley Benton but a modern, not-so-thin, ultra-durable poly lacquer. In a technical way, this modern lacquer does a much better job than any vintage nitro stuff regarding protection of the guitar. The downside is that we can’t make poly look like nitro when aging; it will only be an approximation. But again, it is what it is, and we’ll make the best out of it.
If you have the time, exposing the guitar to direct sunlight for some weeks or months will cause a fading of the color to a certain degree. Over the years, I’ve seen the oddest attempts to do such things, including regularly placing the guitar inside a home solarium. Using artificial UV light is also an option but building a well-working construction for such a big object, like a set-neck guitar, is not easy and you’d need a lot of UV lamps for that. Such devices are often used to make yellowed plastic materials look shiny white again. An overspray with the correct color is also an option. but a lighter color on a darker one is always difficult to do—especially with a semi-transparent color like TV yellow. And I doubt it’s worth the time and money. Not everything is doable and this falls into that category. But we’ll do other things to make it look old and cool, so leave the color as it is.
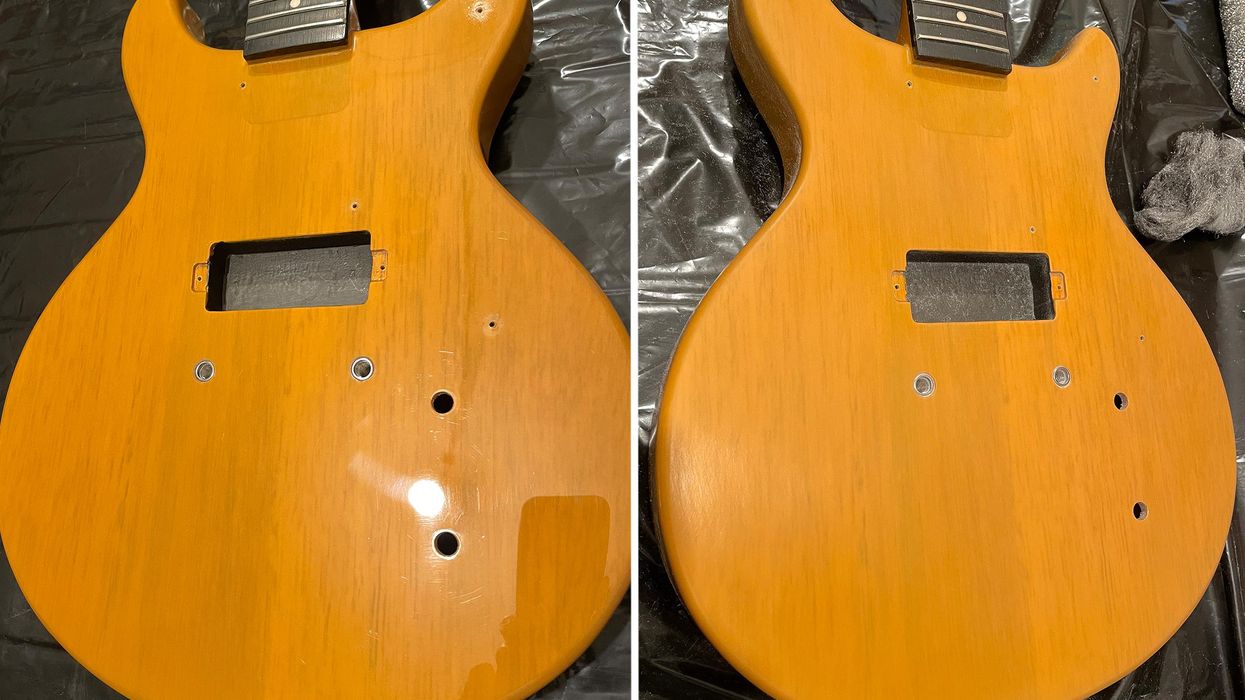
Let’s begin. As usual, grab your steel wool and abrasive cloth to break the shine of the high-gloss lacquer, and don’t forget the backside of the neck. The difference can be seen in Photo 1 (before) and Photo 2 (after).
Aging the Lacquer
This is what a lot of you have been waiting for and today we’ll finally do it: cracking the lacquer!We all know the look of cracked lacquer on vintage guitars, which is part of their special appearance and charm. On vintage guitars this happens over time, the softener disappears, and the paint starts to crack. Here again, facing that our Harley Benton is poly and not nitro-painted, we must follow a different route to get a good result.
Generally, there are two basic methods to do this:
- Mimicking the cracks by using a razor blade to cut the cracks into the paint.
- Using a combination of heat and cold to crack the lacquer.
In both cases this is only the first step. Next, we’ll have to make the cracks more visible, but first things first.
I decided to use the second method: using heat and cold to crack the lacquer. Please note, this will take some time and patience to do it right: It won’t be done in 15 minutes. You don’t need much for this, just a heat gun and several bottles of cooling spray. The process is easy but safety first: Only do this outside, wear gloves and goggles, and place a bucket with cold water or an extinguisher near you … a heat gun gets very hot!
You can’t do this in one step, and you’ll need to work in smaller areas, one by one. Heat up the first area with the heat gun and be careful—you only want to heat up the lacquer and not melt or burn it. If you want to intentionally add some burned spots, a heat gun is the way to go, too. Depending on the type and thickness of the lacquer as well as the power of your heat gun, it can take some time until the lacquer is ready to crack. Start to heat it up from a distance and not with the heat gun directly on the guitar, checking the temperature of the lacquer from time to time with one of your hands. Never put your hand directly under the heat gun! Take the guitar body and your hands away from the gun when you check the temperature. If you feel that it’s not hot enough, keep heating it up until it’s good to go.
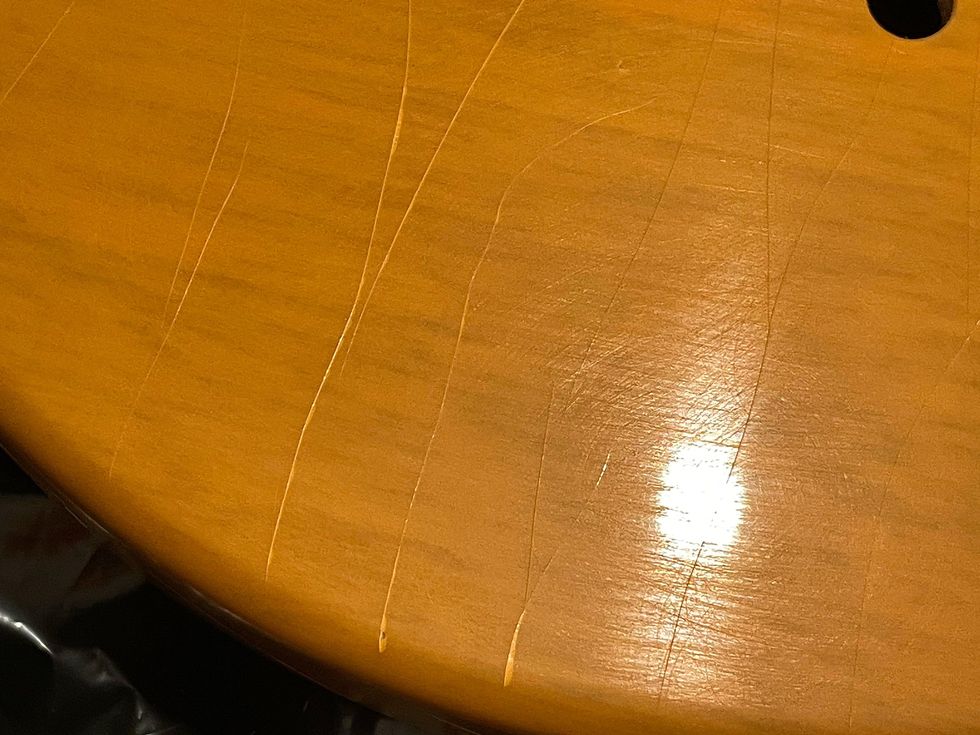
Photo 3
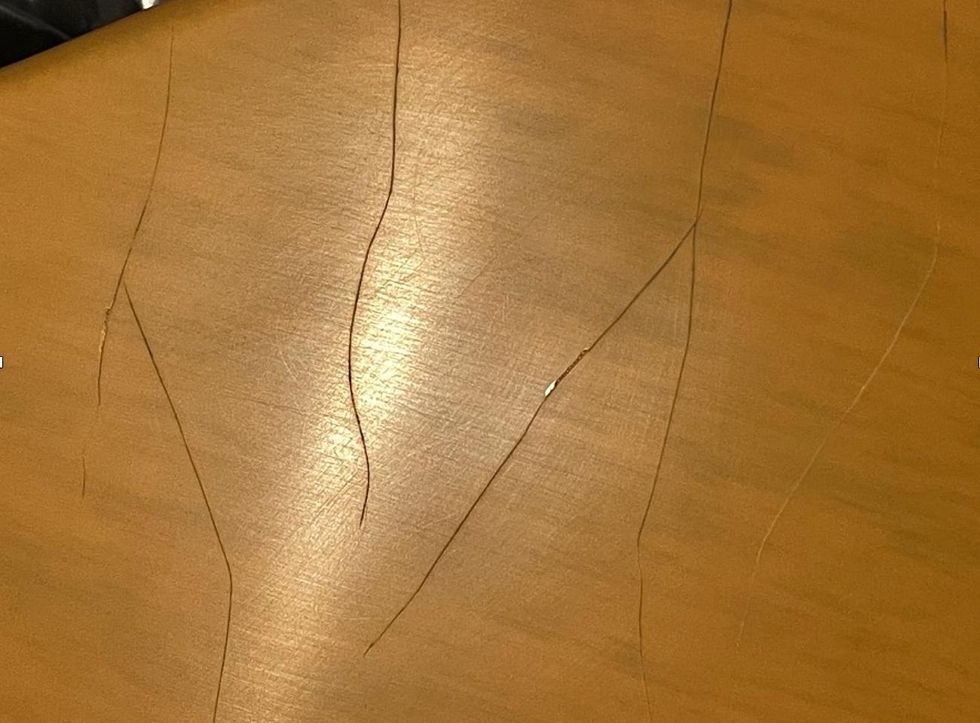
Photo 4
There are no rules set in stone because it depends on the things mentioned above. So, you have to try and see what works on your guitar. If you think the lacquer is hot enough, take away the heat gun and immediately spray the heated area with the cooling spray to create a sudden temperature gradient. You’ll likely have to repeat the process several times until the lacquer starts to crack, and usually you can hear when it cracks, which is a good sign. Work your way all over the guitar and crack it area by area. I needed approximately 90 minutes and four bottles of cooling spray until I was finished (Photo 3).
Does it look the same as cracked nitro lacquer? No, it’s not the same cracking pattern because of two reasons. On a nitro-lacquered guitar, the cracking happens because the softener disappears over time, which is a completely different thing. Poly is hard as glass and will never lose its softener. So, the vintage guitars of the future, let’s say in 100 years from now, will look much different compared to today—no more cracks. The second reason is that only in the middle of the spray is the lowest possible temperature not on the edge of the spray. But it’s the same ballpark, so don’t worry.
After you’re done with the entire guitar, let it cool down for some time before we start to make the cracks more visible. Again, there are different ways to do this. I prefer to use a strong black tea or coffee. Warm up the guitar slightly and dip some paper towels into the black tea or coffee before covering the guitar with them. Let them sit there for some hours before you remove them. The moisture will creep into the cracks, coloring them slightly, so they are more visible. This is a permanent process: The cracks will not lose their color again over time. On poly-lacquered guitars, I’ve also seen and tried alternative methods like using Coca-Cola, potassium permanganate, coffee grounds, stains, and more. The tea/coffee method works great and with good results and is, of course, harmless. But feel free to try other methods if you want to experiment, there’s no law against it.
After removing the paper towels, let it dry for some time before removing any residues from the lacquer using a dampish paper towel. Then, heat up the guitar slightly and let it cool down again. And voila, done! You can see the cracks are now brighter in Photo 4.
Congratulations, we are only one step away from finishing our aging project! Next, we’ll add some dings, dongs, and scratches, which is a lot of fun and a great way to individualize your guitar.
That’s it for now. Next month we’ll do another cool guitar mod, so stay tuned. Until then ... keep on modding!
Teatime: How to Age Wood at Home
Matthias Meyer of Bassart Guitars
Hi PG readers,
Did you ever wonder how it’s possible to add a special gray and dark color to the exposed wood on aged guitars? Here is my recommendation for how to do this with some simple household stuff you already have.
You will need: vinegar essence, water, black tea, steel wool, paper coffee filters, and some jars.
First, twitch a good handful of steel wool and put it in a jar. Next, fill up the jar with vinegar essence, close the jar, and let it sit for one or two days. The reaction of the steel wool and the vinegar will result in iron(II) acetate, which you can use as a dye. Use a cone-shaped paper coffee filter to percolate the liquid into a new jar and you hold the panacea in your hands. By adding some water, you can mitigate the dying effect and it’s easy to make some different aging dyes this way, from very dark to light gray.
Now it’s teatime. Make a strong black tea by using 6 to 8 tea bags in a pot, let it cool down, remove the tea bags, and pour the tea in a new jar.
One way of aging the exposed wood is to use the tea first, immediately followed by the iron(II) acetate (wet on wet technique). For a different effect and color, use the tea first and let it dry before applying the iron(II) acetate. Or use both liquids individually without the other one. It all depends on your personal taste and, of course, the wood itself. Before applying these liquids directly to your precious instruments, you should try to practice the process on some wood scraps you have lying around. Different woods react in very different ways and often the aging process needs one or two days before it becomes visible.
I hope you enjoy experimenting with this process. Cheers!
—Matthias “Matti” Meyer
www.bassartguitars.de
Revisiting the very first wah circuit with delicious vintage-flavored results.
Delicious, present voice. Satisfying, expressive range and filter curve. Well-made. Very little noise.
Toppy tones could be too hot for some players.
$279 street
Vox Real McCoy VRM-1 Wah voxamps.com
Some pedals are more fun than others. And on the fun spectrum, a new Vox wah is like getting a bike for Christmas. There’s gleaming chrome. It comes in a cool vinyl pouch that’s hipper than a stocking. Put the pedal on the floor and you feel the freedom of a marauding BMX delinquent off the leash, or a funk dandy cool-stepping through the hot New York City summertime. It’s musical motion. It’s one of the most stylish effects ever built. A good one will be among the coolest-sounding, too.
Vox Real McCoy - MAIN by premierguitar
Needless to say, there are not a lot of original Vox Clyde McCoys on the gigging circuit. They’re collector-spendy and a rarity, even in nice studios. And as anyone who has ever owned a wah knows, the combination of vigorous stomping and relative fragility in electro-mechanical terms means many wahs live short lives. A late-’60s Clyde McCoy can indeed sound special, though: top end that’s substantial, sweet and searing, and vowel-y contours in the filter sweeps that lend a haunting humanity to the voice. The new Vox Real McCoy VRM-1 is exhilarating in many of the same ways vintage specimens can be.
Of Halos, Pots, Treadles, and Trips
The Real McCoy mixes old and newer components and circuit construction techniques. The machine-populated board is clean, neat, and dotted with time-tested, familiar parts, like BC-109 transistors, and a contemporary halo inductor design. The latter component, like any inductor, shifts the resonant peak and shapes a wah’s voice. The one used here is less noisy than those on early Clyde McCoys, but clearly shares many very similar tone attributes.
Something in the Wahter
When I play a wah, I love using long, slow filter sweeps—like, “Maggot Brain”-at-half-speed slow. The McCoy’s nuanced taper means lots of copious tone colors to paint with if you take that approach. If you’re accustomed to the narrower vocal range of inexpensive wahs, the Real McCoy can inspire a relaxed approach to the effect—the kind that compels a player to lean on a single note and enables sweet, vocal-style support in more tender, soulful musical settings. As much pleasure as there is in these lazy-footed adaptations of the effect, the McCoy’s range and treadle action also makes it a standout for Wah Wah Watson and Skip Pitts “wocka-wocka” rhythm jabs. The Real McCoy is quiet, too, adding little hiss or noise to your signal.
At extremes of the potentiometer’s travel, the McCoy shines. The toppiest of the top end is blue-flame hot—a killer place to punctuate a solo or linger for a whole one, for that matter. The bassier reaches of the sweep are throaty, thick and powerful rather than muffled. I love the sounds the Real McCoy makes here, particularly with a nasty fuzz on the receiving end, which can sound really snarly and focused rather than grating.
The Verdict
The Real McCoy sounds, in most respects, very vintage in its tone profile. There’s lots of range, sharp trebly peaks, and fat, bassy resonance. It feels great underfoot, too. It’s responsive—facilitating fast, fluttering “Dazed and Confused” filter sweeps and long, slow throws of the treadle. About the price: $279 is on the high end for new wah wah. That’s only 20 bucks less than Vox’s V846-HW handwired wah and anywhere from 100 to 180 bucks more than wahs at the affordable end of the price spectrum, where the occasional wah-ist tends to look. If lyrical, super-present wah textures are a cornerstone of your sound, the Real McCoy merits a listen to see if the differences here justify the cost. Even wah newbies, however, may well find the Real McCoy’s characterful voice infectious and irresistible.
Martin D-11E Rock the Vote acoustic-electric guitar is a limited edition collaboration between Martin Guitar, Rock the Vote, and artist Robert Goetzl, honoring David Crosby's passion for voting. Crafted with premium materials and featuring unique LR Baggs M80 soundhole pickup and Luxe by Martin Kovar strings, this guitar inspires civic participation through music.
The Martin D-11E Rock the Vote acoustic-electric guitar is a special edition instrument crafted to inspire people to participate in our democracy. This collaboration between Martin Guitar, David Crosby’s estate, Rock the Vote, and artist Robert Goetzl tells a powerful story. “David was a patriot,” says Executive Chairman Chris Martin IV. “He believed deeply in this great experiment of ours, and his passion for voting is something we wanted to honor and continue.”
The vision for the original D-16E Rock the Vote guitar launched back in 2020 was born from a conversation between Chris and David Crosby, partnering with Rock the Vote to encourage people to register and participate in federal, state, and local elections. That conversation led to blending Robert’s compelling artwork with Martin's renowned craftsmanship. Robert shares, “David threw out this quote, that ‘democracy works if you work it,’ and that became a guiding theme for the artwork.”
A reissue of that original guitar, the all-new D-11E Rock the Vote model includes new features like an LR Baggs M80 soundhole pickup paired exclusively with Luxe by Martin® Kovar™ strings. Kovar is a unique alloy of two ferromagnetic metals, nickel, and cobalt, not found in conventional phosphor bronze strings. When paired with the adjustable M80 humbucking coil, these strings are guaranteed to deliver an exceptional acoustic-electric experience. It’s the ideal pairing for players seeking warm, authentic, amplified tones in any performance setting.
The D-11E Rock the Vote acoustic-electric is crafted with premium materials, including American sycamore satin back and sides and a spruce gloss top showcasing Robert’s custom artwork. Its Dreadnought size and unique 000 depth offer players a powerful, projective sound with strong bass and a comfortable feel. It also features a satin select hardwood neck, ebony bridge and fingerboard, silver binding, and includes a softshell case made of hemp.
This guitar not only commemorates David Crosby’s legacy, but through this collaboration, Martin Guitar is proud to support Rock the Vote with a $5,000 donation. Rock the Vote is a non-partisan, non-profit organization dedicated to building the political power of young people, and over the past 30 years it has helped register over 14 million voters. According to the organization, “In 2024, Millennials and Generation Z will comprise 44% of American voters. Young voters are new voters and as new voters they face unique obstacles to voting... Our efforts focus on research-driven programs and innovative solutions to right the system and ensure each youth generation is represented in our democracy.”
"We are thrilled to partner with Martin Guitar to harness the power of music in inspiring young musicians and their fans to engage in our democracy," said Carolyn DeWitt, President and Executive Director of Rock the Vote. "Music has always been a catalyst for change, uplifting critical issues and driving people to action. As we face the defining challenges of 2024, it's essential that young voices are heard and their passion is transformed into meaningful participation at the polls," adds Carolyn DeWitt, President & Executive Director of Rock The Vote.
With only 47 of these guitars made, honoring the election of the 47th U.S. president, each one represents a commitment to encouraging civic participation through the universal language of music. “I believe it’s our responsibility as citizens to participate in our democracy,” says Chris.
For more information, please visit martinguitar.com.
Introducing Spark MINI Vai, a portable smart guitar practice amp custom-designed by guitar icon Steve Vai. Featuring exclusive presets, a hand-signed model giveaway, and a matching lightweight cable, this amp captures Vai's iconic sound and style. Pre-order now for a chance to win a signed model.
In collaboration with guitar icon and 3-time GRAMMY® Award winner Steve Vai, Positive Grid proudly presents Spark MINI Vai, a portable smart guitar practice amp with an exclusive lightweight cable. Custom-designed by Vai himself, Spark MINI Vai captures his iconic sound and personal design touch. This unique, battery-powered amp delivers multi-dimensional sound and Vai-crafted presets, making it the ultimate rig for playing, practicing, and recording. Plus, during Positive Grid’s pre-order period, customers have a chance to receive a hand-signed model.
Steve Vai is one of the world’s most groundbreaking and influential guitarists, and Spark MINI Vai reflects his unique tone and style. The amp features a custom burgundy Tolex, custom gold piping, and a gold-lined strap, hand-picked by Vai himself. The mandala on the front grille – made famous on his Hydra guitar – pays tribute to Vai’s distinct energy and focus. Spark MINI Vai also comes equipped with a matching lightweight 10-foot guitar cable featuring 24K gold-plated connectors and a durable burgundy weave nylon jacket.
Four exclusive on-board presets created by Vai deliver the raw power of his tone. They include:
- FRESH - Crystal clear clean tone
- MILD - More bluesy clean tone with some grit
- HOT - Well-distorted rock rhythm tone
- FIRE - Full-on lead tone
In addition, Steve Vai has personally autographed 100 of these amps, which will be awarded to random recipients who purchase during the pre-order period starting 9/3/2024. Anyone who purchases during that time will be automatically entered for a chance that their order will be one of these exclusive hand-signed models.*
Commenting on his Spark MINI, Vai shares, “For me, this Spark MINI is an excellent portable practice amp. The 4 tones allow for inspirational playing and I built these presets around my interests. The app allows for instant tweakage of any of the presets. I never travel without this little friend."
Portable and battery-powered, the 10-watt Spark MINI smart guitar practice amplifier delivers surprisingly loud, multi-directional sound and features easy-to-use onboard controls. Spark MINI can also be used as a Bluetooth audio speaker for streaming music or as an audio interface for recording musical ideas.
The free accompanying app unlocks a wide selection of amps and effects plus access to 100,000+ tones and a suite of smart features for practicing and playing. Spark AI offers unlimited tone exploration. Describe any desired tone using the app and Spark AI will suggest tones to audition or download.
For more information, please visit positivegrid.com.
A few small organizational tricks can set your digital workspace up for success.
Hi, and welcome to another Dojo. This time, I’m going to give you ways to cut the clutter from your sessions and help make your recording process more efficient—in short, more kaizen. This compound Japanese word is usually translated as “good change” but has morphed over the years to mean something closer to “continual improvement.” The concept is applied in multiple industries from auto manufacturing to healthcare, and it can certainly be effectively applied on an individual level.
The idea is that multiple small improvements over time will produce big results. Legendary British cycling coach Dave Brailsford called this “the aggregation of marginal gains.” His strategy was simple: Focus on getting one percent better in every area related to riding a bike. Within 10 years, the British cycling team went on 178 World Championship races and won five Tour de France victories and over 60 Olympic gold medals. Kaizen, indeed! I’m still amazed when I get sessions from other engineers who have no color-coded recording session tracks, haphazard organization within the session itself, and haven’t saved multiple versions. These are three problems that are easily solved with a bit of kaizen. Tighten up your belts, the Dojo is now open.
Color differentiation reduces your cognitive load and allows for faster, more efficient recording, editing, mixing, and overall session management.
Diversify Your Color Palette
Color-coding recording session tracks is a powerful tool for visual organization. It’s an essential, non-technical practice that can significantly enhance workflow efficiency and track management. In a typical modern recording session, there can be between 30 and 100 tracks, each representing different instruments, vocals, effects, and other elements. Without a clear organizational strategy, navigating through these tracks can become overwhelming and time-consuming.
By assigning specific colors to different types of tracks, producers and engineers can quickly identify and locate the tracks they need to work on, so establish a consistent color scheme for types of instruments.
Here’s mine:
• Drums are always slate blue.
• Guitars are various shades of green because they’re made from trees (of course, almost everything else is, too, but both guitar and green share the same first letter).
• Bass instruments are always brown (because they’re powerful and can make you brown your trousers).
• Synths and keys are various hues of purple (I think of Prince and “Purple Rain”).
• Vocals are always yellow because when you get lost in the stifling dark caverns of your mix and can’t find your way out, focus on the vocals—they will lead you toward the light.
An example of our columnist’s strict session color coding in his DAW.
Regardless of your choices, color differentiation reduces your cognitive load and allows for faster, more efficient recording, editing, mixing, and overall session management. Moreover, color coding helps in identifying groups of tracks that need to be processed together, such as a drum bus or background vocals, thus making it easier to apply group processing and adjustments.
Your layout of a recording session is another critical factor for maintaining organized and productive workflows. A well-structured session layout ensures that all elements of the recording are easily accessible and logically arranged. My tracks have a consistent order: drums at the top, followed by bass, guitars, keyboards, vocals, and effects. There’s no right way to do this, but whatever you do, be consistent.
“I have an existential map. It has 'You are here' written all over it.” – Steven Wright
Consistency helps individual producers and engineers to work more efficiently, but also facilitates collaboration with others. When multiple people are involved in a project, establish a standardized layout that will allow everyone to quickly understand the session structure, find specific tracks, and contribute without confusion. Also, a clear layout helps minimize mistakes during recording, editing, and mixing, like possibly overlooking important tracks or processing the wrong ones.
Your layout of a recording session is another critical factor for maintaining organized and productive workflows. A well-structured session layout ensures that all elements of the recording are easily accessible and logically arranged. My tracks have a consistent order: drums at the top, followed by bass, guitars, keyboards, vocals, and effects. There’s no right way to do this, but whatever you do, be consistent.
Consistency helps individual producers and engineers to work more efficiently, but also facilitates collaboration with others. When multiple people are involved in a project, establish a standardized layout that will allow everyone to quickly understand the session structure, find specific tracks, and contribute without confusion. Also, a clear layout helps minimize mistakes during recording, editing, and mixing, like possibly overlooking important tracks or processing the wrong ones.
“Waste Not, Want Not”
One of the most important things to always remember is to immediately save a new version the very first time you open a project or session. That way, if something happens, and it will eventually (I’ve even had session data get corrupted on that specific sector of the hard drive), you’ve left the original session alone. Every time you work on the song, or project, save a new version. This practice safeguards the process and ensures project security.
This is also important during the creative phase when trying out different ideas and arrangements. If a new idea doesn't work out, it's easy to revert to a previous version without losing valuable progress. Furthermore, saving versions at critical milestones—such as after recording, editing, and mixing—provides fallback options in case of technical issues or unexpected problems. And lastly, saving versions creates a chronological historical record of the session's development, which is invaluable for reviewing the evolution of the track, project, or entire record!