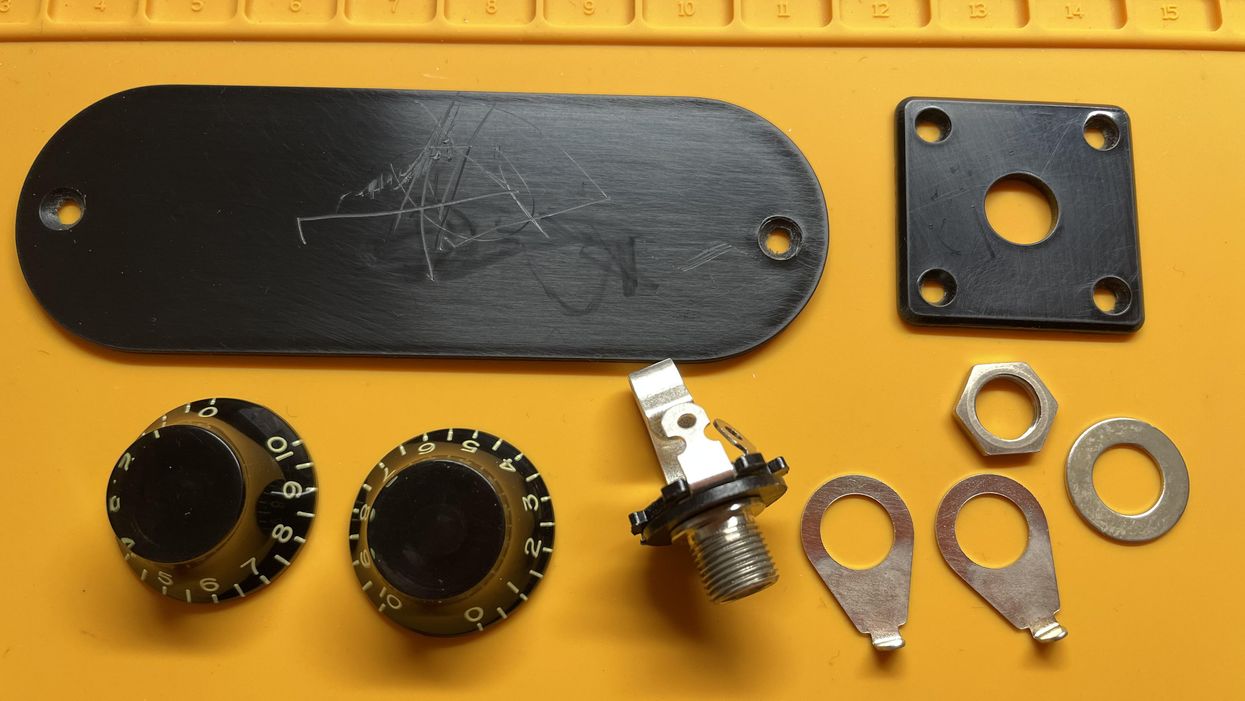
Hello and welcome back to Mod Garage. This month, we'll continue with the aging process of our Harley Benton DC-Junior project guitar (which is a copy of a 1958 Les Paul Junior Double Cut), taking a closer look at the pickguard while aging the rest of the hardware discussed in the last part of this series ["DIY Relic'ing: Harley Benton DC-Junior Electronics"]. If you need a refresher on our aging process for hardware, refer back to "DIY Relic'ing: Break the Shine" for guidance. You can see the parts we'll be discussing today in their "finished" form, aka relic'd, in Photo 1.
1. Output Jack
I'm not a big fan of aging the complete output jack or applying any corrosion to it because it's the transfer point of the signal to the guitar cable. We want this as clean as possible and without any avoidable contact resistance to keep the signal as strong and as fresh as possible. So, aging the parts you can see from the outside is the way to go, meaning the collar, the washer, and the hex nut.
You often see shiny new output jacks on vintage guitars, but why is this? Output jacks don't last forever, and chances are good that a vintage guitar has a replaced output jack that looks new because it is new. If the original output jack is still in a vintage guitar, it's usually dull, often showing some slight rust on the edges of the hex nut. To mimic this appearance, first take off the shine with some steel wool or fine sandpaper as we did before with many other parts. Then use an iron (III) oxide (ferric oxide) liquid to create some patina until you like the result. If you want to mimic some rust on the edges of the hex nut, sand off the nickel until you see the metal underneath—the ferric oxide will do the rest. Just let it sit for soak for a few minutes on these spots.
2. Knobs and Pointers
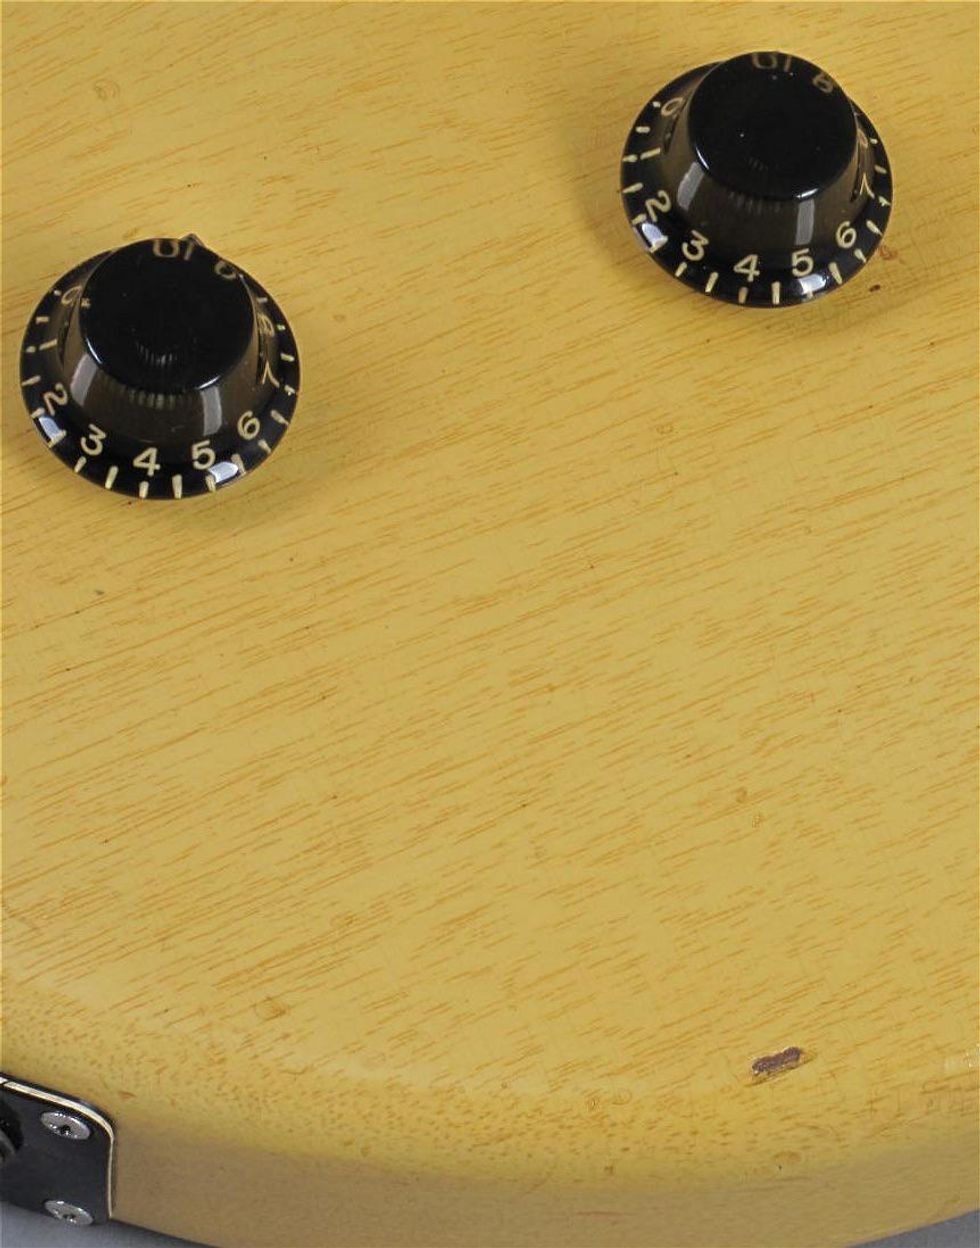
Photo 2
The top-hat knobs on vintage guitars also usually look shiny and new, but for a different reason. Because the knobs are touched and used very often, they get a kind of self-polishing from our fingers through the years, keeping them shiny with a greasy touch. Have a look at the original knobs of a '58 Les Paul Junior, shown in Photo 2, to see what I mean.
To mimic this, you can use a solvent and rub the knobs carefully with a paper towel, the surface will get slightly dull. Afterwards use a polish for plastics (or simply some of your toothpaste) and polish up the knobs a little bit until you like the result. The goal is to find the right mixture between old and new regarding the look. If you like a more beaten-up look, you can add some light scratches and file down some of the edges.
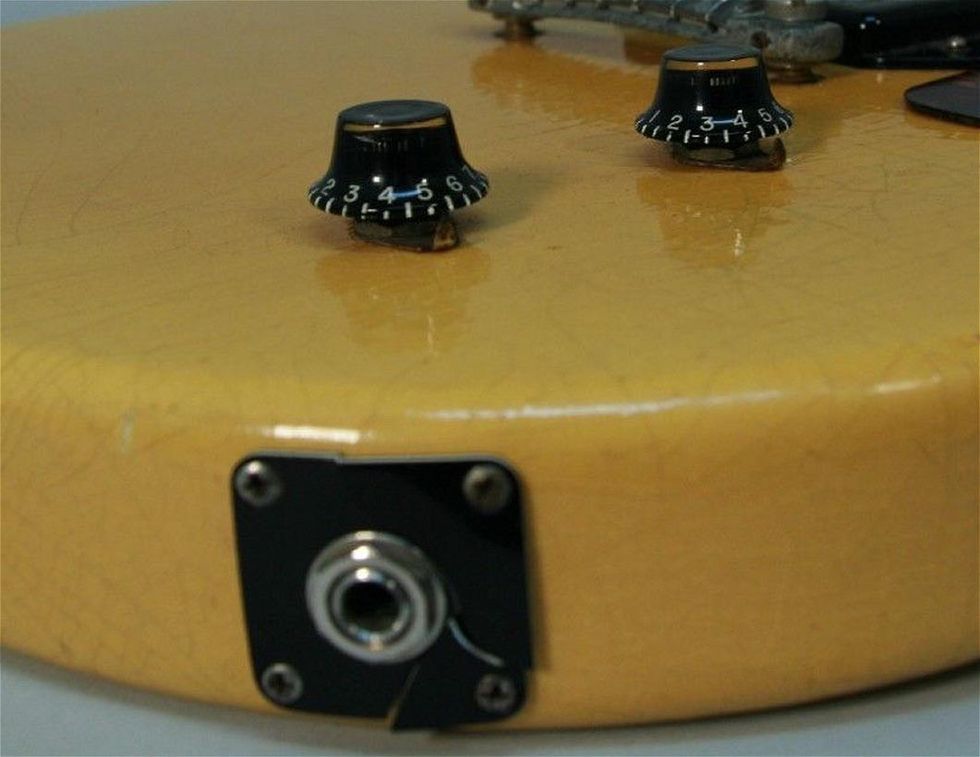
Photo 3
As you can see in Photo 3 of an original Junior from 1958, the pointers usually look dark and rusty. You can use the same process as aging the output jack to give them an old look.
3. Jack Plate and Screws
If you've been following along, you already know how to age screw heads. Nickel works out much better and looks much more authentic compared to chrome, so it's always a good idea to substitute chromed screws like on our Harley Benton with nickel before you proceed.
The jack plate usually shows some dings and scratches from botched attempts to plug in the guitar cable. You can simulate that by scrubbing off the shine with the steel wool, creating some random scratches with sandpaper, and hitting the plastic with the tip of the plug of your guitar cable while the jack plate is lying on a flat and even surface. If you want the jack plate cracked like on the photo of our vintage guitar, as seen in Photo 3, you can sketch out the cracking lines with a fine X-Acto knife on the back of the jack plate. Afterwards, screw it to a flat piece of wood and bolt on the screws very tight until the line cracks. If it doesn't crack, repeat the process and cut deeper with your knife, then install the output jack by fastening the hex nut very tightly.
If you decided to swap the modern 1-ply solid black jack plate for a more authentic 3-ply plate (black/white/black), some more work is required. On vintage guitars, the white sometimes turns to a kind of "nicotine white" or ivory color. To mimic this color, first take off the shine with some steel wool. Now you need something we haven't discussed before: concentrated liquid stain you can mix with alcohol. This is something we'll need again in the future, but as a basis some alcohol like isopropyl or naphtha works great. You also need a stain mixing cup (a small glass) and a spatula or anything else to stir the mixture. To mimic an aged white color, I like to use a stain in amber or vintage amber. Put some alcohol in your glass and add a drop of the stain, stir it, and see what it looks like. If it's too bright, add another drop of the stain and stir again. If it's too dark, add some more alcohol until you like the color.
You can get such stains in almost every luthier supply store. I like to use ColorTone Concentrated Liquid Stain from StewMac. After you finish your mix, take a Q-tip and wipe some of the liquid onto the white layer of your jack plate. Let it dry for a few minutes and watch the result. If it's still too bright, repeat the process. If it's too heavy, use some alcohol to wipe some of it off. You can also use this mix on black plastic parts if you want to mimic some stain spots, with excellent results. Lastly, we use the same mixture of dirt, dust, and ashes that we used for the plastic buttons of the tuners ["DIY Relic'ing Tuners, Part 2"]. I use a mixture of the contents from my vacuum cleaner bag, spiced up with some ashes from my open fireplace. Use your fingers to wipe some dirt onto the white part of the jack plate. Now, how does it look?
I use a mixture of the contents from my vacuum cleaner bag, spiced up with some ashes from my open fireplace.
4. Back Plate and Screws
The back plate of the original '58 Les Paul is a piece of solid black plastic that is held by two screws, and our Harley Benton stays true to this original formula. For the two screws, repeat the process from the jack plate screws. The back plate on vintage guitars usually shows some light scratches, along with some deeper scratches and little chips caused by belt buckles. To mimic this wear, first break the shine with some steel wool, add some random scratches with sandpaper, and use a small chisel or maybe one of your belt buckles to add some deeper scratches and little chips.
By the way, the bottom of the back plate on our Harley Benton is "shielded" with a thick piece of self-adhesive aluminum foil, but it's not connected to ground in any way, so it's pretty useless. If you want to add some shielding, connect it to ground so it can work as it should. There is no shielding inside the cavity of the Harley Benton, same as on the vintage Les Paul. The black color inside the Harley Benton is only black paint but no shielding paint. If you want some shielding in the cavity, go for it, using copper foil or conductive shielding paint.
Congratulations! After you've worked on all these parts, they will look similar to what I did while writing this column for you, as seen in Photo 1.
5. Pickguard
In the last step for today, let's have a look at the pickguard, including the screws. Our Harley Benton comes with a 3-ply (black/white/black) pickguard, so the aging process will be easy: You can simply follow the process from the jack plate. Pickguards usually show scratches from contact with a plectrum, so I recommend using a guitar pick to put some typical scratches on it. Take care of the direction of the pick during this process so it will look authentic afterwards.
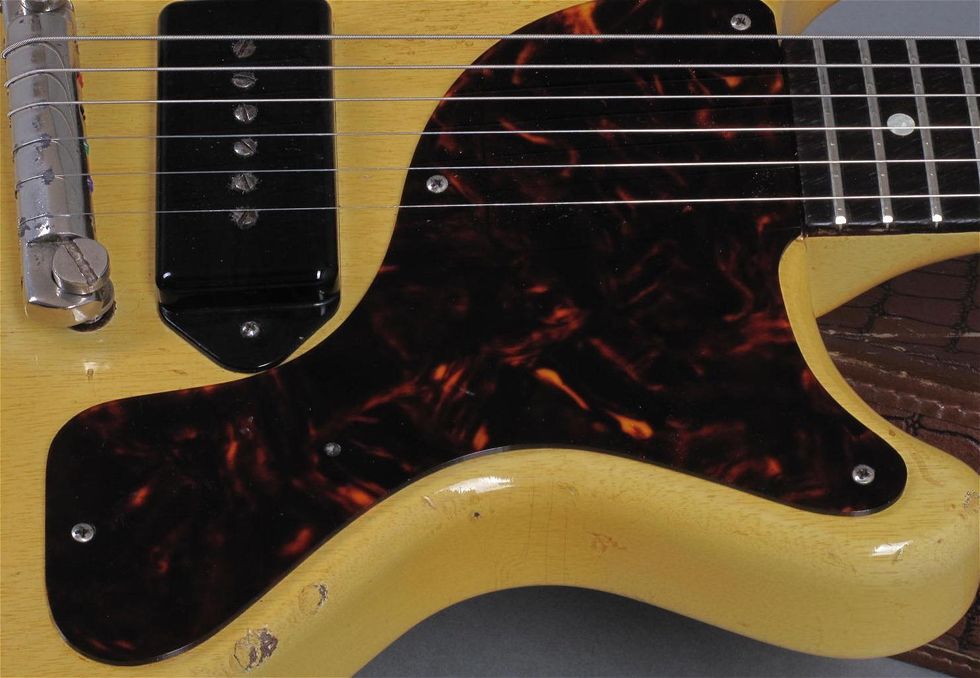
Photo 4
If you're fine with the stock pickguard, you're done for now. The original Les Paul Juniors never had such a pickguard—if they came with a black one, it was always single-ply solid black. Such pickguards are available, and you can swap it if this bothers you. The typical and classic look with a TV yellow Junior guitar was a celluloid tortoise-style pickguard, as seen in Photo 4, which is an original '58 Les Paul Junior.
The old celluloid material was semi-transparent, and the early pickguards had wonderful, rounded edges. The fake tortoiseshell material available today is not transparent in any way, and far from replicating the beauty of the original material. There is a fantastic substitute material called Tortoloid, but it's only available in very thin sheets for acoustic guitars. The only way to come closer to the original would be to use a clear Lucite pickguard and to cover it with a sheet of self-adhesive Tortoloid, or to try to find some of the original celluloid material in the right thickness.
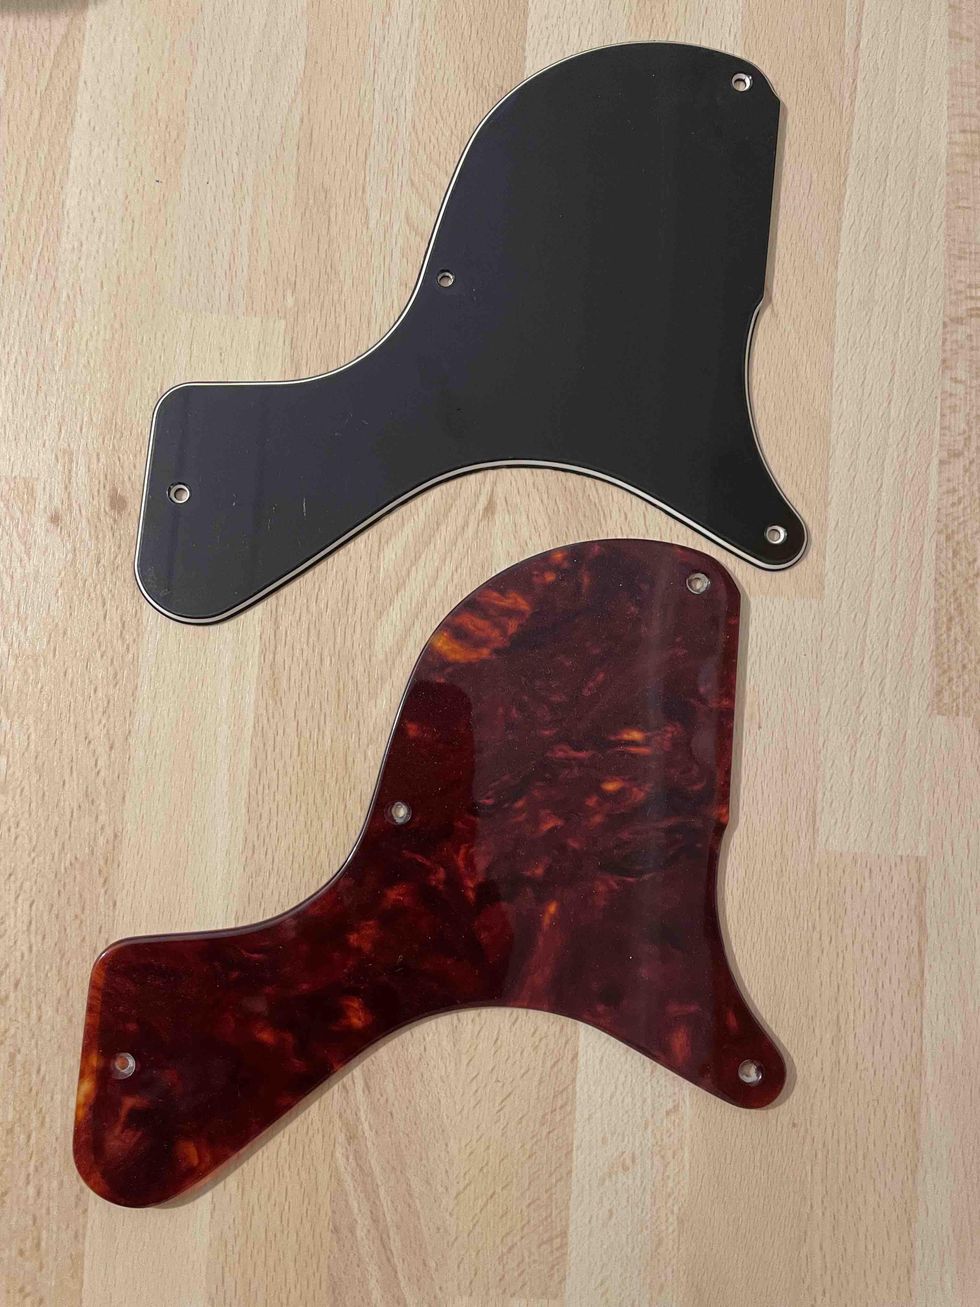
Photo 5
To give this guitar the classic look, and because I love these pickguards very much, I decided to make one for our Harley Benton, using an NOS blank celluloid piece from the '50s, which I got from the Roger Rossmeisl workshop in Berlin. I still have some of these blanks for such projects and working with real celluloid is a pleasure and pain at the same time. Look at this material compared to the stock pickguard in Photo 5.
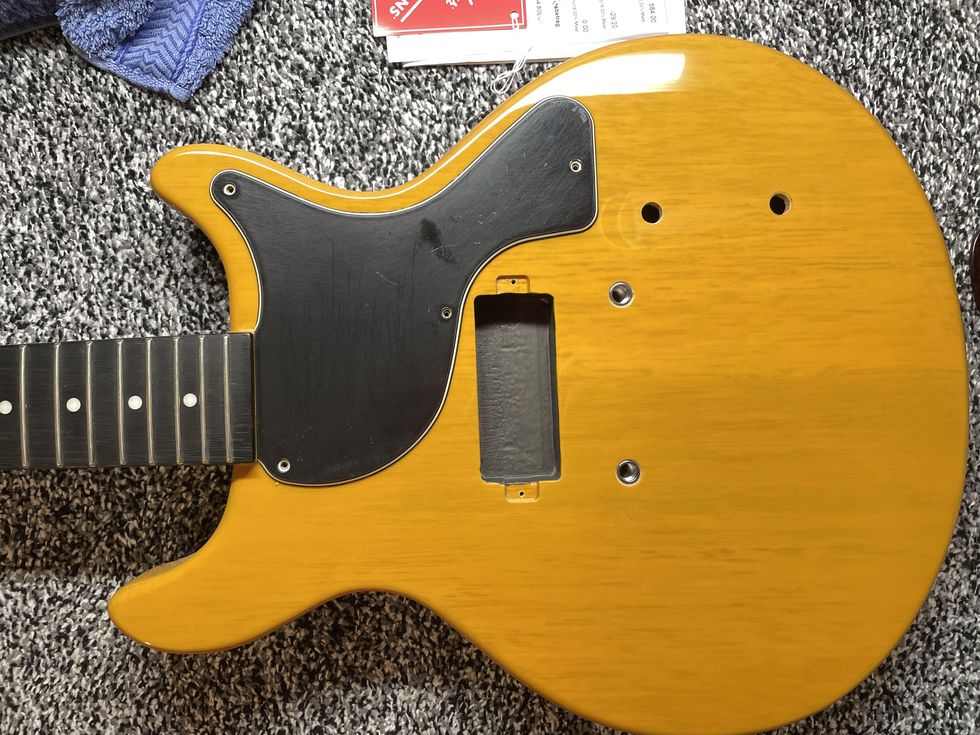
Photo 6
I think it's a big difference. To get a feel for which you prefer, you can see the different pickguards on the project guitar in Photo 6 and Photo 7.
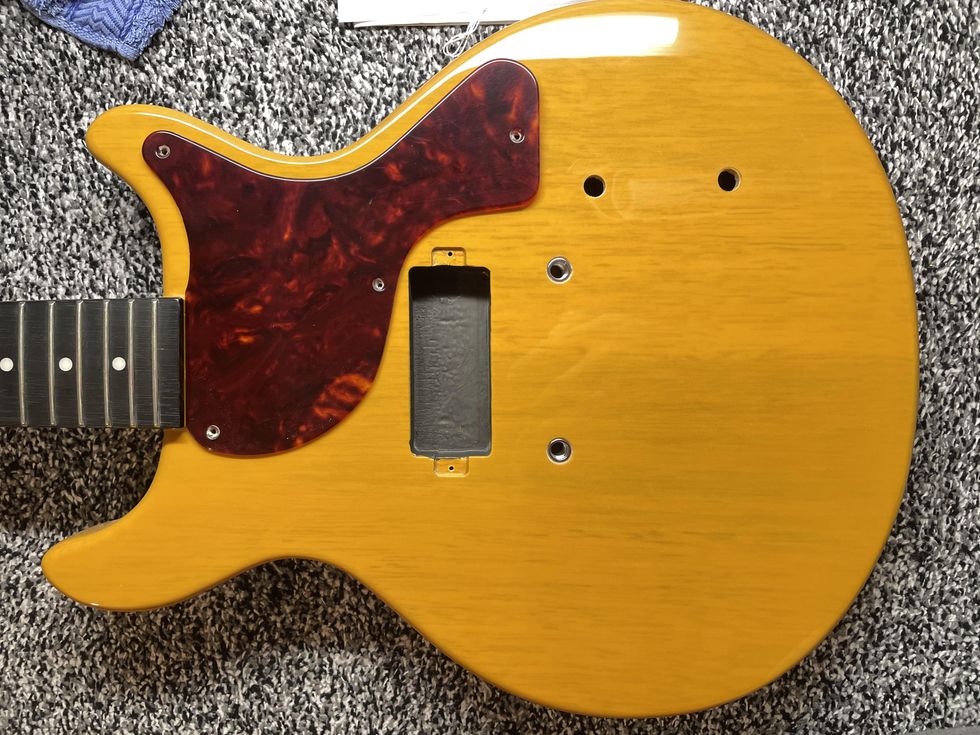
Photo 7
That's it for now. In the next part of this series, we'll work on aging the fretboard and the headstock. But before this, we'll return to guitar mods in the next issue.
Until then ... keep on modding!


