We’re almost finished with the aging process on our project guitar. Let’s work on the fretboard, nut, and truss rod cover, and prepare the headstock for the last hurrah.
Hello and welcome back to Mod Garage. This month we’ll continue with our relic’ing project, taking a closer look at the front side of the neck and treating the fretboard and the headstock. We’ll work on the front side of the headstock in the next part, but first we must prepare it.
When we talk about a vintage Gibson fretboard from the ’50s, we’re talking about the mystic Brazilian rosewood (Dalbergia nigra) and its certain look and feel. Our Harley Benton doesn’t have a Brazilian rosewood fretboard. If it did, the fretboard material would cost more than the entire guitar because it’s so rare and limited today. Brazilian rosewood trade is restricted by CITES and almost no guitar companies use it anymore, except for some special custom shops. Other rosewoods or alternative woods are common substitutes.
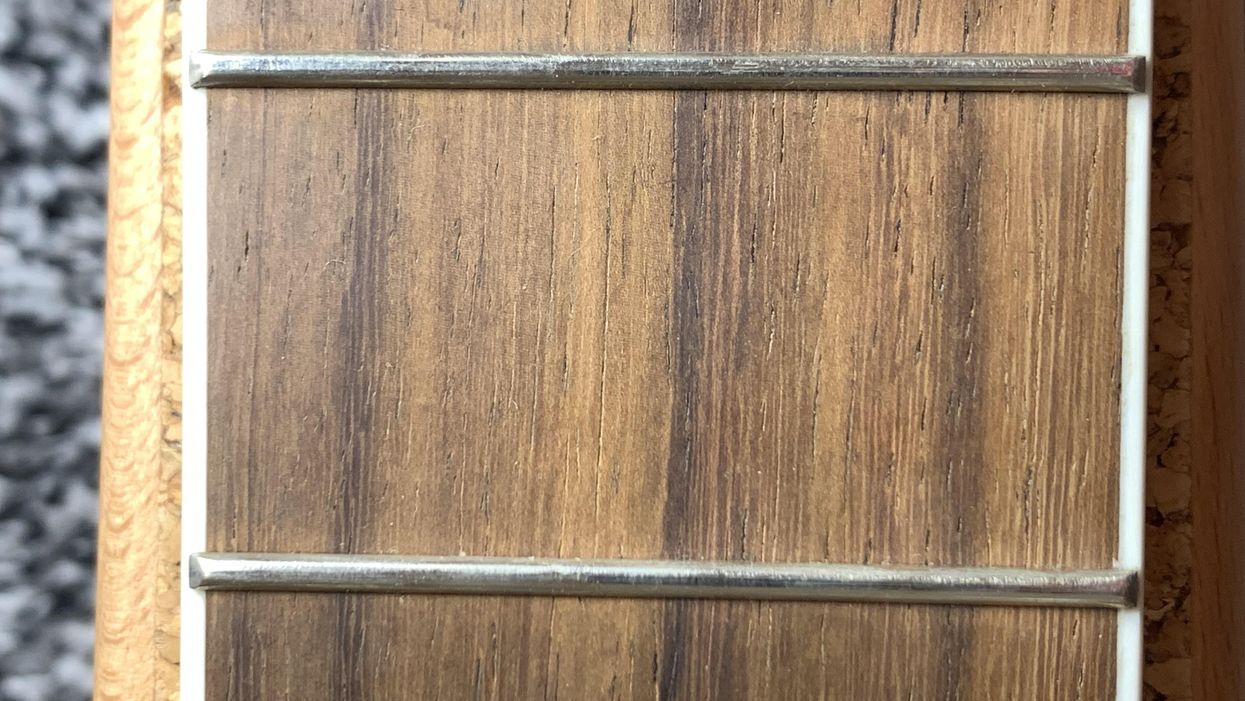
Our Harley Benton fretboard is amaranth (better known as purpleheart), but sadly it was stained or painted black, giving the guitar a different look that’s closer to ebony rather than rosewood. So, there’s no way to get it brown or make it look like rosewood other than getting a new fretboard installed, which isn’t reasonable. Maybe it’s possible to get the black color out of the wood by using chemicals, but we don’t know what we’d find underneath, either. There could be another surprise waiting for us and all the work would be useless. On a budget guitar like this, we’ll have to live with this fretboard, loving it for what it is rather than hating it for what it’s not. The fretwork is surprisingly good and close to excellent, which is far from the industry standard in this price range.
The fretboard edges of well-played vintage guitars feel comfortable and round because the edges receive pressure from a player’s hand over decades.
But to show you the process of aging a fretboard, I chose a guitar with a rosewood fretboard, so you’ll know how to do this on a guitar with this type of fretboard if you want to. It’s not complicated so here we go.
Look at the slightly pale and lifeless color of the rosewood in Photo 1. It has a nice grain but is rather dull. Brazilian rosewood has a rich chocolate brown color, which clearly shows the grain of the wood.
Let’s make it less boring:
Use some fine steel wool or sanding pads to sand the rosewood. Use a soft brush afterwards to get the dust off.
Use some naphtha or alcohol and a cotton cloth to degrease the wood and get all the fine dust and dirt out of it.
Use masking tape to protect the fretboard edges and the binding, if your neck has one. You don’t need to cover the frets. They’re easy to clean after the process. Use a Q-tip and some Vaseline to protect the fretboard dots from the dye.
You need a chocolate brown wood dye and a small soft brush to apply it.
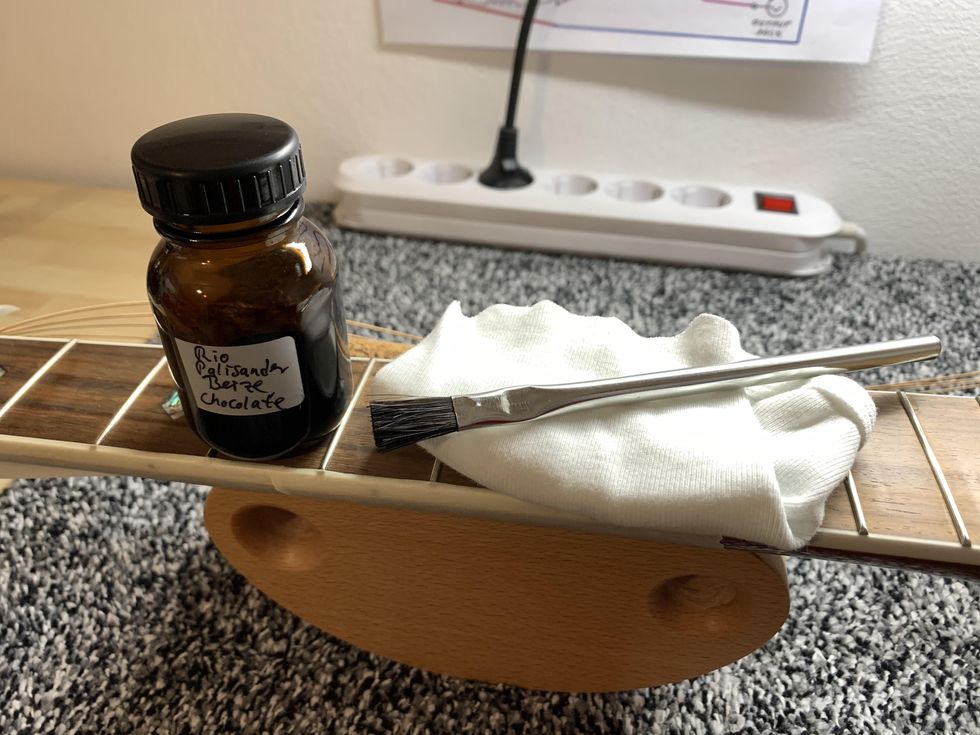
Photo 2
Some luthier supply stores offer special Brazilian rosewood dye in different shades of brown (Photo 2). I decided on a classic chocolate brown color on a solvent base for best results. Apply the dye thin and carefully and let it dry for some minutes.
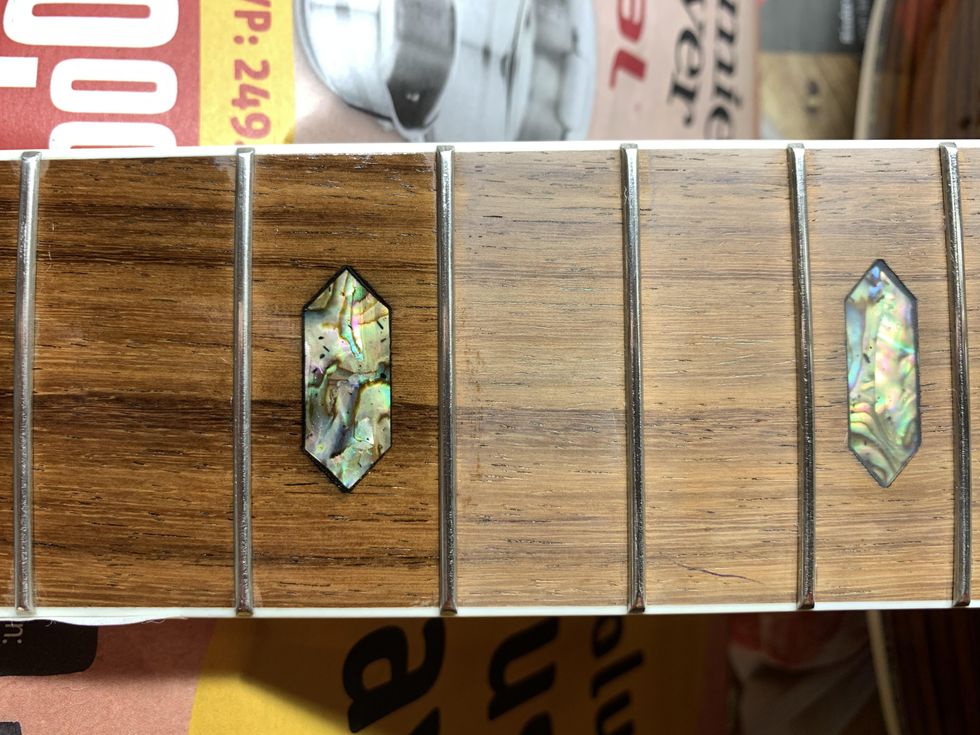
Photo 3
Now look at the difference in Photo 3. It’s easy to see! If you want your fretboard darker, repeat the process until you like it. Cover your workspace with old newspapers and have an old cotton rag nearby just in case. This dye will stain everything permanently and you don’t want it on your clothes or your kitchen table. Let the fretboard dry for a day and take off the masking tape.
Use some very fine steel wool to polish the fretboard and the frets, to get any dye off the fret material easily. Use a soft brush to clean the fretboard afterwards.
Use some naphtha and a Q-tip to carefully clean the fretboard dots from any Vaseline leftovers.
Then use the amber color from the last part of this series [“DIY Relic’ing: Hardware Continued”] together with a fresh Q-tip and apply the amber color to the dots until you like the shade.
Now that we’ve made this rosewood fretboard look much closer to Brazilian rosewood, it’s time to mimic the touch and feel of it. Brazilian rosewood has a certain smell and feel that can be described as greasy compared to most other rosewoods. This is because of the oil content of this wood. We can’t naturally “oil up” other woods, but we can get close to this certain feel by waxing the fretboard rather than oiling it. This is also an easy process so let’s go for it.
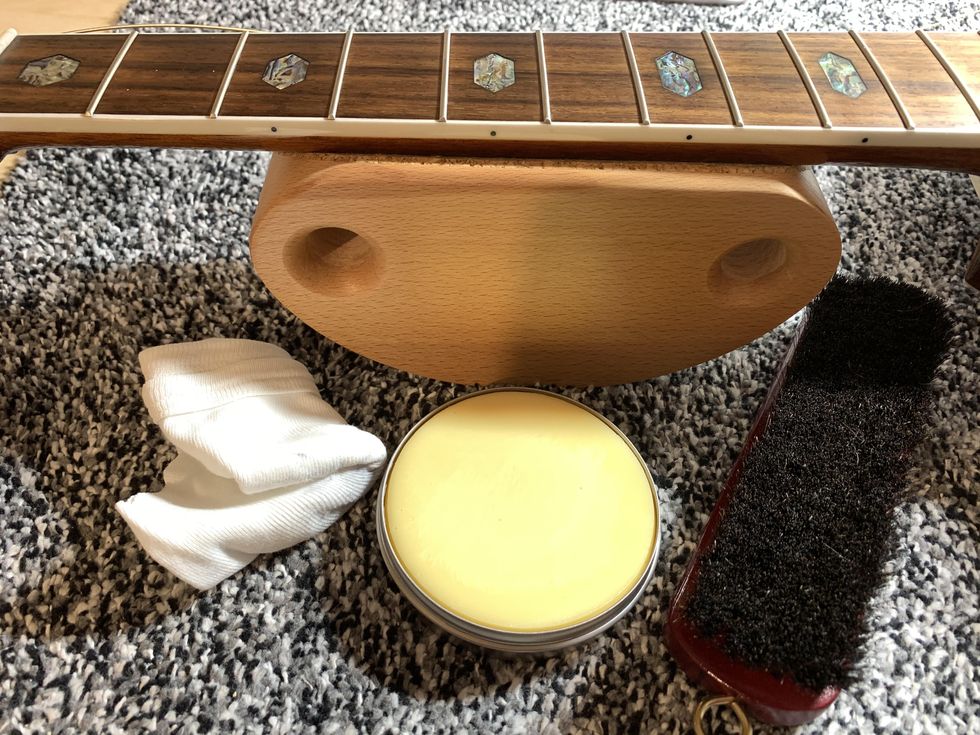
Photo 4
Get a clear, hard wax for fretboards and a soft polishing brush (Photo 4). Apply a thin layer of wax to the fretboard using a cotton cloth to massage it into the wood.
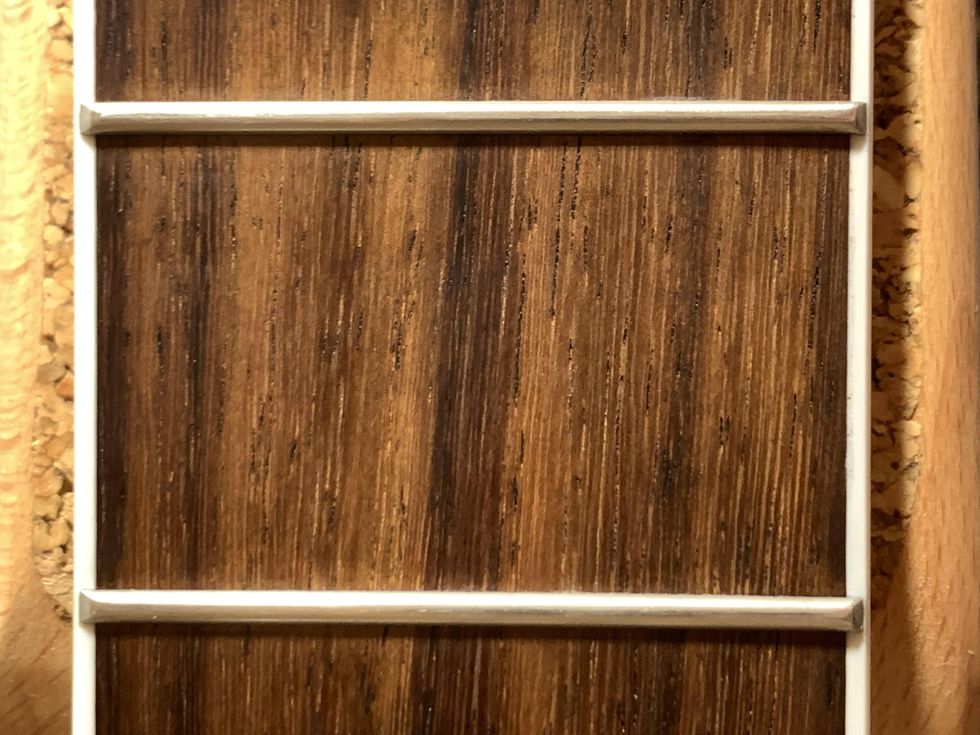
Photo 5
Let it dry for some time, then wipe off any remaining excess wax and use the soft polishing brush to get this greasy look and shine on your fretboard, as seen in Photo 5.
So far, so good. We’ve taken care of the color and the feel of the fretboard but there is another haptic thing to consider when talking about vintage necks: the broken-in feeling of the fretboard edges. The fretboard edges of well-played vintage guitars feel comfortable and round because the edges receive pressure from a player’s hand over decades. This is not what is called “rolled fretboard edge,” which is a common custom shop option, but it goes in the same direction only to a much lesser degree.
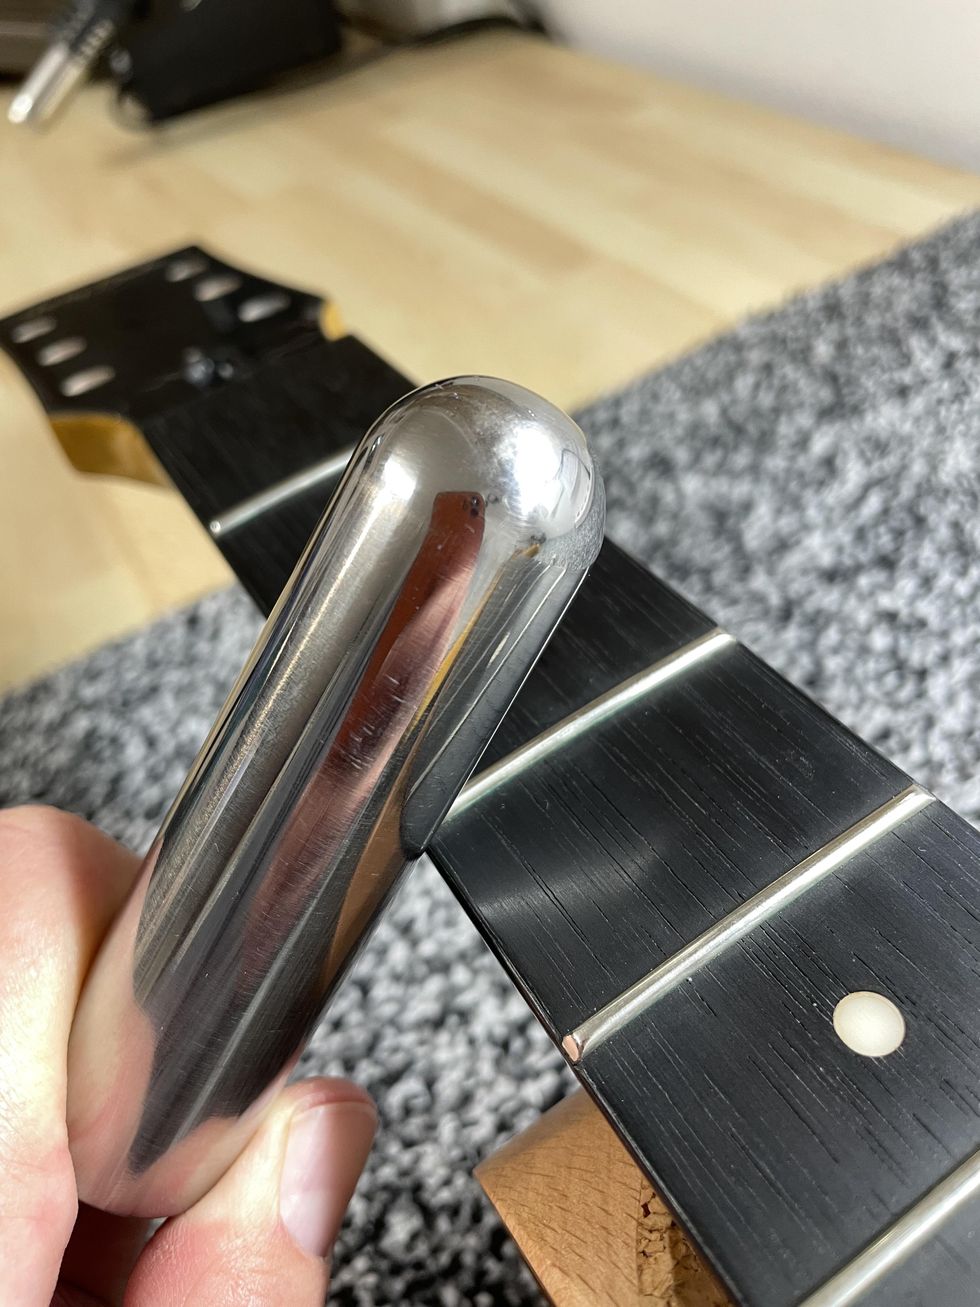
Photo 6
To bring this typical broken-in feeling to your neck, you don’t need much: just a round metal bar and some time. You can do this to any guitar neck. I prefer to use a massive metal slide for pedal-steel players, but you can also use a bigger screwdriver or something similar. If possible, clamp down your guitar and use the steel bar in a 45-degree angle to move it along the edge of the fretboard, applying pressure (Photo 6). What we’re doing with this is not making a rolled edge but compressing fibres, which is exactly the natural process over time. Repeat moving the bar while applying pressure for some time and check the result until you like it. This is not done within a minute, so take your time. With the metal slide, I usually need 10-15 minutes for each edge until I like it, but this depends a lot on how hard your fretboard material is.
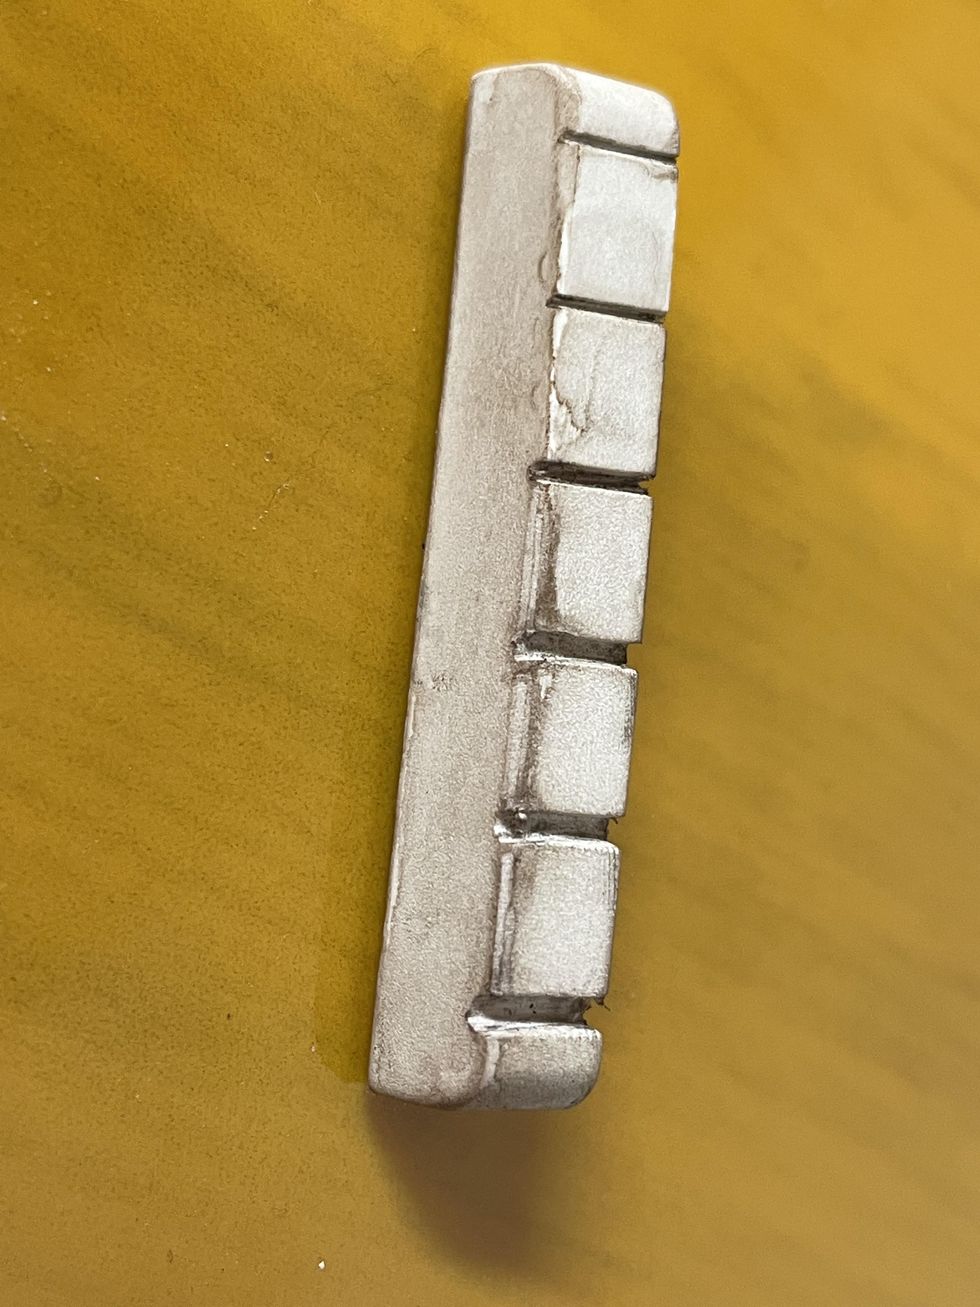
Photo 7
If you’re done with that part, excellent! You just finished your fretboard. Moving up the neck, the nut is our next task. The nut of our Harley Benton is pure white plastic, which not the best choice. If you want to keep it, you can sand it with some steel wool and apply some of the amber color with a Q-tip, followed with some of our mixture of dirt, dust, and ashes we used for the plastic buttons of the tuners [DIY Relic’ing Tuners, Part 2”]. Use your fingers to wipe on some of this mixture and you’re done. If you want to upgrade the nut, nylon is the historically correct material, and such nut blanks are available from numerous luthier supply stores. I decided to use an unbleached bone nut blank and make a new nut. Afterwards, I used some of the amber color and dust to make it look old (Photo 7).
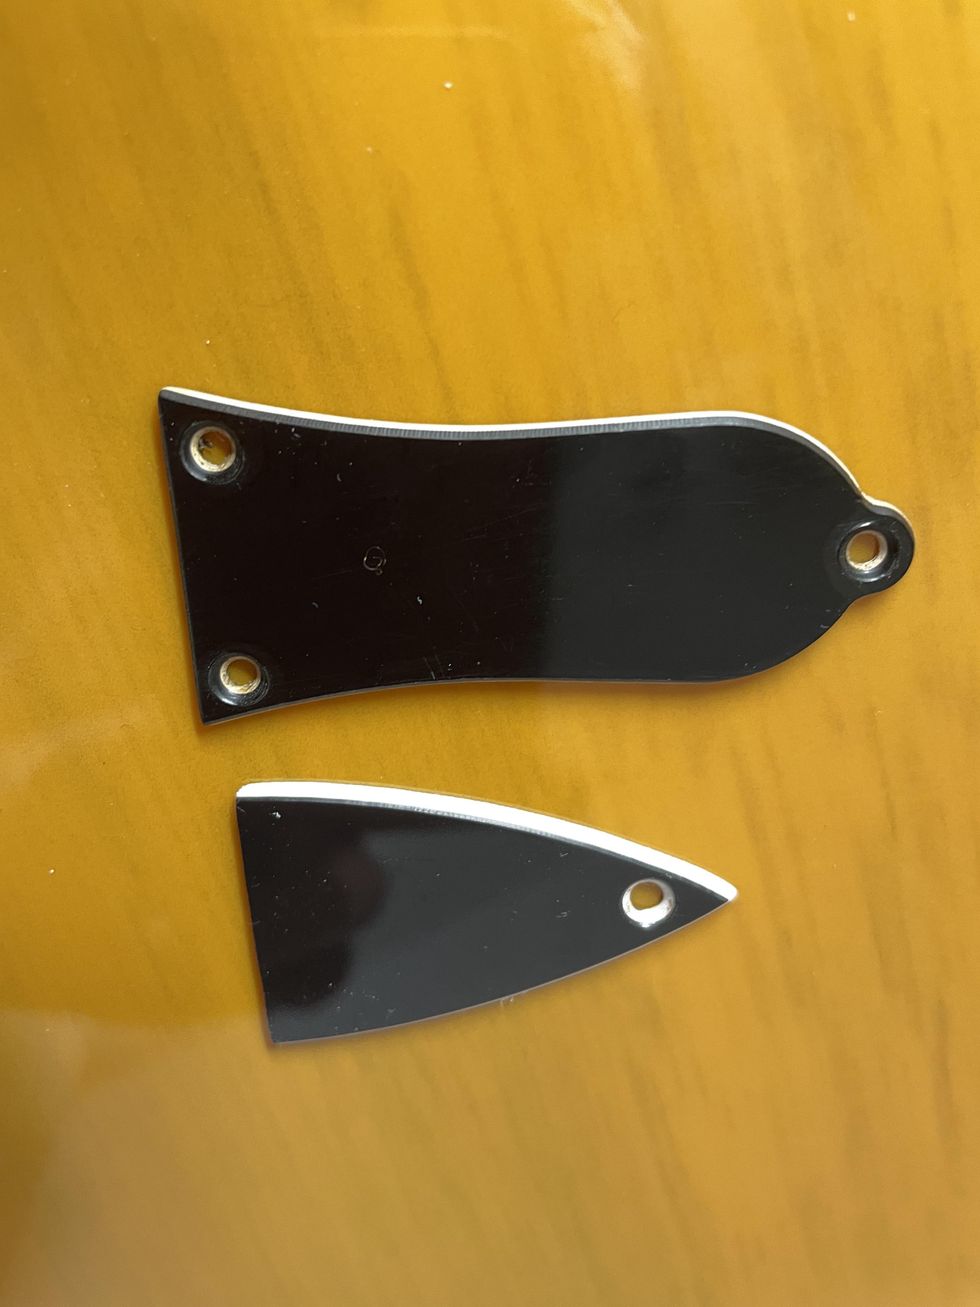
Photo 8
Further up the neck is the cover for the truss rod adjustment screw with its mounting screw. Harley Benton decided to use a modern shape for it, which doesn’t look very good to me. The typical Gibson-style covers with their bell-like shape look much different, so I decided to swap the cover for such a model, modifying it for a flat bottom so it covers the whole opening for the truss rod (Photo 8). To make it look old, you can use the exact steps we used on the jack plate: break the shine with some steel wool, add some light scratches, wipe on some amber color on the white part of the cover, and then rub in some dust and dirt. You already know how to age screws, having done it many times before in the earlier parts of this ongoing project. If you need a refresher on our aging process for screws, refer back to “DIY Relic’ing: Break the Shine” for guidance.
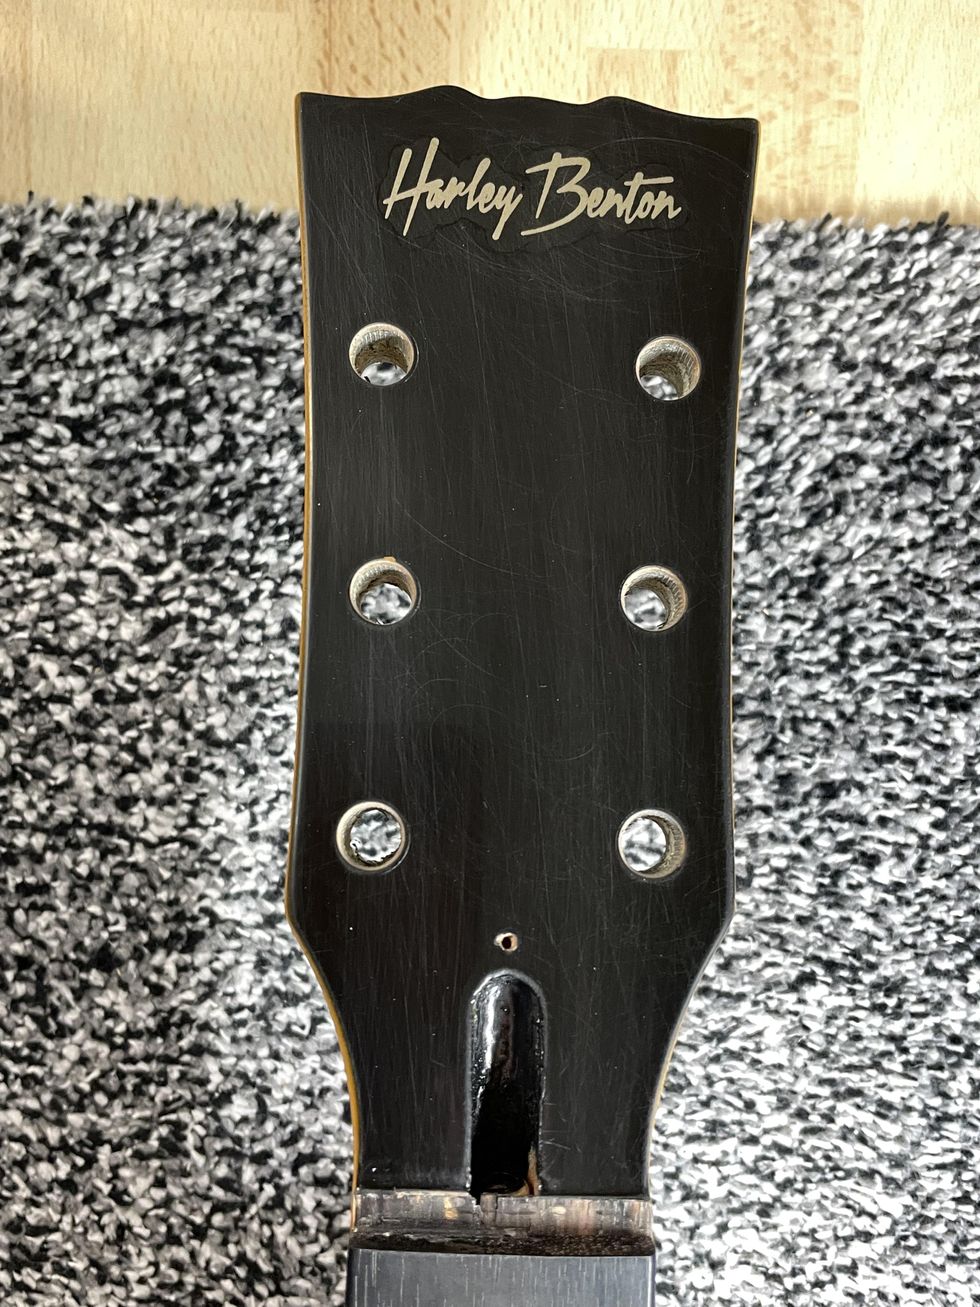
Photo 9
The last thing we’ll do today is begin to work on the headstock of the guitar, which is often a delicate task. A lot of modders try to reshape the headstock so it will look like it’s from a vintage guitar, and, even worse, replace the headstock logo with a fake logo from another company. I would never do that. This project is about aging a guitar and not about making it an exact copy of a vintage original. Personally, I really like the headstock shape of the Harley Benton. It looks at least a little bit Gibson-like, and I also think the Harley Benton logo looks cool the way it is (Photo 9). So, aging it is very easy: Break the shine with some steel wool and wipe off the dust. Use a Q-tip and apply some layers of the amber color to the logo until you like the shade. Adding dings, dongs, and scratches will come later. In the next part of this project, we’ll take care of the backside of the neck and the body by cracking the lacquer to mimic some old nitro lacquer.
That’s it for now. We’re almost finished with this relic’ing project, but before we wrap it up, we’ll return to guitar mods in the next issue. We’ll take a deeper look at putting vintage parts into new electric guitars, so stay tuned.
Until then ... keep on modding!
- Last Call: Someday You'll Regret That Relic Job - Premier Guitar ›
- Mod Garage: DIY Relic'ing—Aging a P-90 Pickup - Premier Guitar ›
- DIY Relic'ing: Break the Shine - Premier Guitar ›
- DIY Guitar Relic'ing: Let's Crack Some Lacquer Finish - Premier Guitar ›
- It’s Rosewood, But What Kind? ›
Walrus Audio's MAKO MkII Series offers premium all-in-one, multi-algorithm pedals with improved tonality, new UI, and added controls for versatility. Featuring new amplifier models, OLED navigation screens, and updated programs based on user feedback, these pedals are designed for inspiring studio-grade tones.
Walrus Audio is excited to announce the release of their highly ambitious and highly anticipated MAKO MkII series. With the original MAKO line, players were offered premium all-in-one, multi-algorithm models for with the D1 Delay, R1 Reverb, and M1 Modulation, as well as top-of-the-line amp and cabinet simulation with the ACS1. After four years of real-world use and experience with the first generation, the team went to work applying everything they learned and heard from players to make the next generation of MAKO pedals even better.
Each pedal in the MAKO Series has been redesigned and rebuilt for vast improvements in tonality, new UI with the addition of an OLED navigation menu screen, and added secondary controls for even greater versatility. Dialing in these inspiring studio grade tones has never been easier and has never sounded better.
The ACS1 MkII features three new amplifier models to go with the three existing models, all inspired by high-gain amps for heavy-style players to get people moving:
- The distinctively raw and punchy Peavey® 5150.
- The warm, rich, and harmonically complex Orange® Rockerverb.
- The world-famous, in-your-face Mesa Boogie® Dual Rectifier.
Additional updates on the series are as follows:
- OLED navigation screen menu for improved UI.
- Increased headroom and lowered noise floor for tonal improvement.
- Rebuilt and fine tuned programs based on user feedback.
- All six R1 programs completely rebuilt from the ground up.
- All new Grain Delay algorithm on the D1.
- Six additional cabinet models for the ACS1, designed by Justin York at York Audio.
- Total BPM Control and BPM Readout on screen for time-based effects.
- Now 128 on-board presets.
- Many new program controls (ex. size control on R1, noise gate on ACS1).
- Flanger sound added to the Chorus algorithm on M1.
MAKO MkII Series pedals are packaged in custom anodized aluminum enclosures. Exact sizes for all four pedals is 4.9” x2.52” x 2.64”. Power requirement for all four pedals is 9VDC (300mA minimum).
Walrus Audio is offering the R1 MkII, D1 MkII, and M1 MkII for $399.99. The ACS1 MkII is offered at $449.99. All are available for preorder now at walrusaudio.com and through authorized dealers with expected shipment starting in mid-October.
For more information, please visit walrusaudio.com.
Here’s how to recreate the wide-ranging Epiphone Tone Expressor system on your guitar.
Hello and welcome back to Mod Garage! This is the second part of the Mod Garage look at the Epiphone Tone Expressor system (Pt.1), which is found on the Al Caiola signature model that was built from late 1963 until 1969. After discussing the individual parts and settings last month, we will now bring it all together and see how to use the system in a modern guitar.
In general, it’s possible to use the Varitone/Tone Expressor system in any electric guitar as long as you have enough space to squeeze all the stuff into it. You can mimic a lot of different pickups with this system, but because it’s designed for guitars with humbuckers, that’s how it works best. It’s also possible to use it the other way around and thicken up single-coil pickups instead of slenderizing humbucker tones, and in a future column I’ll talk about what I like to call the “reverse Varitone” system.
For a good and simple overview about all the details from last month, I decided to use a technical drawing to show the isolated Varitone system, so it’s easy for you to identify the individual parts:
Diagram courtesy of SINGLECOIL
This is the basic structure of the Gibson Varitone system with the original values Gibson used. The inductor is a 1.5 H choke. The Epiphone Tone Expressor system is identical but uses a 15 H choke as an inductor. There is a second version of the Tone Expressor system found on the Al Caiola model using the same structure but with different values for the parts. I think this was because different pickups were used, so here are the values for the version of the system in the Al Caiola guitar:
• 15 H choke as an inductor instead of 1.5 H
• Replace the single 100k resistor with a 33k resistor
• .0033 µF cap is used instead of the .001
• .01 µF cap is used instead of the .0033
• .022 µF cap is used instead of the .01
• .047 µF cap is used instead of the .03
• .1 cap µF is used instead of the .22
For best results, use the original Gibson Varitone values along with PAF-style humbuckers—the second version will work best with mini-humbuckers or similar pickups. Depending on the pickups you use, you can experiment and make your own custom version out of it.
“You can mimic a lot of different pickups with this system, but because it’s designed for guitars with humbuckers, that’s how it works best.”
The differences are:
• Using a 15 H instead of the 1.5 H inductor will shift the notches of the filters created by the Tone Expressor system down approximately a fifth for a fuller and fatter tone. Because it is possible to combine several caps with this wiring, choosing a 15 H inductor was also a clever move to keep the tone clearer and more present. You can experiment with this, too. A choke with something between 7 and 10 H will be in the middle of both versions.
• Using a 33k instead of the 100k coupling resistor fits pickups with a lower output like the mini-humbucker perfectly, while the 100k is great for pickups with more output like a PAF.
• The different cap values also correspond to the combination of different pickups and chokes, e.g., for a twangy, Telecaster-type tone, you need a 0.22 µF cap along with a PAF humbucker, while a 0.1 µF cap will do the same along with a mini-humbucker.
So, here we go with the Al Caiola wiring, starting with how it looks in the original guitars from the ’60s. You can clearly see the big, silver-cased choke on top of the electronics as well as the caps, resistors, and the individual switches.
Photo courtesy of Bonfires Vintage
And here is the drawing of the Tone Expressor system I made for you:
Drawing courtesy of SINGLECOIL
All switches are DPDT switches, the tone and volume pots are both 500k audio, and the tone cap is 0.022 µF. A is the coupling resistor (33k or 100k), B is the five 10M ohm pulldown-resistors (one on each switch), which prevent popping noises when engaging a switch, and C is an additional 33k decoupling resistor on each switch that is necessary to decouple the switches from each other when you want to combine their settings. You don’t need that on the Varitone because you can’t combine several caps with the rotary switch.
Besides experimenting with the parameters of the choke, the caps, and the coupling resistor, you can enhance your tonal palette quick and easy by using a pickup selector switch that can engage both pickups together.
In closing, here is a scaled-down version of this wiring, in case you don’t want to use a choke or can’t find one.
Drawing courtesy of SINGLECOIL
As you can see, the coupling resistor (A) and the decoupling resistors (C) are removed. That’s because in the system with the choke (second order filter system), these are necessary, but without a choke, they’re not.
That’s it. Since we are still in the year of the Strat, next month we will have a look into the Fender Cory Wong Stratocaster, so stay tuned!
Until then, keep on modding!
Whether you’re tired of slinging combos and bigger into your car’s trunk or looking for reliable backup and backline power, these pedal-sized options have plenty to offer.
Here’s a rundown of six amps in a stompbox format. Carry soft, play loud!
Blackstar Amplification AMPED 2
A portable 100-watt pedal amp with onboard effects that’s perfect for the guitar player that wants an all-in-one watt-cranker and an effects processor
blackstaramps.com
NUX Amp Academy (NGS-6)
This compact workhorse offers 18 amp models, seven signal blocks, independent outputs, and a robust IR loader—plus, it functions as a USB audio interface.
nuxaudio.com
MayFly Audio Sunrise Amp Simulator
The MayFly emulates the classic sound of black-panel amps, including their preamp, power amp, speaker cabinet, and spring reverb. It's intended to plug directly into a PA or DAW, and includes a stereo headphone output jack.
mayflyaudio.com
Friedman IR-D
The IR-D dual-channel tube preamp is an entire Friedman rig, inspired by the JTM45, in a compact pedalboard-friendly package.
friedmanamplification.com
Strymon Iridium Amp and IR Cab Pedal
The Iridium offers three iconic tube amplifier models and nine super-high-resolution, 500 ms impulse response speaker cabinets, along with size-adjustable IR-based room ambience.
strymon.net
Revv Anniversary Series G3
The new Anniversary Edition Revv G series pedals feature new aesthetics and even more amp-like feel and tone—modeled after Revv amps’ purple channel.
revvamps.com
Polyphonic pitch shifting, adjustable ramp speed, and three-way tone switch.
Octa Psi Features:
- Instant Effect Order Switching: Solve the classic question "Octave/Pitch before or after fuzz?" with ease –just hold down both foot switches.
- Flexible Output Configuration: Switch between AllWet or Wet/Dry blend with a quick double-tap of Blend.
- Momentary or Latching Octave/Pitch: Switch between latching or momentary octaves for completecreative control, simply hold the Fuzz switch.
Polyphonic Octave and Pitch Shifter:
- Three Modes: Up, Down, and Dual modes for creating nearly every harmonic interval, includingpower chords, stacked fourths, and diminished chords.
- Momentary Mode: Perfect for dive-bombs and wild multi-octave bends.
- Adjustable Ramp Speed: For creatively timed pitch bending, just like having an onboardexpression pedal.
Transfigurating Fuzz Circuit:
- All-Analog, Transistor-Based: Delivers incredible sound with wave after wave of gain staging leading to hard clipping.
- Three-Way Tone Switch: Carve out the perfect fuzz tone with Scoop, Punch, or Psi mode.
- Massive Sound: Makes your guitar pickups sound enormous at any volume.
Stunning Design and Ease of Use:
- High Octane Circuitry – Housed in a proprietary angled aluminum enclosure for simplicity and durability.
Upgrade your sound and explore new sonic possibilities with the Octa Psi Transfigurating Fuzz Pedal.Prepare yourself to experience the ultimate in pitch-shifting, octave generation, and analog fuzz!
Octa Psi Highlights:
- Polyphonic Pitch Shifter:○ +/- Two Octave Range and nearly every harmonic interval.
- Low latency and fast-tracking for great tone in dropped tunings or wild bends.
- Switchable All-Wet ⇆ Wet/Dry Blend by double tapping the Blend control.
- Momentary or Latching Octave and Pitch Shifter by holding down the Fuzz stomp.
- Adjustable Ramp Speed for the pitch shifter by holding Octave down and adjusting Blend.4
- Three pitch-shifting modes (Up/Dual/Down) for multiple octaves, crazy intervals, chords,and even chorus modulation.
- Analog Transistor Fuzz:
- Super thick, analog transistor fuzz and distortion.
- Three-way bass response: Scoop, Punch, or Psi mode for massive undertones.
- Order switching between Fuzz ⇆ Octave (Pitch) by pressing and holding both Octave andFuzz.
Tech Specs:
- Pedal Type: Octave Fuzz and Pitch Shifter
- Switching: Momentary or Latching Pitch Shifter
- Analog/Digital: Mixed, Analog Fuzz & Digital DSP
- Effects: Polyphonic Pitch Shifter, Octave, Fuzz, Distortion
- Inputs/Outputs: TS 1⁄4” jacks
- Bypass: True Bypass or Silent Buffered Bypass, user selectable
- Power Requirements: 9-18 VDC, 150mA (high current power supply sold separately) - No battery
- Height: 2.7”
- Width: 3.9”
- Depth: 5”