We’re almost finished with the aging process on our project guitar. Let’s work on the fretboard, nut, and truss rod cover, and prepare the headstock for the last hurrah.
Hello and welcome back to Mod Garage. This month we’ll continue with our relic’ing project, taking a closer look at the front side of the neck and treating the fretboard and the headstock. We’ll work on the front side of the headstock in the next part, but first we must prepare it.
When we talk about a vintage Gibson fretboard from the ’50s, we’re talking about the mystic Brazilian rosewood (Dalbergia nigra) and its certain look and feel. Our Harley Benton doesn’t have a Brazilian rosewood fretboard. If it did, the fretboard material would cost more than the entire guitar because it’s so rare and limited today. Brazilian rosewood trade is restricted by CITES and almost no guitar companies use it anymore, except for some special custom shops. Other rosewoods or alternative woods are common substitutes.
Our Harley Benton fretboard is amaranth (better known as purpleheart), but sadly it was stained or painted black, giving the guitar a different look that’s closer to ebony rather than rosewood. So, there’s no way to get it brown or make it look like rosewood other than getting a new fretboard installed, which isn’t reasonable. Maybe it’s possible to get the black color out of the wood by using chemicals, but we don’t know what we’d find underneath, either. There could be another surprise waiting for us and all the work would be useless. On a budget guitar like this, we’ll have to live with this fretboard, loving it for what it is rather than hating it for what it’s not. The fretwork is surprisingly good and close to excellent, which is far from the industry standard in this price range.
The fretboard edges of well-played vintage guitars feel comfortable and round because the edges receive pressure from a player’s hand over decades.
But to show you the process of aging a fretboard, I chose a guitar with a rosewood fretboard, so you’ll know how to do this on a guitar with this type of fretboard if you want to. It’s not complicated so here we go.
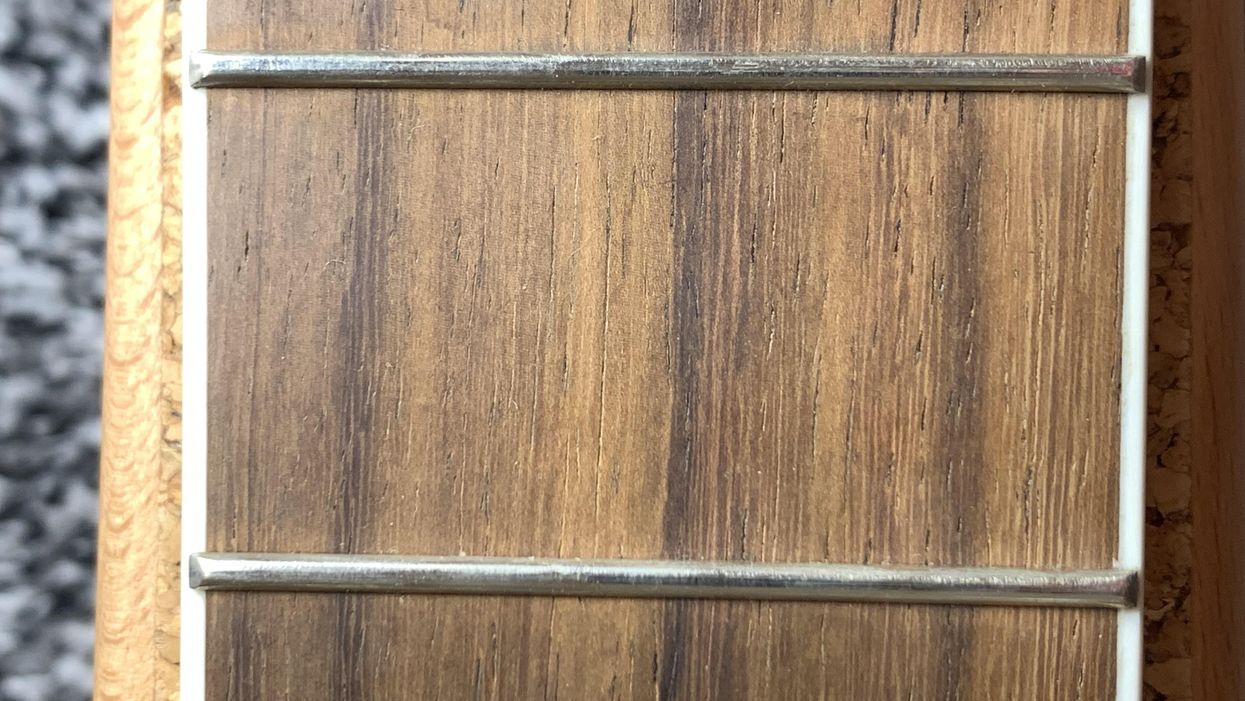
Look at the slightly pale and lifeless color of the rosewood in Photo 1. It has a nice grain but is rather dull. Brazilian rosewood has a rich chocolate brown color, which clearly shows the grain of the wood.
Let’s make it less boring:
Use some fine steel wool or sanding pads to sand the rosewood. Use a soft brush afterwards to get the dust off.
Use some naphtha or alcohol and a cotton cloth to degrease the wood and get all the fine dust and dirt out of it.
Use masking tape to protect the fretboard edges and the binding, if your neck has one. You don’t need to cover the frets. They’re easy to clean after the process. Use a Q-tip and some Vaseline to protect the fretboard dots from the dye.
You need a chocolate brown wood dye and a small soft brush to apply it.
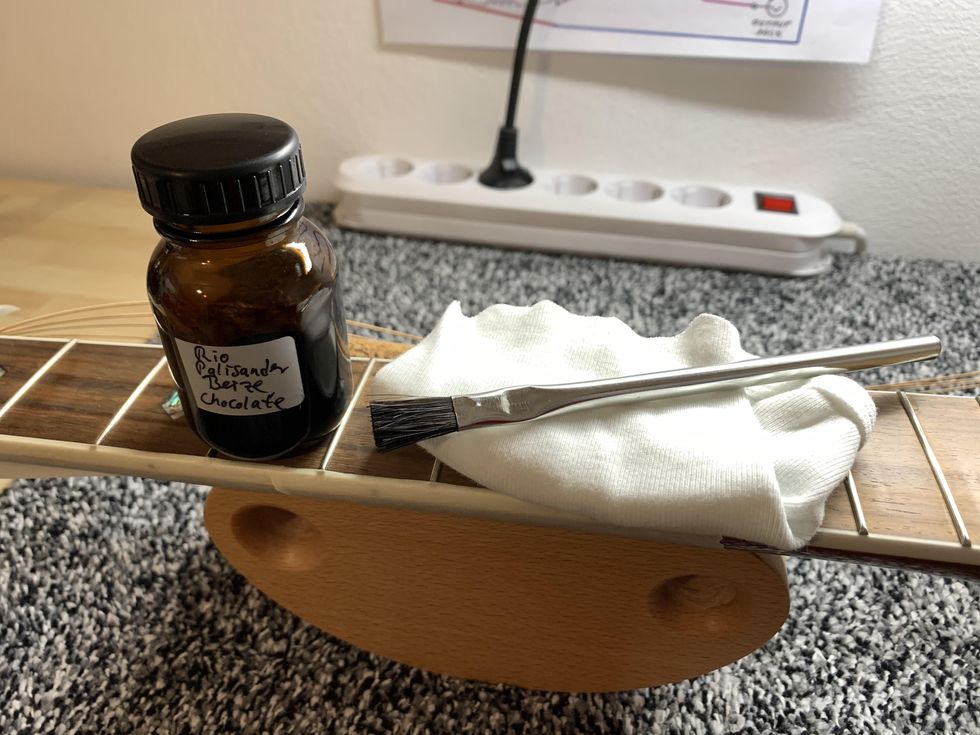
Photo 2
Some luthier supply stores offer special Brazilian rosewood dye in different shades of brown (Photo 2). I decided on a classic chocolate brown color on a solvent base for best results. Apply the dye thin and carefully and let it dry for some minutes.
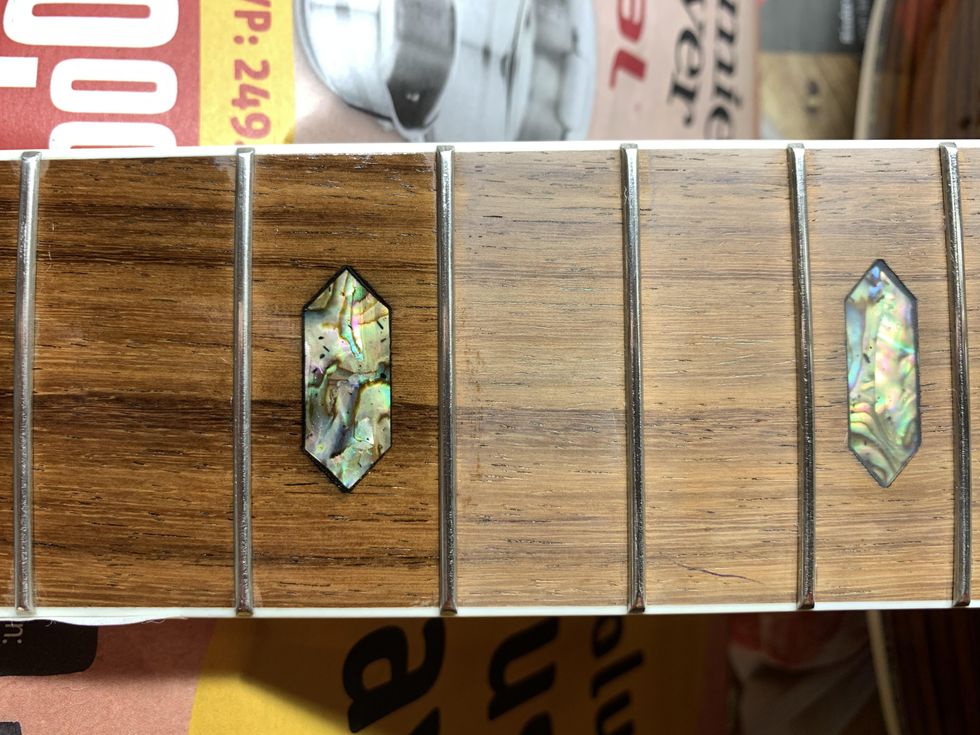
Photo 3
Now look at the difference in Photo 3. It’s easy to see! If you want your fretboard darker, repeat the process until you like it. Cover your workspace with old newspapers and have an old cotton rag nearby just in case. This dye will stain everything permanently and you don’t want it on your clothes or your kitchen table. Let the fretboard dry for a day and take off the masking tape.
Use some very fine steel wool to polish the fretboard and the frets, to get any dye off the fret material easily. Use a soft brush to clean the fretboard afterwards.
Use some naphtha and a Q-tip to carefully clean the fretboard dots from any Vaseline leftovers.
Then use the amber color from the last part of this series [“DIY Relic’ing: Hardware Continued”] together with a fresh Q-tip and apply the amber color to the dots until you like the shade.
Now that we’ve made this rosewood fretboard look much closer to Brazilian rosewood, it’s time to mimic the touch and feel of it. Brazilian rosewood has a certain smell and feel that can be described as greasy compared to most other rosewoods. This is because of the oil content of this wood. We can’t naturally “oil up” other woods, but we can get close to this certain feel by waxing the fretboard rather than oiling it. This is also an easy process so let’s go for it.
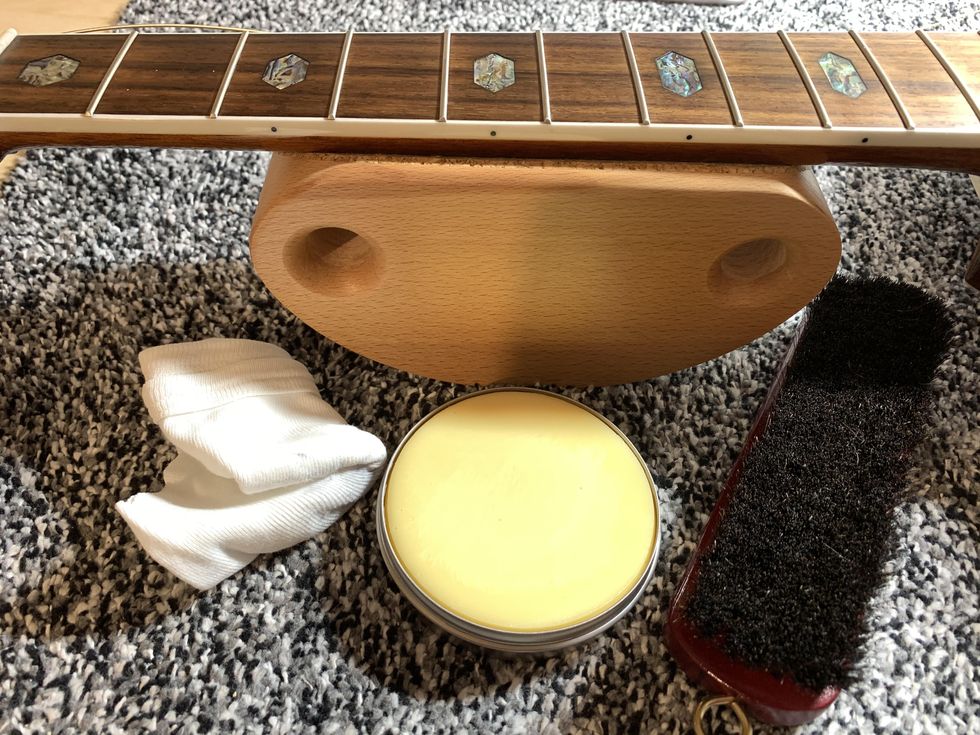
Photo 4
Get a clear, hard wax for fretboards and a soft polishing brush (Photo 4). Apply a thin layer of wax to the fretboard using a cotton cloth to massage it into the wood.
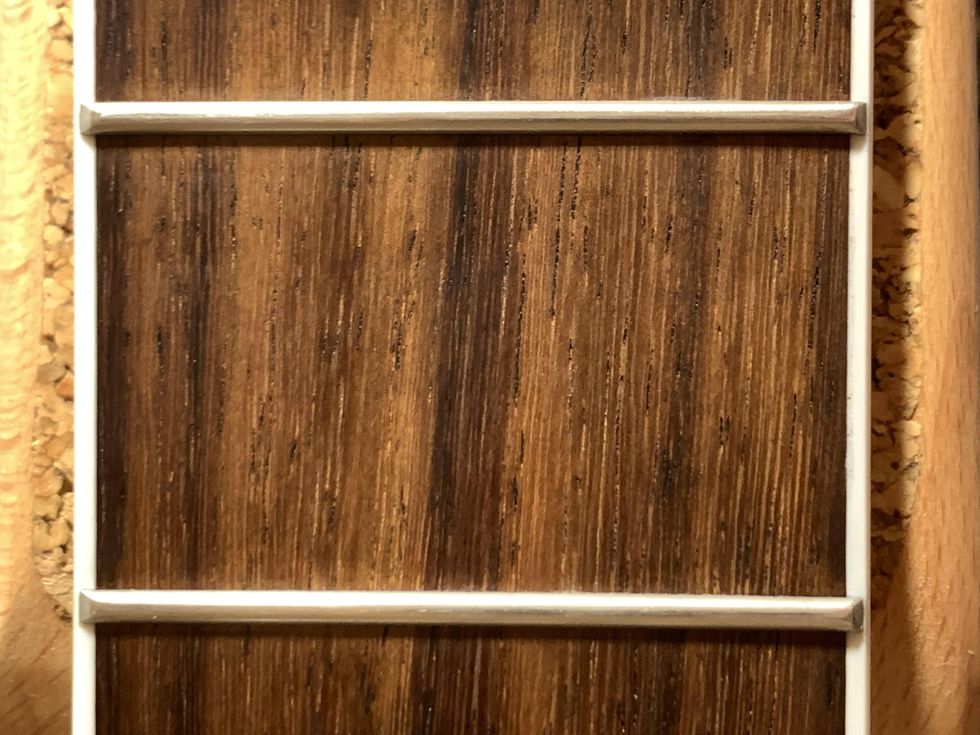
Photo 5
Let it dry for some time, then wipe off any remaining excess wax and use the soft polishing brush to get this greasy look and shine on your fretboard, as seen in Photo 5.
So far, so good. We’ve taken care of the color and the feel of the fretboard but there is another haptic thing to consider when talking about vintage necks: the broken-in feeling of the fretboard edges. The fretboard edges of well-played vintage guitars feel comfortable and round because the edges receive pressure from a player’s hand over decades. This is not what is called “rolled fretboard edge,” which is a common custom shop option, but it goes in the same direction only to a much lesser degree.
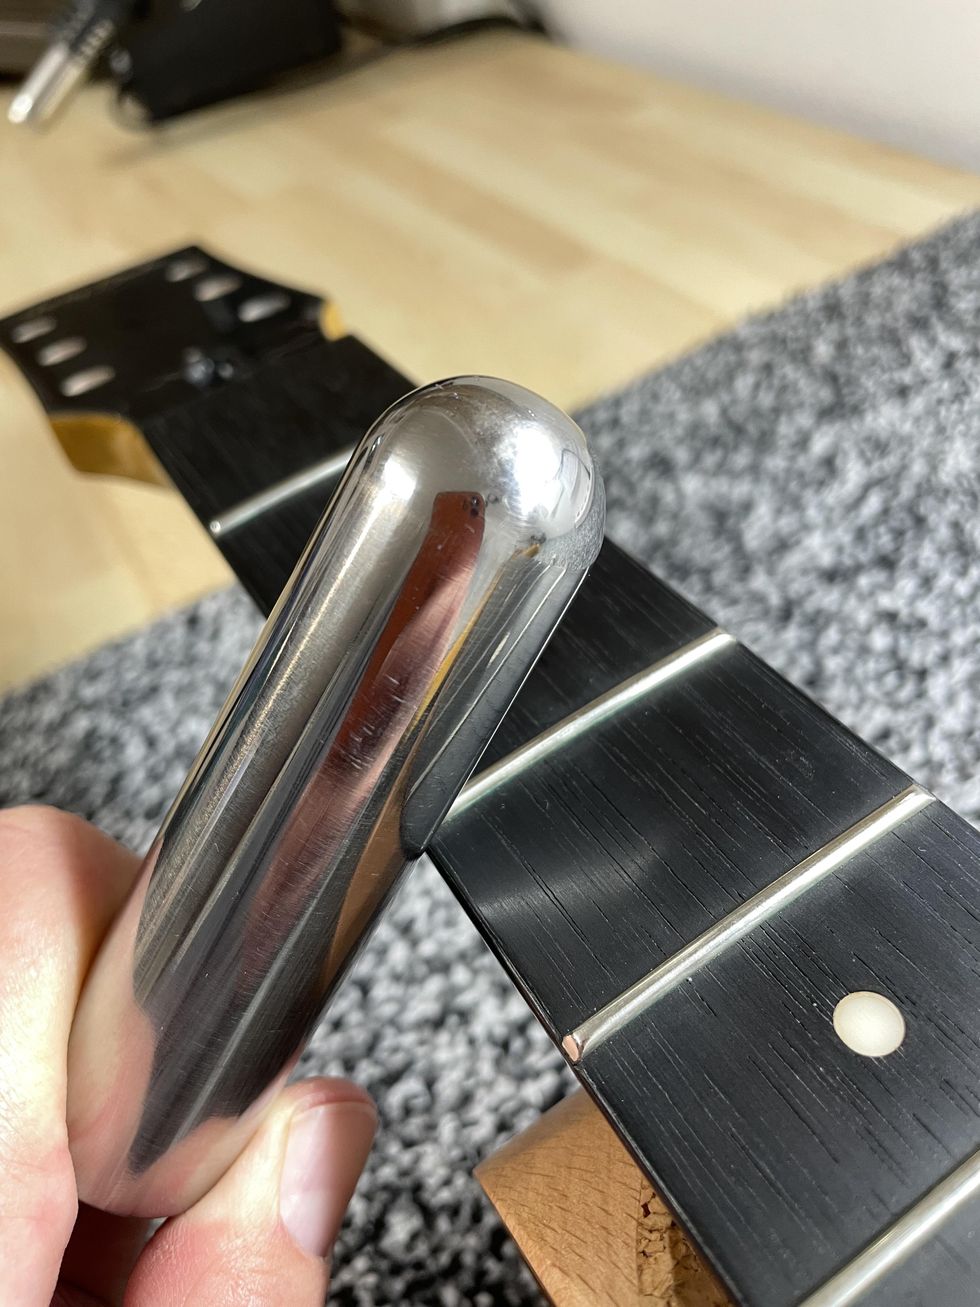
Photo 6
To bring this typical broken-in feeling to your neck, you don’t need much: just a round metal bar and some time. You can do this to any guitar neck. I prefer to use a massive metal slide for pedal-steel players, but you can also use a bigger screwdriver or something similar. If possible, clamp down your guitar and use the steel bar in a 45-degree angle to move it along the edge of the fretboard, applying pressure (Photo 6). What we’re doing with this is not making a rolled edge but compressing fibres, which is exactly the natural process over time. Repeat moving the bar while applying pressure for some time and check the result until you like it. This is not done within a minute, so take your time. With the metal slide, I usually need 10-15 minutes for each edge until I like it, but this depends a lot on how hard your fretboard material is.
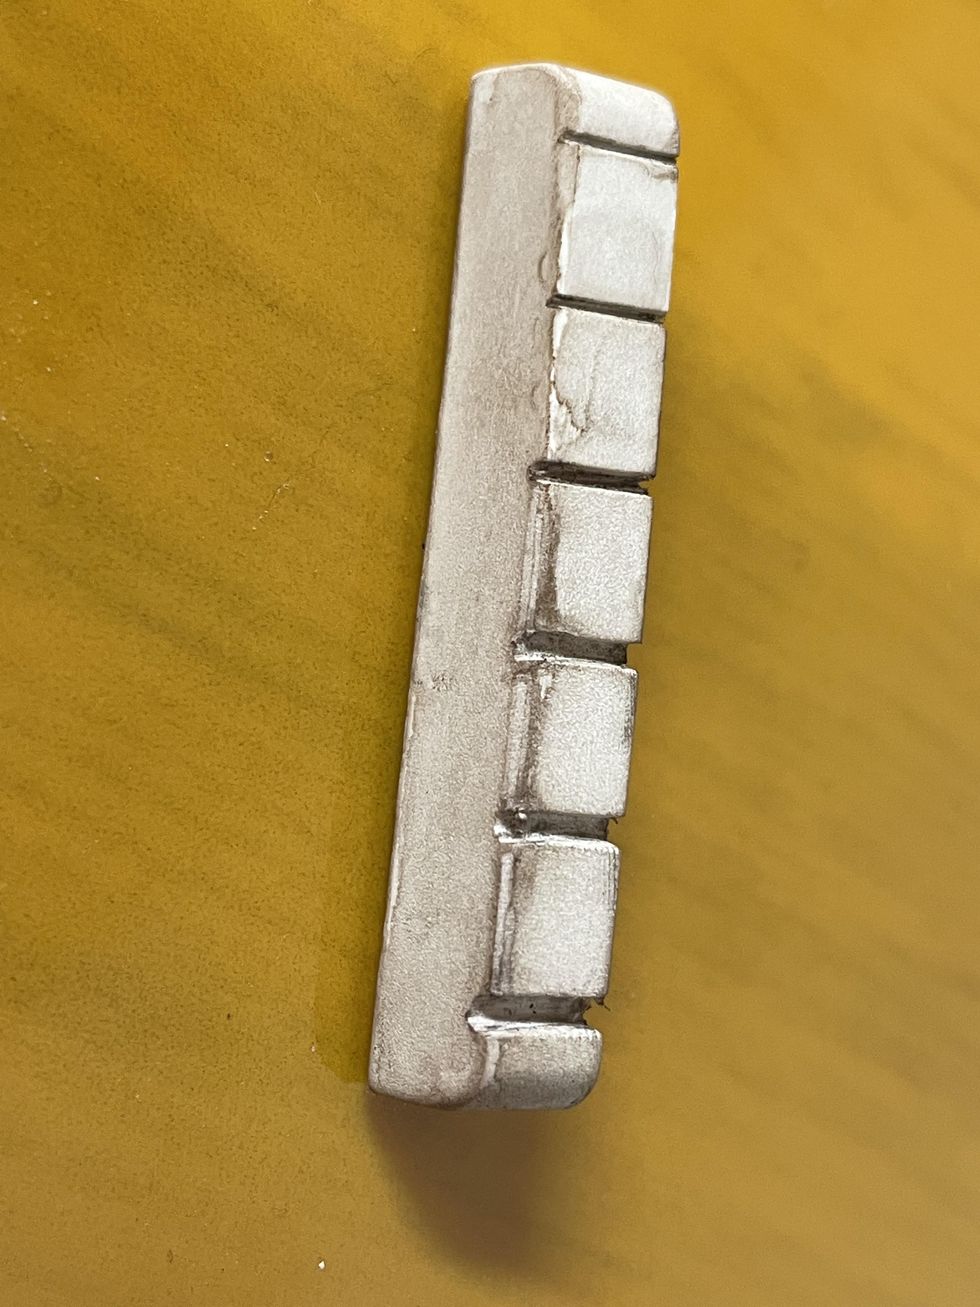
Photo 7
If you’re done with that part, excellent! You just finished your fretboard. Moving up the neck, the nut is our next task. The nut of our Harley Benton is pure white plastic, which not the best choice. If you want to keep it, you can sand it with some steel wool and apply some of the amber color with a Q-tip, followed with some of our mixture of dirt, dust, and ashes we used for the plastic buttons of the tuners [DIY Relic’ing Tuners, Part 2”]. Use your fingers to wipe on some of this mixture and you’re done. If you want to upgrade the nut, nylon is the historically correct material, and such nut blanks are available from numerous luthier supply stores. I decided to use an unbleached bone nut blank and make a new nut. Afterwards, I used some of the amber color and dust to make it look old (Photo 7).
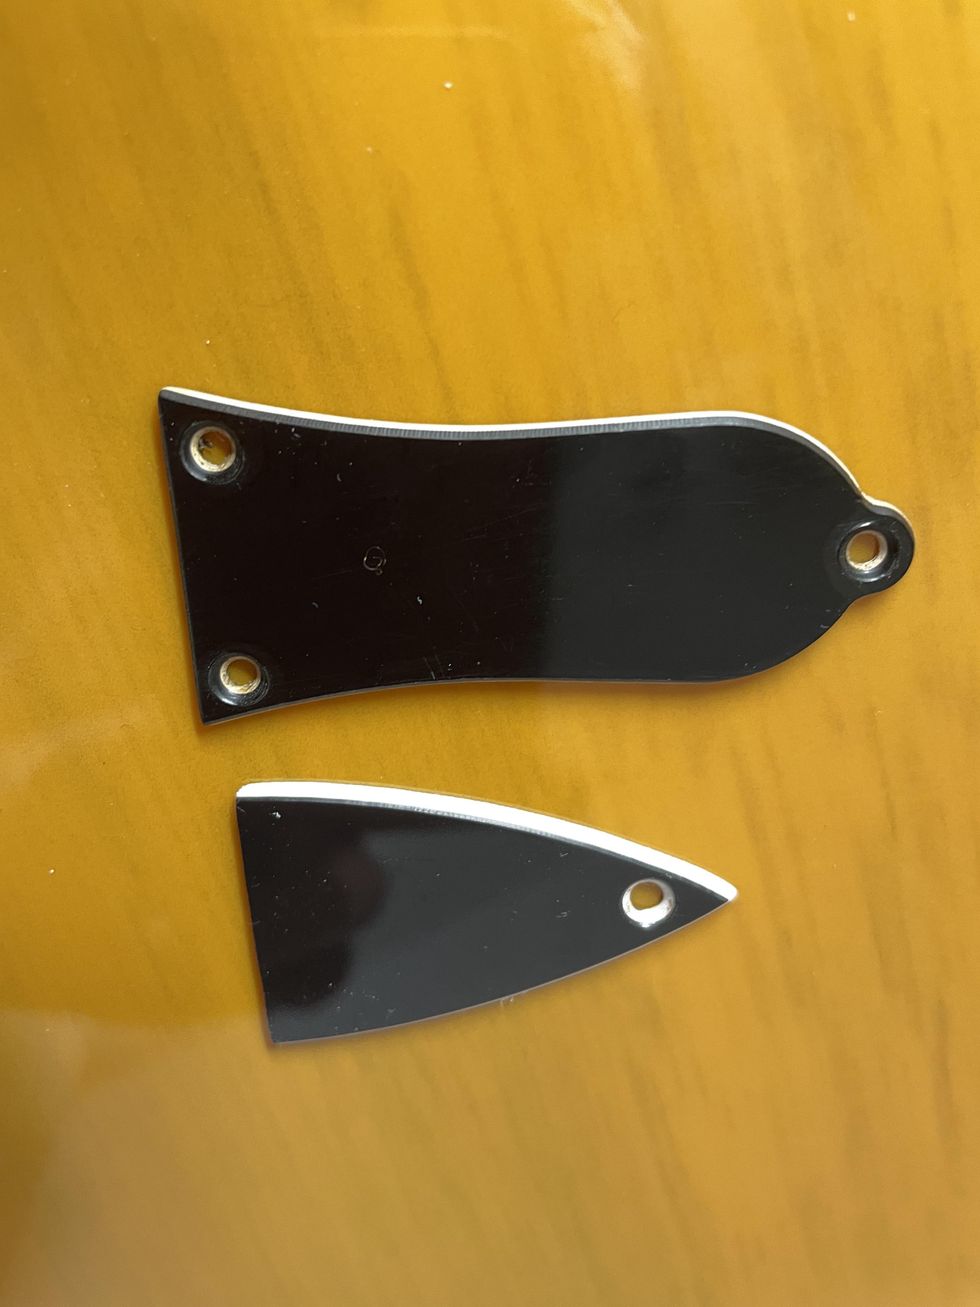
Photo 8
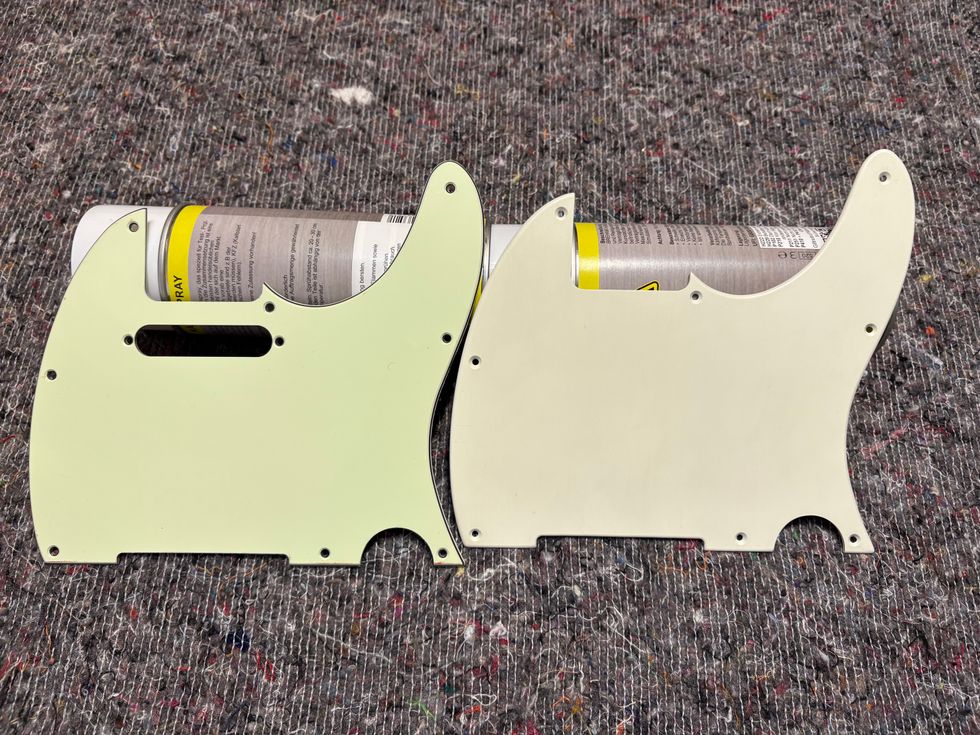
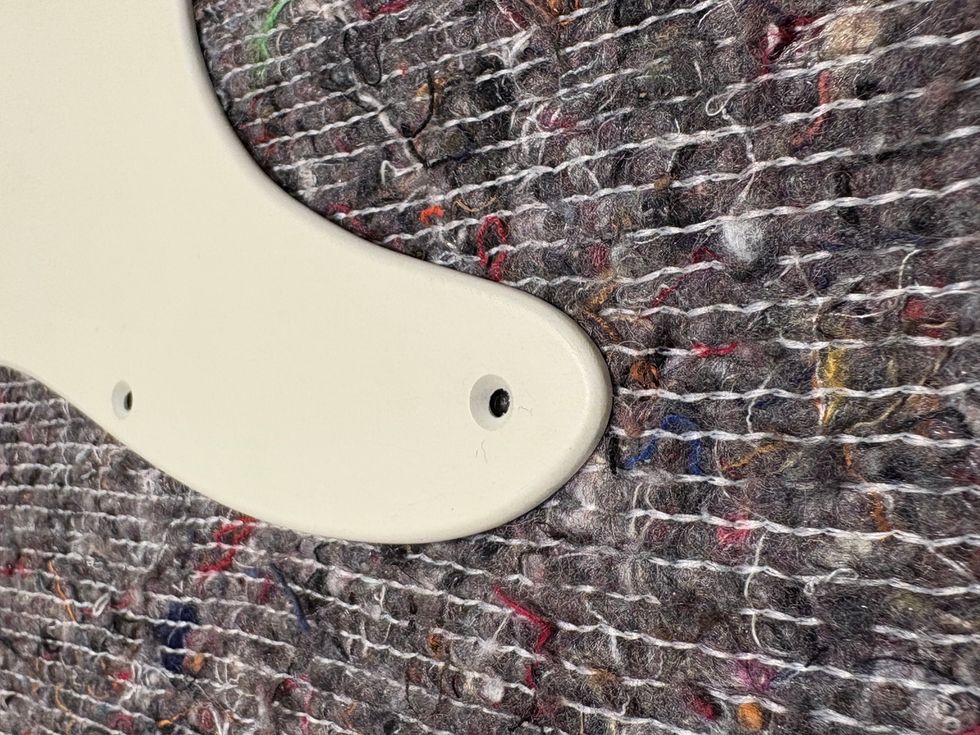
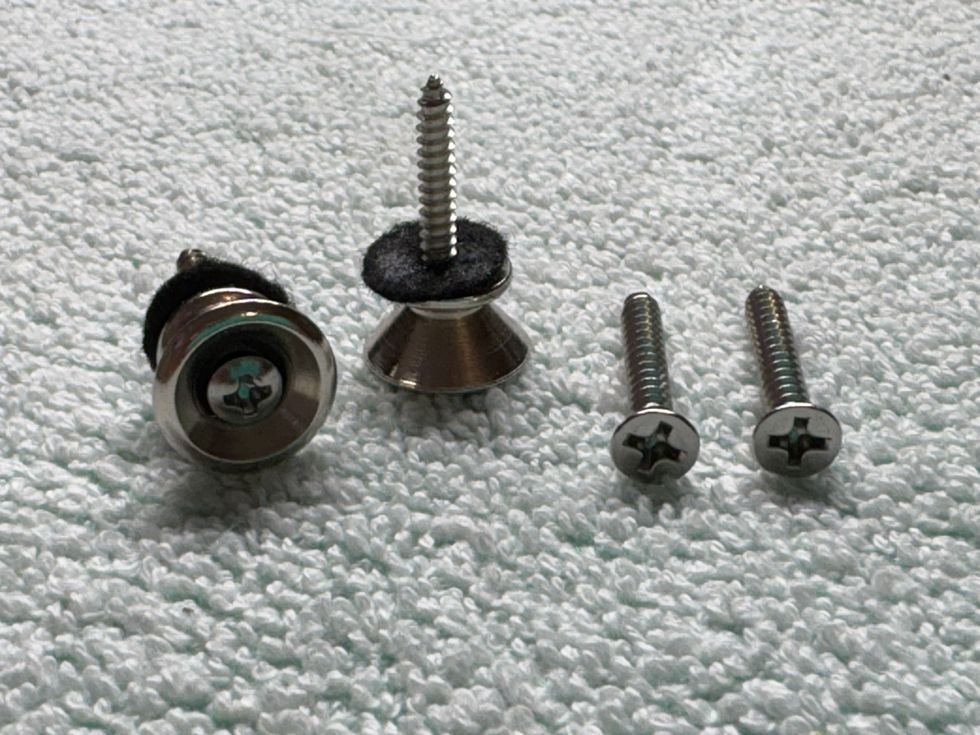
Further up the neck is the cover for the truss rod adjustment screw with its mounting screw. Harley Benton decided to use a modern shape for it, which doesn’t look very good to me. The typical Gibson-style covers with their bell-like shape look much different, so I decided to swap the cover for such a model, modifying it for a flat bottom so it covers the whole opening for the truss rod (Photo 8). To make it look old, you can use the exact steps we used on the jack plate: break the shine with some steel wool, add some light scratches, wipe on some amber color on the white part of the cover, and then rub in some dust and dirt. You already know how to age screws, having done it many times before in the earlier parts of this ongoing project. If you need a refresher on our aging process for screws, refer back to “DIY Relic’ing: Break the Shine” for guidance.
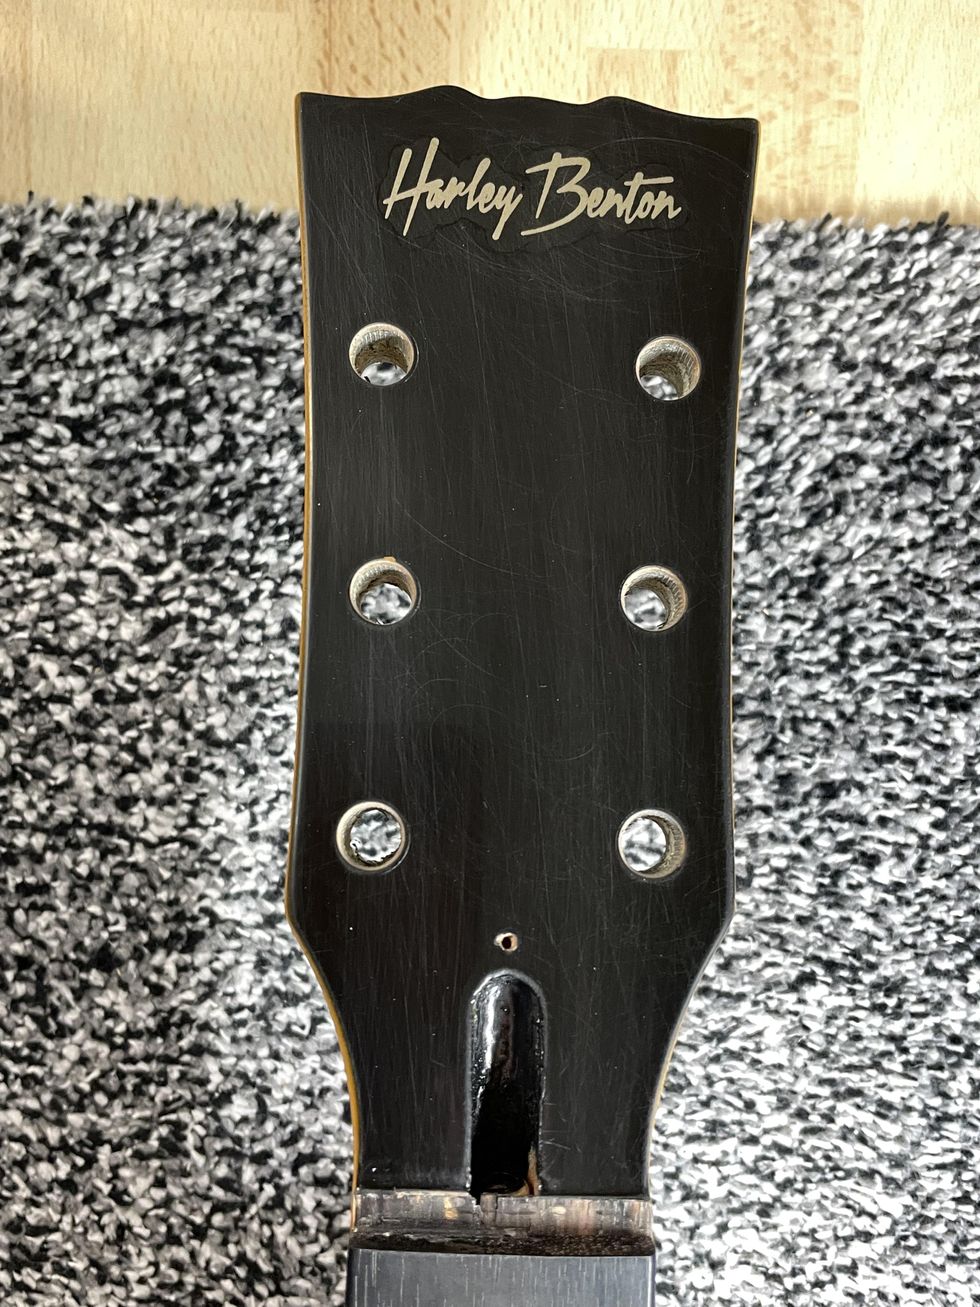
Photo 9
The last thing we’ll do today is begin to work on the headstock of the guitar, which is often a delicate task. A lot of modders try to reshape the headstock so it will look like it’s from a vintage guitar, and, even worse, replace the headstock logo with a fake logo from another company. I would never do that. This project is about aging a guitar and not about making it an exact copy of a vintage original. Personally, I really like the headstock shape of the Harley Benton. It looks at least a little bit Gibson-like, and I also think the Harley Benton logo looks cool the way it is (Photo 9). So, aging it is very easy: Break the shine with some steel wool and wipe off the dust. Use a Q-tip and apply some layers of the amber color to the logo until you like the shade. Adding dings, dongs, and scratches will come later. In the next part of this project, we’ll take care of the backside of the neck and the body by cracking the lacquer to mimic some old nitro lacquer.
That’s it for now. We’re almost finished with this relic’ing project, but before we wrap it up, we’ll return to guitar mods in the next issue. We’ll take a deeper look at putting vintage parts into new electric guitars, so stay tuned.
Until then ... keep on modding!
- Last Call: Someday You'll Regret That Relic Job - Premier Guitar ›
- Mod Garage: DIY Relic'ing—Aging a P-90 Pickup - Premier Guitar ›
- DIY Relic'ing: Break the Shine - Premier Guitar ›
- DIY Guitar Relic'ing: Let's Crack Some Lacquer Finish - Premier Guitar ›
- It’s Rosewood, But What Kind? ›
Single-coils and humbuckers aren’t the only game in town anymore. From hybrid to hexaphonic, Joe Naylor, Pete Roe, and Chris Mills are thinking outside the bobbin to bring guitarists new sonic possibilities.
Electric guitar pickups weren’t necessarily supposed to turn out the way they did. We know the dominant models of single-coils and humbuckers—from P-90s to PAFs—as the natural and correct forms of the technology. But the history of the 6-string pickup tells a different story. They were mostly experiments gone right, executed with whatever materials were cheapest and closest at hand. Wartime embargos had as much influence on the development of the electric guitar pickup as did any ideas of function, tone, or sonic quality—maybe more so.
Still, we think we know what pickups should sound and look like. Lucky for us, there have always been plenty of pickup builders who aren’t so convinced. These are the makers who devised the ceramic-magnet pickup, gold-foils, and active, high-gain pickups. In 2025, nearly 100 years after the first pickup bestowed upon a humble lap-steel guitar the power to blast our ears with soundwaves, there’s no shortage of free-thinking, independent wire-winders coming up with new ways to translate vibrating steel strings into thrilling music.
Joe Naylor, Chris Mills, and Pete Roe are three of them. As the creative mind behind Reverend Guitars, Naylor developed the Railhammer pickup, which combines both rail and pole-piece design. Mills, in Pennsylvania, builds his own ZUZU guitars with wildly shaped, custom-designed pickups. And in the U.K., Roe developed his own line of hexaphonic pickups to achieve the ultimate in string separation and note definition. All three of them told us how they created their novel noisemakers.
Joe Naylor - Railhammer Pickups
Joe Naylor, pictured here, started designing Railhammers out of personal necessity: He needed a pickup that could handle both pristine cleans and crushing distortion back to back.
Like virtually all guitar players, Joe Naylor was on a personal tone quest. Based in Troy, Michigan, Naylor helped launch Reverend Guitars in 1996, and in the late ’90s, he was writing and playing music that involved both clean and distorted movements in one song. He liked his neck pickup for the clean parts, but it was too muddy for high-gain playing. He didn’t want to switch pickups, which would change the sound altogether.
He set out to design a neck pickup that could represent both ends of the spectrum with even fidelity. That led him to a unique design concept: a thin, steel rail under the three thicker, low-end strings, and three traditional pole pieces for the higher strings, both working with a bar magnet underneath. At just about a millimeter thick, rails, Naylor explains, only interact with a narrow section of the thicker strings, eliminating excess low-end information. Pole pieces, at about six millimeters in diameter, pick up a much wider and less focused window of the higher strings, which works to keep them fat and full. “If you go back and look at some of the early rail pickups—Bill Lawrence’s and things like that—the low end is very tight,” says Naylor. “It’s almost like your tone is being EQ’d perfectly, but it’s being done by the pickup itself.”
That idea formed the basis for Railhammer Pickups, which began official operations in 2012. Naylor built the first prototype in his basement, and it sounded great from the start, so he expanded the format to a bridge pickup. That worked out, too. “I decided, ‘Maybe I’m onto something here,’” says Naylor. Despite the additional engineering, Railhammers have remained passive pickups, with fairly conventional magnets—including alnico 5s and ceramics—wires, and structures. Naylor says this combines the clarity of active pickups with the “thick, organic tone” of passive pickups.
“It’s almost like your tone is being EQ’d perfectly, but it’s being done by the pickup itself.” —Joe Naylor
The biggest difficulty Naylor faced was in the physical construction of the pickups. He designed and ordered custom molds for the pickup’s bobbins, which cost a good chunk of money. But once those were in hand, the Railhammers didn’t need much fiddling. Despite their size differences, the rail and pole pieces produce level volume outputs for balanced response across all six strings.
Naylor’s formula has built a significant following among heavy-music players. Smashing Pumpkins’ Billy Corgan is a Railhammer player with several signature models; ditto Reeves Gabrels, the Cure guitarist and David Bowie collaborator. Bob Balch from Fu Manchu and Kyle Shutt from the Sword have signatures, too, and other players include Code Orange’s Reba Meyers, Gogol Bordello’s Boris Pelekh, and Voivod’s Dan “Chewy” Mongrain.
Chris Mills - ZUZU Pickups
When Chris Mills started building his own electric guitars, he decided to build his own components for them, too. He suspected that in the course of the market’s natural thinning of the product herd, plenty of exciting options had been left unrealized. He started working with non-traditional components and winding in non-traditional ways, which turned him on to the idea that things could be done differently. “I learned early on that there are all kinds of sonic worlds out there to be discovered,” says Mills.
Eventually, he zeroed in on the particular sound of a 5-way-switch Stratocaster in positions two and four: Something glassy and clear, but fatter and more dimensional. In Mills’ practice, “dimensional” refers to the varying and sometimes simultaneous sound qualities attained from, say, a finger pad versus a fingernail. “I didn’t want just one thing,” says Mills. “I wanted multiple things happening at once.”
Mills wanted something that split the difference between a humbucker’s fullness and the Strat’s plucky verve, all in clean contexts. But he didn’t want an active pickup; he wanted a passive, drop-in solution to maximize appeal. To achieve the end tone, Mills wired his bobbins in parallel to create “interposed signal processing,” a key piece of his patented design. “I found that when I [signal processed] both of them, I got too much of one particular quality, and I wanted that dimensionality that comes with two qualities simultaneously, so that was essential,” explains Mills.
Mills loved the sound of alnico 5 blade magnets, so he worked with a 3D modeling engineer to design plastic bobbins that could accommodate both the blades and the number of turns of wire he desired. This got granular—a millimeter taller, a millimeter wider—until they came out exactly right. Then came the struggle of fitting them into a humbucker cover. Some key advice from experts helped Mills save on space to make the squeeze happen.
Mills’ ZUZUbuckers don’t have the traditional pole pieces and screws of most humbuckers, so he uses the screw holes on the cover as “portholes” looking in on a luxe abalone design. And his patented “curved-coil” pickups feature a unique winding method to mix up the tonal profile while maintaining presence across all frequencies.
“I learned early on that there are all kinds of sonic worlds out there to be discovered.” —Chris Mills
Mills has also patented a single-coil pickup with a curved coil, which he developed to get a different tonal quality by changing the relative location of the poles to one another and to the bridge. Within that design is another patented design feature: reducing the number of turns at the bass end of the coil. “Pretty much every pickup maker suggests that you lower the bass end [of the pickup] to compensate for the fact that it's louder than the treble end,” says Mills. “That'll work, but doing so alters the quality and clarity of the bass end. My innovation enables you to keep the bass end up high toward the strings.”
Even Mills’ drop-in pickups tend to look fairly distinct, but his more custom designs, like his curved-coil pickup, are downright baroque. Because his designs don’t rely on typical pickup construction, there aren’t the usual visual cues, like screws popping out of a humbucker cover, or pole pieces on a single-coil pickup. (Mills does preserve a whiff of these ideals with “portholes” on his pickup covers that reveal that pickup below.) Currently, he’s excited by the abalone-shell finish inserts he’s loading on top of his ZUZUbuckers, which peek through the aforementioned portholes.
“It all comes down to the challenge that we face in this industry of having something that’s original and distinctive, and also knowing that with every choice you make, you risk alienating those who prefer a more traditional and familiar look,” says Mills.
Pete Roe - Submarine Pickups
Roe’s stick-on Submarine pickups give individual strings their own miniature pickup, each with discrete, siloed signals that can be manipulated on their own. Ever wanted to have a fuzz only on the treble strings, or an echo applied just to the low-register strings? Submarine can achieve that.
Pete Roe says that at the start, his limited amount of knowledge about guitar pickups was a kind of superpower. If he had known how hard it would be to get to where he is now, he likely wouldn’t have started. He also would’ve worked in a totally different way. But hindsight is 20/20.
Roe was working in singer-songwriter territory and looking to add some bass to his sound. He didn’t want to go down the looping path, so he stuck with octave pedals, but even these weren’t satisfactory for him. He started winding his own basic pickups, using drills, spools of wire, and magnets he’d bought off the internet. Like most other builders, he wanted to make passive pickups—he played lots of acoustic guitar, and his experiences trying to find last-minute replacement batteries for most acoustic pickups left him scarred.
Roe started building a multiphonic pickup: a unit with multiple discrete “pickups” within one housing. In traditional pickups, the vibration from the strings is converted into a voltage in the 6-string-wide coils of wire within the pickup. In multiphonic pickups, there are individual coils beneath each string. That means they’re quite tiny—Roe likens each coil to the size of a Tylenol pill. “Because you’re making stuff small, it actually works better because it’s not picking up signals from adjacent strings,” says Roe. “If you’ve got it set up correctly, there’s very, very little crosstalk.”
With his Submarine Pickups, Roe began by creating the flagship Submarine: a quick-stick pickup designed to isolate and enhance the signals of two strings. The SubPro and SubSix expanded the concept to true hexaphonic capability. Each string has a designated coil, which on the SubPro combine into four separate switchable outputs; the SubSix counts six outputs. The pickups use two mini output jacks, with triple-band male connectors to carry three signals each. Explains Roe: “If you had a two-channel output setup, you could have E, A, and D strings going to one side, and G, B, and E to the other. Or you could have E and A going to one, the middle two strings muted, and the B and E going to a different channel.” Each output has a 3-position switch, which toggles between one of two channels, or mute.
“I’m just saying there’s some unexplored territory at the beginning of the signal chain. If you start looking inside your guitar, then it opens up a world of opportunities.” —Pete Roe
This all might seem a little overly complicated, but Roe sees it as a simplification. He says when most people think about their sound, they see its origin in the guitar as fixed, only manipulatable later in the chain via pedals, amp settings, or speaker decisions. “I’m not saying that’s wrong,” says Roe. “I’m just saying there’s some unexplored territory at the beginning of the signal chain. If you start looking inside your guitar, then it opens up a world of opportunities which may or may not be useful to you. Our customers tend to be the ones who are curious and looking for something new that they can’t achieve in a different way.
“If each string has its own channel, you can start to get some really surprising effects by using those six channels as a group,” continues Roe. “You could pan the strings across the stereo field, which as an effect is really powerful. You suddenly have this really wide, panoramic guitar sound. But then when you start applying familiar effects to the strings in isolation, you can end up with some really surprising textural sounds that you just can’t achieve in any other way. You can get some very different sounds if you’re applying these distortions to strings in isolation. You can get that kind of lead guitar sound that sort of cuts through everything, this really pure, monophonic sound. That sounds very different because what you don’t get is this thing called intermodulation distortion, which is the muddiness, essentially, that you get from playing chords that are more complex than roots and fifths with a load of distortion.” And despite the powerful hardware, the pickups don’t require any soldering or labor. Using a “nanosuction” technology similar to what geckos possess, the pickups simply adhere to the guitar’s body. Submarine’s manuals provide clear instruction on how to rig up the pickups.
“An analogy I like to use is: Say you’re remixing a track,” explains Roe. “If you get the stems, you can actually do a much better job, because you can dig inside and see how the thing is put together. Essentially, Submarine is doing that to guitars. It’s allowing guitarists and producers to look inside the instrument and rebuild it from its constituent parts in new and exciting ways.”
Pearl Jam announces U.S. tour dates for April and May 2025 in support of their album Dark Matter.
In continued support of their 3x GRAMMY-nominated album Dark Matter, Pearl Jam will be touring select U.S. cities in April and May 2025.
Pearl Jam’s live dates will start in Hollywood, FL on April 24 and 26 and wrap with performances in Pittsburgh, PA on May 16 and 18. Full tour dates are listed below.
Support acts for these dates will be announced in the coming weeks.
Tickets for these concerts will be available two ways:
- A Ten Club members-only presale for all dates begins today. Only paid Ten Club members active as of 11:59 PM PT on December 4, 2024 are eligible to participate in this presale. More info at pearljam.com.
- Public tickets will be available through an Artist Presale hosted by Ticketmaster. Fans can sign up for presale access for up to five concert dates now through Tuesday, December 10 at 10 AM PT. The presale starts Friday, December 13 at 10 AM local time.
earl Jam strives to protect access to fairly priced tickets by providing the majority of tickets to Ten Club members, making tickets non-transferable as permitted, and selling approximately 10% of tickets through PJ Premium to offset increased costs. Pearl Jam continues to use all-in pricing and the ticket price shown includes service fees. Any applicable taxes will be added at checkout.
For fans unable to use their purchased tickets, Pearl Jam and Ticketmaster will offer a Fan-to-Fan Face Value Ticket Exchange for every city, starting at a later date. To sell tickets through this exchange, you must have a valid bank account or debit card in the United States. Tickets listed above face value on secondary marketplaces will be canceled. To help protect the Exchange, Pearl Jam has also chosen to make tickets for this tour mobile only and restricted from transfer. For more information about the policy issues in ticketing, visit fairticketing.com.
For more information, please visit pearljam.com.
The legendary German hard-rock guitarist deconstructs his expressive playing approach and recounts critical moments from his historic career.
This episode has three main ingredients: Shifty, Schenker, and shredding. What more do you need?
Chris Shiflett sits down with Michael Schenker, the German rock-guitar icon who helped launch his older brother Rudolf Schenker’s now-legendary band, Scorpions. Schenker was just 11 when he played his first gig with the band, and recorded on their debut LP, Lonesome Crow, when he was 16. He’s been playing a Gibson Flying V since those early days, so its only natural that both he and Shifty bust out the Vs for this occasion.
While gigging with Scorpions in Germany, Schenker met and was poached by British rockers UFO, with whom he recorded five studio records and one live release. (Schenker’s new record, released on September 20, celebrates this pivotal era with reworkings of the material from these albums with a cavalcade of high-profile guests like Axl Rose, Slash, Dee Snider, Adrian Vandenberg, and more.) On 1978’s Obsession, his last studio full-length with the band, Schenker cut the solo on “Only You Can Rock Me,” which Shifty thinks carries some of the greatest rock guitar tone of all time. Schenker details his approach to his other solos, but note-for-note recall isn’t always in the cards—he plays from a place of deep expression, which he says makes it difficult to replicate his leads.
Tune in to learn how the Flying V impacted Schenker’s vibrato, the German parallel to Page, Beck, and Clapton, and the twists and turns of his career from Scorpions, UFO, and MSG to brushes with the Rolling Stones.
Credits
Producer: Jason Shadrick
Executive Producers: Brady Sadler and Jake Brennan for Double Elvis
Engineering Support by Matt Tahaney and Matt Beaudion
Video Editor: Addison Sauvan
Graphic Design: Megan Pralle
Special thanks to Chris Peterson, Greg Nacron, and the entire Volume.com crew.
Katana-Mini X is designed to deliver acclaimed Katana tones in a fun and inspiring amp for daily practice and jamming.
Evolving on the features of the popular Katana-Mini model, it offers six versatile analog sound options, two simultaneous effects, and a robust cabinet for a bigger and fuller guitar experience. Katana-Mini X also provides many enhancements to energize playing sessions, including an onboard tuner, front-facing panel controls, an internal rechargeable battery, and onboard Bluetooth for streaming music from a smartphone.
While its footprint is small, the Katana-Mini X sound is anything but. The multi-stage analog gain circuit features a sophisticated, detailed design that produces highly expressive tones with immersive depth and dimension, supported by a sturdy wood cabinet and custom 5-inch speaker for a satisfying feel and rich low-end response. The no-compromise BOSS Tube Logic design approach offers full-bodied sounds for every genre, including searing high-gain solo sounds and tight metal rhythm tones dripping with saturation and harmonic complexity.
Katana-Mini X features versatile amp characters derived from the stage-class Katana amp series. Clean, Crunch, and Brown amp types are available, each with a tonal variation accessible with a panel switch. One variation is an uncolored clean sound for using Katana-Mini X with an acoustic-electric guitar or bass. Katana-Mini X comes packed with powerful tools to take music sessions to the next level. The onboard rechargeable battery provides easy mobility, while built-in Bluetooth lets users jam with music from a mobile device and use the amp as a portable speaker for casual music playback.
For quiet playing, it’s possible to plug in headphones and enjoy high-quality tones with built-in cabinet simulation and stereo effects. Katana-Mini X features a traditional analog tone stack for natural sound shaping using familiar bass, mid, and treble controls. MOD/FX and REV/DLY sections are also on hand, each with a diverse range of Boss effects and fast sound tweaks via single-knob controls that adjust multiple parameters at once. Both sections can be used simultaneously, letting players create combinations such as tremolo and spring reverb, phaser and delay, and many others.
Availability & Pricing The new BOSS Katana-Mini X will be available for purchase at authorized U.S. Boss retailers in December for $149.99. For the full press kit, including hi-res images, specs, and more, click here. To learn more about the Katana-Mini X Guitar Amplifier, visit www.boss.info.