
Four blue-chip engineers—Dave Fridmann, Eric Bauer, Colin Marston, and Jarvis Taveniere—explain what you need to do to prepare your home recordings for prime-time mixing—and sonic glory.
Some time ago, home recording was a field largely occupied by ambitious amateurs who weren't quite ready for a pro studio and wild eccentrics whose limitless creativity knew no bounds. This made the rare home-recorded release a special treat, and albums by artists such as Brian Wilson, Daniel Johnston, and Guided By Voices gave us a glimpse into their raw creative processes. But as the ubiquity of laptop DAWs replaced 4-track machines and portable digital recording consoles as the de facto home setup, the field became democratized.
It's not news that recording gear has gotten cheaper in recent years. Nowadays, for the price you would have paid for a low-end 4-track back in the '90s, you can buy a mid-level interface, monitors, and a decent enough microphone to make studio-quality recordings. "If you've got a [Focusrite] Scarlett, an SM57, and Ableton Live, you have so much more in front of you than the Beatles ever dreamed of having," says Dave Fridmann, producer/engineer and owner of Cassadaga, New York's Tarbox Road Studios, who has famously mixed home-recorded albums by Tame Impala and his longtime collaborators the Flaming Lips. "There's no reason why you can't do anything you can think of with that gear. Anything." If that's not encouraging enough, consider that even major-label artists such as Fiona Apple and guitarist-producer Steve Lacy have, at times, avoided high-budget studio sessions, opting to record at home and use the same inexpensive tools that are accessible to the rest of us.
While those of us who want to can—and, during the pandemic, most likely did—get to work on our next masterpiece in the comfort of our homes, some limits remain. And for many of us who have been recording on our own, the biggest limitation may be our own ability to mix. What do we do when it's time to make the final decisions on how our tracks should sound? It might seem intuitive, but anyone who has ever tried to mix his or her own recordings knows that the right sound can be hard to nail down and the limitless list of plug-ins can be overwhelming. Lucky for us, there are plenty of professional engineers who are ready to mix our home recordings and elevate them to the level of sonic majesty. With that in mind, we tracked down four of our favorite engineers and discussed the process of having an engineer mix our home-studio tracks.
When Two Brains Think as One
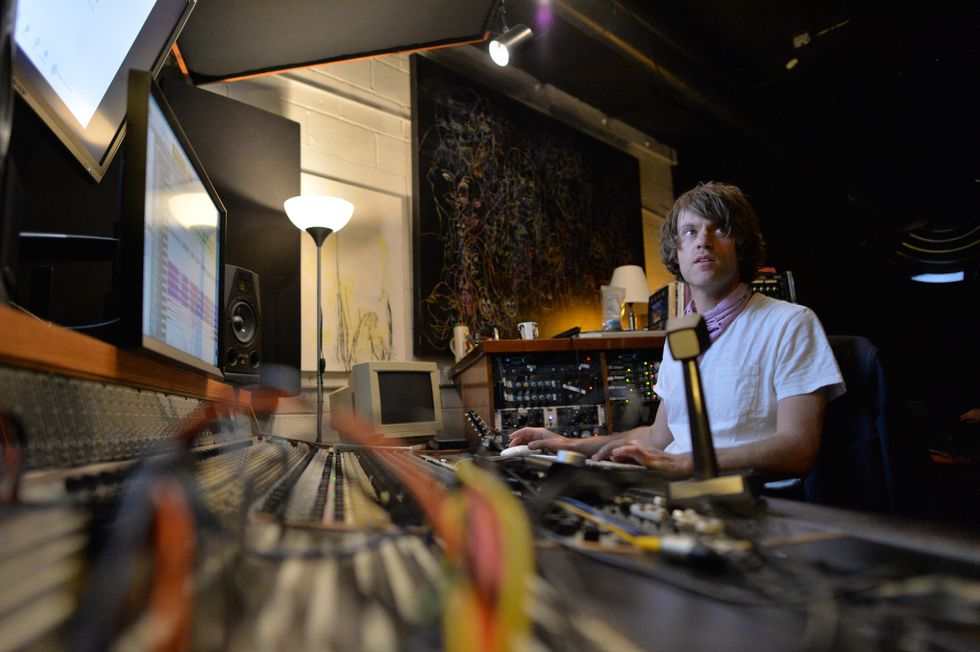
Artists should feel free to reach out to their mixing engineers as early in their recording process as possible, says Jarvis Taveniere, who is happy to share helpful tips with his clients, from brainstorming mic placement to setting up a room.
The very first step is to find the right person for the job. You'll probably want to pick someone who has worked with bands you know, bands you like, or bands you think sound like what you're working on. You should feel comfortable reaching out to engineers and asking questions. Good engineers are only going to want to mix your record if they feel like they can add something to it, and you should feel the same way about them.
Jarvis Taveniere, who plays in the band Woods and has engineered albums by bands such as Fleet Foxes, King Gizzard & the Lizard Wizard, and Real Estate, tells us that it's of utmost importance that an artist and engineer really click. "I don't want to have to convince people that their vision of their song is wrong," he says. "If I don't like their vision of it, then we shouldn't be working together, and I say that with love."
"It's cool to listen to yourself through one mic and be like, 'What does it sound like? Does this sound good? Does it sound harsh?'" —Jarvis Taveniere
You'll also want to consider how you'd like to work together. It's always fun and can be instructive to attend a mixing session, but if you don't have a good fit locally, remote mixing opens up your options to just about anyone you can think of—who fits your budget, of course. Technical details may narrow down your search, too. But don't be dissuaded if it doesn't make sense to work with the engineer of your dreams right now. Every engineer has his or her own way of mixing, and that means different requirements for the files you actually send them—more on that later. And if you've already recorded your album without your engineer's parameters in mind, you may have more limitations than if you haven't gotten started.
Before You Hit “Record”
The engineers we spoke with agreed that, most of the time, clients don't reach out about mixing until their recording is mostly finished. But if you're considering tracking at home and can figure out who you'd like to work with before you begin, that mixing engineer can offer some insight about recording and collaborating.
Taveniere says contact before recording is his "perfect scenario," and believes it can be helpful to discuss things such as mic selection, mic placement, and even simple room treatment options to avoid potential mixing headaches. For example, he explains, "The room is important. If you're recording something at home, close-miking guitar amps is easy and you can do bass and keys direct, so the few things that can have ambience can open up the record. If you're in a room that's rectangular or square, with parallel walls, and you have a condenser on an acoustic, you're probably gonna hear some of the room, you're gonna hear some of those reflections." With the help of a sample recording and a photo, he's happy to help clients get a warm and focused room sound. "Throwing down some rugs, building or buying some 2'x4' absorption panels … it's fun to set up your space so you can have a good sounding room." Addressing such issues in advance will not only make mixing easier, it may give mixers like Taveniere more flexibility to make their mark on your recordings.
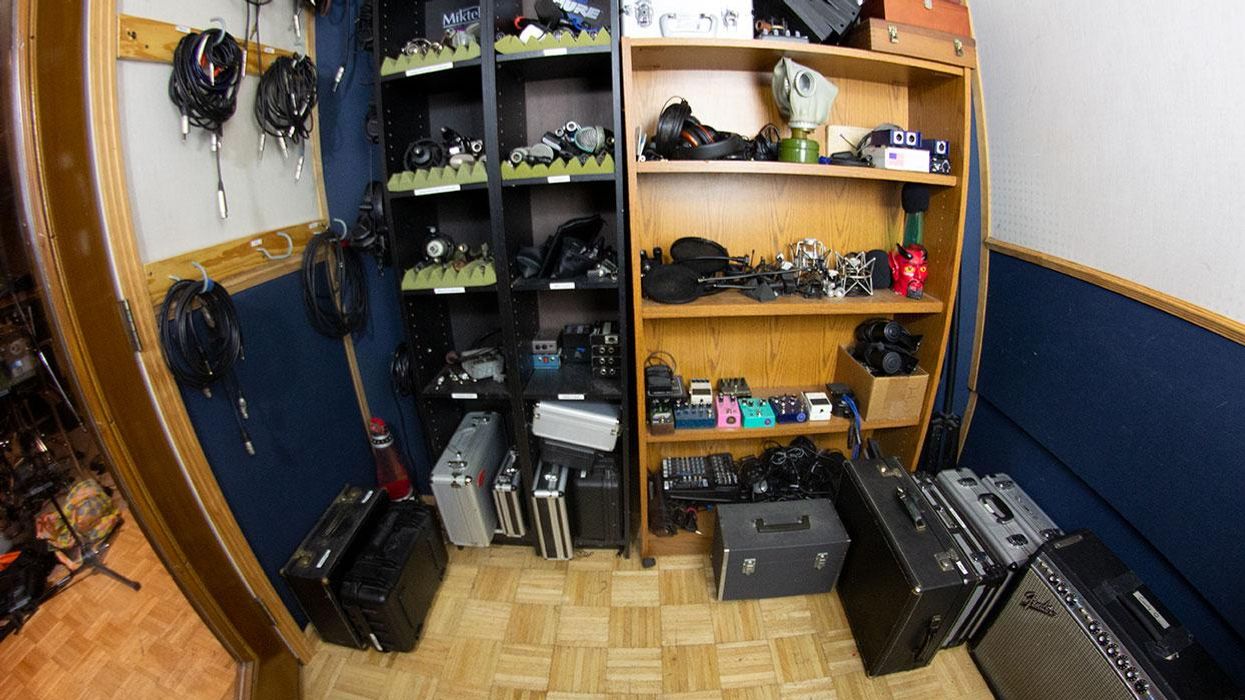
Colin Marston, seen here hard at work at his Menegroth: The Thousand Caves studio, advises you to keep your tracking levels low.
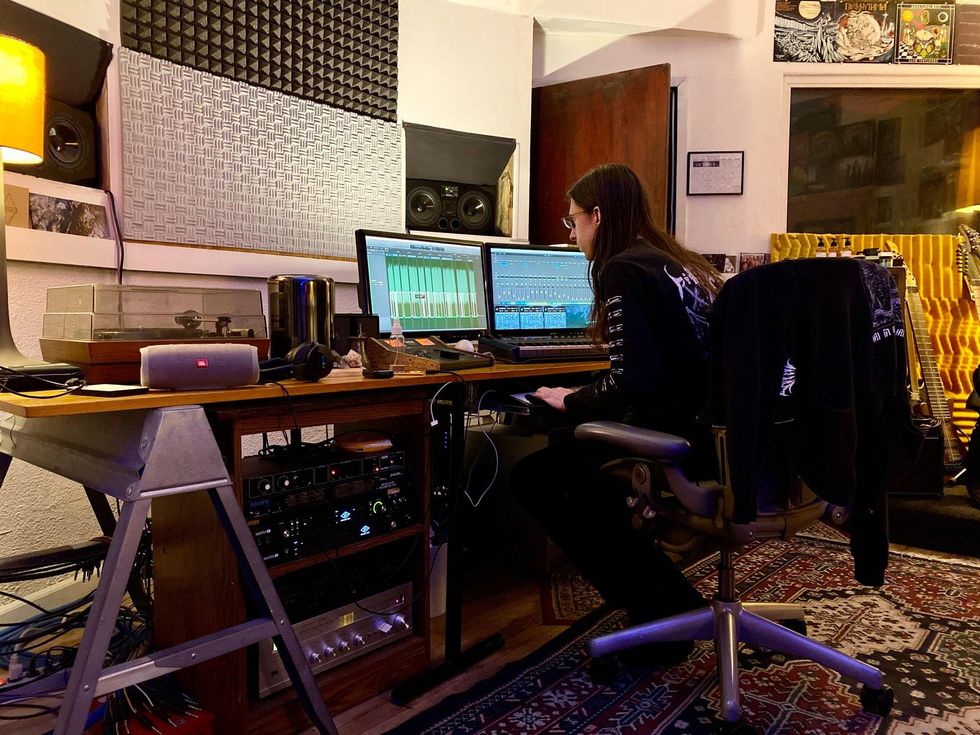
If you're not ready to commit to a mixing engineer before you start tracking, there are some simple tips you can follow that will make things easier later. "Use minimal mic setups, one or two mics at the most, especially when you're in a practice space," recommends Eric Bauer, who runs Bauer Mansion studio in San Francisco, where he's worked with Thee Oh Sees, Ty Segall, and many more. Taveniere agrees, adding, "It's cool to listen to yourself through one mic and be like, 'What does it sound like? Does this sound good? Does it sound harsh?' You can make adjustments if you go slow and think about it, and make decisions."
This is very easy to apply to electric guitar tracking. "If you put a mic in front of it and get a level that isn't clipping, that's good enough for me," says Colin Marston, who runs Menegroth, The Thousand Caves studio in Queens, New York, and plays in Gorguts, Krallice, and Dysrhythmia. This is also a reminder to be sure to record with enough headroom. Once a level clips, it can't be undone. As for common fears about recording too quietly? Marston assures us not to worry, saying, "With 24-bit audio, we have more headroom than you could ever hope to hear, so it's better to shoot a little bit conservatively when it comes to that."
Know Your Tones
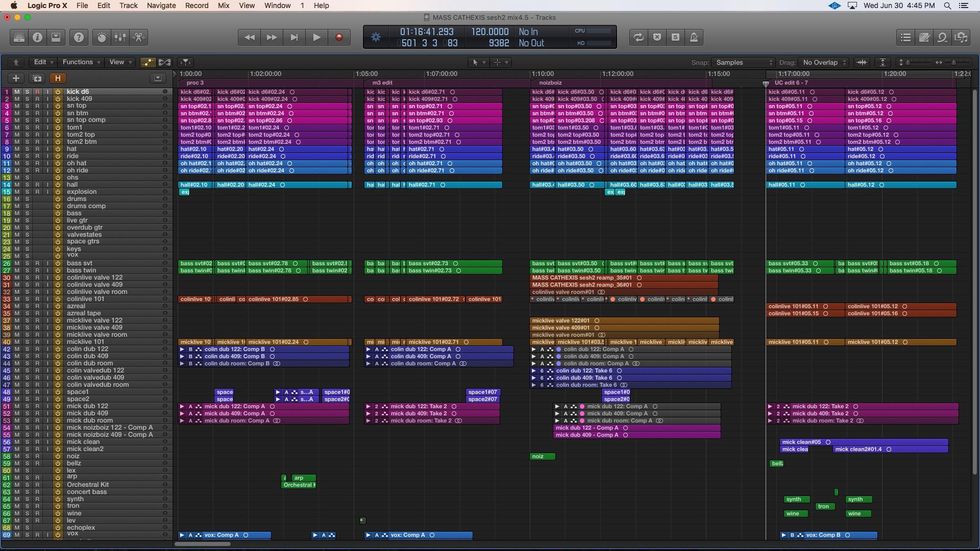
Straight from Colin Marston's desktop: an organized session with easy-to-understand labelling.
Some guitarists who record at home are unable to capture the sounds they want. Others are capable of getting their desired tones, but need help taking their project across the finish line. For players in the former camp, Marston recommends reamping. This means the sky's the limit when it comes to guitar tones. And it's a godsend for guitarists seeking the sound of a big, cranked amp, but who can't get that at home.
"The definition of reamping is running anything through another amp," explains Marston. "If I take a signal that's already been miked and run that through an amp again [and record it with a mic, again], it's like a game of telephone: You're gonna get a really blurry, weird signal that no one is used to hearing, because it's being filtered twice through this process that we're only ever used to hearing it filtered through once." Because of this, it may be ideal to plan to reamp your signal from the start, and to perhaps record your original guitar part via DI. "For reamping to sound undetectable, it's gotta be via a DI signal of some variety," Marston adds. "That can be a straight DI or a signal that has been run through a simulator, pedals, or the preamp stage of an amp. Different engineers may have different opinions about which signal they receive."
"With 24-bit audio, we have more headroom than you could ever hope to hear, so it's better to shoot a little bit conservatively." —Colin Marston
Reamping can be a time-consuming process, since the engineer is effectively re-recording your takes, but it all depends on what you are trying to achieve. "That's one of those things you have to estimate at the beginning," Marson says. "Is this time and investment to shorten the overall session or is this going to unnecessarily add time where the tone they've got already is pretty good?"
But it's ideal to just find a sound you love and get it printed. "What's happening now is that people are recording flat: They stick a mic in front of something and they record it and then they shape the sound," says Fridmann. "I don't encourage people to do this. I think it's a much better idea to get a great sound, something with character that fits the tone of the song you're working on, and print it and be done with it and don't go back. I don't want to—and you don't need to—fiddle with plug-ins for six weeks. If you've got a sound you think is cool, print it and move on.
Delivering Your Tracks
Here's a quick check-list to help make your tracks mix-ready:
- Make sure there's no clipping on your track levels
- Label your tracks, clearly and cleanly
- Turn off master channel processing before bouncing tracks to a sharable format
- Send WAV files to avoid audio quality loss
- Use a sample rate and bit depth of at least 44.1kHz/24-bit
- Provide rough mixes with your tracks
- Use zip files or another means to compress files before emailing
"You can leave it up to the mix engineer, but I don't see why you would. From my standpoint, that's a production decision. If you send me a clean guitar that has no processing on it, but you're expecting it to be distorted, we've got way too much to talk about, and I'm trying to mix this song today."
Audio File Hygiene
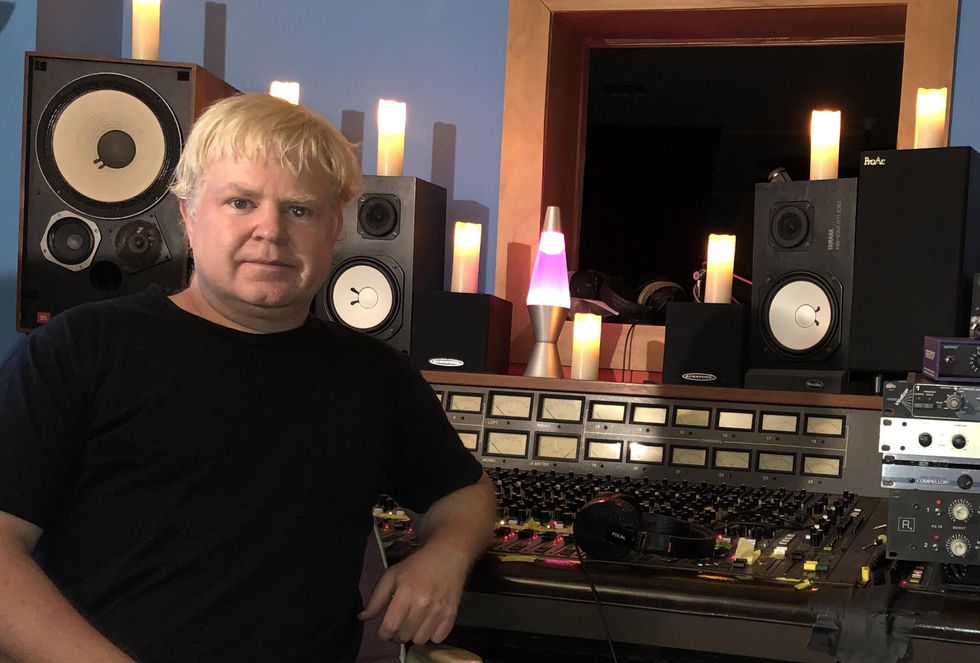
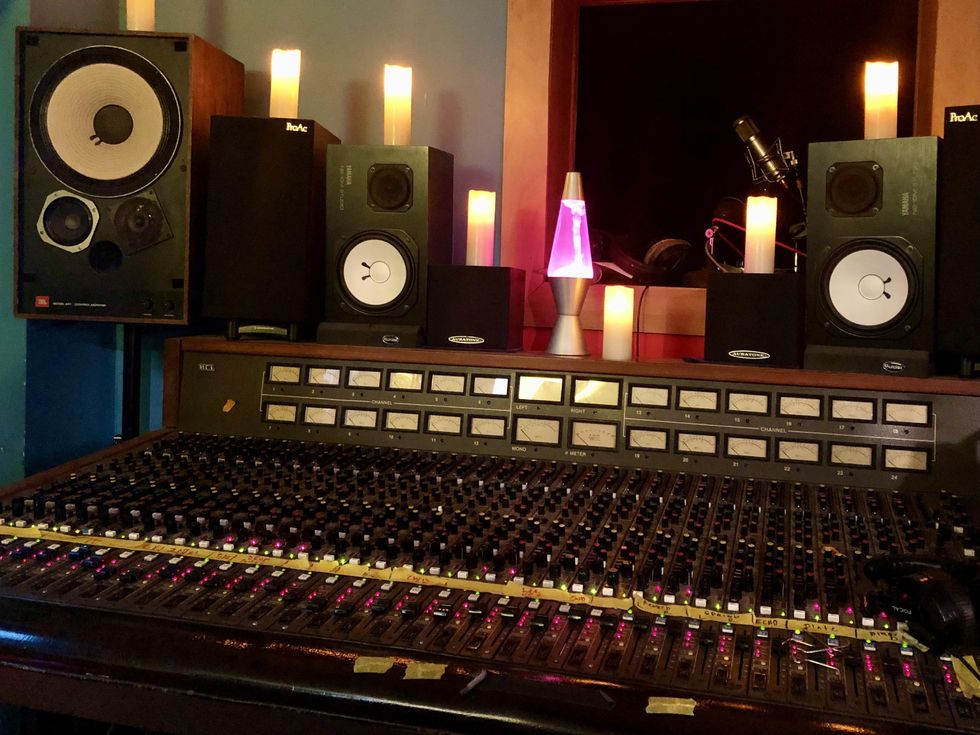
At the start of every mixing session, Eric Bauer will run a client's rough mixes through his board to help them hear what they can expect from his signal chain.
Most of the engineers we spoke to ask their clients to send them separate synced audio files accompanied by a rough mix. This provides the most flexibility while letting them hear how you're imagining the final recording. Some engineers prefer to have a DAW session as well, so this should be part of any conversation before you get started working together.
If you're bouncing down individual tracks, it's important that you understand exactly what you need to do to make the compiled tracks work. And if you don't, talk to your engineer. Most DAWs make it quite easy to export synced tracks, while others, particularly GarageBand, do not.
"Use minimal mic setups, one or two mics at the most, especially when you're in a practice space." —Eric Bauer
Bauer explains the dangers of bad exporting: "People bring over files and they'll be not synced, not to the same length, so we'll have to sync them up in Pro Tools, which is never completely accurate. I'll have random guitar solos, an overdub of a guitar solo, and I'll have to move it. That's one of the big problems I get."
Whether you're sending separate WAV files or DAW sessions, every track needs to be effectively labeled in a universal way that will help your engineer quickly understand what they're looking at. In an ideal situation, your engineer will spend time mixing and not navigating extensive file names, trying to figure out what's going on with your tracks. That means keep your labels short and clear—Marston offers "GTR U87" as a short label anyone mixing a record would understand—and keep your folders organized.
Second That Emotion
Dave Fridmann encourages home recordists to focus on songwriting and getting cool sounds, and to let mixing engineers worry about the technical details.
When Fridmann mixed Kevin Parker's self-recorded Tame Impala debut, Innerspeaker, Parker flew from Australia to Tarbox Road to mix the album. When they completed the mix, both felt satisfied with the result. But Parker changed his mind upon returning home and flew all the way back to work with Fridmann on a remix. Sure, it was a lot of extra work, and Fridmann says both mixes sounded good, but he agrees that the final version was the better of the two. That just goes to show that there is more than one way to mix a recording. Everyone hears music their own way and the best finished product is what sounds best to the artist … and even that can change. What mixing engineers do is help us hear what is possible and bring that to life.
"If you've got a [Focusrite] Scarlett, an SM57, and Ableton Live, you have so much more in front of you than the Beatles ever dreamed of having." —Dave Fridmann
As artists, we can spend months or years listening to our recordings at home, and anything outside of that can sound surprising. We just need to keep an open mind. While Bauer says that artists often "have it in their mind that those roughs are the one," he has his own strategy to help them hear new possibilities. "At the start of every session, I'll put [the rough mix] up on my board just as they have it, and I'll do a rough mix of their mix running through my two-bus mixing chain. I'll have a bus compressor and a bus EQ, and I'll run their whole mix through that before I start doing anything. Then, we'll start mixing and I'll do it the way I think it should be done. When they leave here, they have three mixes to choose from: their original mix, their mix through my board, and my mix."
Eric Bauer cautions clients to make sure their files are synced correctly.
Fridmann cautions against getting bogged down in the details, because ultimately there's no replacement for good writing and solid playing. "You've gotta have faith in yourself," he says. "No mix engineer is gonna make you say, 'Oh wow, this was mediocre and terrible, but now it's great.' If there's some spark there, if there's something that's musically engaging to you already, then mixing will exemplify that.
"It's not about the technical issues," he continues. "Yes, we have to solve all of these things and maybe somebody hears something weird in some frequency range. Fine—we'll address all that stuff, but that doesn't matter. It doesn't matter when you hear 'Baby Love' and it doesn't matter when you hear 'Back in Black.' Those aren't technical issues that we're listening to—we're listening to emotions and that's what mixing is about to me."
- The Recording Guitarist: DIY Mastering Tools - Premier Guitar ›
- Studio Legends: Alan Parsons on "Dark Side of the Moon" - Premier ... ›
- 10 Recording Mistakes Guitarists Make (And How to Avoid Them ... ›
Improved tracking and richness in tones. Stereo panning potential. 100 presets.
Can be hard to use intuitively. Expensive!
$645
Electro-Harmonic POG III
It’s been a very rainy, moody couple of weeks, which is to say, perfect weather for getting lost in the labyrinthine depths of the new Electro-Harmonix POG III polyphonic octave generator. The POG III is yet another evolution (mutation?) within EHX’s now rather expansive stable of octave effects. But to those who know the POG through its original incarnation, or one of several simpler subsequent variants, the POG III represents a pretty dramatic leap forward.
There’s a few things you should know about the POG III straight away. First, it’s very expensive. At $645, it’s 245 clams more than its predecessor, the POG 2, (which was already a considerable investment) and more than twice the price of the simplest POG pedals like the Micro and Pico. Cold hard cash isn’t all you’re likely to trade away, either. Extracting the most value and utility from the POG III takes time and effort—even if you’re experienced with other pedals in the POG family. But for the guitarist and musician whose creations and pleasures transcend traditional playing styles and song forms, or for whom sound design is a primary pursuit, the POG III is a potential studio fixture and portal to musical parts undiscovered.
Copious Control
This is no cop out: The POG III has many more features and combinations thereof than can be mentioned in the space of this review—even if we merely listed them. The manual that EHX included (and is a must-read) is 23 pages long. It’s digestible, certainly. But there is much to learn.
“The Organ Swell reveals much about how rich and organic octave tones can sound in the POG III.”
Even so, the POG III’s 10 factory presets (you can create up to 100 of them) are great jumping-off points for crafting your own sounds and understanding the pedal’s basic dynamics, functionality, and interactivity among the controls. The organ swell preset is a great place to start. Players and bands that use keyboard and synth pads behind their guitar phrases were among POG’s early adopters. POG III’s organ sounds are pretty impressive. And while few will be fooled into thinking you have the pipe organ from St. Stephen’s Cathedral at your fingertips, the Organ Swell reveals much about how rich and organic octave tones can sound in the POG III. With precise timing and fretting, crafty chord phrasing and spacing, the right attack setting, and less aggressive guitar volume and tone settings, you can fashion a pretty convincing Bach organ arpeggio—particularly if you add a suitably expansive reverb or delay.
Cooking Up Wider, Weirder Images
A very cool new feature on the POG III is the panning knobs that accompany individual bands. Panning each band as part of a stereo image adds dimensionality. But it can also lend a more organic “live” flavor to a tone composite by situating fundamental sounds front and center, while sounds that serve as harmonic support can be mixed lower and reoriented spatially to offer more or less emphasis. These relationships can be enhanced and manipulated further by using the stereo spread control and the detune slider to create pitch modulation effects that range from mellow chorus to an almost rotary-speaker-like movement. This stereo mixing process is among the most fun and engaging parts of using the POG III.
Unusual filtering effects are here in abundance for exploring, too. Like so many modes on the POG III, the possible permutations feel endless, but here are some interesting examples.
• High-mid filter emphasis, matched to a quacky, fast envelope trigger, a sprinkle of perfect 5th, an even healthier scoop of +1 and +1 octave, and a strong foundation of -2 octave, all driven by a melodic pattern of staccato 16th notes—the result is a strange percolating pattern of carnival organ sounds against an anchor of low-resonant cello tones.
• Shifting the filter emphasis to the low end with similar envelope sensitivity, bumping the -2 octave and fifths, and subjecting the dry signal to the same filtering effects yields tectonic sub-rumbles and swells that a film- or game-sound designer could use to suggest the propulsion unit for a city-sized alien mothership. Even leaning my guitar against my amplifier and bouncing a racquet ball against the guitar body sounds amazing here. (And yes! You should really try this!)
Granted, many of these sounds fall as much into the category of sound effects and design as much as music in the songs-and-riffs sense. But I think strength in one category can reinforce the other, and in the case of the POG III, there is enough range in both directions to intrigue players everywhere along the spectrum. It still excels at funky bass textures, twisted faux 12-string, and at providing ghostly, backgrounded high-harmony lines for leads. But these time-tested POG applications merely scratch the surface.
The Verdict
The POG has come a long way since its old bent-metal, big box days. The tracking is excellent, and there’s a lot less fighting against artificial, cheesy sounds once you grasp the finer points of crafting a sound and your dynamic approach. The POG III’s complexity makes the going a little harder on fly-by-the-seat-of-your-pants intuitive tinkerers, and musicians with experience in synthesis will probably navigate the unit’s features much more readily than some. As expensive as it is, it’s probably best to be sure you can find a place for it in your work before you take the leap. But if you can afford $645 to take a chance, the POG III may illuminate whole directions you might not have considered with a less expansive effect.
Vox’s Valvenergy Tone Sculptor
Two new pedals from the Valvenergy series use a Nutube valve to generate unique dynamics and tone ranges that can be used to radical ends.
When tracking in a studio or DAW, you’re likely to use compression and EQ on most things. Many enduringly amazing and powerful records were made using little else. And though many musicians regard both effects as a bit unglamorous and utilitarian, EQs and comps are as capable of radical sounds as more overtly “weird” effects—particularly when they are used in tandem.
I spent a day workshopping ideas in my studio using just the Vox Valvenergy Smooth Impact compressor and Tone Sculptor EQ, and a dash of amp tremolo and reverb to taste. In the process, I produced more arresting sounds than I had heard from my guitars in many days. There were radical direct-to-desk-style Jimmy Page/Beatles distortion tones, sun-sized, cosmic electric 12-string, Bakersfield twang that could burn through crude, and many other sweet and nasty colors. Most decent EQ and compressor combinations can achieve variations on all those themes. But the Smooth Impact and Tone Sculptor also reveal interesting personalities in unexpected places.
The individuality and energy in the Vox Valvenergy pedals is attributable, in part, to the Nutube vacuum tube used in the circuit. Though it looks little like a vacuum tube as most guitarists know them, the thin, wafer-like Nutube is, in fact, a real vacuum tube like those used in fluorescent displays. Fluorescent display tubes have limitations. A maximum operating voltage of around 40 volts means they aren’t useful for bigger power tube applications like a 6L6, which has an operating voltage of about 400 volts. But it can work quite well as a preamp tube in concert with an op amp power section, which is how the Nutube is used in the new Valvenergy pedals, as well as older Vox products like the Vox MV50 and Superbeetle amps.
Valvenergy Tone Sculptor
When you think about “cinematic” effects, you likely imagine big reverb or modulation sounds that create a vivid picture and feeling of space or motion. But narrow, hyper-focused EQ profiles can evoke very different and equally powerful images. Radical EQ settings can add aggression, claustrophobic intimacy, and stark, explosive dark-and-light contrasts more evocative of Hitchcock’s Psycho than Ridley Scott’s Blade Runner.
Any of these moods can be summoned from the Valvenergy Tone Sculptor. Six sliders cut or boost 10 dB frequency bands spanning 100 Hz to 5.6 kHz. A seventh slider cuts or boosts the master output by 12 dB. This platter of options might not sound like much. But you can use these seven controls together to very specific ends.
“Radical EQ settings can add aggression, near-claustrophobic intimacy, and stark, explosive dark-and-light contrasts.”
For example, bumping the high-midrange and the master output produces narrow cocked-wah-like filter sounds with enough push to produce extra amp overdrive—effectively turning the Tone Sculptor into a buzzy, almost fuzz-like filter effect. But unlike a wah, you can carefully scoop high end or add a spoonful of bass to blunt harsh frequencies or give the tone a bit more weight. You can also broaden the palette of an amp/guitar pairing. I matched a particularly trebly Jazzmaster bridge pickup with a very hot and toppy Vox AC15-flavored amp for this test—a recipe that can be spiky on the best days. But with the Tone Sculptor in the line, I could utilize the same sharp, fuzzy, and filtered Mick Ronson wah tones while shaving some of the most piercing frequencies.
EQ pedals exist on many points along the cost spectrum. And at $219, the Tone Sculptor lives on the high side of the affordable range. Does it offer something less expensive models can’t deliver? Well, for one thing, I found it relatively quiet, which is nice whether you’re shaping toppy high-contrast effects or performing more surgical adjustments. And the sliders feel nuanced and nicely tapered rather than like a dull axe with a few basic frequency notches. But in many situations I also liked the color imparted by the circuit—generated, presumably, by the Nutube. “Color,” in audio terms, is a broad and subjective thing, and one should not necessarily expect the warm, tube-y glow of a vintage tube Pultec. Still, the Tone Sculptor has many forgiving, flattering qualities—typical of studio EQs—that enable fine tuning and experimentation with more radical and creative applications of the effect.
Valvenergy Smooth Impact
As with the Tone Sculptor, the Smooth Impact’s use of Nutube engenders certain expectations. It’s easy to surmise that because Smooth Impact has a vacuum tube in the circuit that it will behave like a little Teletronix LA-2A leveling amplifier. That’s a big ask for a $219 stompbox. On the other hand, the Smooth Impact exhibits some appealing characteristics of studio tube compression. At lower compression levels, it works well as a thickening agent—adding mass without much additional noise. And at higher compression levels it can sound snappy, crisp, and tight without feeling like you’ve bled every trace of overtone from your signal.
The Smooth Impact’s controls aren’t totally atypical. But because it lacks some familiar features like variable attack and release, yet is more complicated than a 1-knob DynaComp, you have to trust your ear to navigate interactions among the controls. The most unfamiliar of these is the 3-way vintage/natural/sag toggle. The first two are defined by preset attack and release settings: Vintage is slow attack and long release, and natural is the opposite. The sag mode’s compression is more like what you get from tube saturation, and it’s useful for adding thickness and complexity to a thin amp tone at modest compression levels.
Though the vintage and natural modes certainly have a different feel, they don’t always sound worlds apart. And like the sag mode, the thing they have in common is the way they enrich lifeless amp output at low to medium compression, with a bit of grind from the tube gain and a little extra makeup gain from the output. At the most aggressive settings, the tube gain can get a little crispy. And really crushing the compression can flatline your tone without adding much in the way of extra sustain. These are limitations common to many compressors with similar features. But unless I was chasing very ultra-snappy Prince and Nile Rodgers fast-funk caricatures, I enjoyed the Smooth Impact most in its in-between ranges, where mass, mild, harmonious drive, and low noise showcase the pedal’s sometimes studio-like personality.
Significantly smaller and lighter than original TAE. Easy to configure and operate. Great value. Streamlined control set.
Air Feel Level control takes the place of more surgical and realistic resonance controls. Seventy watts less power in onboard power amp. No Bluetooth connectivity with desktop app.
$699
Boss Waza Tube Amp Expander Core
Boss streamlines the size, features, and price of the already excellent Waza Tube Expander with little sacrifice in functionality.
Many of our younger selves would struggle to understand the urge—indeed, the need—to play quieter. My first real confrontation with this ever-more-present reality arrived when Covid came to town. For many months, I could only sneak into my studio space late at night to jam or review anything loud. Ultimately, the thing that made it possible to create and do my job in my little apartment was a reactive load box (in this case, a Universal Audio OX). I set up a Bassman head next to my desk and, with the help of the OX, did the work of a gear editor as well as recorded several very cathartic heavy jams, with the Bassman up to 10, that left my neighbors none the wiser.
Boss’ firstWaza Tube Amp Expander, built with an integrated power amp that enables boosted signal as well as attenuated sounds, was and remains the OX’s main competition. Both products have copious merits but, at $1,299 (Boss) and $1,499 (Universal Audio), each is expensive. And while both units are relatively compact, they aren’t gear most folks casually toss in a backpack on the way out the door. The new Waza Tube Expander Core, however, just might be. And though it sacrifices some refinements for smaller size, its much-more accessible price and strong, streamlined fundamental capabilities make it a load-box alternative that could sway skeptics.
Micro Manager
The TAE Core is around 7 1/2" wide, just over 7 " long, and fewer than 4 " tall, including the rubber feet. That’s about half the width of an original TAE or OX. The practical upside of this size reduction is obvious and will probably compel a lot of players to use the unit in situations in which they’d leave a full-size TAE at home. The streamlined design is another source of comfort. With just five knobs on its face, the TAE Core has fewer controls and is easier to use than many stompboxes. In fact, the most complicated part of integrating the TAE Core to your rig might be downloading the necessary drivers and related apps.
Connectivity is straightforward, though there are some limitations. You can use TAE Core wirelessly with an iOS or Windows tablet or smartphone, as long as you have the BT-DUAL adaptor (which is not included and sets you back around 40 bucks). However, while desktop computers recognize the TAE Core as a Bluetooth-enabled device, you cannot use the unit wirelessly with those machines. Instead, you have to connect the TAE Core via USB. In a perfectly ordered world, that’s not a big problem. But if you use the TAE Core in a small studio—where one less cable is one less headache—or you prefer to interface with the TAE Core app on a desktop where you can toggle fast and easily between large, multi-track sessions and the app, the inability to work wirelessly on a desktop can be a distraction. The upside is that the TAE Core app itself is, functionally and visually, almost identical in mobile and desktop versions, enabling you to select and drag and drop virtual microphones into position, add delay, reverb, compression, and EQ effects, choose various cabinets with different speaker configurations and sizes, and introduce new rigs and impulse responses to a tone recipe in a flash. And though the TAE Core app lacks some of the photorealistic panache and configuration options in the OX app, the TAE Core’s app is just as intuitive.Less Is More
One nice thing about the TAE Core’s more approachable $699 price is that you don’t have to feel too bad on nights that you “underutilize” the unit and employ it as an attenuator alone. In this role, the TAE Core excels. Even significantly attenuated sounds retain the color and essence of the source tone. Like any attenuator-type device, you will sacrifice touch sensitivity and dynamics at a certain volume level, yielding a sense of disconnection between fingers, gut, guitar, and amp. But if you’re tracking “big” sounds in a small space, you can generate massive-sounding ones without interfacing with an amp modeler and flat-response monitors, which is a joy in my book. And again, there’s the TAE Core’s ability to “expand” as well as attenuate, which means you can use the TAE Core’s 30-watt onboard power amp to amplify the signal from, say, a 5-watt Fender Champion 600 with a 6" speaker, route it to a 2x12, 4x12, or virtual equivalent in the app, and leave your bandmate with the Twin Reverb and bad attitude utterly perplexed.
The Verdict
Opting for the simpler, thriftier TAE Core requires a few sacrifices. Power users that grew accustomed to the original TAE’s super-tunable “resonance-Z” and “presence-Z” controls, which aped signal-chain impedance relationships with sharp precision, will have to make do with the simpler but still very effective stack and combo options and the “air feel level” spatial ambience control.The DC power jack is less robust. It features only MIDI-in rather than MIDI-in/-through/-out jacks, and, significantly, 70 watts less power in the onboard power amp. But from my perspective, the Core is no less “professional” in terms of what it can achieve on a stage or in a studio of any size. Its more modest feature set and dimensions are, in my estimation, utility enhancements as much as limitations. If greater power and MIDI connectivity are essentials, then the extra 600 bones for the original TAE will be worth the price. For many of us, though, the mix of value, operational efficiencies, and the less-encumbered path to sound creation built into the TAE Core will represent a welcome sweet spot that makes dabbling in this very useful technology an appealing, practical proposition.
IK Multimedia is pleased to announce the release of new premium content for all TONEX users, available today through the IK Product Manager.
The latest TONEX Factory Content v2 expands the creative arsenal with a brand-new collection of Tone Models captured at the highest quality and presets optimized for live performance. TONEX Tone Models are unique captures of rigs dialed into a specific sweet spot. TONEX presets are used for performance and recording, combining Tone Models with added TONEX FX, EQ, and compression.
Who Gets What:
TONEX Pedal
- 150 crafted presets matched to 150 Premium Tone Models
- A/B/C layout for instant access to clean, drive, and lead tones
- 30 Banks: Amp & cab presets from classic cleans to crushing high-gain
- 5 Banks: FX-driven presets featuring the 8 new TONEX FX
- 5 Banks: Amp-only presets for integrating external IRs, VIR™, or amps
- 5 Banks: Stompbox presets of new overdrive/distortion pedals
- 5 Banks: Bass amp & pedal presets to cover and bass style
TONEX Mac/PC
- 106 new Premium Tone Models + 9 refined classics for TONEX MAX
- 20 new Premium Tone Models for TONEX and TONEX SE
TONEX ONE
- A selection of 20 expertly crafted presets from the list above
- Easy to explore and customize with the new TONEX Editor
Gig-ready Tones
For the TONEX Pedal, the first 30 banks deliver an expansive range of amp & cab tones, covering everything from dynamic cleans to brutal high-gain distortion. Each bank features legendary amplifiers paired with cabs such as a Marshall 1960, ENGL E412V, EVH 412ST and MESA Boogie 4x12 4FB, ensuring a diverse tonal palette. For some extremely high-gain tones, these amps have been boosted with classic pedals like the Ibanez TS9, MXR Timmy, ProCo RAT, and more, pushing them into new sonic territories.
Combined with New FX
The following 5 banks of 15 presets explore the depth of TONEX's latest effects. There's everything from the rich tremolo on a tweed amp to the surf tones of the new Spring 4 reverb. Users can also enjoy warm tape slapback with dotted 8th delays or push boundaries with LCR delay configurations for immersive, stereo-spanning echoes. Further, presets include iconic flanger sweeps, dynamic modulation, expansive chorus, stereo panning, and ambient reverbs to create cinematic soundscapes.
Versatile Control
The TONEX Pedal's A, B, and C footswitches make navigating these presets easy. Slot A delivers clean, smooth tones, Slot B adds crunch and drive, and Slot C pushes into high-gain or lead territory. Five dedicated amp-only banks provide a rich foundation of tones for players looking to integrate external IRs or run directly into a power amp. These amp-only captures span clean, drive, and high-gain categories, offering flexibility to sculpt the sound further with IRs or a real cab.
Must-have Stompboxes
TONEX Pedals are ideal for adding classic effects to any pedalboard. The next 5 banks focus on stompbox captures, showcasing 15 legendary overdrive, distortion, and fuzz pedals. This collection includes iconic models based on the Fulltone Full-Drive 2, Marshall DriveMaster, Maxon OD808, Klon Centaur, ProCo RAT, and more.
For Bass Players, Too
The last 5 banks are reserved for bass players, including a selection of amp & cab Tone Models alongside a few iconic pedals. Specifically, there are Tone Models based on the Ampeg SVT-2 PRO, Gallien-Krueger 800RB, and Aguilar DB750, alongside essential bass pedals based on the Tech21 SansAmp, Darkglass B7K and EHX Big Muff. Whether it's warm vintage thump, modern punch, or extreme grit, these presets ensure that bassists have the depth, clarity and power they need for any playing style.For more information and instructions on how to get the new Factory
Content v2 for TONEX, please visit:
www.ikmultimedia.com/products/tonex