Having endured for more than half a century—and still going strong—the venerable Stratocaster has delivered great tone to generations of guitarists. One of the instrument's strengths is how easily it can be adjusted to suit different playing techniques and musical styles.
Here's a case in point: Recently a client brought me his 1993 Strat (Photo 1) for a setup. His primary concern was that he was having a problem staying in tune, especially when bending one string while holding another. While we were discussing this, he revealed he rarely used the tremolo and kept the bar swung back out of the way when he played. Based on this, I recommended he allow me to lock his tremolo down—or "deck" it against the body. I knew this would resolve many of the tuning issues he was having. He agreed and I proceeded with the relatively simple project described below.
If you're a Strat player who doesn't find much utility in the trem system, you might consider doing this too. This tweak isn't for everyone—many Strat players feel the trem provides much of the guitar's magic. But there are also those who play a Strat because they love its pickups, scale length, weight, and feel, but prefer the stability of having its bridge locked down tight against the body. Some even swear this increases sustain.
Fortunately, it's a reversible mod, so you can try it out and see for yourself. If the tuning advantages outweigh losing whammy capability, great. If you find you miss your trem, you can always return to a floating bridge setup. (I explain that process in the DIY video "How to Float a Strat Trem.")
Evaluating the guitar.
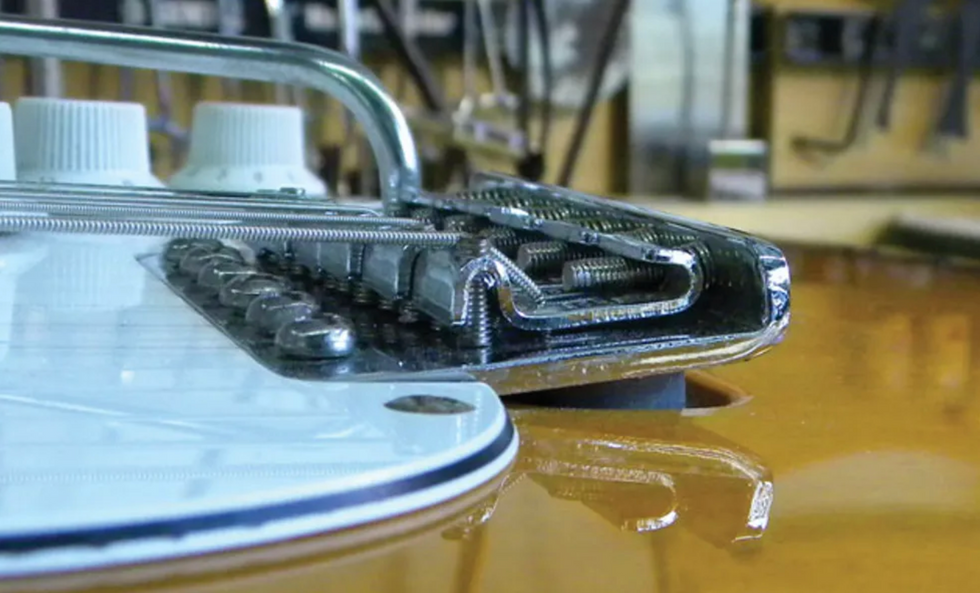
Photo 2
This Strat had spent some time on the road, but it was in good shape. It had a vintage-style, six-screw bridge—not the two-post design of modern Strats. I noticed there were only two springs holding the tremolo to the claw, which explained why the bridge was tilting forward so much (Photo 2).
It's crucial to know the intended tuning and string gauges before you set up a Strat. My client explained he strings up with .010-.046 sets and tunes to standard pitch (unlike some Strat players who tune down a half-step à la Hendrix and Stevie Ray Vaughan).
Getting started.
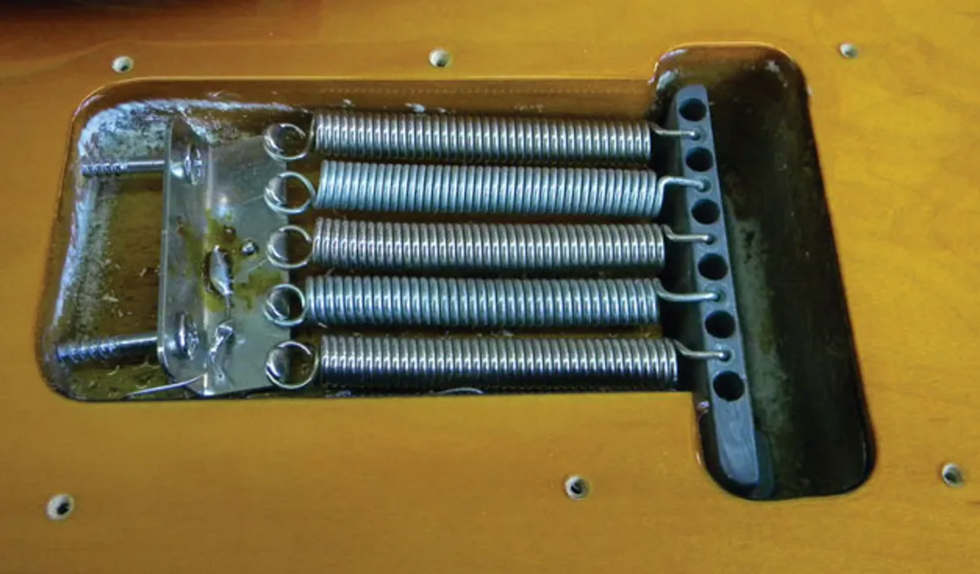
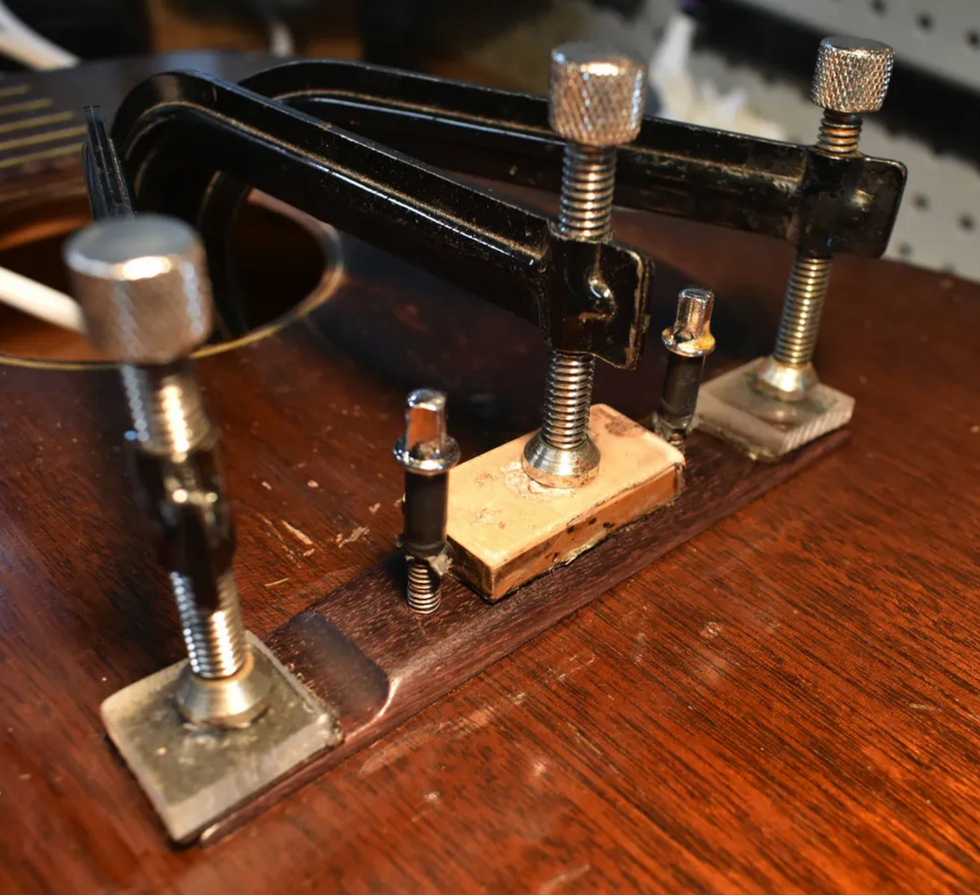
Photo 3
Getting started. The first step is to remove the cover plate on the back so you can access the claw and trem springs. To provide maximum stability, I added three more springs to the claw (Photo 3) and then used a Phillips screwdriver to move the claw toward the body and tighten the five springs (Photo 4).
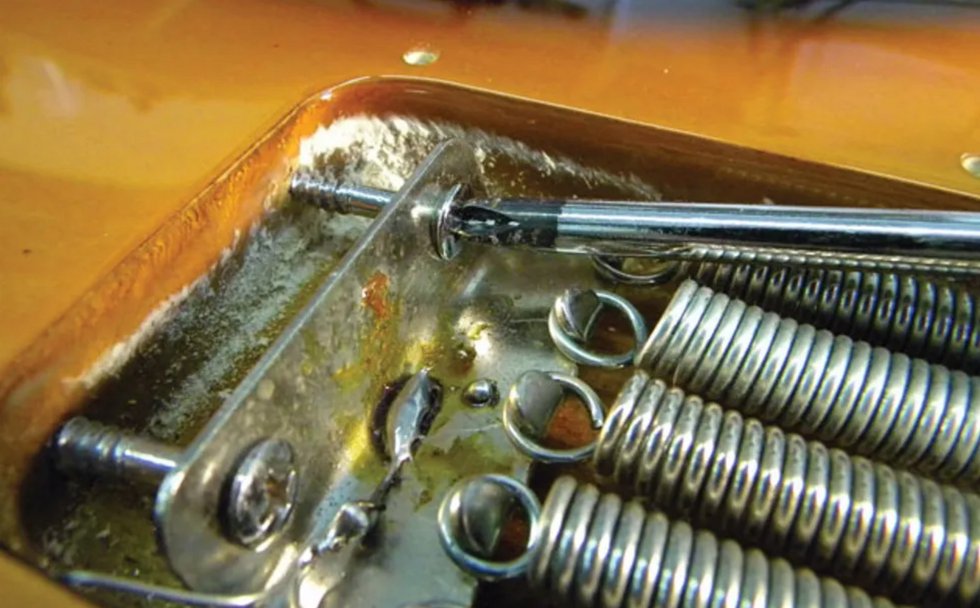
Photo 4
The goal is to tighten the springs enough so the tremolo doesn't move when you bend a string. At this point, we're just roughing in the spring tension—we'll come back and fine-tune it in a moment.
Tip: Remember to tune the guitar after every adjustment. If you neglect to do this, you may have to redo your work. This holds true for every step of a setup, including adjusting a truss rod, setting saddle height, and intonating the strings.
Take it to the bridge!
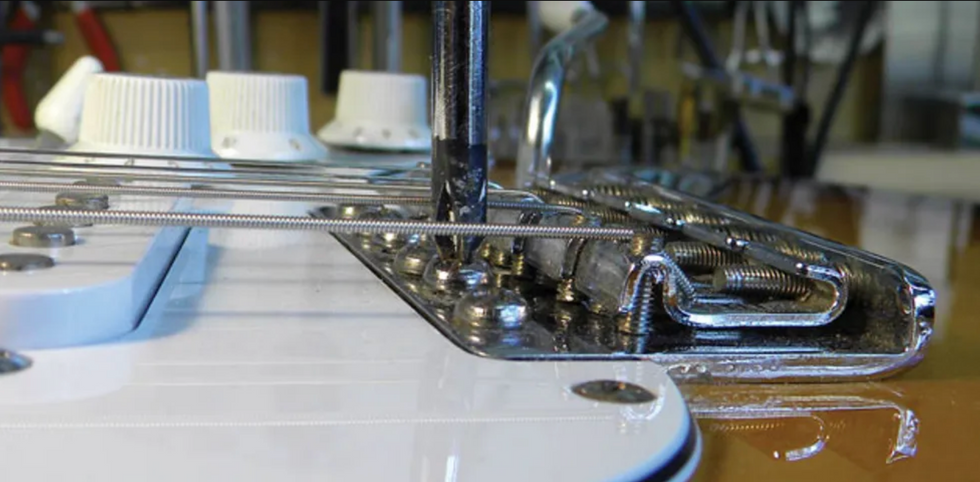
Photo 5
Next, turn the guitar over and make sure the six mounting screws holding the tremolo to the body are all adjusted flush to the bridge plate (Photo 5). Don't tighten them too much, otherwise the tremolo will rock forward on its beveled edge. Lower each screw just enough for the bridge plate to sit flat and flush with the body.
Testing one, two.
Tune up and test the spring tension by bending the strings. Does the trem move at all? If so, tighten the claw a bit closer to the body. Hold a note on one string and bend another against it. You want the held note to stay in tune as you bend the other string. Keep in mind that some guitar necks flex a bit when you bend a string and this will subtly affect the tuning. In this case, we're only paying attention to the tremolo to see if it rocks forward when bending strings.
Be patient: You may need to tighten the springs several times before the trem stays rock solid when you bend. Remember to always tune after every adjustment. Once the trem is secured flush to the body and doesn't tilt forward when you bend strings, it's time to move to the final setup stage.
Adjust the saddles.
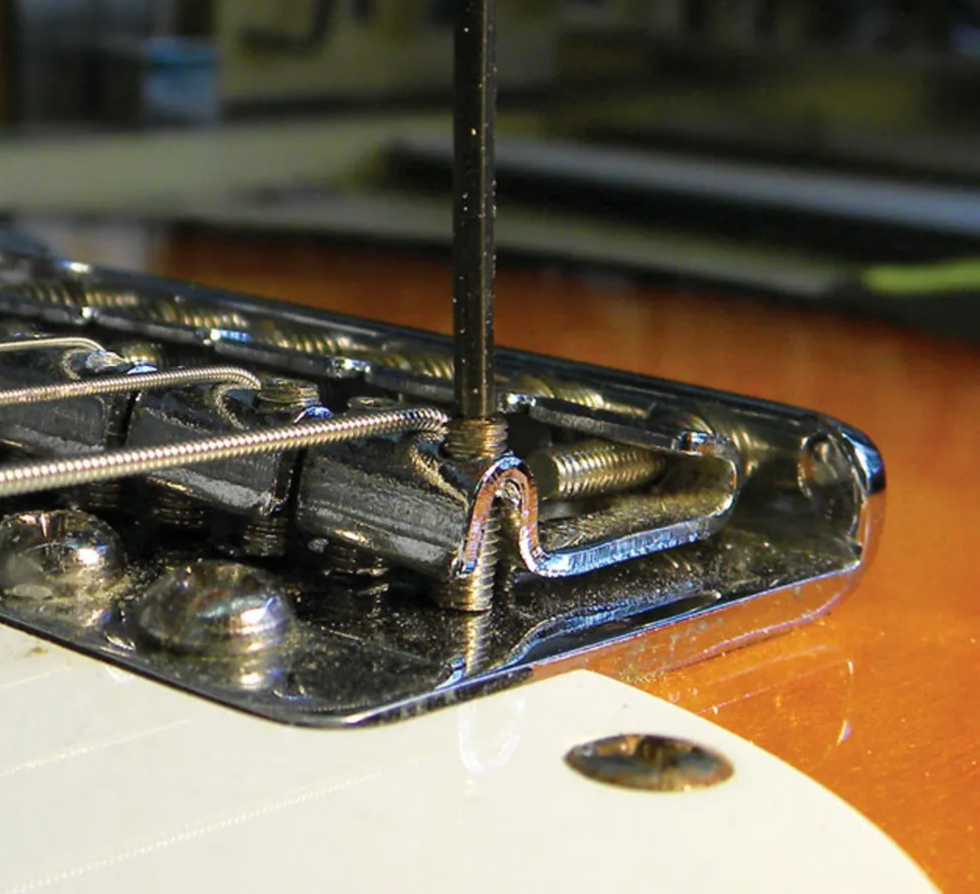
Photo 6
Now adjust the action at the bridge saddles. Using an Allen wrench, adjust the two screws to position each saddle to your preferred height (Photo 6). Make sure each saddle stays level and doesn't tilt, and adjust the saddles in a gentle arc that matches the fretboard radius. I explain this operation in "How to Set Up a Fender Stratocaster."
Final setup.
After decking the trem and adjusting the action, the strings may be sitting too close to the pickups and this can negatively affect intonation. So we have to check the pickup height before doing anything else. If you want to brush up on this, read "How to Balance Pickups on Strats and Teles."
After adjusting the pickups, then tackle the intonation. Again, I detail this process in "How to Set Up a Fender Stratocaster."
Beware of Stripped Screw Holes
Occasionally when locking down a Strat trem I've encountered worn out screw holes, either at the spring claw or bridge plate. Stripped-out holes must be doweled and re-drilled, otherwise the screws will continue to strip out more wood and will eventually slip out of the hole. Last year I wrote a column about fixing stripped-out holes for pickguard screws, and the same principles apply here, although in this case the holes are bigger and require a slightly larger dowel. Check out "Got a Loose Screw?" for complete details. Remember, if you don't have the proper tools or knowledge to correctly do this—or any guitar job—play it safe and consult your local guitar tech.
Tip: Always put fresh strings on your guitar before you adjust the intonation.
All right—that's it! You've now locked down your trem and should have a much easier time keeping your guitar in tune.
[Updated 9/24/21]