Welcome back to Mod Garage. I’ve wanted to cover this topic for a long time, but to be honest, I didn’t dare because it seems so trivial. I’m sure a lot of you already have a natural routine to assess tuning, but I receive guitars daily for repairs, and enhancing tuning stability is something I hear about a lot—on electric as well as acoustic guitars. There are many reasons why a guitar has problems staying in tune, but today we’ll discuss the simplest one: the strings.
A column about strings? Now he’s crazy, you might say. Believe it or not, on eight out of 10 guitars with tuning problems, it turns out this is caused by the strings themselves and/or the way the strings were installed. For some guitars, the nut or the saddle/tremolo is causing problems; others have problems with the tuners or worn-out bridge pins on acoustic guitars, string trees, etc. But bad strings and exotic ways to install them are reason No. 1 for tuning problems. Let’s have a deeper look into what happens here and what can be done.
“The more windings you have on your posts, the greater the chance for tuning problems.”
Over the years I’ve seen the craziest things people do with their strings. Here are some simple guidelines for you to combat tuning problems, whether it’s an electric or acoustic guitar, or if it has steel or nylon strings.
Possible Problem No. 1: The Strings Themselves
You all know this “problem” when setting up new strings on a guitar: After getting them in tune and playing for a minute, you need to tune them again, and this will last for some time, depending on the material of the strings. This is normal when strings are getting stretched for the first time; they’ll stay in tune after they’ve settled. Here are some hints to get around this:
1. Stretching the strings several times after setting them up by simply pulling them upwards with your hands will speed up this process noticeably. There are also tools for this called string stretchers, but you can simply do it with your hands. This is called pre-stretching and is very simple to do. As a rule of thumb, steel strings will settle sooner than nylon strings.
2. A customer bought “pre-stretched strings” and brought them in so I could try a set of these in the shop. I could notice no difference other than the price, but I wanted to mention that such sets exist.
3. Cryogenic-treated string sets may stay in tune faster right from the start. This treatment is widely used to remove tension, especially out of metal parts—like on high-precision components for racing engines. This might work on steel strings, but I have my doubts that it will work on nylon strings. Funny enough, I’ve never read about tuning improvement on any cryogenic-treated string set, but a lot is mentioned about how good they sound, how long they will last, etc. It’s up to you if these strings sound any different from other string sets. Give it a try. In time, each string set should stay in tune without any problems, no matter what method you use to speed things up.
“Cryogenic-treated string sets may stay in tune faster right from the start.”
Some time ago, I had a British-made Burns guitar from the ’60s on the workbench that was still equipped with the original flatwound string set it came with from the factory. These strings were perfectly in tune after almost 60 years. If the strings aren’t damaged, there should be no problem. A problem I regularly see is that completely new string sets have a rotten egg under the hood, caused by problems during manufacturing. From my experience, it’s mostly steel strings of certain brands and very often the G string, but I’ve also had bad D and B strings out of the box. With such strings, no matter what you try, you can’t get them in tune, and you’ll see they have an unnatural pattern of movement. I have no idea what causes this problem during manufacturing, but just keep this in mind if you run into tuning issues with a new set of strings. The solution is simple: Replace the bad string or the whole set with a new one.
Possible Problem No. 2: The More, the Merrier
Many people think it’s right and important to wind up the complete string length so it can stay in tune better because of the many windings, adding stability (Photo 1). Exactly the opposite is true. The more windings you have on your post, the greater the chance for tuning problems. Getting as few windings as possible on the post is the way to go. Have a look at a locking tuner. They have zero windings on the post for the best possible tuning stability. We’ll talk about how to do this in a minute. The best and funniest statement I’ve heard over the years was from a customer, when I tried to explain that it’s not a good idea to wind up the complete string length. He explained he’ll continue doing this because the manufacturer has good reasons to choose this length. I suppose somebody must do whatever makes somebody happy.
Possible Problem No. 3: Loose Tuners
Whenever you change your strings, make sure all screws and hex nuts from your tuners are tight. With a loose and moving tuner you’ll not only have tuning problems, but it’s also a common source for strange noises you can even hear in the amplified tone of a guitar. Sounds trivial but it’s important.
Possible Problem No. 4: Improper String Installation
This is by far the most common problem, and everyone has their own way of stringing up guitars. Some are superior to others. I don’t say my method I use in the shop is the best and only way that works. But over the years I tried a lot of different methods and the one I want to show and recommend to you is the best-working one for me. It incorporates what we just talked about: putting the least windings possible on the post for maximum tuning stability, mimicking the way a locking tuner works. This works on all standard tuners and is very easy to learn, so give it a try.
If you don’t want to compromise, there is no way around using locking tuners on your guitar. But if locking tuners are 10/10, the winding method that follows is 8.5/10, which is not bad at all.
I’m showing the winding method on an acoustic guitar with a 3/3 tuner configuration, but it also works with a 6L or 6R tuner configuration. It won’t work with the ’50s vintage Kluson types you often see on Stratocasters and Telecasters because there is no string hole on the post other than the one on top.
1. Position the post of the tuner so the string hole will be in line with the corresponding string slot for a string on the nut.
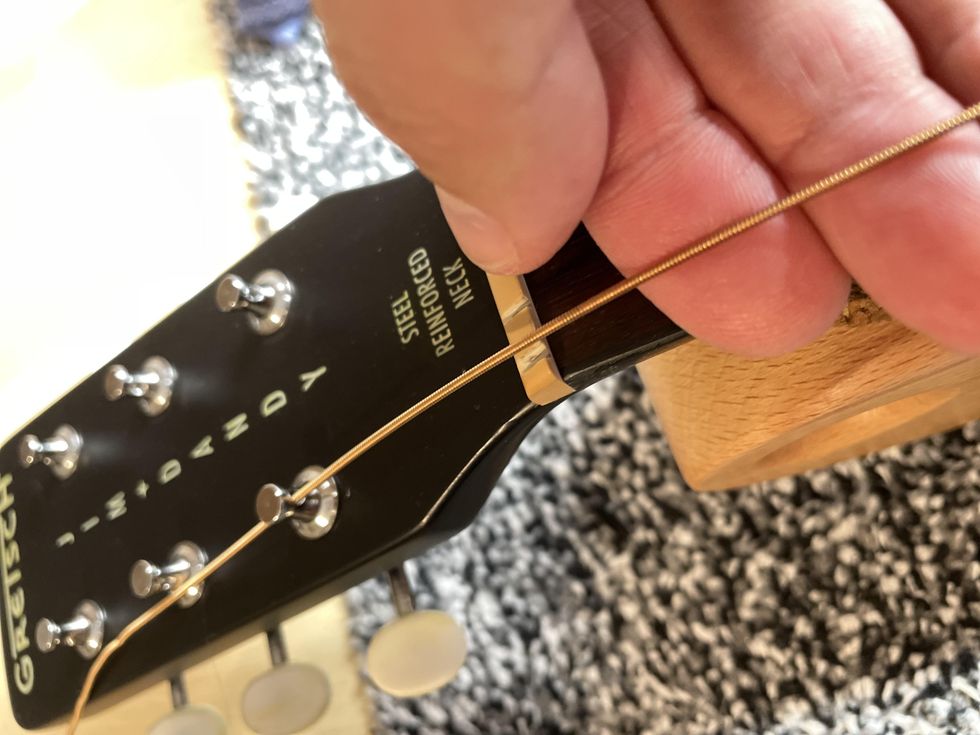
Photo 2
2. Guide the string through the string hole of the post and leave only a little slack. As a guideline, if you can put the fingers of your right hand underneath the strings, that’s enough. Now, use a finger of your right hand and lock the string after the nut, leaving a little slack lying on the fretboard (Photo 2). I like to snip off a good portion of the rest of the string at this point, to make the following process easier. But you can also leave it full length until you’re finished—whatever you like best.
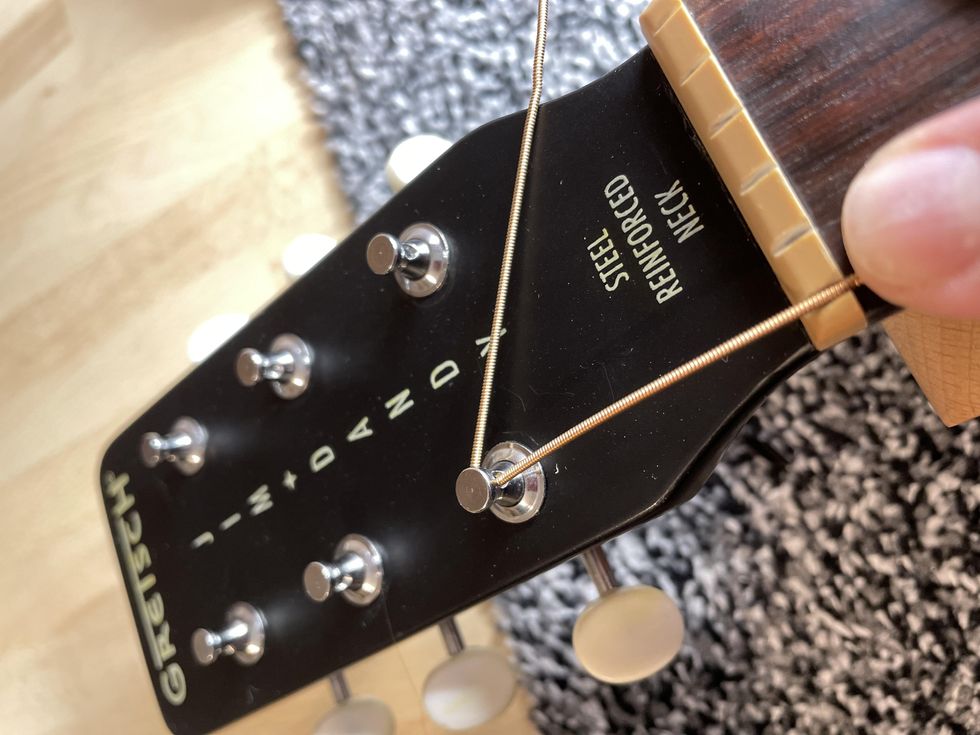
Photo 3
3. Bend the rest of the string around the post sharply so it will form a “V.” Don’t forget to still keep the string locked with a finger (Photo 3).
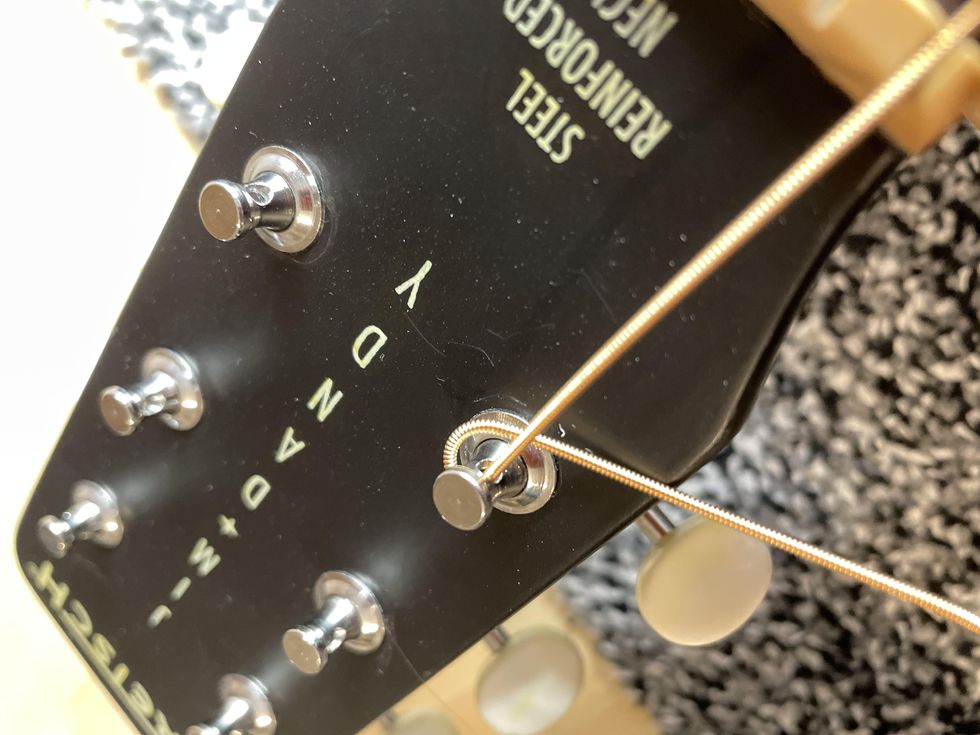
Photo 4
4. Next, put the rest of the string underneath the string, pressing it firmly against the post, still locking the string with your finger, and bend it over the string (Photo 4 and Photo 5).
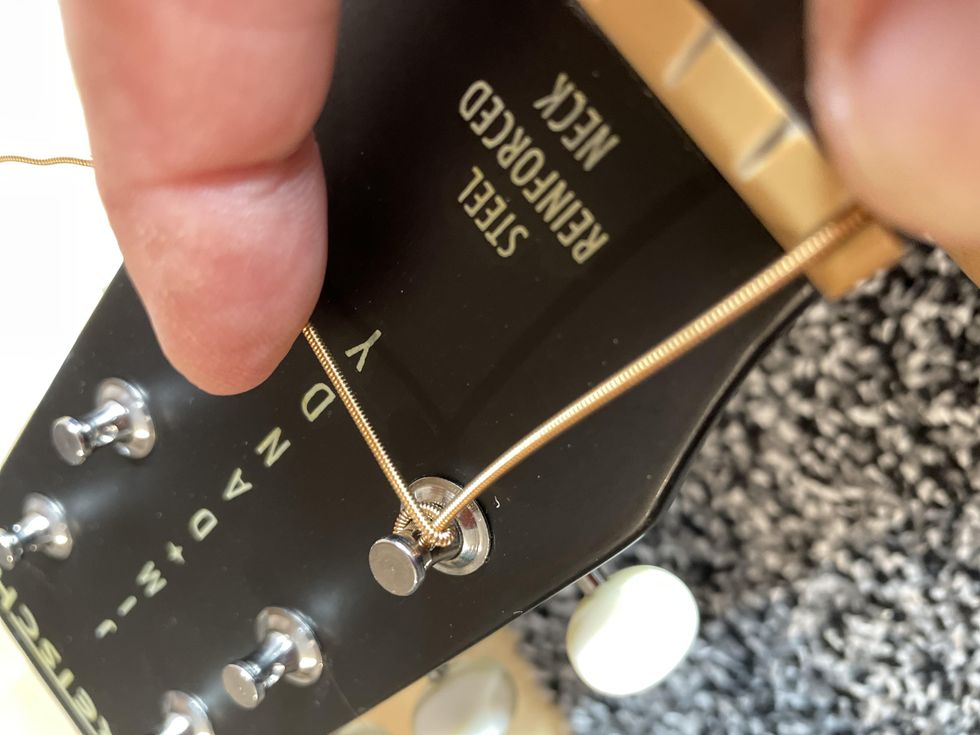
Photo 5
5. Tune up your string and release the finger you used to lock the string. You’ll only need a very small movement of the tuner to get the string up to tune, so this is something you’ll have to get used to. Cut off the rest of the string and you’re done (Photo 6).
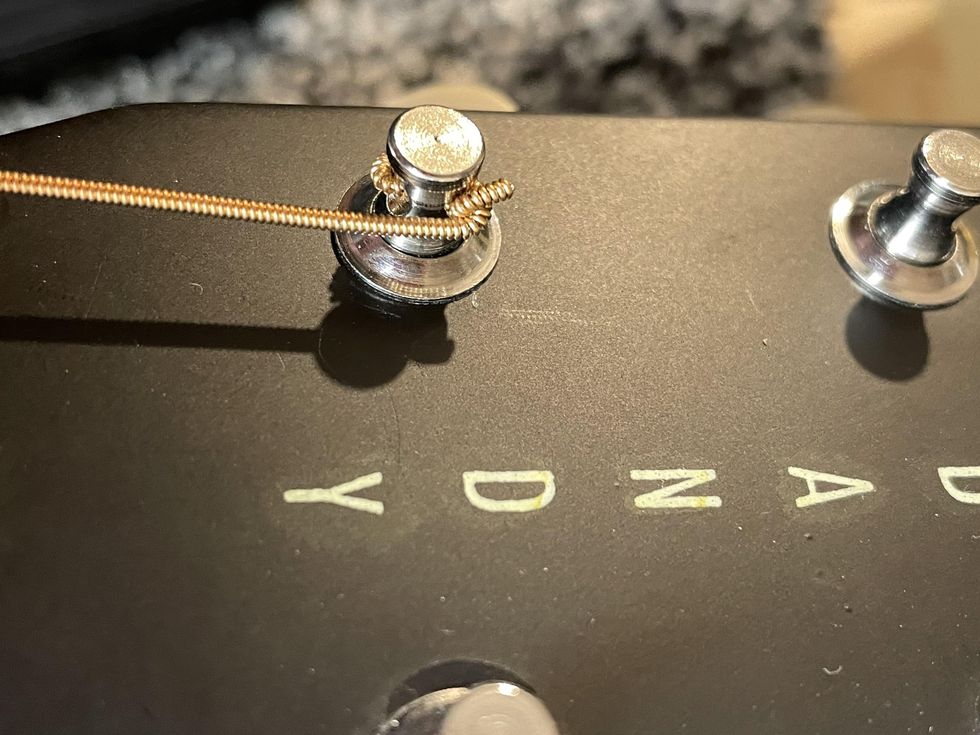
Photo 6
On a 6-in-line tuner configuration, you can proceed with the other strings as shown. With a 3/3 configuration, you’ll have to mirror the process with the G, B, and high-E string. The rule of thumb is the rest of the string is always bent towards the middle of the headstock to create the “V.”
It’s very simple to do and very effective. It’s also important to lock the string with your finger during the whole process until it’s up to tune.
When you have a guitar that won’t stay in tune, chances are good that this is all you need to do. If this doesn’t help, at least you did everything that could be done before consulting your local luthier. And your luthier will be impressed about your troubleshooting, for sure. It will save them some time troubleshooting and it’ll save you some bucks, too.
Next month we’ll finally finish our DIY relic’ing project, so stay tuned.
Until then ... keep on modding!


