When it comes to cosmic tone, it’s critical to have functional potentiometers. Here’s how to install them correctly and keep them ship-shape afterward.
(Originally published March 27, 2020)
Over the last few years, we've discussed the construction of potentiometers and diagnosed several potential problems with these essential, yet sometimes pesky, electric guitar components. (If you missed these, check out “The Trouble with Tribbles" and “Dealing with Knobs and Pots.")
Let's now consider problems that can occur when replacing pots, and then discuss ways to either avoid or solve these potential issues. Over the years I've analyzed virtual cries for help from hundreds of customers, and as a result I can safely say that non-working pots fall into one of two categories that account for essentially 100 percent of the problems: (1) mechanical damage while installing the pots, or (2) soldering damage when wiring them up. It's very, very rare that a pot comes DOA from the factory. Reputable manufactures have quality control systems to prevent this, so it's almost guaranteed that a problem with a potentiometer has to do with the end user. So let's take a look at these two scenarios.
Mechanical damage.
In this case, the most common damage is caused by overtightening the nuts, especially when installing pots into a guitar with a stiff wooden top like a Les Paul.When installing pots, forget the adage "the more, the merrier." Instead, keep this in mind: The next level beyond "tight" and "super-tight" is "broken." Guitar pots don't have to handle a lot of weight or withstand a nuclear strike, so they should only be screwed down tight enough to remain immobile when you rotate the knobs.
First and foremost, it's essential that you install the pots correctly. This might sound obvious or trivial, but you can't imagine how many guitars I've seen where pots have been installed in, shall we say, unusually creative ways.
Here's how to do it right: The first step is to slip the lock washer onto the pot shaft and then insert the shaft through the hole in your guitar's pickguard or top. With the shaft protruding through the other side, now put the flash washer on the shaft, followed by the hex nut, which you can initially thread with your fingers. Finally, use a socket wrench, small adjustable wrench, or an ESP Multi Spanner to carefully tighten the hex nut until it's snug against the washer and doesn't turn anymore.
If you discover that the pot sits too high on your pickguard or guitar top, you'll need to remove the pot and start over by first threading another hex nut on the shaft, followed by the lock washer, and then repeating the installation process. This "underside" hex nut will let you adjust the height of the pot to your individual wishes. Simply insert the shaft through the pickguard or top, eyeball the height, and adjust the hidden hex nut up or down on the pot threads as needed. Finally, add the flash washer and exterior hex nut to complete the process. The key here is to always remember the correct order of these parts.
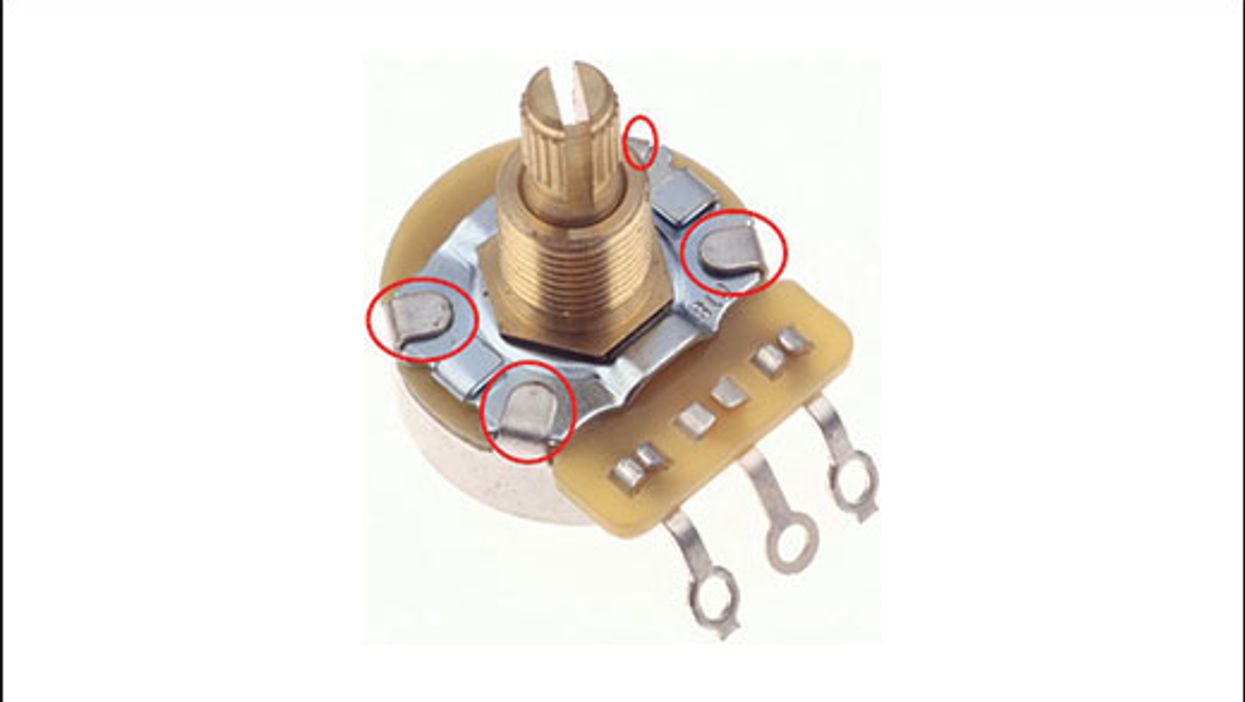
So what happens to a pot when you overtighten it? If the four tiny tabs that hold the little metal plate to the shaft, wiper, etc., are unable to withstand the force applied to the shaft when you torque down the hex nut, they'll bend and let the plate and the shaft rotate freely. Hmm, no good.
But don't worry, it's an easy fix: Use needle-nose pliers or a small flathead screwdriver to gently pull the tabs up a little more so you can rotate the plate and return it to its centered position. Then bend the tabs back into place so they hold the shaft securely (Photo 1). Done!
It's almost guaranteed that a problem with a potentiometer has to do with the end user.
Other mechanical damage is typically caused by trying to remove or install knobs that aren't made for a given pot's shaft. When you try to hammer down a non-fitting knob, you can easily break the shaft by forcing it through the knob bushing. (In most cases, this happens when trying to force a metric knob, measured in millimeters, onto a U.S. pot shaft, measured in fractions of an inch.)
If you try to remove a jammed knob that someone managed to "fit" using brute force—or even attach with superglue—chances are good you'll break the wiper inside the pot and pull out the entire shaft along with the knob.
Yet this is easy to avoid: Never try to force a knob onto the pot shaft; instead use one that fits. If you need to remove an improperly fitted knob, use a heat gun to soften the plastic or a saw to split it open. Don't use any upward or downward pressure—that will ruin the pot, for sure.
Soldering damage.
The easiest way to damage a pot is to overheat it, especially when attaching a ground wire to the back casing. It's a common mistake. When it comes to how long your soldering iron should be in contact with the pot, the golden rule is "as short as possible, but as long as necessary." It takes time to develop this skill, so you'll need to practice. Also, to avoid disaster it's crucial to have the right tools. Here are some helpful guidelines for soldering onto pots.
1. If you don't have a soldering station with an adjustable temperature control, you need at least two different handheld soldering irons: one rated at around 30 watts and the other around 60 watts. This is exactly what I use for any soldering job outside the shop. The 30-watt iron is for soldering on the pot terminals, pickup selector switch terminals, output jack terminals—those common tasks. The 30-watt iron is our daily go-to tool for all things guitar at the shop.
The 60-watt iron is for soldering to pot casings and Stratocaster tremolo claws. Don't try to solder to a pot's case with a 30-watt iron—the solder will need a very long time to flow and you'll expose the pot to a lot of heat. With a 60-watt iron, the solder will flow instantly and soldering time will be very short. This yields strong solder joints.
2. If you want to be on the safe side, remove the case from the pot before you solder to it. That's what I do when I want to avoid damaging vintage pots. To remove the case, gently bend the four metal tabs away from you. To reinstall the case, simply bend the tabs back into place. Take your time and go easy.
3. Always rub the metal casing with 180-grit sandpaper before soldering to it. Manufacturers use all kinds of greasy coatings to protect the case against oxidation, which can make a soldering job close to impossible. So sand the case until it's clean and shiny, and then clean it with naphtha. This will provide the perfect base for a good soldering joint. But don't do this to vintage pots! For those, it's paramount to preserve the patina that comes with age.
4. If you decide not to remove the pot's case, strive to avoid any unnecessary heat. Here are some helpful tips:
- Always turn the pot down to 0 before soldering to its case.
- Use a heat sink on the case. For this job, you'll need something bigger than just a standard clip. To enhance its effect, you can chill the heat sink in the fridge ahead of time.
- If you need to connect one of the terminals to ground, as on most volume pots, don't try to solder the terminal directly to the case by bending it back. This may look cool and vintage, but you'll need a lot of heat and good soldering technique to pull this off. Simply use a piece of solid-core wire and solder it to the terminal and from there to the case—this yields the same performance.
- After tinning the case, let it completely cool down before you solder the wire to it.
5. Don't apply excessive solder to a terminal—it will flow down the terminal's leg and find its way inside the pot.
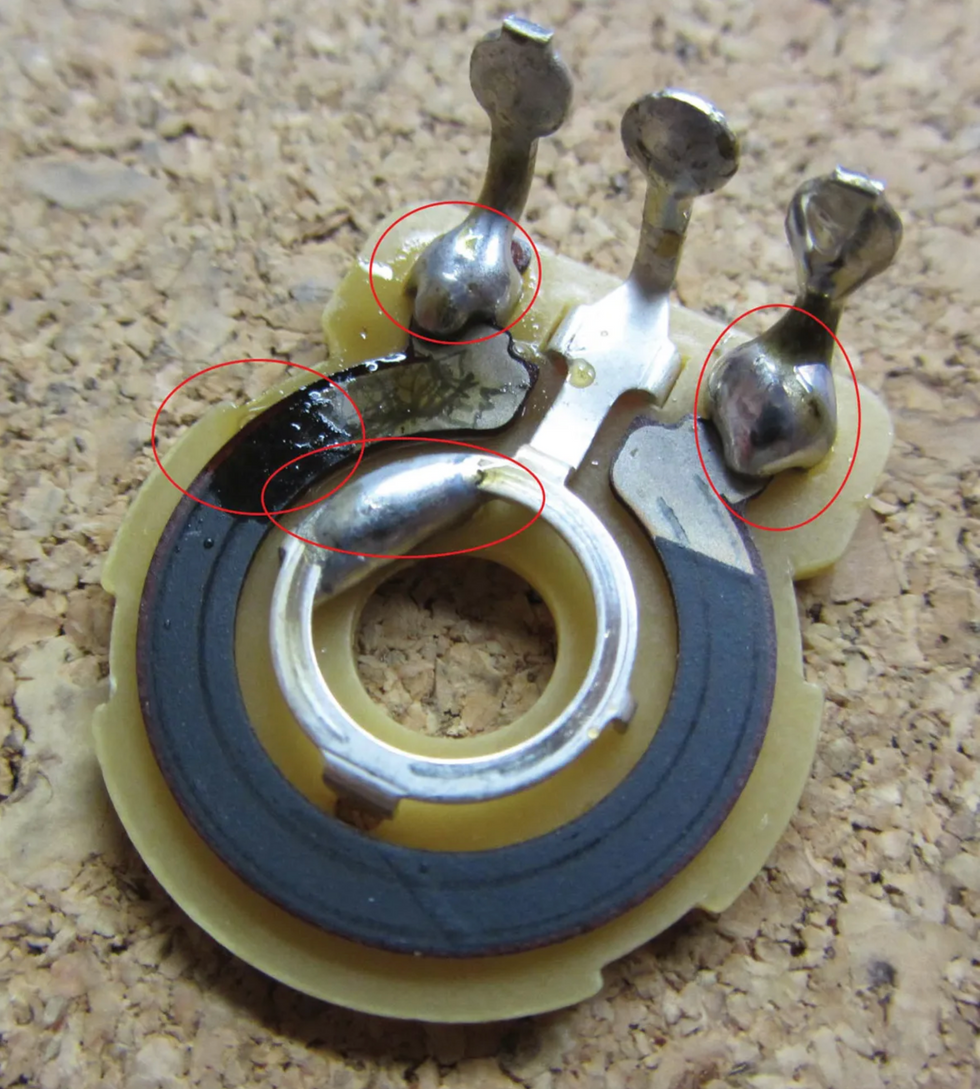
Photo 2 — Photo courtesy singlecoil.com
Photo 2 shows a pot from my "Hall of Shame" collection. Look at the two red marks at the end of the two terminals. These solder blobs are what happen when you apply way too much solder. There's also a big solder blob on the middle terminal's inner ring. How someone managed to get the solder inside there will forever remain a mystery. On the upper left, notice how the carbon is melted and buckled from too much heat. This poor little thing had to endure cruel treatment ... may it rest in peace!
Remember, if you don't solder regularly, there's no shame in having a professional guitar tech do the work for you—especially when you have a vintage guitar and need to work on its original pots. Retaining your guitar's value is an excellent investment. Soldering on pots isn't rocket science, but it requires the right tools, experience, and a steady hand.
Maintaining pots.
These are mechanical devices with a limited lifespan, and it's inevitable they'll start to wear out over time. Yes, it's possible to clean, repair, and renew the carbon inside, but this only makes sense for a vintage pot, not a modern one. Instead of trying to repair the latter, it's more cost-effective to simply replace it.
Typical pots are not completely sealed; they have open areas around the terminals, so moisture and dust can creep inside. To prevent this, you can buy pots that are completely sealed or cover standard pots with an additional dust seal. Usually a guitar's electronic compartment is closed and not directly exposed to contamination, so an additional dust cover isn't necessary for our applications.
Also, there's no need to maintain your pots. At a certain point, they'll begin to wear out and make scratchy noises when you turn them. This means it's replacement time! You can delay this a bit with contact cleaner, but this treatment is only temporary. Contact cleaner is cool for some applications, such as servicing hi-fi equipment, but it can't repair worn-out pots.
My advice? Never use contact cleaner on your pots because the cleaner will attract debris, and when it evaporates you're left with hard, dry crud—something you definitely do not want inside your pot. To combat this, you'll spray more cleaner and thus begin a destructive cycle. This results in replacing the pot much earlier than necessary, exactly the opposite of what you want. We all know the road to hell is paved with good intentions. If a pot is really dusty and making scratchy noises—maybe you took your Tele to Burning Man—the best thing to do is open it up and swab everything with Q-Tips soaked in naphtha.
Finally, when it comes time to replace a pot, pay attention to the specs. Some pots are designed for 2,000 rotations while others are tested to withstand 20,000. You get what you pay for, and this isn't a place to cut corners.
All right! Next month we'll examine the Peavey Omniac JD, Jerry Donahue's signature model T-style, and I'll show you how to transfer its sophisticated wiring scheme to your own guitar. Until then ... keep on modding!
- Three Must-Try Guitar Wiring Mods - Premier Guitar ›
- Mod Garage: Three Ways to Wire a Tone Pot - Premier Guitar ›
- Mod Garage: Dealing with Knobs and Pots - Premier Guitar ›
Vernon Reid's signature Reverend is equipped with Korina, ebony, Railhammer Pickups, and Floyd Rose for punchy tones.
From the vivid imagination of Vernon Reid comes the Totem Series of Reverend Vernon Reid guitars. A sleek body features graphics inspired by Carl Jung's Collective Unconscious Theory, Joseph Campbell's The Hero's Journey, and artists Jean-Michel Basquiat and Romare Beardon. West African Adinkra symbols adorn the pickups and headstock, while American Hobo symbols grace the fretboard. Africana and Americana symbolism meld with profound graphics, conjuring vivid images that speak to humankind's perilous, yet necessary journeys in three different graphic designs: The Talisman, The Mystery Tramp, and The Shaman.
While visually stunning, these instruments are also refined tools of the trade. The recipe of Korina, ebony, and Railhammer Pickups, coupled with the sheer metallic mass of the Floyd Rose, serves up a tone best described as punchy. Harmonics pop, single notes sing, and chords ring with tasty overtones - delivering that knockout punch whether you're playing clean funk or heavy rock. The Reverend Vernon Reid Signature Totem Series guitars are genuinely collectible art pieces that sound and play as amazing as they look.
The Reverend Vernon Reid Signature Totem Series Guitars are now available through any Reverend Authorized Dealer.
For more information, please visit reverendguitars.com.
Ex-B-52s member, composer, and NYC music scene veteran Pat Irwin loves pairing EHX pedals with keyboards—and recollecting good times with his late guitar virtuoso friend.
I’ve got a thing for Electro-Harmonix effects boxes. I’ve got a Crying Tone Wah that’s the coolest, a 16 Second Digital Delay, and a Deluxe Memory Man. All have made their way onto my ambient country band SUSS’s new record, Birds & Beasts. And currently a Big Muff, two Freeze Sound Retainers, and a Mel9 Tape Replay Machine are on my pedalboard. Here’s the thing: I like using them on keyboards.
I remember spending one cold winter night recording keyboards for a track called “Home” that made it onto Promise, the third SUSS album. I was playing a Roland Juno-106 through the Deluxe Memory Man while my bandmate Bob Holmes manipulated the delay and feedback on the pedal in real time. The effect was otherworldly. You can also hear the Crying Tone on SUSS’s “No Man’s Land” and “Train,” on Bandcamp. Sure, the guitars sound great, but those keyboards wouldn’t sound the same without the extra touch of the Crying Tone. I also used it on the B-52s’ “Hallucinating Pluto,” and it went out on the road with us for a while.
One of the first musicians I met when I moved to New York City in the late ’70s was the late, great Robert Quine. Quine and I would talk for hours about guitars, guitarists, and effects. I bought my first Stratocaster from Quine, because he didn’t like the way it looked. I played it on every recording I’ve made since the first Lydia Lunch record, 1980’s Queen Of Siam, and on every show with 8 Eyed Spy, the Raybeats, the B-52s, and my current bands PI Power Trio and SUSS. It was Quine who taught me the power of a good effects pedal and I’ll never forget the sessions for Queen of Siamwith the big band. Quine played everything through his Deluxe Memory Man straight into the recording console, all in one take except for a few touch ups here and there.
Quine and I used to go to Electro-Harmonix on 23rd Street and play through the boxes on display, and they let us pick out what we wanted. It’s where we first saw the 16 Second Digital Delay. That was a life-changer. You could make loops on the fly and reverse them with the flick of a switch. This thing was magical, back then.
“Quine played everything through his Deluxe Memory Man straight into the recording console, all in one take except for a few touch ups."
When I recorded a piece I composed for the choreographer Stephen Petronio and performed it at the Dance Theatre Workshop in Manhattan, I put everything through that 16 Second Digital Delay, including my clarinet. Later, when I recorded the theme for the cartoon Rocko’s Modern Life, I played all of the keyboards through the Deluxe Memory Man. Just when things would get a little too clean, I’d add a little more of the Memory Man.
I’m pretty sure that the first time I saw Devo, Mark Mothersbaugh had some Electro-Harmonix effects boxes taped to his guitar. And I can’t even think of U2 without hearing the Edge and his Deluxe Memory Man. Or seeing Nels Cline for the first time, blowing a hole in the universe with a 16 Second Digital Delay. Bill Frisell had one, too. I remember going into the old Knitting Factory on Houston Street and passing Elliott Sharp. He had just played and I was going in to play. We were both carrying our 16 Second Delays.
Who knows, maybe someone from another generation will make the next “Satisfaction” or “Third Stone from the Sun,” inspired to change the sound of a guitar, keyboard, or even a voice beyond recognition with pedals. If you check out Birds & Beasts, you’ll hear my old—and new—boxes all over it. I know that I won’t ever make a SUSS record or play a SUSS show without them.
Things change, rents go up, records are being made on computers, and who knows how you get your music anymore? But for me, one thing stays the same: the joy of taking a sound and pushing it to a new place, and hearing it go somewhere you could never have imagined without effects pedals.
The legendary Elvis sideman was a pioneer of rockabilly guitar, and his approach to merging blues and country influenced generations of guitar pickers. Here’s how he did it.
Chops: Intermediate
Theory: Beginner
Lesson Overview:
• Craft simple blues-based phrases that lie within the CAGED system.
• Understand how double-stops are used in rockabilly music.
• Improve your Travis picking.
Click here to download a printable PDF of this lesson's notation.
In 2016 we lost one of the most influential guitarists and unsung heroes the world has ever known. The driving force behind Elvis Presley’s first recordings, Winfield Scott “Scotty” Moore III helped shape the sound of rock ’n’ roll and inspire generations of fans. Born in 1931, Scotty caught his big break in 1954 when he was called to do a session with Elvis at Sam Phillip’s Sun Studio in Memphis. History was made that day when Elvis recorded “That’s All Right,” and for about four years, Scotty provided 6-string magic for such Elvis hits as “Heartbreak Hotel,” “Hound Dog,” and “Jailhouse Rock.”
A huge Chet Atkins fan, Scotty grew up listening to country and jazz. This blend would have a dramatic impact on his sound, as he would mix Travis picking with some ear-twisting note choices based on chords, rather than using an obvious scalar approach.
I used a thumbpick on the examples in this lesson to sound as authentic as possible. Using a thumbpick on some notes makes them stand out in comparison to those plucked with the remaining fingertips. Ex. 1 is a classic Scotty-type rhythm riff in E that uses some Travis picking. Play the notes on the 6th and 4th strings with your thumb, and use your index and middle fingers for the double-stops on the 3rd and 2nd strings. This is illustrated in the notation: Attack all the up-stemmed notes with your fingers and down-stemmed notes with your thumb.
Click here for Ex. 1
The next example (Ex. 2) reveals one of the more common elements of Scotty’s lead work: double-stops. It makes sense when you consider that Scotty often performed with just a bass player and drummer, so when it came time to play a solo, he needed to create a strong sense of harmony. The first three phrases begin in the “E” shape of the CAGED system before moving down to the “A” shape and returning to the “E” shape. Those last two measures sit squarely in the “E” shape at the 12th position.
Click here for Ex. 2
Ex. 3 returns to Scotty’s Travis-picking influence by outlining an A chord before leading the idea in a new direction with double-stops. The example begins in the “C” shape and resolves in the “E” shape, though this wouldn’t have meant anything to the legendary guitarist. However, his reliance on moving the five basic chord shapes around the neck is undeniable.
In this version of “Hound Dog”—a song originally recorded by Big Mama Thornton—Moore takes a bluesy solo starting at :45.
Click here for Ex. 3
The blues was an essential part of Scotty’s style, and Ex. 4 shows something he might play over the first eight measures of a blues in E. To use the moves in any given key, it’s important to understand how intervals work within a chord. For example, over the E7, I’m approaching the root and 3 (G#) with a half-step slide. With that information, you’re able to transpose this musical shape all over the neck. Approach each double-stop with this method, and you’ll get a lot of mileage out of this rather simple lick.
Click here for Ex. 4
Ex. 5 shows some of Scotty’s single-note ideas, though the phrase still begins with a double-stop on the top two strings to grab the listener’s attention. Measures three and four use a strange collection of notes. Scotty isn’t thinking of a scale here. The phrase begins with a bluesy flourish and a melodic descent to the root. When he gets there, he moves down a half-step to the 7 (an unusual note to play on a dominant chord, but if it sounds good, it is good), and then up again to resolve to the A chord.
Click here for Ex. 5
Scotty was also a big fan of using three-note grips. In Ex. 6, you can see how these ear-grabbing sounds would work over our blues progression. It begins with an E triad in the “D” shape. It’s genuinely amazing how many great chordal licks Scotty could come up with by using just a few chord forms.
Click here for Ex. 6
Ex. 7 is a little trickier, but a great example of how to move from an A chord to an E chord using some double-stops and single notes along with position shifts and sixths. This is very much a country phrase and evidence of the genre’s importance to the rockabilly sound.
Click here for Ex. 7
The final example (Ex. 8) is a longer, 20-measure piece outlining a full progression with Scotty's superb Travis-picking ideas. While this isn’t a column specifically on Travis picking with a collection of exercises to develop that skill, here are a couple of simple tips that should help you navigate this music.
First, focus only on the bass notes. The thumb needs to be automatic. Strive to put no thought into playing the bass part. This takes time but eventually you’ll be free to concentrate on the melody. The last part to absorb is the excellent ending chord. It’s a maj6/9 with the root on top—very common in the rockabilly style.
Click here for Ex. 8
From here it’s easy to hear Scotty’s immense influence on guitardom. It would be well worth your time to go down a rabbit hole of YouTube vids from the CAAS (Chet Atkins Appreciation Society) conference. Nearly every player from that scene owes a debt to Mr. Moore.
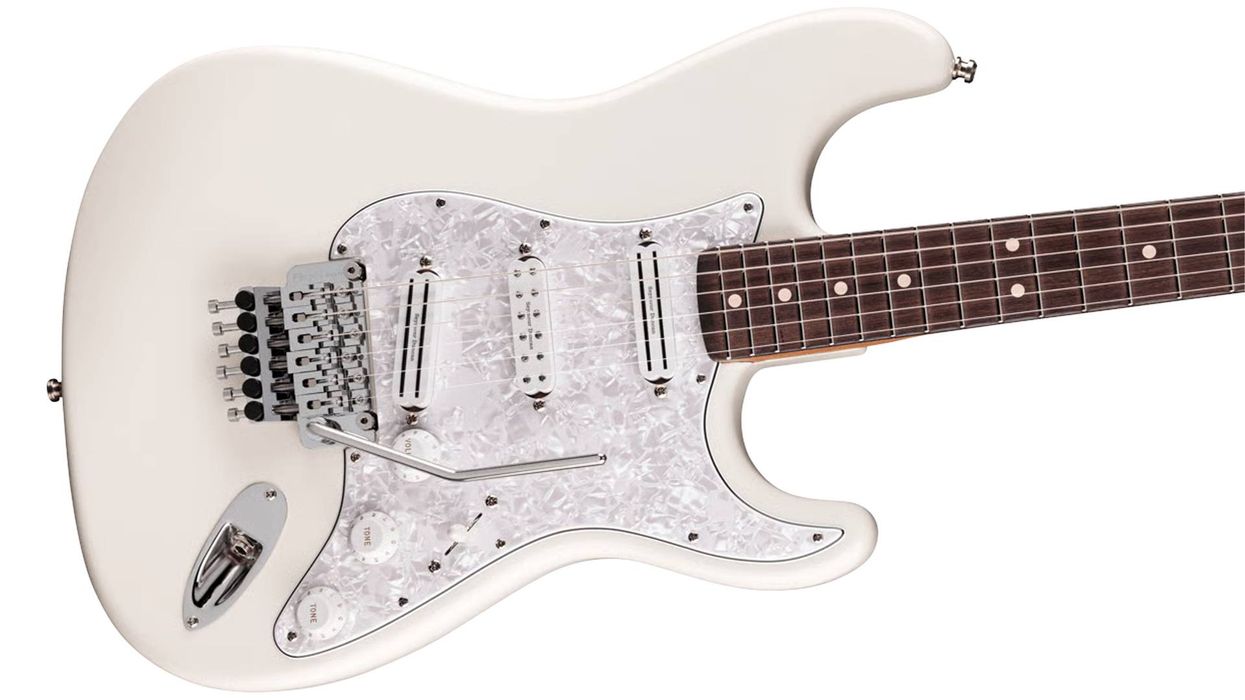
A reimagined classic S-style guitar with Fishman Greg Koch Signature pickups and a Wilkinson VS100N tremolo.
Designed to resonate with both tone and soul, this guitar boasts a slightly larger profile with a raised center section, offering superior dynamics and feel. A chamber beneath the pickguard enhances punch, while hum-free Fishman Greg Koch Signature Gristle-Tone pickups and a Wilkinson VS100N tremolo complete the package.
This marks the third signature model from Reverend Guitars for blues virtuoso Greg Koch, joining the revered Gristlemaster and Gristle-90. Each of these guitars, equipped with Fishman’s Greg Koch Signature pickups, embodies the relentless pursuit of tone, delivering inspiration to players who seek to push their own musical boundaries.
The Gristle ST has everything I need to engage in fiendish musical deeds. It has the classic sounds with a second voice to the pickups that adds more girthsome tones, a tremolo system that can take a licking and stay in tune, it’s a gorgeous looking and playing instrument that is just a little bit larger as to not look like a mandolin when played by a larger soul such as myself…I can dig it all! – Greg Koch
The Reverend Greg Koch Gristle ST is now available through any Reverend Authorized Dealer.
For more information, please visit reverendguitars.com.