An accessibly priced gateway to a high-gain playground.
Killer sounds in a reasonably priced package. Huge gain range.
Begs for more footswitching options.
$899
EVH 5150 Iconic Series 40W 1x12 Combo
evhgear.com
The late Eddie Van Halen spent much of his early career in search of what’s now known as the “brown sound.” Years after cracking the code, he helped bottle various versions of the recipe into the 5150 line of amps. Various iterations of these amps are now studio and stage staples, and are often used in heavy genres that transcend Van Halen’s vision.
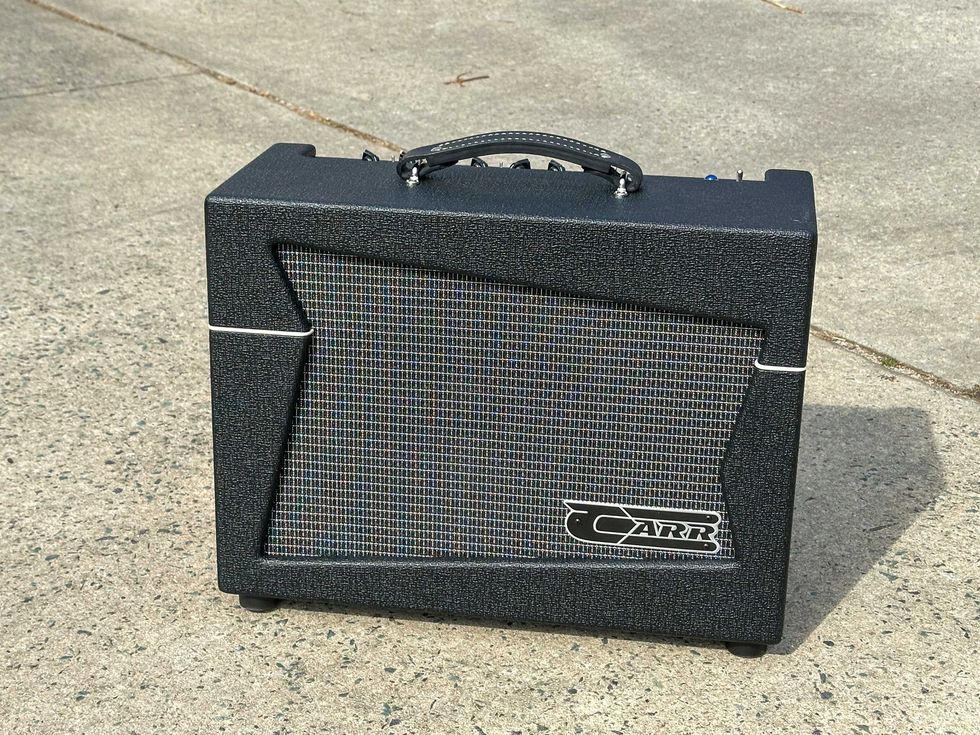
These amps have never been cheap. But the new EVH 5150 Iconic Series models offer a much more affordable take on 5150 designs and are offered in two versions: a 40W 1x12 combo that retails for a very reasonable $899 and an 80W head version at $999. For this review, we look at the 2-channel combo.
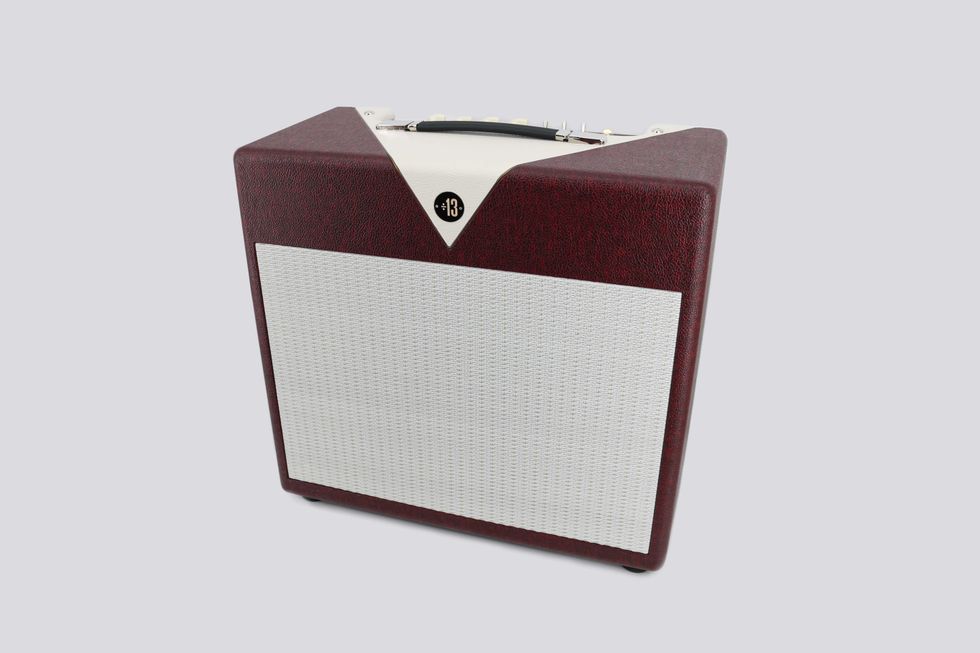
High-Calorie Combo Platter
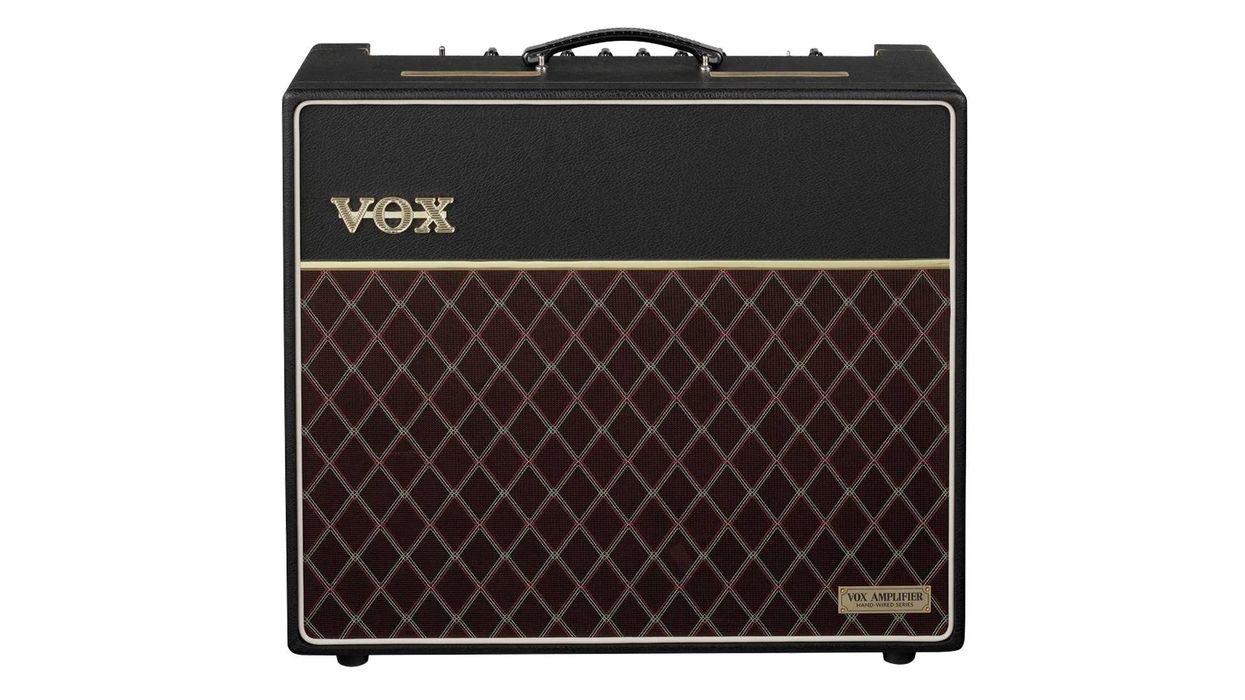
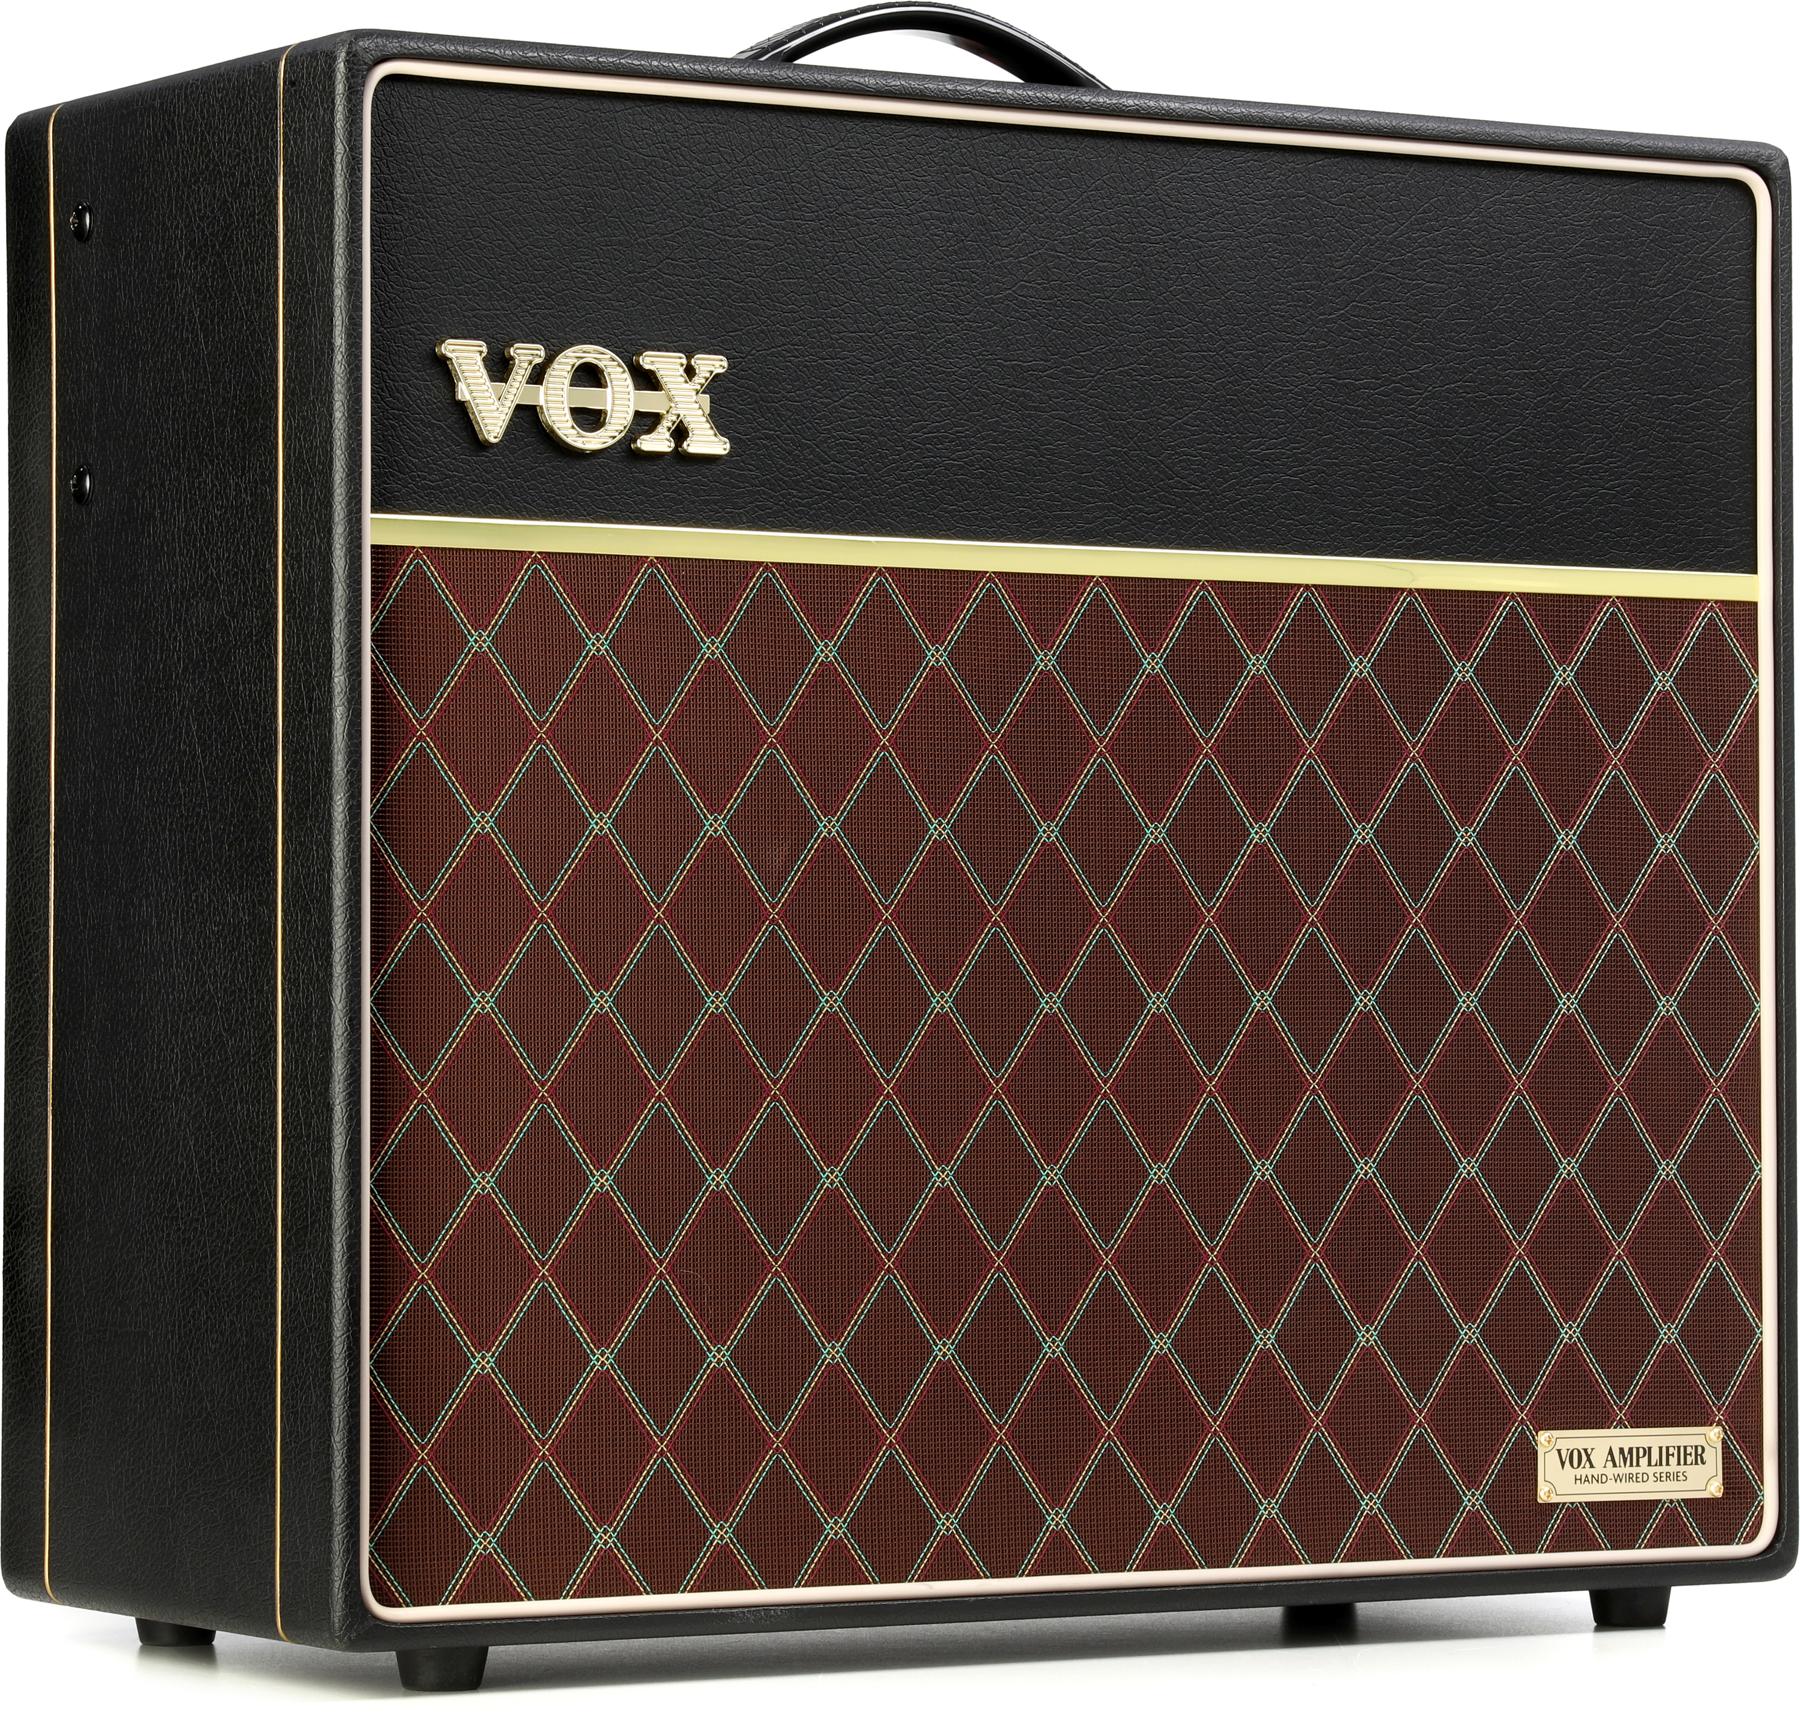
The 5150 Iconic Combo is powered by two 6L6 power tubes, two ECC83 preamp tubes, and a specially designed 40-watt Celestion speaker, all of which are encased in a closed-back MDF cabinet for tighter, heavier bass response. Closed-back combos are slightly unusual as they are costlier to manufacture and tube cooling can be a concern. Most dedicated EVH tone chasers will probably be happy for the audible effects of the closed-back configuration, though.
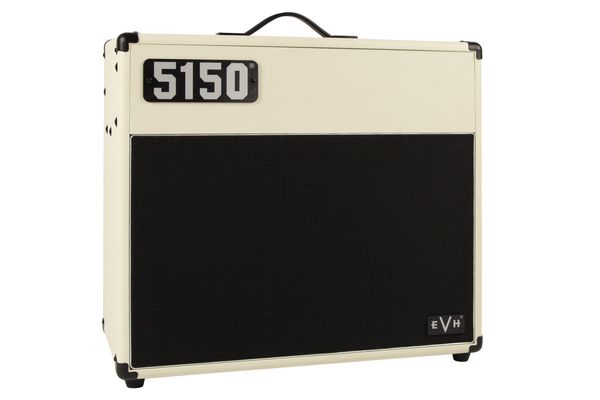
The combo has a sparse, utilitarian vibe. Apart from a 5150 logo on the top left corner of the cabinet and an EVH logo affixed to the bottom right corner of the grille, there’s little to distinguish it. The controls are hidden away on the top panel. Here you’ll find gain and volume knobs for each channel, and shared controls for EQ (low, mid, high), boost, reverb, resonance, and presence. There’s also a noise gate control exclusively for channel 2. There are three mini buttons: one for channel switching and the other two for the additional presets for each of the channels.
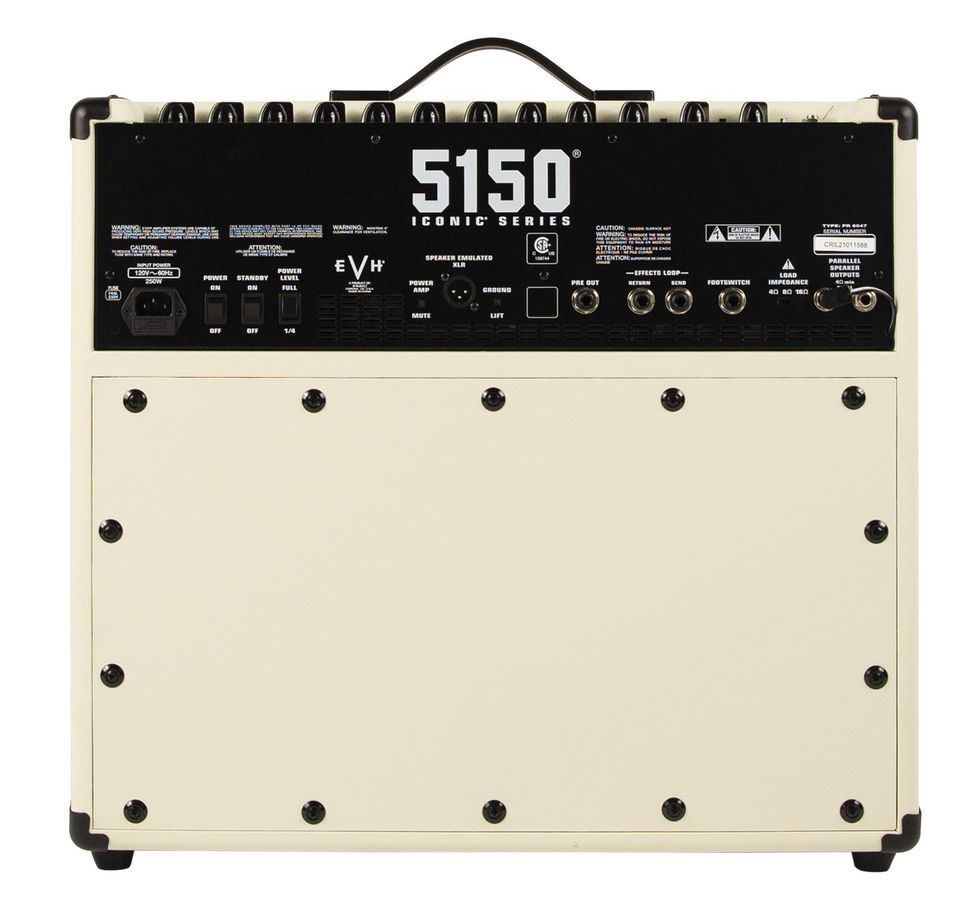
The rear panel is home to a XLR output (with speaker emulation), a power amp mute switch, a preamp out jack, a power level switch (which lets you choose between 40W or 10W), and an effects loop. The cool thing about this loop is that you can use the return jack to bypass the preamp while the boost, reverb, resonance, and power level remain functional.
A Ton of Gain Unchained
While the 5150 Iconic is a 2-channel amp, each channel has its own switchable low-/high-gain mode, effectively giving you four different gain profiles. Channel 1 has a push button for selecting between clean and overdrive. The channel 2 mini-button, meanwhile, engages the ultra-hot “burn” voicing.
The overdrive preset of channel 1 is essentially a crunch channel, sort of like the blue channel of the 5150 III, but with slightly more gain. Even with the gain at 2, the overdrive preset is pretty distorted. Bumping the gain to just 4.5 yields tones closer to distortion than overdrive.
Channel 1’s overdrive mode ranges deep into high-gain realms and could easily be used as a “lead” channel.
Channel 1’s overdrive mode ranges deep into high-gain realms and could easily be used as a “lead” channel. Channel 2, however, is comparatively hellacious. With gain at just 2 you’ll get output roughly equivalent to channel 1’s overdrive channel with the gain at 8. With channel 2’s gain up to 7, I was well into extreme modern metal territory. But that’s just the tip of the iceberg! Channel 2’s burn mode adds even more heat and saturation, yielding ridiculous amounts of sustain. Single notes seemed to last forever, even without finger vibrato. At times it felt like an EBow at work.
With this much over-the-top gain available, it was a smart move for EVH to include a noise gate on the 5150 Iconic. The gate is helpful, but it has its limits. Even with the gate threshold at maximum, a fair bit of hum and amp noise persists at the most beastly levels.
The Best of Both Channels
If there were a way to footswitch between channel 1’s clean and overdrive sounds, the 5150 Iconic would essentially become a 3-channel amp, with clean, crunch, and lead sounds. But that would likely make the Iconic much more expensive.
In lieu of a footswitchable third channel, though, the boost function, which is footswitchable and adds up to 10 dB of volume, is one way to MacGyver a faux 3-channel setup. I got a pretty workable template using these three settings:
- Channel 1 with gain on 2 and overdrive preset selected. Guitar volume lower for a cleanish sound.
- A boosted version of that cleanish sound, with boost on 8 and guitar volume at maximum for a crunch sound.
- Channel 2 with gain high for a lead sound.
If only there were a way to get a footswitchable setup with four sounds to include the burn preset!
The Verdict
James Brown, the legendary amp designer who worked closely with Eddie Van Halen to create the original Peavey 5150 amp, was recruited by EVH in 2019 to become a principal analog engineer. He was tasked with masterminding the 5150 Iconic series. And it’s safe to say Brown succeeded.
The resulting 5150 Iconic Series 40W 1x12 is a unique amp. It can easily do the Van Halen thing. But it’s also insanely versatile and capable of sounds from clean to ultra-high gain to the most extreme molten metal. It’s also just a great all-around amp. And it’s easy to imagine the 5150 Iconic becoming ubiquitous in the manner of a Fender Hot Rod Deluxe for the heavy-music set.
EVH 5150 Iconic Series Combo Demo | First Look
- NAMM 2022 Guitar Gear Gallery - Premier Guitar ›
- EVH Launches Wolfgang Standard Series and Revamps Wolfgang ... ›
- EVH Unveils the Stripe Series "Circle" Guitar ›
- EVH Introduces the Striped Series '78 Eruption Guitar - Premier Guitar ›
- History of High-Gain Amps: From Marshall to EVH ›
This Japan-made Guyatone brings back memories of hitchin’ rides around the U.S.
This oddball vintage Guyatone has a streak of Jack Kerouac’s adventurous, thumbing spirit.
The other day, I saw something I hadn’t noticed in quite some time. Driving home from work, I saw an interesting-looking fellow hitchhiking. When I was a kid, “hitchers” seemed much more common, but, then again, the world didn’t seem as dangerous as today. Heck, I can remember hitching to my uncle’s cabin in Bradford, Pennsylvania—home of Zippo lighters—and riding almost 200 miles while I sat in a spare tire in the open bed of a pickup truck! Yes, safety wasn’t a big concern for kids back in the day.
So, as I’m prone to do, I started digging around hitchhiking culture and stories. Surprisingly, there are organized groups that embrace the hitching life, but the practice remains on the fringe in the U.S. Back in the 1950s, writer Jack Kerouac wrote the novel On the Road, which celebrated hitchhiking and exposed readers to the thrill of maverick travel. Heck, even Mike Dugan (the guitarist in all my videos) hitched his way to California in the 1960s. But seeing that fellow on the side of the road also sparked another image in my brain: Yep, it always comes back to guitars.
Let me present to you a guitar that’s ready to go hitching: the Guyatone LG-180T, hailing from 1966. The “thumbs-up” headstock and the big “thumb” on the upper bout always made me think of thumbing a ride, and I bought and sold this guitar so long ago that I had forgotten about it, until I saw that hitchhiking dude. Guyatone was an interesting Japanese company because they were primarily an electronics company, and most of their guitars had their wooden parts produced by other factories. In the case of the LG-180T, the bodies were made by Yamaha in Hamamatsu, Japan. At that time, Yamaha was arguably making the finest Japanese guitars, and the wood on this Guyatone model is outstanding. We don’t often see Guyatone-branded guitars here in the U.S., but a lot of players recognize the early ’60s label Kent—a brand name used by an American importer for Guyatone guitars.
With a bit of imagination, the LG-180T’s “thumbs up” headstock seems to be looking for a roadside ride.
Kent guitars were extremely popular from the early ’60s until around 1966. The U.S. importer B&J fed the American need for electric guitars with several nice Kent models, but when the Guyatone contract ended, so did most of the Kent guitars. After that, Guyatone primarily sold guitars in Japan, so this example is a rare model in the U.S.
“Unless you are a master at guitar setups, this would be a difficult player.”
This headstock is either the ugliest or the coolest of the Guyatone designs. I can’t decide which. I will say, no other Japanese guitar company ever put out anything like this. You have to give the Guyatone designers a thumbs up for trying to stand out in the crowd! Guyatone decided to forgo an adjustable truss rod in this model, opting instead for a light alloy non-adjustable core to reinforce the neck. Speaking of the neck, this instrument features the most odd-feeling neck. It’s very thin but has a deep shoulder (if that makes any sense). Totally strange!
Another strange feature is the bridge, which offers very little adjustment because of the three large saddles, which sort of rock back and forth with the tremolo. It’s a shame because these pickups sound great! They’re very crisp and have plenty of zing, but unless you are a master at guitar set-ups, this would be a difficult player.
This could be why the LG-180T only appeared in the 1966 and 1967 catalogs. After that, it disappeared along with all the other Yamaha-made Guyatone electrics. By 1969, Guyatone had gone bankrupt for the first time, and thus ended guitar production for a few decades. At least we were blessed with some wacky guitar designs we can marvel at while remembering the days when you could play in the back end of an explosive 1973 AMC Gremlin while your mom raced around town. Two thumbs up for surviving our childhoods! PG
Fifteen watts that sits in a unique tone space and offers modern signal routing options.
A distinct alternative to the most popular 1x10 combos. Muscular and thick for a 1x10 at many settings. Pairs easily with single-coils and humbuckers. Cool looks.
Tone stack could be more rangeful.
$999
Supro Montauk
supro.com
When you imagine an ideal creative space, what do you see? A loft? A barn? A cabin far from distraction? Reveling in such visions is inspiration and a beautiful escape. Reality for most of us, though, is different. We’re lucky to have a corner in the kitchen or a converted closet to make music in. Still, there’s a romance and sense of possibility in these modest spaces, and the 15-watt, 1x10, all-tubeSupro Montauk is an amplifier well suited to this kind of place. It enlivens cramped corners with its classy, colorful appearance. It’s compact. It’s also potent enough to sound and respond like a bigger amp in a small room.
The Montauk works in tight quarters for reasons other than size, though—with three pre-power-section outputs that can route dry signal, all-wet signal from the amp’s spring reverb, or a mixture of both to a DAW or power amplifier.
Different Stripes and Spacious Places
Vintage Supro amps are modestly lovely things. The China-made Montauk doesn’t adhere toold Supro style motifs in the strictest sense. Its white skunk stripe is more commonly seen on black Supro combos from the late 1950s, while the blue “rhino hide” vinyl evokes Supros from the following decade. But the Montauk’s handsome looks make a cramped corner look a lot less dour. It looks pretty cool on a stage, too, but the Montauk attribute most likely to please performing guitarists is the small size (17.75" x 16.5" x 7.5") and light weight (29 pounds), which, if you tote your guitar in a gig bag and keep your other stuff to a minimum, facilitates magical one-trip load ins.
Keen-eyed Supro-spotters noting the Montauk’s weight and dimensions might spy the similarities to another 1x10 Supro combo,the Amulet. A casual comparison of the two amps might suggest that the Montauk is, more-or-less, an Amulet without tremolo and power scaling. They share the same tube complement, including a relatively uncommon 1x6L6 power section. But while the Montauk lacks the Amulet’s tremolo, the Montauk’s spring reverb features level and dwell controls rather than the Amulet’s single reverb-level knob.
“High reverb levels and low dwell settings evoke a small, reflective room with metallic overtones from the spring sprinkled on top—leaving ghostly ambience in the wake of strong, defined transient tones.”
If you use reverb a lot and in varying levels of intensity, you’ll appreciate the extra flexibility. High reverb levels and low dwell settings evoke a small, reflective room with metallic overtones from the spring sprinkled on top—leaving ghostly ambience in the wake of strong, defined transient tones. There are many shades of this subtle texture to explore, and it’s a great sound and solution for those who find the spring reverbs in Fender amps (which feature no dwell control) an all-or-nothing proposition. For those who like to get deep in the pipeline, though, the dwell offers room to roam. Mixing high level and dwell settings blunts the amp’s touch sensitivity a bit, and at 15 watts you trade headroom for natural compression, compounding the fogginess of these aggressive settings. A Twin Reverb it ain’t. But there is texture aplenty to play with.
A Long, Wide Strand
Admirably, the Montauk speaks in many voices when paired with a guitar alone. The EQ sits most naturally and alive with treble and bass in the noon-to-2-o’clock region, and a slight midrange lean adds welcome punch. Even the amp’s trebliest realms afford you a lot of expressive headroom if you have enough range and sensitivity in your guitar volume and tone pots. Interactions between the gain and master output controls yield scads of different tone color, too. Generally, I preferred high gain settings, which add a firecracker edge to maximum guitar volume settings and preserve touch and pick response at attenuated guitar volume and tone levels.
If working with the Montauk in this fashion feels natural, you’ll need very few pedals. But it’s a good fit for many effects. A Fuzz Face sounded nasty without collapsing into spitty junk, and the Klon-ish Electro-Harmonix Soul Food added muscle and character in its clean-boost guise and at grittier gain levels. There’s plenty of headroom for exploring nuance and complexity in delays and modulations. It also pairs happily with a wide range of guitars and pickups: Every time I thought a Telecaster was a perfect fit, I’d plug in an SG with PAFs and drift away in Mick Taylor/Stones bliss.
The Verdict
Because the gain, master, tone, and reverb controls are fairly interactive, it took me a minute to suss out the Montauk’s best and sweetest tones. But by the time I was through with this review, I found many sweet spots that fill the spaces between Vox and Fender templates. There’s also raunch in abundance when you turn it up. It’s tempting to view the Montauk as a competitor to the Fender Princeton and Vox AC15. At a thousand bucks, it’s $400 dollars less than the Mexico-made Princeton ’68 Custom and $170 more than the AC15, also made in China. In purely tone terms, though, it represents a real alternative to those stalwarts. I’d be more than happy to see one in a backline, provided I wasn’t trying to rise above a Geezer Butler/Bill Ward rhythm section. And with its capacity for routing to other amps and recording consoles in many intriguing configurations, it succeeds in being a genuinely interesting combination of vintage style and sound and home-studio utility—all without adding a single digital or solid-state component to the mix.
Watch the official video documenting the sold-out event at House of Blues in Anaheim. Join Paul Reed Smith and special guests as they toast to quality and excellence in guitar craftsmanship.
PRS Guitars today released the official video documenting the full night of performances at their 40th Anniversary celebration, held January 24th in conjunction with the 2025 NAMM (The National Association of Music Merchants) Show. The sold-out, private event took place at House of Blues in Anaheim, California and featured performances by PRS artists Randy Bowland, Curt Chambers, David Grissom, Jon Jourdan, Howard Leese, Mark Lettieri Group, Herman Li, John Mayer, Orianthi, Tim Pierce, Noah Robertson, Shantaia, Philip Sayce, and Dany Villarreal, along with Paul Reed Smith and his Eightlock band.
“What a night! Big thanks to everyone who came out to support us: retailers, distributors, vendors, content creators, industry friends, and especially the artists. I loved every second. We are so pleased to share the whole night now on this video,” said Paul Reed Smith, Founder & Managing General Partner of PRS Guitars. “I couldn’t be more proud to still be here 40 years later.”
With nearly 1,400 of the who’s who in the musical instrument industry in attendance, the night ended with a thoughtful toast from PRS Signature Artist John Mayer, who reflected on 40 years of PRS Guitars and the quality that sets the brand apart. “The guitars are great. You can’t last 40 years if the guitars aren’t great,” said Mayer. “Many of you started hearing about PRS the same way I did, which is you would talk about PRS and someone would say ‘They’re too nice.’ What’s too nice for a guitar? What, you want that special vibe that only tuning every song can give you on stage? You want that grit just like your heroes … bad intonation? The product is incredible.”
Be sure to locate your sample library where it can be quickly referenced on your DAW.
Improve your recordings using your own samples. Bryan Clark, house producer at Nashville’s Blackbird Studio, tells you how to take the final steps in building your own sample library.
Mastering the sample import process in your chosen DAW can significantly enhance your creativity and streamline your workflow. With a clear understanding of the tools and techniques available, you will be better equipped to bring your musical ideas to life and make your productions stand out.
This month, we finish up a three-part series on creating your own sample libraries. In this final installment, I’m going to give you the basic ways to import your samples into various popular DAWs. Each one has its unique workflow and user interface, but the fundamental process remains very similar. This Dojo guide will cover how to import samples into Ableton Live, LUNA, Logic Pro, Pro Tools, and Studio One.
Ableton Live
Steps to Import Samples
Drag and Drop: Simply locate the sample file in your computer’s file explorer, then drag and drop it directly into an audio track in the session or arrangement view.
Browser Window: Use Ableton’s built-in browser (on the left-hand side). Navigate to the sample’s location on your hard drive, then drag it into the workspace.
Create a Simpler or Sampler Instrument: Drag the sample into a MIDI track with Simpler or Sampler loaded. This allows you to trigger the sample using MIDI notes.
Tips: Use the warp feature for time-stretching and syncing samples to your project’s tempo.
Organize your samples into collections using the “Add Folder” option in the browser.
LUNA
Steps to Import Samples
Drag and Drop: Drag the sample from your file explorer directly into the timeline. Then hold the CTRL key down, click on the end of the loop, and drag it to the length it needs to be.
Browser/Workspace: Use the media browser to navigate to your sample’s location on your hard drive. Drag it into an audio track in your session.
Audio Track Import: Right-click on an empty area in the timeline or a track and select “Import Audio” to locate and add your sample.
Tips: Use LUNA’s built-in varispeed capabilities to match your sample to the session’s tempo.Logic Pro
Steps to Import Samples
Drag and Drop: Drag the sample from the Finder directly into an audio track in the workspace.
File Browser: Use the file browser (accessible via the media sidebar or “F” key) to locate and drag samples into the timeline.
Quick Sampler: Drag your sample onto a MIDI track with the Quick Sampler plugin loaded. This lets you play the sample chromatically.
Tips: Use Logic’s flex time feature to sync samples to your project’s tempo. Organize samples into Logic’s library for quick access.Pro Tools
Steps to Import Samples
Import Audio Dialog: Go to File > Import > Audio; then locate your sample and click “Convert” or “Add” to bring it into the session.
Drag and Drop: Drag the sample directly from your file explorer into an audio track.
Workspace Browser: Use the workspace (accessible via Window > New Workspace) to locate your sample. Drag it into your session.
Tips: Use the elastic audio feature for tempo matching and pitch adjustments.
Place your samples into playlists for efficient access during editing.
Studio One
Steps to Import Samples
Drag and Drop: Drag your sample directly from your file explorer into the timeline or browser.
Browser: Open Studio One’s browser (on the right-hand side), navigate to the folder containing your sample, and drag it into your project.
Sampler Track: Drag the sample onto a MIDI track, and use the Sample One sampler for additional manipulation.
Tips: Enable the “Stretch Audio Files to Song Tempo” option in the browser for automatic tempo synchronization. Create sample folders within Studio One’s browser for quick access.General Best Practices
Regardless of the DAW you use, it is important to maintain a smooth and efficient workflow. Organize your sample library with clear folder names and categories to make locating files easy (see last month’s installment for detailed strategies). Where possible, learn DAW-specific shortcuts for importing and editing samples to save time. Always check if your DAW offers a feature to sync the sample’s tempo to your project to ensure seamless integration. Finally, regularly back up your sample collection to avoid losing important audio files and preserve your creative assets! Seriously. Do it now.
Next month, we’re off to “console” land and I’ll be investigating console emulations (hype or not?), summing bus processors, and more to give you a more “studio” sound. Until then, blessings and namaste.