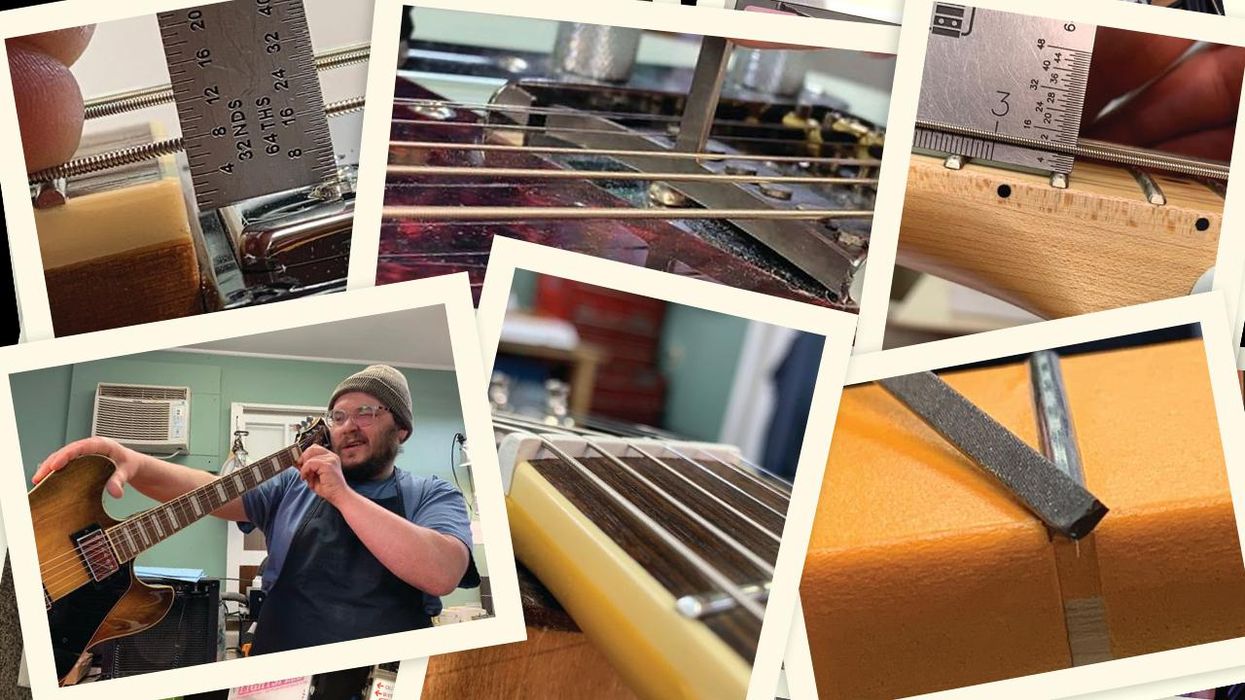
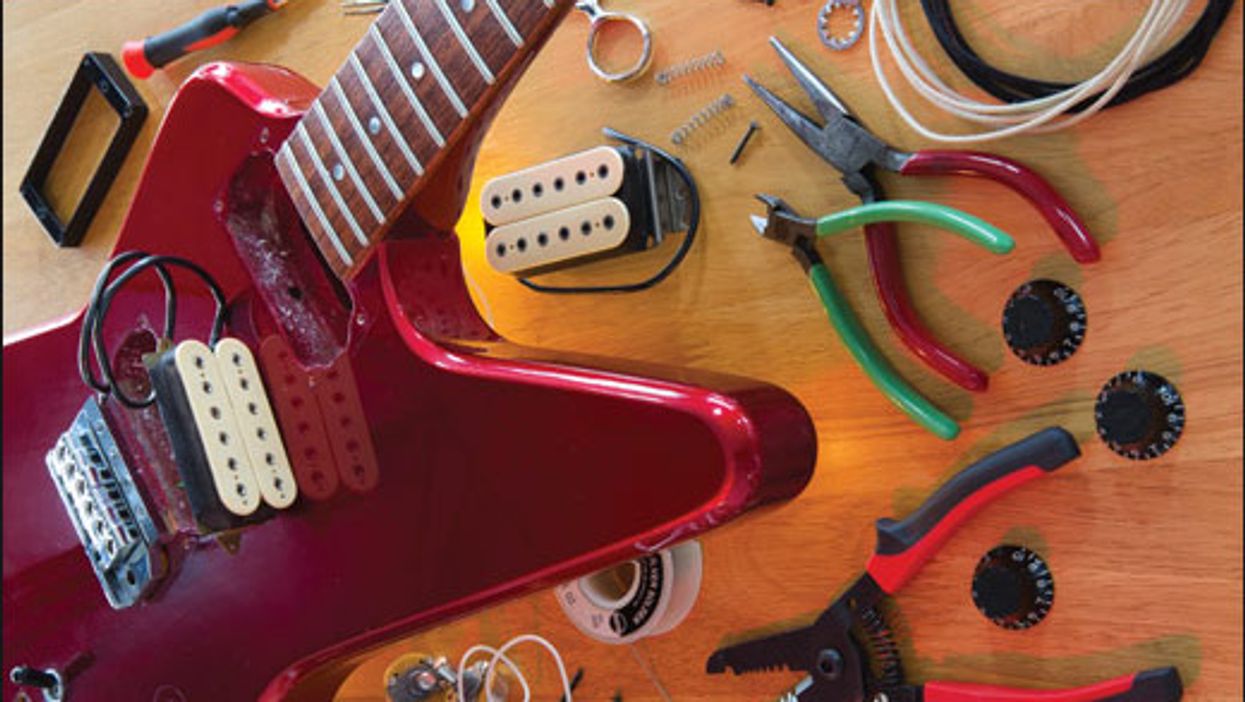
Ace Nashville luthier Joe Glaser and his crew reveal their recipes for maximum chime and jangle.
A handful of musicians have built their careers around the 12-string guitar—Lead Belly, Leo Kottke, and Roger McGuinn come to mind—but for most guitarists, an electric or acoustic 12-string is a specialty instrument to be hauled out when a song needs a little extra jangle. As such, 12-string guitars get a smaller part of a player’s setup budget and are rarely checked, despite the fact that they may suffer more from string tension issues than their 6-string siblings. That’s too bad, because when a 12-string’s action is too high or it’s not set up correctly, it feels twice as hard to play.
With a good setup, a 12-string can sound magical. If you have one, or are considering acquiring one, you’ll benefit from understanding some of the factors that contribute to this instrument’s sonic mojo. If you’re not accomplished at setting up a guitar—or game to learn how—we suggest you seek the services of a professional to work on your instrument. However, armed with a little knowledge, the proper tools, and a bit of patience, you can achieve excellent results doing your own basic setup and maintenance. At the very least, understanding the setup process will help you identify a good tech.
Also—and this is important—if you’re shopping for a used 12-string, knowing how to recognize and identify potential setup issues will help you make an informed buying decision, and potentially save you a lot of money.
When it comes to deciding on how to space the strings at the nut, 12-string guitars require extra thought: You have to deal with the space between the two strings within each pair, and, of course, the spacing of the pairs themselves across the fretboard.
Just as with a 6-string guitar, bass, banjo, or mandolin, 12-string setup can be divided into playability and intonation. On the playability side, there is no one-size-fits-all approach, and through experience, guitarists need to discover their personal comfort zones. At Glaser Instruments we typically tell people that for good tone and a wide dynamic range, your setup should be as high as you can manage to play comfortably, yet as low as necessary to keep you wanting to play that instrument. The playability part of setup is personal, but, for the most part, tuning is more absolute. (Some session players have their own intonation formulas, but that’s a subject for another day.)
Because there’s no one “correct” way to set up a guitar, we’re simply going to share a few things we’ve learned in the last 35 years—proven techniques that work for us and our clients. To illustrate these concepts, we’ve chosen two guitars: a 1965 Rickenbacker 360/12 and a ’65 Guild F-212. The latter belongs to producer Bob Ezrin, whose credits include Peter Gabriel, Alice Cooper, Pink Floyd, Kiss, Lou Reed, and Phish. This Guild has added jangle to countless tracks, so chances are you’ve actually heard it.
Each guitar needed some work to play and sound its best, so we’ll take you through what we did and describe how we approached those procedures and why. Some setup issues are common to both 6- and 12-string instruments and have been already covered in Premier Guitar, so instead of rehashing them here, we’ll link you to them. In this article, we’ll focus on considerations that are unique to 12-string setup.
Wrangling the Ric
Photo 1— On this Ric’s original nut, string spacing between the pairs is inconsistent. Also, notice how the two strings in the 1st unison pair are closer together than in the 2nd unison. This nut will be replaced to improve playability.
Photo by Andy Ellis
If you’ve played a 12-string, you know that typically the top two pairs are tuned in unison, while the lowest four pairs are tuned in octaves. On most 12-string guitars, the octave pairs are configured so each high octave string precedes its low octave mate when you strum down across the strings toward the floor.
But on a Rickenbacker 12, this convention is reversed. On string pairs 6-4, the low octave comes first, followed by the high octave, and this idiosyncratic stringing has a subtle sonic effect on chords and riffs. Rest assured the setup principles we’ll discuss here apply to any electric 12, regardless of which way the octave pairs are arranged. We mention the Ric stringing in case you haven’t yet had the pleasure of playing one—don’t freak out when you see it!
Typically the gauges for a light electric 12-string set are .046w/.026w, .036w/.018, .026w/.012, .017/.008, .013./013, and .010/.010, moving from the 6th to the 1st pairs. The “w” indicates a wound string, so as you can see, this means two of the octave pairs—the 5th and 4th—have a mix of wound and plain wire. As we’ll see in a moment, combining radically different string construction and thickness creates unique intonation challenges, and this applies to both electric and acoustic 12s.
Truss rod adjustment. Setups always start with a quick overview and then a truss rod adjustment, if needed. We want a little relief or “bow”—about a business card’s thickness—located around the 6th or 7th fret. As with all things guitar, there is no right or wrong, and while the laws of physics pertain to string rattle and intonation, personal preference ultimately rules. In general, the lighter your attack, the straighter the neck and the lower the action can be.
The Ric’s owner uses a regular light gauge set and plays with a light touch, so we checked the relief and tightened the dual truss rods slightly, reducing the amount of bow by a small amount. [For details on how to adjust a truss rod, read “Time for a Neck Adjustment?” and “Demystifying Truss Rod Tools.”]
String spacing at the nut. While initially inspecting our project Ric, we noticed that the strings weren’t correctly spaced at the nut (Photo 1), so we decided to cut a new one. To preserve the original look, we opted for black synthetic nut material.
Tip: It’s not uncommon to encounter oddball string spacing on an older 12-string, so be sure to check this when buying a used model.
When it comes to deciding on how to space the strings at the nut, 12-string guitars require extra thought: You have to deal with the space between the two strings within each pair, and, of course, the spacing of the pairs themselves across the fretboard. Remember, except for the two unisons, the strings are gauged very differently within each pair, and getting them to look good and feel right is more than twice as complicated as cutting a standard 6-string nut.
If you’re shopping for a used 12-string, knowing how to recognize and identify potential setup issues will help you make an informed buying decision, and potentially save you a lot of money.
There are several different versions of “correct” nut spacing and, as with all things, it boils down to a personal choice based on feel. At our shop we use a computer-controlled Plek machine to cut nut slots because of its speed and accuracy. But machines have to be programmed by humans, so let’s look at the decisions we make when programming our Plek. By the way, these are the same decisions we’d make if we were doing this work by hand—the way we did for years before acquiring the Plek.
As with cutting a 6-string nut, our first step for this Ric was to place the outside strings—a .010 and the .046—where they feel best along the neck edges. The goal is to have these outer strings spaced as widely apart as possible for easy chording, but not so far out that they fall off the neck while playing. Where you place the outside strings depends on how the neck is shaped and how the fret ends are cut and beveled.
Next, we placed the inside unison 1st string where it feels good to fret, which is essentially as close to its mate as possible without causing the two to crash together when they’re plucked with a medium-hard attack. Many 12-string players will tell you that a certain amount of string-against-string “chatter” is actually part of what gives the 12-string guitar its unique chime, so you don’t have to completely eliminate this. A space between the unisons of about .070" is typical. That’s approximately the thickness of a quarter, which makes a great low-tech calibrator.
Now, using the Ric’s outside bass string (.046) and the inside treble (.010) as guides, we located the remaining “main” strings, in this case, the .013, .017, .026w, and .036w (the 2nd, 3rd, 4th, and 5th strings, respectively).
There are different formulas for spacing these main strings: equal center-to-center, equal space between strings, or a hybrid of these two approaches. Essentially, hybrid spacing uses equal distances from the closest edge of the smaller string to the center of the adjacent larger one, moving from the treble side toward the bass.
Before we had a Plek machine at our shop, we used a special formula to calculate our hybrid spacing. But now, there’s an easier way: You can use an inexpensive String Spacing Rule from Stewart-MacDonald to quickly do the job—no math required. [You can watch a video on how to use this tool at stewmac.com.]
Once you’ve located and marked the four main strings on the nut, it’s time to place each string’s pitch mate. Again, the first consideration is feel, although .070" is a good starting point for the space between each pair.
Photo 2 — The string spacing is noticeably off at the bridge, not only within the pairs themselves, but also between them. Compare the 4th, 3rd, and 2nd courses, for example.
Photo by Andy Ellis.
Cutting nut slots. The string slot depth adjustment is done with nut files that correspond to string gauge. String slotting in the nut is very important for comfort, sound, and tuning. Slots left too high will impede playability and make the first position notes sound sharp when they’re fretted. But if you cut the slots too low, the strings will rattle when played open. [For an in-depth explanation of how to remove an old nut and carve a new one, read “How to Convert a Flattop to Nashville Tuning.”]
When filing the proper depth of the string slots on a 12-string nut, keep in mind that the bottoms of the slots should be cut so each string clears the 1st fret by the same amount. Again, we’re dealing with very different gauges in each octave pair. On a 12-string guitar, you might assume that keeping the tops of the strings level in each pair would make it more comfortable to play—and this is true. But by doing so, the lighter-gauge string would have more distance to travel to contact the top of the fret, and this can pull them noticeably out of tune.
At our shop we cut slots so a string clears the 1st fret by a few thousandths of an inch more than it would clear the 2nd fret if held down at the 1st fret. As you might imagine, this is a subject that generates lots of debate, and you can find online tutorials supporting a variety of theories—some good, some baloney.
Dealing with the saddles. The next thing we look at is the bridge. We saw that on this Ric, the string spacing was uneven by any standard (Photo 2). This is one of the most important aspects of playability. If the strings aren’t evenly laid out, it gets hard to differentiate between the pairs, which can cause confusion when you’re playing.
Also, the string radius across the bridge was uneven and didn’t match the fretboard radius. For optimal playability, you want the string saddles to follow the curve of the frets.
And that’s not all: Unlike some electric 12-string guitars, this Ric doesn’t have individual saddles for each string, but instead uses a single aluminum saddle for each pair. This can make it impossible to correctly intonate strings with very different gauges, such as within the 6th course with its .046 low E and .026 high octave.
Photo 3 — Cut from an aluminum bar, this custom saddle has been drilled and tapped for its intonation screw and is now ready to be shaped with a file.
Photo by Andy Ellis
To fix these problems, we decided to replace several saddles with new ones we’d fabricate from aluminum bars (Photo 3).
Finding the intonation points. After cutting the saddle blanks, and drilling and tapping the holes for each saddle’s intonation screw, we installed the new saddles on the bridge and strung everything up to pitch. Because of their disparate gauges, some string pairs need different points of contact on their shared saddle, so our next step was to manually file these in. But how do you find each string’s unique intonation point?
Photo 4 — Using pieces of a thick plain string to determine unique intonation points on the saddle shared by the
6th-course octave pairs.
Photo by Andy Ellis
Here’s our simple trick: First we cut two short lengths from a thick plain string, and then placed one of these lengths between each string and the saddle (Photo 4). After tuning to pitch, we checked the intonation with a precision electronic tuner, moving the string pieces forward or backward—like you would with individually adjustable saddles. Once we were satisfied with the intonation, we marked the spots on the saddle to give us an idea of how to shape the top with a file.
Photo 5 — Individual intonation points have now been filed into this 6th-course saddle.
Photo by Andy Ellis
Next we removed the new saddle, put it in a small vise, and filed away each side so the point of string contact matched the marks we’d made previously (Photo 5). Any minor intonation adjustments can be made after the saddle is on the guitar and we’re doing the final setup.
Photo 6 — Now installed in the bridge, the new 6th-course saddle is ready for final slotting and shaping.
Photo by Andy Ellis
Photo 6 shows the new 6th-string saddle installed on the bridge.
Photo 7 — Using a digital caliper to measure the gap between strings in each pair.
Photo by Andy Ellis
String spacing at the bridge. With the replacement saddles installed, we could now correct the string spacing at this end of the guitar. After positioning the two outside strings to leave sufficient playing clearance along the edge of the fretboard, we set the inside unison 1st string, and then placed the other four main strings using the hybrid formula described earlier. Once the main strings were in place, we positioned the paired strings. This process is similar to spacing the strings at the nut, except at the bridge, the separation within each pair is slightly wider—typically about .080" (Photo 7).
On this Ric, some strings were not spaced correctly from the start, so we had to “migrate” a few slots on the old saddles that we kept. You do this by first filing slightly deeper slots in the correct position and then removing material from the top of the affected saddles to eliminate the old marks. This requires patience and a steady hand. Remember, you can raise the bridge slightly to compensate for filing off a small amount of the saddle.
As you position the string pairs on the saddles, take time to visually confirm that they stay perpendicular to the frets as they travel along the neck to their nut slots.
Photo 8 — With a radius gauge, you can check if the saddles match the curve of the fretboard and determine how deep to file each saddle slot.
Photo by Andy Ellis
To determine the depth of the final saddle slots, we first measured the fretboard with a radius gauge at the 1st, 12th, and 19th frets. This Ric had a 10" radius at all three locations, so we put a 10" radius in the bridge saddles too. Many of the strings were not in this curve (Photo 8), so using the same files as on the nut, we deepened slots where needed and achieved our target radius, using the radius gauge to check our work.
Final adjustments. Every guitar is different in terms of setup. Depending on the fret plane and neck stiffness, some guitars will allow you to set the action very low. Most players prefer to have 12-string action set a little lower than on a 6-string, so it’s not a struggle to fret the guitar, given all the additional string tension. Fortunately, this Ric allowed us to go quite low because the neck was stiff and quite consistent without any major dips or humps.
This Ric’s bridge operates much like a Tune-o-matic, so we set the action at the 12th fret by raising or lowering each side of the bridge, the way you would on a Les Paul. After that, we readjusted the intonation by moving each of the six shared saddles back and forth, again as you would on a Tune-o-matic. [To understand the principles behind intonating an electric guitar, read “How to Set Up a Fender Stratocaster” and “How to Install a New Tune-o-matic Bridge.”]
As a final step, we checked the tuning at the nut. First, we carefully tuned the “beats” out of each open pair, and then checked each string at frets 1 and 2. These fretted notes should look good on a tuner—maybe a tad sharp under finger tension—but still produce beatless unisons and octaves. This can take some work, including some very gentle final filing of the nut slots to make sure the strings all leave from the very front edge of the nut.
Next, we checked intonation again at the 12th fret, this time comparing the open strings to the fretted notes, looking for any beating in the fretted pairs. As expected, we needed to make small adjustments with the file to position a few strings to the front or back of the shared saddle until all of them were perfectly in tune.
Photo 9 — Ah! Now the strings are spaced evenly at the bridge, the saddles are radiused and intonated, and all sharp edges have been filed smooth and polished. This Ric is ready to rock.
Photo by Andy Ellis
With the radius, action, and intonation squared away, we had one last task: Round and polish the saddles to remove any sharp edges (Photo 9).
Test drive. It’s worth mentioning that an instrument might be nicely intonated in the clinical context of a shop bench, but not be so sweet in the reality of a gig or session. Guitarists may have different opinions about intonation—in fact, some studio players prefer to tune the pairs slightly off to produce a cool chorusing effect. For that reason, the last phase of a good setup requires spending time with the instrument’s owner, patiently putting the guitar through its paces and tweaking to suit. If you’re doing your own setup on an electric 12, allow yourself time to dial everything in before you pronounce the guitar ready for prime time.
Finessing the F-212
Photo 10 — After having its neck reset, our project Guild F-212 is secured with clamps while the glue dries.
Photo by Andy Ellis
The first step in setting up an acoustic 12-string is to determine whether or not it can be set up at all. The increased string tension applied by the extra strings takes a toll on an acoustic, literally reshaping the instrument over time. Often the neck pulls forward and the soundboard bellies up, and as a result, the action becomes unplayable. Lowering the saddle may solve the problem in the short term, but if this incremental collapsing continues, ultimately the neck will need to be removed and reinserted into the body at a new angle. Called a neck reset, this is a job for an experienced professional.
Tip: When buying a used acoustic, you need to determine if a neck reset is required. Because it costs hundreds of dollars, a neck reset is a key factor in negotiating the selling price.
Assessing an acoustic 12. Here’s how you can evaluate the instrument’s condition. First, the neck should have a small amount of relief between the nut and body joint. Put a 12-string capo at the 1st fret, then press and hold the 6th-string pair at the fret where the neck joins the body. At around the 7th fret, peer between the bottom of the 6th-string pair and the top of the frets. Ideally, you want to see a small gap. Using your free hand (remember to keep pressing the strings against the frets where the neck joins the body), tap the paired strings against the frets to help you gauge the size of the gap. Repeat this on the 1st pair to estimate relief on the treble side of the fretboard.
For the electric Ric, we were looking for a gap approximately the thickness of a business card. On an acoustic with thicker strings, you might want a slightly larger gap, but the business card is a good starting point. If there’s too much relief—the gap is too large—the truss rod needs to be tightened.
Tip: Many 12-string guitarists tune down a half-step or even a whole-step below standard. Dropped tuning makes the strings easier to fret, reduces strain on the neck and body, and makes a 12-string sound huge.
If this doesn’t straighten the neck enough, you’ll need to check the neck angle or forward pitch in relation to the body. For guitars with bolt-on necks, this angle can be adjusted quite easily, usually with a shim. But on guitars with glued-in or “set” necks—this applies to most acoustic guitars—changing the neck angle is an involved procedure best left to a qualified repair person.
To evaluate the neck angle, first test out the action by playing up and down the fretboard. If the instrument feels reasonably playable and the neck is fairly straight, then check how much of the saddle is exposed at the bridge. A visible 1/8" (.125) of saddle is ideal. A bit more is okay, but 1/16" or less can create trouble. It’s probably a sign that the saddle has already been lowered, and it doesn’t leave you any more leeway to reduce the action. A shallow saddle profile typically indicates a neck reset is required, and that was the case with our project F-212. Photo 10 gives you an idea of what this entails.
But let’s assume you can control the relief with the truss rod and you have enough available saddle height to adjust the action. The next order of business is to confirm the nut is in good shape. As we saw with the Ric, string spacing on a 12-string is particularly tricky because you’re dealing with distances within the string pairs and also between them. And remember, to avoid intonation problems, the bottoms of all the strings need to be a uniform height from the 1st fret.
Photo 11 — This nut looks good. As on an electric 12, the bottoms of all the open strings should sit at a
consistent height above the 1st fret.
Photo by Andy Ellis
On our Guild F-212, the nut looked fine (Photo 11), so we didn’t have to replace or modify it. But if the string spacing or slot depth is off on your acoustic 12’s nut, review the concepts and procedures we just covered for the Ric, and apply them to your flattop.
Intonating the saddle. As with any acoustic guitar, the placement of the saddle in the bridge is critical for good intonation as you play higher up the neck. Theoretically, saddle placement is twice the distance from the nut to the 12th fret, but a guitar with its saddle placed there will play increasingly sharp as you fret in higher positions, so saddle “compensation” is necessary. This means moving the point where the string sits on the saddle back away from the neck by a small amount.This amount can vary according to string gauge and action, but a good average is 4/32" (0.125) at the 1st string and 7/32" (0.219) at the 6th, measured from the middle of the saddle slot.
There are two common saddle widths for most steel-string acoustics, whether 6- or 12-string. The narrower one is approximately 3/32" (0.093), and this allows scant room for adjusting the contact point of each string. The other common width is 1/8" (0.125), and this allows slightly more room to adjust each string’s vibrating length.
Many 12-string guitarists tune down a half-step or even a whole-step below standard. Dropped tuning makes the strings easier to fret, reduces strain on the neck and body, and makes a 12-string sound huge.
One intonation option is to widen the saddle slot and install a saddle with a width of 1/4" or more, which would give considerably more room to adjust the contact point for each string. This was not uncommon in the ’70s, but today most players consider it overkill because of the cost, small gain in tuning accuracy, and negative impact on an instrument’s value.
On many guitars, the contact point for the string as it comes up from its bridge pin toward the soundhole is the center of the saddle or slightly forward from the center. However, with a small file and a bit of patience, you can achieve more accurate intonation by shifting this contact point. And that’s what we decided to do for this F-212—create a new bone saddle and adjust the contact points to improve the tuning within the constraints of the 1/8" saddle width. This is a reversible mod, and that’s an important consideration for a vintage guitar—especially one with such a rich recorded legacy as this Guild.
Tip: For years, memorable music has been made on non-intonated acoustic 12s. So unless the intonation is really bothering you, consider keeping a non-intonated saddle on your guitar.
Knowing where to place the contact points on a 12-string saddle comes from years of experience—it’s not something that’s easily described in an article because so much depends on the guitar, the strings, and the player.
Photo 12 — This new bone saddle blank has been shaped, fitted, and radiused, and is now ready to be intonated.
Photo by Andy Ellis
That said, the basic steps go like this: First you fit and radius a new bone blank (Photo 12). While it’s still seated in the saddle slot, pencil perpendicular lines across the saddle to mark where each string emerges through the bridge pin holes to contact the saddle.
Next, along the top of the saddle and parallel to it, pencil in the contact points where the different strings will rest. The 1st and 2nd unison pairs will sit much like the single 1st and 2nd strings do on a 6-string—the 1st pair will be forward, the 2nd pair as far back as possible, essentially resting on the rear edge of the saddle.
Then pencil in the contact points for the four lower strings of each octave pair. Again, these points will resemble the pattern of a 6-string guitar, which has its 3rd string sitting forward on the front (soundhole) edge, and strings 4, 5, and 6 respectively shifting slightly back away from the neck toward the bridge pins.
The high strings in each octave pair typically sit further back on the saddle than their lower mates. The octave 3rd string (high G, in standard tuning), sits at the rear edge, and the 4th, 5th, and 6th octaves gradually shift forward, with the octave 6th sitting perhaps about center on the saddle.
Photo 13 — The bone saddle in the process of being filed and intonated. We’re looking at the rear of the saddle, so the bass strings are to the left, and the treble strings to the right. The perpendicular pencil marks to the left indicate where each string will cross the saddle from the bridge pin holes, while the marks along the top of the saddle indicate the unique resting point for each string. The unisons will have the same contact points, but the strings in each octave pair will sit at different positions, relative to the front and rear of the saddle.
Photo by Andy Ellis
Once you’ve made your marks, remove the saddle and start filing away the material around each pencil mark to create a ridge for the string to rest on. Photo 13 shows a saddle in the process of being shaped, with string pairs 6-1 running from left to right. As you file, be careful not to remove the pencil marks on the top of the saddle. They are your guides, and should remain on your saddle until the final polishing.
After carving the contact points, radius the top of the saddle to match the fretboard curve, and using very fine abrasive paper, polish out the file and pencil marks. Install the saddle, string up, and check the action.
Photo 14 — The finished intonated saddle. Notice the different contact points for the strings within each octave pair. The 3rd course illustrates this quite dramatically: The high G rests toward the rear of the saddle, while the low G
sits closer to the front.
Photo by Andy Ellis
Photo 14 shows the finished saddle installed in the Guild’s bridge. If you look carefully, you can see many of these contact points and how they differ within the octave pairs. Again, this is simply an example of what worked well for our particular F-212, but it illustrates a fairly standard acoustic 12 arrangement.
If the action needs to be lowered, remove the saddle and sand down its flat bottom. Proceed very slowly. Even though it’s a hassle to repeatedly restring, tune, and check the action, that’s still a lot less work than having to start from scratch because you sanded off too much of the bottom. Once you have the action where you want it, blow the dust off the guitar, give it a polish, and start basking in its glorious chime.
Special thanks to Bob Ezrin for loaning us his 1965 Guild F-212 and EM2’s Mark Montgomery for letting us rework his ’65 Rickenbacker 360/12.
[Updated 3/24/22]
- DIY: How to Set Up a Fender Stratocaster - Premier Guitar ›
- DIY: How to Convert a Flattop to Nashville Tuning - Premier Guitar ›
- Guitar Shop 101: How to Intonate an Acoustic 12-String - Premier ... ›
- 7 ways to upgrade your guitar - Premier Guitar ›
- DIY: How to Adjust Your Guitar's Neck Relief & Truss Rod—Plus, Fix Your Action | Helmer’s How-Tos - Premier Guitar ›
- 10 Acoustic 12-Strings for All Budgets - Premier Guitar ›
- Squier Paranormal Jazzmaster XII Review - Premier Guitar ›
- Unlock Your Guitar's Potential with this Easy 4-Step Setup Guide ›
Elliott Sharp is a dapper dude. Not a dandy, mind you, but an elegant gentleman.
The outside-the-box 6-string swami pays homage to the even-further-outside-the-box musician who’s played a formative role in the downtown Manhattan scene and continues to quietly—and almost compulsively—shape the worlds of experimental and roots music.
Often the most potent and iconoclastic artists generate extraordinary work for decades, yet seem to be relegated to the shadows, to a kind of perma-underground status. Certainly an artist like my friend Elliott Sharp fits this category. Yes, his work can be resolutely avant-garde. But perhaps the most challenging thing about trying to track this man is the utterly remarkable breadth of his work.
I am writing this piece for a guitar magazine, so, necessarily, I must serve up info that is guitar-centric. And I can do that, at least a little bit. But Elliott is also a noted composer, runs his own little record label, plays woodwinds proficiently, is a guitar builder/tinkerer, author, gracious supporter of other musicians’ efforts, family man, and killer blues player—a blues scholar, in fact. So where do we, the public, conditioned to needing categories, pigeonholes, and easy assessment signals, put Elliott Sharp—an artist with a powerful work ethic and a long, illustrious career of making mind-bending sounds and conceptual works? How about putting him in the pantheon of the maverick and the multifaceted? Surely this pantheon exists somewhere! In mind, in heart. To those for whom such things resonate and inspire, I bring you Elliott Sharp.
One can obviously go to the information superhighway to find info on Elliott, and to hear his music, so I won’t go into too many details about where he was born (Cleveland) and when (March 1, 1951; as of this writing, Elliott is 74), or what he is best known for (being a crucial figure in the downtown New York City scene from 1979 to the present). He is Berlin Prize winner and a Guggenheim Fellow (among other honors). And I have never asked him what strings and picks he uses, so maybe I have already blown it here. But I realize now, having taken on this assignment, that inherent in writing about and trying to explain Elliott Sharp is an implicit TMI factor. There is so much going on here, so much diverse information that could be imparted, that I would not be the least bit surprised if some readers eventually glaze over a bit and start thinking of their own life’s efforts and goals as rather paltry. I get that! Although you shouldn’t.
E# @NaturalHabitat
Here, now, is my portrait of Elliott, accompanied by what I imagine is a day in the life of Elliott when he’s at home in New York City.
Elliott Sharp is a dapper dude. Not a dandy, mind you, but an elegant gentleman. He, like so many in New York and in the world of music/art/guitar, favors dark-hued clothing (yeah, a preponderance of black) and is most often seen wearing a classic slouch hat of obvious quality. He relocated from Buffalo via Western Massachusetts to lower Manhattan in 1979 to a zone that was, back then, quite treacherously decrepit, in an apartment that offered only an hour or so of heat in the winter, etc., etc. It was cheap, and things were always happening, and, in fact, it was the 1950s domicile of William Burroughs, Allen Ginsberg, and Jack Kerouac.The area became the nexus of an ever-expanding circle of iconoclastic, experimental artists of many stripes.
Sharp plays what passes for a fairly staid instrument in his collection: a bass and guitar doubleneck, in 1992.
Elliott is still in that building in the East Village, though it is now only his workplace and not his living space. I am trying to remember exactly when I met Elliott, but it was probably about 25 years ago, and he still had only the one small, original apartment and a shared music space in the Garment District. I, like countless others before and after me, stayed in that East Village apartment whenever I needed a place to crash and Elliott was elsewhere, and eventually he was able to secure the next door apartment and expand his space. This is where Elliott Sharp works every day that he is not touring, pretty much 9 to 6. The place is a bit funky and dusty, and it is filled with instruments, amps (some classics, like a mid-’60s Princeton Reverb and a tweed Champ), and other tools accumulated over many decades—in spite of the many times that certain ones had to be sold to keep bread on the table.
When he’s not composing, scoring films, recording other artists, or gigging with the bands he has been in or led for the last several decades (Mofungo, Carbon/Orchestra Carbon, SysOrk, Terraplane, The Bootstrappers, Aggragat), Elliott tinkers with guitars, pedals, mandolins. Elliott is, to me, the king of guitar transformation, and his tinkering is stunningly Frankensteinian as he guts, rebuilds, and alters all kinds of stringed instruments, both electric and acoustic. He recently told me that in the ’60s he built fuzz boxes out of tobacco tins to make money. How cool would it be to have one of those now?? If one does a search on Elliott Sharp, many photos will reveal what I'm talking about: the handcrafted doubleneck he was most often seen playing in the ’80s (there was maybe more than one), 8-string guitars, modified Strat-type guitars with completely different pickups.. He also has a fancy guitar or two, such as his Koll fanned-fret 8-string, upon which he has played many a solo recital. During Covid time,, things were a little slow in the cash-flow department and, as a family man with twins, a little extra income was needed. So Elliott started building really cool-looking guitars out of cheap
ones and parts from wherever and refinishing them in hip and attractive ways and called them Mutantu. He sold them to friends and friends of friends. Yours truly basically only changes strings on his guitars, appealing helplessly to experts to do any kind of work on his guitars and amps, afraid of costly errors. The maverick and multifaceted among us, like Elliott, possess no such fear.
Even a leader in experimental 6-string gets a little guitar face now and then—especially when he’s playing blues.
Photo by Scott Friedlander
So, back to that promised day in the life of Elliott Sharp (as imagined, with some degree of knowledge, by me): It’s early morning, and there is family to contend with. No bohemian lollygagging! So it’s feed the kids breakfast, do what parents must do. Then it’s off to the office (his studio), so Elliott dons a fine gray shirt (is that silk?), dark trousers, coat, and hat, and walks north from the family apartment on nearly the lowest point of eastern Manhattan to the East Village. The traffic and endless refurbishing of the Williamsburg Bridge roars familiarly overhead, the East River flows, and eventually a river of another kind, Houston Street, is crossed. Up the stairs to the fifth floor and the studio door is unlocked. Espresso is made. (There will be more of this.) The computer is turned on. And then ... who knows? Anything could be on the docket, but some sort of work will ensue for a good eight hours. Maybe a new graphic score for a German symphony is in the works (some of these have become visual artworks, too), or maybe it's time to try another mix of that Terraplane track, the one with Elliott’s friend, hero, and inspiration Hubert Sumlin—the one Elliott recorded not long before the famed Howlin’ Wolf guitarist joined his ancestors in the Great Beyond. Or maybe he’s recording a variation on his trio ERR Guitar (where he was originally joined by Marc Ribot and Mary Halvorson), called ERE Guitar Today, with Sally Gates and Tashi Dorji. Could happen—and it did. You can see Elliott’s studio in the ERE Guitar CD booklet.
Or maybe it’s guitar tinkering/building time. Where’s that delightfully chunky neck from China that would be awesome on that fake Tele body that was just refitted with no-name humbuckers (“sounded good once I removed the pickup covers,” Elliott observes) and a resophonic guitar tailpiece? By 5 or 6 it’s time to go home, maybe cook dinner tonight. And then ... my little imagined epic ends with a tasteful cinematic cliché: the dissolve.
The E# Way
Elliott Sharp has techniques that, in some cases, are all his own. No stranger to open tunings, prepared guitar, and other extended techniques, he often utilizes rhythmic, two-hand tapping to create spiraling, hypnotic patterns. His composing over these many years has employed and embraced genetics, Fibonacci numbers, algorithms, and fractal geometry. Though a mathematics and physics know-nothing myself, I see and hear a relationship between these elements as he has applied them to his uncompromisingly avant-garde compositions and these tapping patterns often heard in his solo work. Once he kicks in signal processing, stand back! What one hears sounds like four people (or other species and life forms), and the sensation is exhilarating. Sure, there could also be evidence of (here it comes) skronk (I can't believe I used that word), but Elliott certainly does not reside permanently in that world. Enjoying all kinds of sounds, from the lonesome moan of a resonator guitar to the aleatoric sputterings and squeals of a tormented electric guitar, is something he and I share, after all. Take, for example, two of his latest recordings on his zOaR imprint, Mandorleand Mandocello, which document his solo work on the two instruments, respectively. Both recordings investigate the instruments’ acoustic characteristics before, about half-way through, switching suddenly to electric, ultra-processed sounds. It’s a bracing experience that explains a few things about this man and the breadth of his aesthetic sweep. The sounds bring up images of recombinant DNA (information on which he has also imbued into his work), roiling lava, and the ever-expanding universe. Recommended!
Sharp applies his wicked two-handed-tapping technique to his 8-string, fanned-fret guitar built by Saul Koll.
Photo by Scott Friedlander
So, this might fit into the aforementioned TMI category, but Elliott Sharp puts out a staggering amount of recordings. Every time I see him (which is not often enough), he has a little pile of compact discs for me, often on zOaR. I saw somewhere recently that he has released 165 recordings, but I think there are probably more than that. It’s hard for even the data lords to keep up! But it’s not always Elliott Sharp pieces or improvisation/collaborations on these albums. Other artists whom Elliott knows and respects can be represented, such as Spanish electric guitarist/conceptualizer A. L. Guillén, late bassist/producer Peter Freeman, Italian voice and guitar duo XIPE, or Hardenger fiddle player Agnese Amico—all articulate and singular musicians whom Elliott assists by releasing their music. I am grateful for this. It’s obviously more “work” for Elliott, and he accomplishes it, along with everything else he takes on or imagines doing, with elegant aplomb. Though obviously a nose-to-the-grindstone worker, Elliott is generally low-key and relaxed, even after those espressos.
The last thing I want to write about is Elliott's interpretations of the music of Thelonious Monk. Are you surprised, even after everything else you have just read, that something like that exists? In 2003, Elliott released a solo acoustic guitar recording called Sharp? Monk? Sharp! Monk!, and stunned the world (well, those few who pay attention to such things). However, my first exposure to Elliott's Monk interpretations was the more recent Monkulations, expertly recorded live in Vienna in 2007. (You can hear it on Bandcamp). These recordings are, justifiably I suppose, controversial in certain corners, because they do not adhere to Monk's exact written particulars note-for-note. Yet the mood, gestures, rhythmic wonders, and even the harmonic depth of Thelonious Monk often emerges, and frequently in astonishing ways. I understand why some would take issue with this approach because it departs significantly from the jazz tradition, but I find it remarkably fresh, bold, and so delightfully E#. They reveal an aspect of Elliott’s thinking and playing that is surprising in some ways, but also so him. It is clear to me that Elliott has seriously examined and internalized Monk’s repertoire.
Spring(s) in the garden: Sharp can use just about any tool in his improvisations.
Photo by Norman Westberg
Elliott is an artist who plays more than one instrument, plays them all in unique, startling, and often innovative ways, composes rigorous conceptual works from chamber music to operas, makes electronic music with no guitar, plays mean blues guitar like a swamp rat, authors books (I highly recommend his mostly memoir IrRational Music, and a second book is emerging this fall), builds and modifies guitars and other devices, is stunningly prolific, and is an elegant gentleman. The planet is a better place with him and his work in it. The maverick and multifaceted often have a rough road to tread, as we all know. So check out Elliott Sharp's vast world if any of this seems interesting to you. Thanks, Elliott!
YouTube
Watch Elliott Sharp and Marc Ribot deliver a masterclass in free improvisation at Manhattan’s Cornelia Street Café in 2010—Sharp’s two-handed tapping and slide playing included.
Elliott Sharp’s Favorite Gear
This doubleneck guitar accompanied Sharp on many of his ’80s performances and is one of his earlier experimental instruments, as is this 8-string.
Road
Guitars
• Strandberg 8-string Boden
• 1996 Henderson-Greco 8-string
Amp
• Fender Deluxe Reverb or black-panel Twin Reverb (depending on size of venue)
• Trace-Elliot bass amp w 4x10 cabinet
(live rig uses both amps, run in stereo)
Effects
• Eventide H90 w/ Sonicake expression pedal
• Sonicake Fuzz
• Hotone Komp
• Hotone Blues
• TC Electronic Flashback 2
• VSN Twin Looper
Accessories
• Slides, EBows, springs, metal rods and strips, small wooden and ceramic square plates
Home
Guitars
• 1946 Martin OO-18 acoustic guitar
• 2006 Squier 51 (Sharp explains: “On New Year's Day 2007, I took the twins down to the East River in their stroller. They were 15 months old and knew a few words. As we rolled along, they started shouting “guitar, guitar,” and, sure enough, sticking out of a garbage can was a black Squier 51 that someone had attempted to ritually sacrifice. Brought it home and cleaned it, and it’s become a favorite couch guitar.”)
Obviously, any sound that emerges from the Triple-Course Bass Pantar is likelly to be interesting.
Studio
Guitars and stringed instruments
• Fender 1994 ’50s Telecaster built from a Fender-offered kit
• Mutantum lime green metalflake Strat w/Seymour Duncan Little ’59 pickups
• Mutantum solidbody “manouche” Strat w/classical neck
• Saul Koll custom 8-string
• Rick Turner Renaissance Baritone
• 1966 Epiphone Howard Roberts
• 1965 Harmony Bobkat
• 1984/’96 Heer-Henderson Doubleneck
• 1956 Gibson CF-100 acoustic guitar
• 1968 Hagstrom H8 8-string bass
• Mutantum Norma fretless electric
• Godin Multiac Steel Duet
• 2001 Dell’Arte Grande Bouche
• 1958 Fender Stringmaster 8-string console steel guitar
• 1936 Rickenbacker B6 lap steel
• 1950s Framus Nevada Mandolinetto
• Mutantum Electric Mandocello
• Arches H-Line
• Triple-Course Bass Pantar
Amps
• 1966 Fender black-panel Princeton Reverb
• 1980 Fender 75 (Per Sharp: “Cut down to a head and modded by Matt Wells into a Dumble-ish monster! For recording, it plugs into a 1x10 cab with a Jensen speaker or a Hartke Transporter 2x10 cab
• 1970 Fender Bronco
• 1960 Fender tweed Champ modded by Matt Wells
Effects and Electronics
• Vintage EHX 16-Second Delay w/foot controller
• Eventide H3000
• Eventide PitchFactor
• Lexicon PCM42
• ZVEX Fuzz Factory
• Summit DCL-200 Compressor Limiter
• SSL SiX desktop
• Prescription Electronics Experience
• Zoom Ultra Fuzz
• Korg MS-20 analog synthesizer
• Korg Volca Modular synthesizer
• Make Noise 0-Coast synthesizer
• Moog Moogerfooger Ring Modulator
• Moog Moogerfooger Low-Pass Filter
• Softscience Optical Compressor (for DI recording, custom made by Kevin Hilbiber)
Strings
• Ernie Ball Regular Slinky (.010–.046) or Power Slinky (.011–.048), for conventional guitar.
The least exciting piece of your rig can impact your tone in a big way. Here’s what you need to know.
Hello, and welcome back to Mod Garage. This month, we will have a closer look at an often overlooked part of our guitar signal chain: the guitar cable. We’ll work out what really counts and how your cable’s tonal imprint differs from your guitar’s tone-control function.
Today, the choice of guitar cables is better than it’s ever been, and you can choose between countless options regarding color, stability, plug style, length, diameter, bending strength, shielding, etc. A lot of companies offer high-quality cables in any imaginable configuration, and there are also cables promising special advantages for specific instruments or music styles, from rock to blues to jazz.
Appearance, stability, longevity, bending stiffness, and plug configuration are matters of personal preference, and every guitarist has their own philosophy here, which I think is a great thing. While one player likes standard black soft cables with two straight plugs, their buddy prefers red cables that are stiff as hell with two angled plugs, and another friend swears by see-through coiled cables with golden plugs.
“We often want to come as close as possible to sounding like our personal heroes, but we fail because we’re using the wrong cable for a passive guitar.”
Regarding reliability, all these parameters are important. Who wants a guitar cable making problems every time you are on stage or in the studio? There are also technical parameters like resistance, capacitance, transfer resistance on the plugs, and more. Without making it too technical, we can summarize that, sound-wise, the only important technical parameter for a passive guitar circuit is the capacitance of the cable. Sadly, this information is often missing in the manufacturer’s description of a guitar cable, and there’s another thing we have to keep in mind: Most manufacturers try to offer cables with the smallest possible capacitance so the guitar can be heard “unaltered” and with a “pure” tone. While these are honourable intentions, they are self-defeating when it comes to making a guitar sound right.
Let’s take a trip back to the past and see what cables players used. Until the early 1980s, no one really cared about guitar cables—players simply used whatever was available. In the ’60s and ’70s, you could see a lot of ultra-long coiled cables on stage with players like Clapton, Hendrix, May, Townshend, Santana, and Knopfler, to name just a few. They used whatever was available, plugged in, and played without thinking about it. Ritchie Blackmore, for example, was famous for notoriously using incredibly long cables on stage so he could walk around. Joe Walsh and many other famous players did the same. Many of us have these players’ trademark sounds in our heads, and we often want to come as close as possible to sounding like our personal heroes, but we fail because we’re using the wrong cable for a passive guitar. So what are we talking about, technically?
It’s important not to look at the guitar cable, with its electrical parameters, as a stand-alone device. The guitar cable has to be seen as part of the passive signal chain together with the pickups, the resistance of the guitar’s pots (usually 250k or 500k), the capacitance of the wires inside the guitar, and, of course, the input impedance of the amp, which is usually 1M. The interaction of all these in a passive system results in the resonance frequency of your pickups. If you change one of the parameters, you are also changing the resonance frequency.
”Ritchie Blackmore, for example, was famous for notoriously using incredibly long cables on stage so he could walk around.“
You all know the basic formulation: The longer the cable, the warmer the tone, with “warmer” meaning less high-end frequencies. While this is true, in a few moments you will see that this is only half the truth. Modern guitar cables are sporting a capacitance of around 100 pF each meter, which is very low and allows for long cable runs without killing all the top end. Some ultra-low-capacitance cables even measure down to only 60 pF each meter or less.
Now let’s have a look at guitar cables of the past. Here, capacitances of up to 400 pF or more each meter were the standard, especially on the famous coiled cables. See the difference? No wonder it’s hard to nail an old-school sound from the past, or that sometimes guitars sound too trebly (especially Telecasters), with our modern guitar cables. This logic only applies to our standard passive guitar circuits, like those in our Strats, Teles, Les Pauls, SGs, and most other iconic guitar models. Active guitars are a completely different ballpark. With a guitar cable, you can fine-tune your tone, and tame a shrill-sounding guitar.
“No problem,” some will say. “I simply use my passive tone control to compensate, and that’s it. Come on, capacitance is capacitance!” While this logic seems solid, in reality this reaction produces a different tone. “Why is this?” you will ask. Thankfully, it’s simple to explain. You might be familiar with the typical diagrams showing a coordinate system with "Gain/dB" on the Y-axis and "Frequency/kHz" on the X-axis. Additional cable capacitance will shift the resonance frequency on the X-axis, with possible differences of more than one octave depending on the cable. A cable with a higher capacitance will shift the resonance frequency towards the left and vice versa.
Diagram courtesy Professor Manfred Zollner (https://www.gitarrenphysik.de)
Now let’s see what happens if you use your standard passive tone control. If you close the tone control, the resonance frequency will be shifted downwards mostly on the Y-axis, losing the resonance peak, which means the high frequencies are gone. This is a completely different effect compared to the additional cable capacitance.
Diagram courtesy Professor Manfred Zollner (https://www.gitarrenphysik.de)
To summarize, we can say that with different cable capacitances, you can mimic a lot of different pickups by simply shifting the resonance frequency on the X-axis. This is something our passive tone control can’t do, and that’s exactly the difference you will have to keep in mind.
So, let’s see what can be done and where you can add additional cable capacitance to your system to simulate longer guitar cables.
1. On the cable itself
2. Inside the guitar
3. Externally
In next month’s follow-up to this column, we will talk about different capacitances and how you can add them to your signal chain with some easy-to-moderate modding, so stay tuned!
Until then ... keep on modding!
Do you overuse vibrato? Could you survive without it?
Vibrato is a powerful tool, but it should be used intentionally. Different players have different styles—B.B. King’s shake, Clapton’s subtle touch—but the key is control. Tom Butwin suggests a few exercises to build awareness, tone, and touch.
The goal? Find a balance—don’t overdo it, but don’t avoid it completely. Try it out and see how it changes your playing!
By refining an already amazing homage to low-wattage 1960s Fenders, Carr flirts with perfection—and adds a Hiwatt-flavored twist.
Killer low end for a low-wattage amp. Mid and presence controls extend range beyond Princeton or tweed tone templates. Hiwatt-styled voice expands vocabulary. Built like heirloom furniture.
Two-hundred-eighty-two bucks per watt.
$3,390
Carr Skylark Special
carramps.com
Steve Carr could probably build fantastic Fender amp clones while cooking up a crème brulee. But the beauty of Carr Amps is that they are never simply a copy of something else. Carr has a knack for taking Fender tone and circuit design elements—and, to a lesser extent, highlights from the Vox and Marshall playbook—and reimagining them as something new.
Those that playedCarr’s dazzling original Skylark know it didn’t go begging for much in the way of improvement. But Carr tends to tinker to very constructive ends. In the case of the Skylark Special, the headline news is the addition of the Hiwatt-inspired tone section from theCarr Bel-Ray, a switch from a solid-state rectifier to an EZ81 tube rectifier that enhances the amp’s sense of touch and dynamics, and an even deeper reverb.
Spanning Space Ages
With high-profile siblings like the Deluxe, Bassman, Tremolux, and Twin, Fender’s original Harvard is, comparatively, a footnote in Fender’s wide-panel tweed era (the inclusion of Steve Cropper’s Harvard in the Smithsonian notwithstanding). But the Harvard is somewhat distinctive among tweed Fenders for using fixed bias, which, given its power, makes it a bridge that links in both circuit and sound to the Princeton Reverb. The Skylark Special’s similar capacity for straddling tweed and black-panel touch and tone is fundamental to its magic.
Like the Harvard and the Princeton, the Skylark Special’s engine runs on two 6V6 power tubes and a single 12AX7 in the preamp section. A 12AX7 and 12AT7 drive the reverb and the reverb recovery section, respectively, and a second 12AT7 is assigned to the phase inverter. (The little EZ81 between the two 6V6 power tubes is dedicated to the rectifier). Apart from the power tubes and the 12AX7 in the preamp, however, the Skylark Special deviates from Harvard and Princeton reverb templates in many important ways. Instead of a 10" Jensen or Oxford, it uses a 50-watt 12" Celestion A-Type ceramic speaker, and it includes midrange and presence controls that a Harvard or Princeton do not. It also features a boost switch that manages to lend body and brawn without obliterating the core tone. There is also, as is Carr’s style, a very useful attenuator that spans zero to 1.2 watts. Alas, there is no tremolo.
“I’d wager the Skylark Special will be around every bit as long as a tweed Harvard when most of your printed-circuit amps have shoved off for the recycler.”
It goes without saying, perhaps, that the North Carolina-built Skylark Special is made to standards of craft that befit its $3K-plus price. Even still, Carr upgraded nine of the coupling capacitors to U.S.-made Jupiters. They also managed to shave six pounds from the Baltic birch cabinet weight—reducing total weight to 35 pounds and, in Steve Carr’s estimation, improving resonance. Say what you will about the high price, but I’d wager the Skylark Special will be around every bit as long as a tweed Harvard when most of your printed-circuit amps have shoved off for the recycler.
Sweet Soulful Bird
Fundamentally, the Skylark Special launches from a Fender space. But this is a very refined Fender space. The bass is rich, deep, and massive in ways you won’t encounter in many 12-watt combos, and the warm contours at the tone’s edges lend ballast and attitude to both clean tones and the ultra-smooth distorted ones at the volume’s higher reaches. All of these sounds dovetail with the clear top end you imagine when you close your eyes and picture quintessential black-panel Fender-ness. The presence and midrange controls, along with the 50-watt speaker, lend a lot in terms of scalpel-sharp tone shaping—providing a dimension beyond classical Fender-ness—especially when you bump the midrange and turn up your guitar volume.
The tube rectifier, meanwhile, shifts the Skylark Special’s touch dynamics from the super-immediate reactivity of a solid-state rectifier to a softer, more-compressed, more sunset-hued kind of tactile sensitivity. But don’t let that lead you to worry about the amp’s more explosive capabilities. There is more than enough high-midrange and treble to make the Skylark Special go bang.
Anglo and Attenuated Alter Egos
The Hiwatt-inspired setting is still dynamic, but it’s a little tighter than the Fullerton-voiced setting. There’s air and mass enough for power jangling or weighty leads. The differences in the Bel-Ray’s tube selection (EL84 power tubes as well as an EF86 in the preamp) means the Skylark Special’s version of the Hiwatt-style voice is—like the amp in general—warm and round in the low-mid zone and softer around the edges, where the Bel-Ray version has more high-end ceiling and less mellow glow in the bass. It definitely gives the Skylark Special a transatlantic reach that enhances its vocabulary and utility.
Attenuated settings are not just practical for suiting the amps to circumstances and size of space you’re in; they also offer an extra range of colors. The maximum 1.2 watt attenuated setting still churns up thick, filthy overdrive that rings with harmonics.
The Skylark Special’s richness and variation means you’ll spend a lot of time with guitar and amp alone. Anything more often feels like an intrusion. But the Skylark Special is a friend to effects. Strength in the low-end and speaker means it humors the gnarliest fuzzes with grace. And with as many shades of clean-to-just-dirty tones as there are here, the personalities of gain devices and other effects shine.
The Verdict
Skylark Special. It’s fun to say—in a hep-cat kind of way. The name is très cool, but the amp itself sounds fabulous, creating a sort of dream union of the Princeton’s and Harvard’s low-volume character, a black-panel Deluxe’s more stage-suited loudness and mass, and a zingier, more focused English cousin. It can be sweet, subdued, surfy, rowdy, and massive. And it works happily with pedals—most notably with fuzzes that can make lesser low-mid-wattage amps cough up hairballs. The price tag smarts. But this is a 12-watt combo that goes, sonically speaking, where few such amps will, and represents a first-class specimen of design and craft.