Image 1
We've covered metal parts and tuners, now let's learn how to make a pickup look like it's 70 years old.
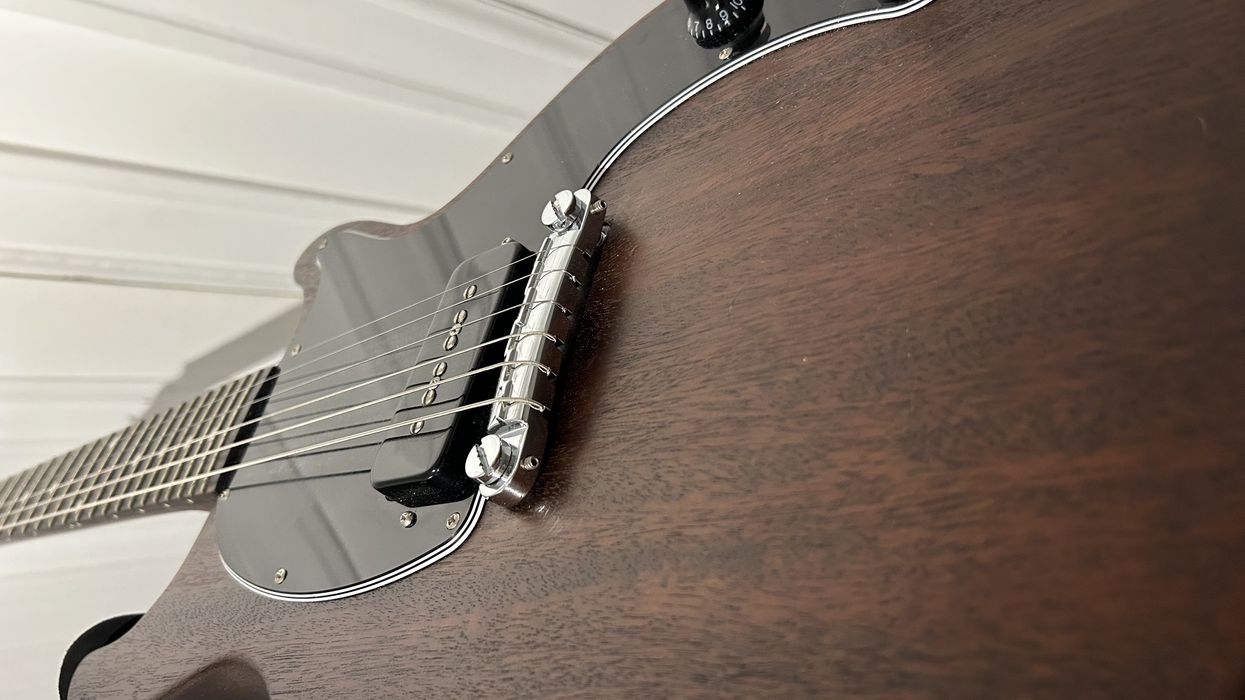
Hello and welcome back to Mod Garage. This month we continue our relic'ing project, taking a closer look at the pickup and its black plastic cover. Our Harley Benton project guitar has a single P-90 dog-ear pickup at the bridge position, similar to a vintage Gibson Les Paul Junior. The P-90 is a single-coil pickup, but sound-wise, its raw, raunchy, beefy tone is the perfect crossover between a single-coil and a humbucker. No wonder many players prefer this type of pickup to have the best of both worlds.
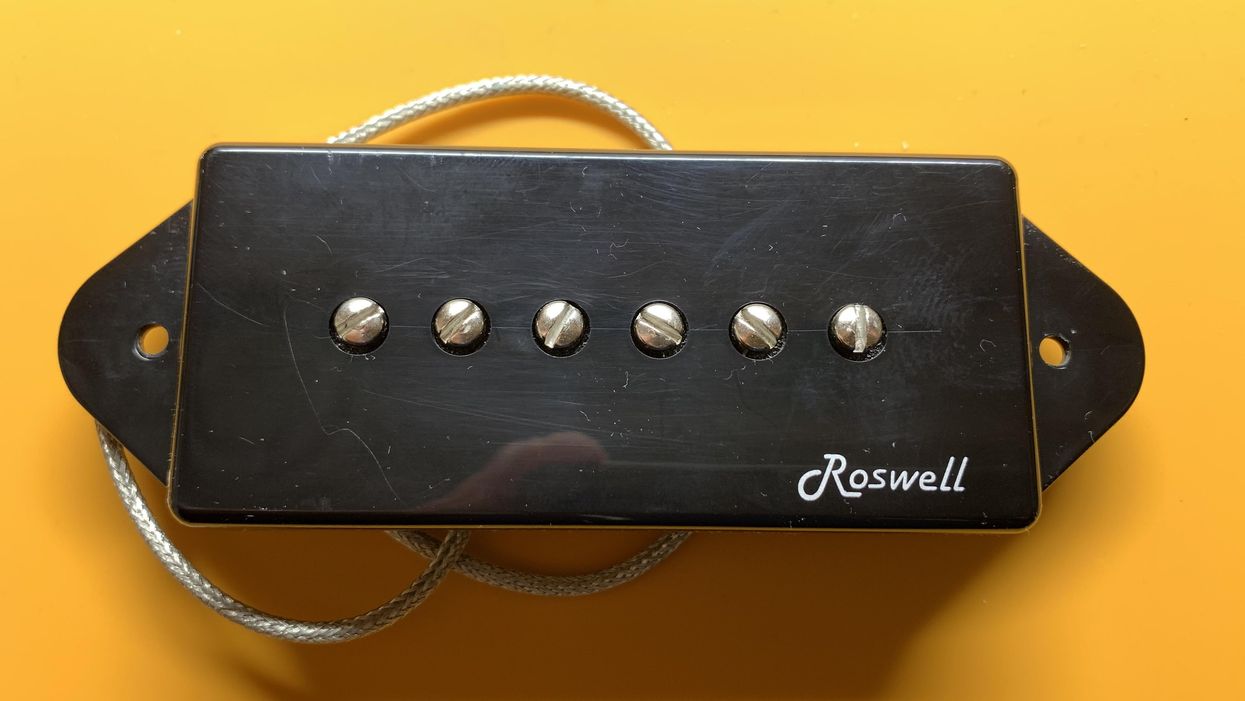
Our guitar is loaded with a pickup from Roswell Pickups. If you've never heard of Roswell, it's one of the biggest pickup manufacturing companies in the world, serving countless guitar companies, including the big guys. Chances are good that you've played their pickups without even knowing it. The company's former name was WSC Pickups before it was renamed in 2014. Our pickup, shown in Image 1, is the "P90D" Dog Ear model with a black dog-ear cover sporting the Roswell logo. Interestingly, it's a neck pickup they put in the bridge position of this guitar, but a bridge version is available as well.
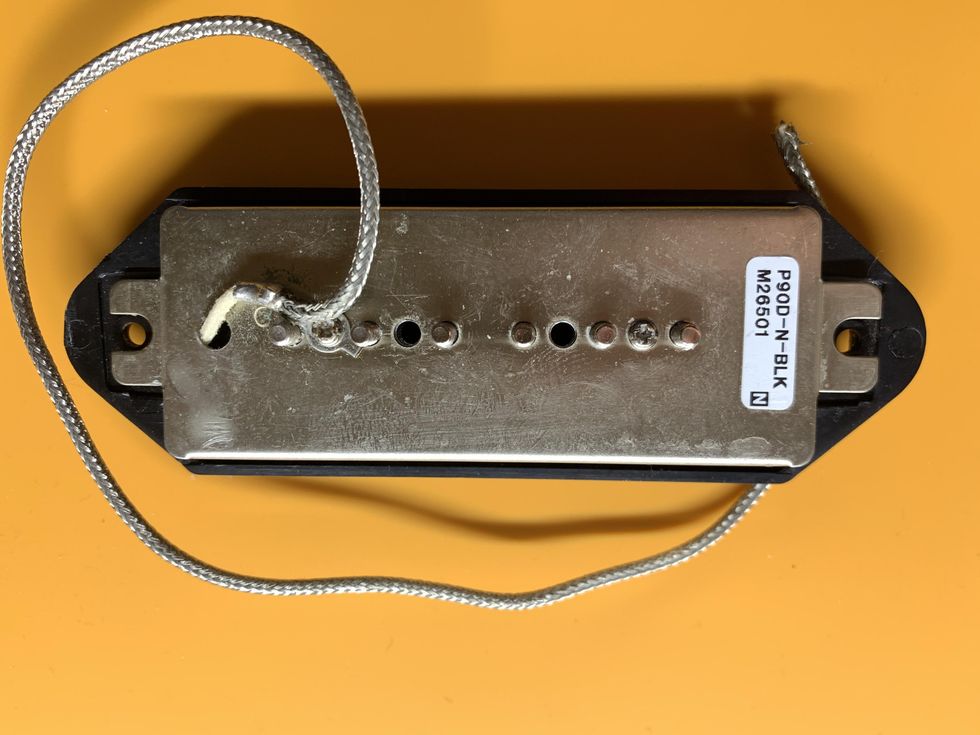
Image 2
The overall construction of the pickup looks very classic. It even features the typical braided shielded wire type that was used in the '50s (Image 2). It's a scatter-wound pickup with degaussed alnico 5 bar magnets, so we can say it's close to an original pickup from the '50s. I was really curious how it would sound. To my surprise, it sounds very fresh and alive, with a good portion of high-end—definitely more on the single-coil side rather than in the humbucker ballpark. It's not the typical P-90 sound we all know and expect, but I really like this pickup.
Personally, I think it's better to have some high-end even if you don't need it, rather than to need it and not have it. I decided to keep it for this guitar, but my brain already worked in the background on how to tweak the electronics to also receive a more typical P-90 tone (more about this in the next part of this series). Anyway, if you want a heavier and darker tone, it's easy to get a replacement pickup and there are many, many P-90 pickups available without breaking the bank.
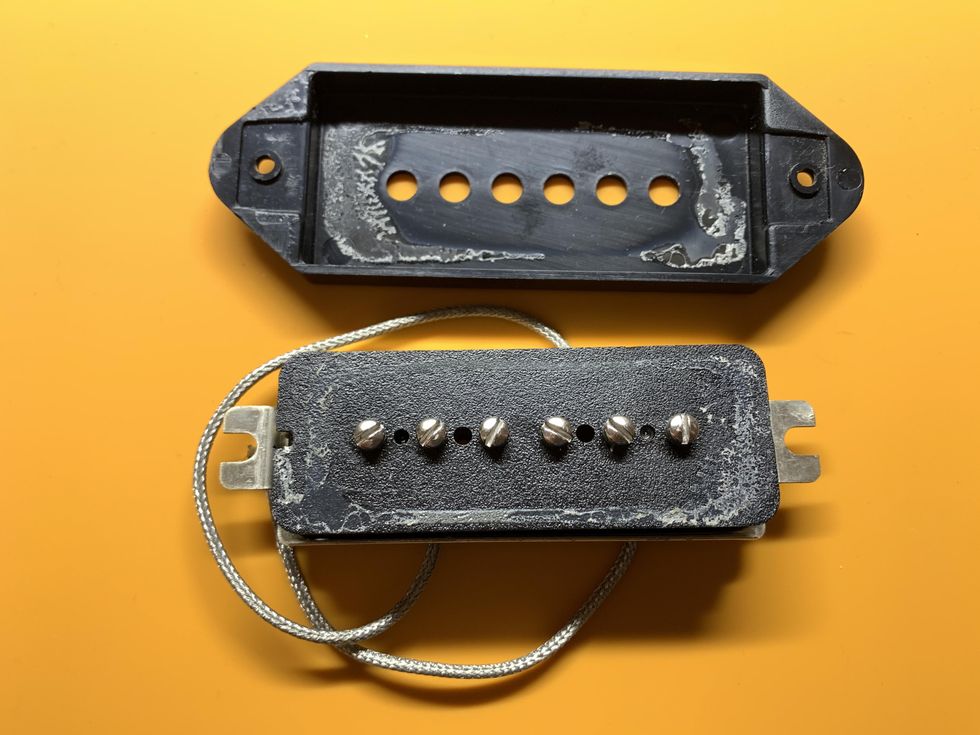
Image 3
After taking the pickup out of the guitar, I decided to change the cover for a more vintage-looking overall shape. The cover the pickup came with is rectangular and looks too boxy to my taste. The covers from the '50s are rounder and smoother, so I decided to change it because I prefer this aesthetic. A surprise was just around the corner: The cover is glued onto the pickup, so removing it on the fly wasn't possible. I have no idea why they glued on the cover in the factory, but after a minute it was clear there's no easy way to remove the cover without damaging the pickup. The cover was absolutely bonded to the pickup's top. So, I used a simple hairdryer to warm up the cover and, after some minutes, I could remove the cover with my hands (Image 3).
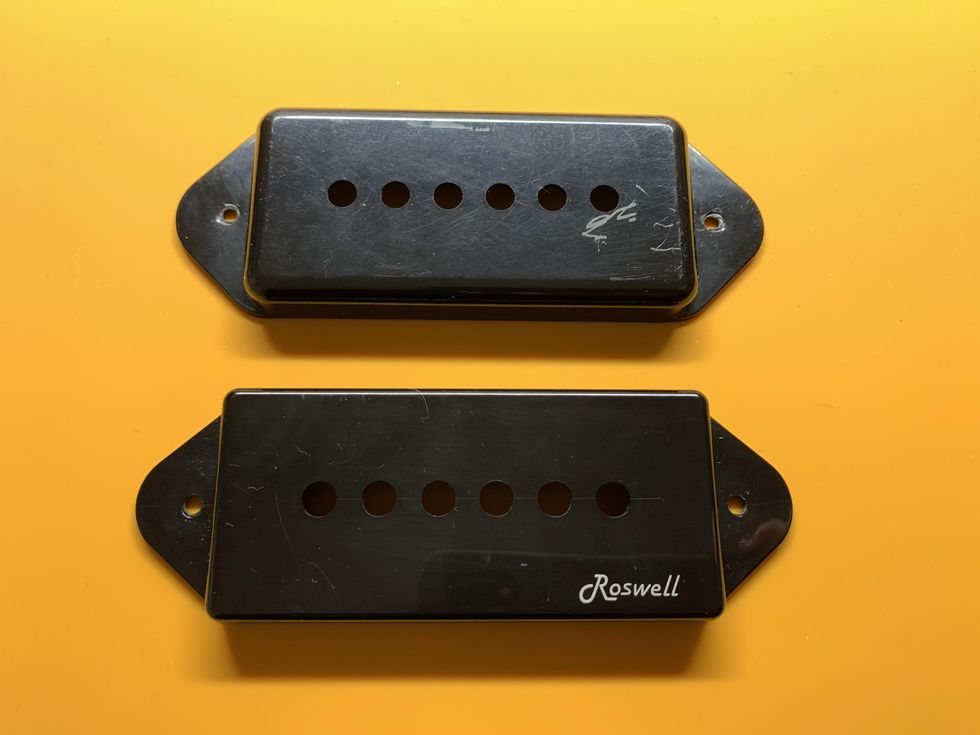
Image 4
It's up to you if you want to remove the glue from the top of the pickup by scraping it away after warming it up with the hairdryer, or simply leave it as is. I decided to leave it because, with the new cover on, you can't see it anyway. A word of warning: Don't use a heat gun for this operation. A hairdryer is all you need. The pickup cover is thin plastic, which a heat gun can melt within seconds.
Comparing both covers side by side (Image 4) clearly shows the different shapes, and you can decide what you like best. The rounded-edge cover I chose is very close to the vintage pickup covers from the '50s, and I had a used one in my parts tray. I didn't care about the scratches and paint on it because we want to relic it anyway.
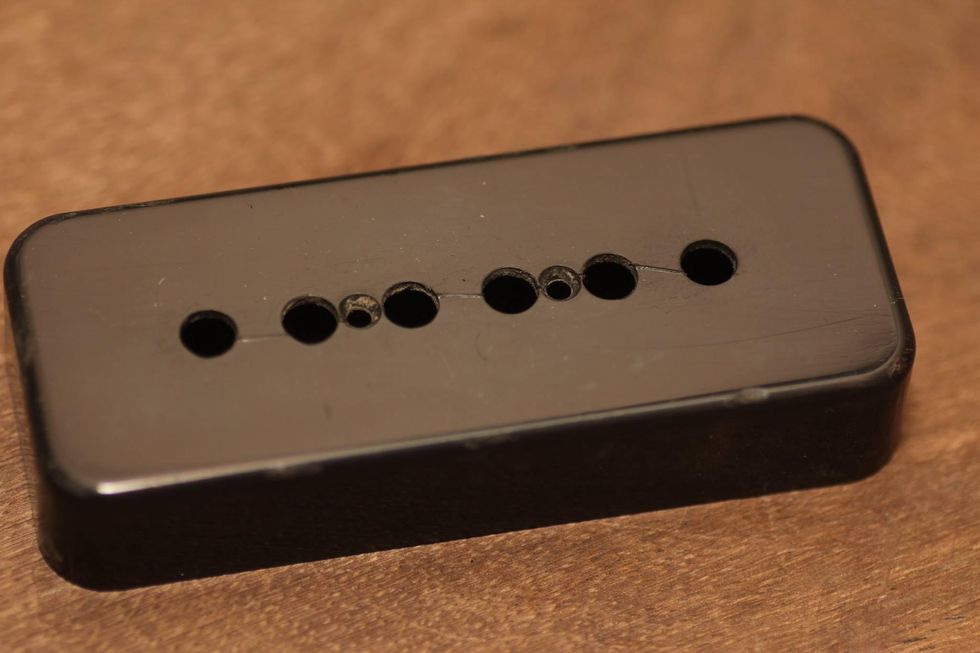
Image 5
Next, I took out the six pole-piece screws of the pickup because we want to age these, too, along with the two screws holding the pickup in place. If you've been following along at home, you know this procedure by now, but if you missed earlier parts of this series, please reference "DIY Relic'ing: Break the Shine," "DIY: Relic'ing Tuners, Part 1," and "DIY: Relic'ing Metal Hardware." We'll use the same relic'ing process here as we did for the other metal parts. As always, first break the shine with fine sandpaper or steel wool. After cleaning the screws with a brush, put them on a wooden board and use the iron (III) oxide (ferric oxide) liquid to create some patina. Don't forget to wear gloves and goggles and to use old newspapers to protect the surface you're working on. Once you're pleased with the result, stop the process with water and dry the screws with a paper towel before putting them back into the pickup.
Now, this is our first time with a piece of black plastic to relic, and, as you can imagine, it's harder to do compared to white plastic because the visible results are more subtle on darker materials. For an idea of what we're going for, Image 5 shows a vintage P-90 soapbar pickup cover from the '50s, which gives an impression of how a pickup may look after 70 years.
Images 6 & 7
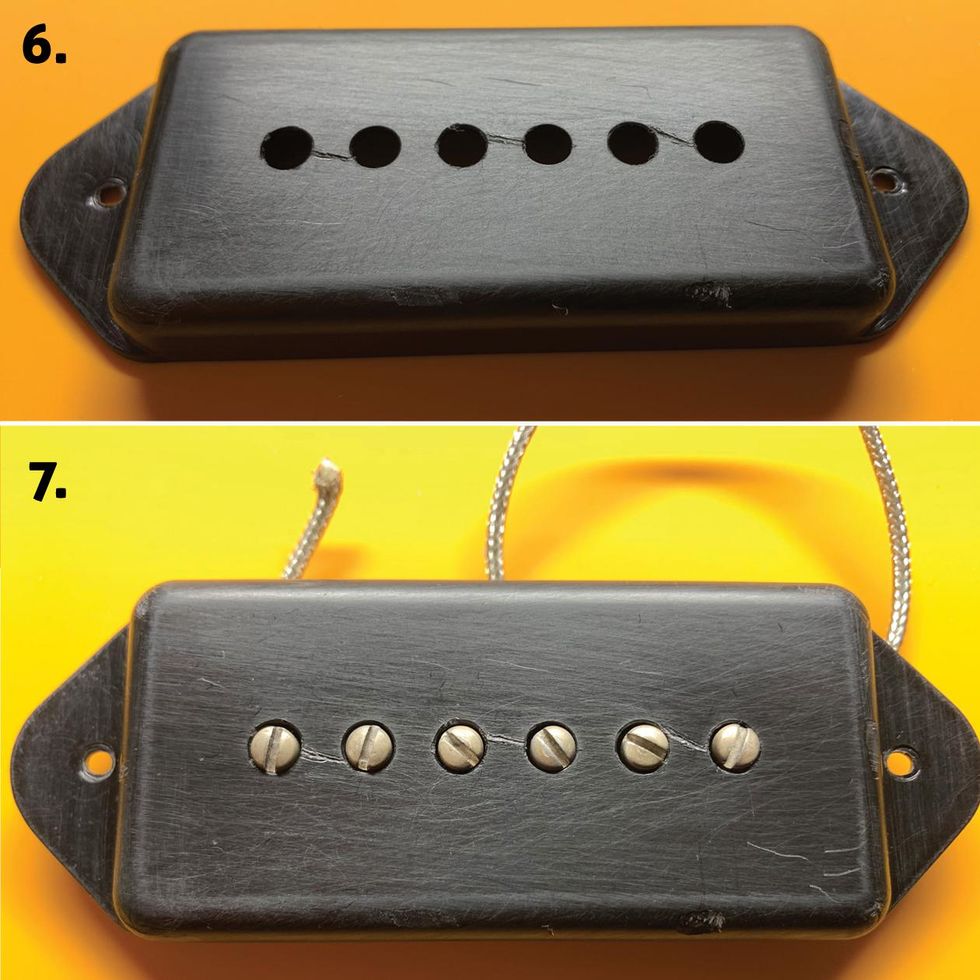
As you can see, it's not just about building up artificial dirt marks, so I decided to follow this photo as a pattern for the replacement cover regarding scratches and damages. First, I took some fine steel wool and rubbed off the shine. After cleaning it with a brush, I used a steel scribe to mimic the damages between the holes. You can also use a nail, X-Acto knife, scalpel … whatever you have available. Next, I used a needle to put some fine scratches at the top and a very sharp small chisel to create some chunking damages on the border and the corners. To finish, put the cover inside your box with the mixture of nails, metal parts, broken glass, gravel, sand, little stones, basalt, etc., and shake it around until you like the result.
After cleaning the cover, put it on the pickup to see the final result, as shown in Image 6 and Image 7. Voilá!
Images 8 & 9
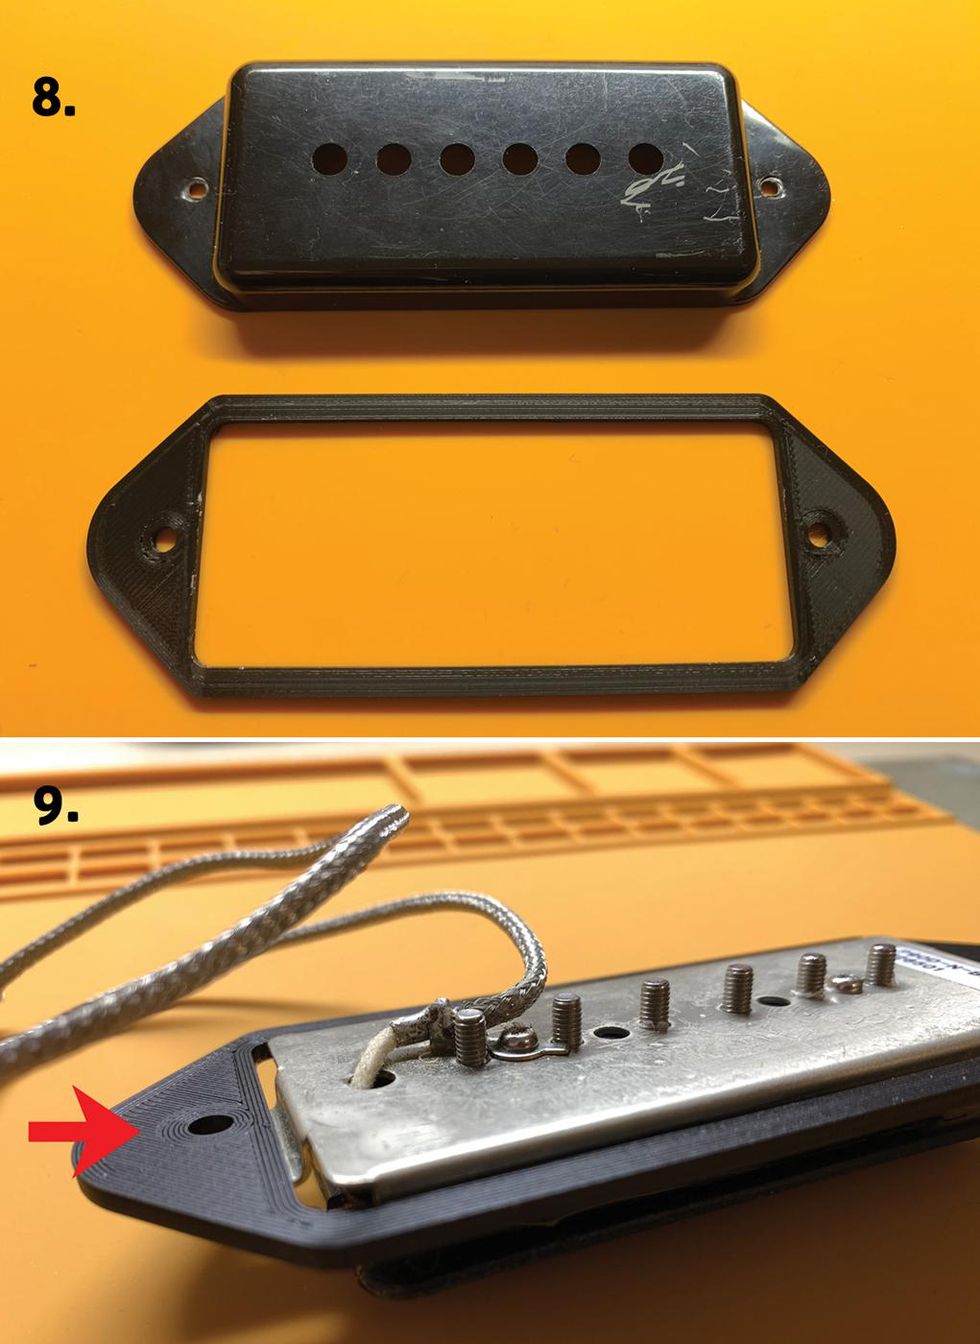
In closing, some words about height adjustment of such a pickup. I like a pickup height adjustment of 1/16" (1.6 mm) for a P-90 at the bridge position, but as you may know, there is no way to adjust the height of such pickups. All you can do is adjust the pole-piece screws to follow the radius of the fretboard, but there is no spring or latex tubing under the attachment screws of the pickup. For this, special shims are available to put underneath the pickup so it will rise. These shims are available in different thicknesses so you can balance your individual pickup height adjustment. I decided to put a 7/32" (2.5 mm) shim underneath the pickup, so it's perfectly balanced to my ears. To keep an optical appearance, I decided to use a shim made of black plastic in the exact shape of the cover (Images 8 and 9).
That's it for this round. In the next part of this series, we'll discuss the electronics for this guitar and start aging the components, including the knobs, the output jack, etc. But before this, I'll close the chapter about grounding next month.Until then ... keep on modding!
- Fender 1954 Heavy Relic Strat Review - Premier Guitar | The best ... ›
- Last Call: Someday You'll Regret That Relic Job - Premier Guitar ... ›
- The DIY Relic Job—Fantasy or Reality? - Premier Guitar | The best ... ›
- DIY Relic’ing: Neck Treatment - Premier Guitar ›
Brent Mason is, of course, on of the most recorded guitarists in history, who helped define the sound of most ’90s country superstars. So, whether you know it or not, you’ve likely heard Mason’s playing.
Professional transcriber Levi Clay has done the deepest of dives into Brent Mason’s hotshot licks. At one point, he undertook the massive project of transcribing and sharing one of Mason’s solos every day for 85 or so days. Mason is, of course, on of the most recorded guitarists in history, who helped define the sound of most ’90s country superstars. So, whether you know it or not, you’ve likely heard Mason’s playing. Levi shares the insight he gleaned from digging deep, and he tells us what it was like when they shared a stage last year. Plus, Levi plays us some great examples of Mason’s playing.
For the first time ever, two guitar greats, John 5 and Richie Kotzen will be heading out on the road this year. The tour will launch October 16 and run through November, hitting markets across the U.S.
Find the full tour itinerary right plus a link for tickets & VIP, including additional dates featuring John 5 only. Reserved seating tickets will go on sale Friday May 16 though a fan presale will begin today at noon local time and fans are strongly encouraged to buy early to get the best seats.
Meet and Greets for both artists will be available. For John 5 please go to: https://john5store.com/collections/vip.
Today, John 5 also announces more details of his anticipated new album. Called The Ghost, it will be released October 10 and is led by the new track “Fiend,” featuring Kenny Aronoff.
John 5 continues running public tours this month for his Knights In Satan’s Service Museum of KISS Memorabilia in Los Angeles, California. Guided tours are open to the public for one month only (with a possible expansion). Current dates available are May 12-16, May 19-23 and May 27-30. Each will be led by John 5 himself who will provide tons of rich detail and answer any questions. Secure your place HERE.
JOHN 5 continues to tour with Mötley Crüe including an upcoming residency in Las Vegas in 2025.RICHIE KOTZEN &
JOHN 5 FALL 2025 TOUR
October 16 El Cajon, CA @ Magnolia
October 17 Riverside, CA @ Fox Performing Arts
October 18 Roseville, CA @ Goldfield Trading Post
October 19 San Jose, CA @ The Ritz
October 21 Phoenix, AZ @ Celebrity Theatre
October 22 Albuquerque, NM @ KiMo Theatre
October 24 Dallas, TX @ Granada Theater
October 25 Leander, TX @ The Haute Spot
October 27 New Orleans, LA @ House of Blues
October 28 Memphis, TN @ Minglewood Hall
October 29 Nashville, TN @ Fogg Street Lawn Club
October 30 Atlanta, GA @ Variety Playhouse
October 31 Orlando, FL @ House of Blues
November 1 Fort Lauderdale, FL @ Culture Room
November 2 Clearwater, FL @ Capitol Theatre
November 4 Richmond, VA @ The National
November 5 Leesburg, VA @ Tally Ho Theater
November 6 Patchogue, NY @ Patchogue Theatre
November 11 Glenside, PA @ Keswick Theatre
November 12 Derry, NH @ Tupelo Music Hall
November 13 Foxborough, MA @ Six String Grill & Stage
November 14 Stroudsburg, PA @ Sherman Theater
November 15 Lorain, OH @ Lorain Palace Theatre
November 16 Columbus, OH @ The King Of Clubs
November 17 Warrendale, PA @ Jergels
November 19 Wyandotte, MI @ District 142
November 20 Flint, MI @ The Machine Shop
November 21 Fort Wayne, IN @ Piere’s
November 22 St. Charles, IL @ Arcada Theatre
November 23 Belvidere, IL @ Apollo Theatre
November 25 Denver, CO @ Oriental Theater
November 29 Pioneertown, CA @ Pappy & Harriet's*
*John 5 only
AEROSMITH guitarist and songwriter JOE PERRY is set to return to the road for a series of August performances with THE JOE PERRY PROJECT. The 8-date run kicks off August 13 in Tampa, FL and wraps August 23 in Port Chester, New York, with an August 19 performance in PERRY’s Boston hometown (see the itinerary below). For the North American trek—which marks the first solo shows for PERRY this year—the legendary guitarist will be joined by his Aerosmith bandmates Brad Whitford (guitar) and Buck Johnson (keys), along with The Black Crowes’ Chris Robinson (vocals), and Stone Temple Pilots’ Robert DeLeo (bass), and Eric Kretz (drums).
“Well…it’s time to let the music do the talkin again,” PERRY says. “I’m really excited about the JPP line up this year!!!! Most of these guys played with me at The Roxy in L.A. at the debut event for my latest solo album [Sweetzerland Manifesto] in January 2018. They’re all busy as hell but thankfully they’re able to carve out some time for this run. And I’m not only lucky enough to have Brad Whitford onstage with me but Chris Robinson of The Black Crowes! [who sang ‘Fortunate One’ on Sweetzerland Manifesto MKII], Robert DeLeo and Eric Kretz from STP!!! and Buck Johnson who plays keys and sings with Aerosmith, the Hollywood Vampires, and is also a solo artist in his own right.”
For the shows, the Rock and Roll Hall of Fame inductee says “the set list is gonna include my fav JPP cuts, STP, Black Crowes, and with Brad we’ll be hitting the Aero hits and some deep cuts and then ya never know!!!! Gonna be a BLAST, and if you’ve ever been to one of my shows you know the words GARAGE BAND on STEROIDS come to mind! See you there!!!!”
DATE | LOCATION | VENUE |
Wednesday, August 13 | Tampa, FL | Seminole Hard Rock - Tampa |
Thursday, August 14 | Hollywood, FL | Seminole Hard Rock - Hollywood |
Saturday, August 16 | Toronto, ON | HISTORY |
Sunday, August 17 | Muskoka, ON | Kee to Bala |
Tuesday, August 19 | Boston, MA | Wang Theatre |
Wednesday, August 20 | Hampton Beach, NH | Hampton Beach Casino Ballroom |
Friday, August 22 | Mashantucket, CT | The Premier Theater at Foxwoods Resort Casino |
Saturday, August 23 | Port Chester, NY | Capitol Theatre |
A sample page from the author’s analog log.
Seasonal changes are tough on your acoustic. Here’s how you can take better care of your prized instrument.
As you read this, spring is in bloom in most of the US, or maybe it has been for some time. I’m timing this column specifically to ask acoustic guitarists, in this season of increasing humidity and comfortable conditions, to prepare for what’s coming. It’s never too soon, and time flies. Before you know it, we’ll be back to the maintenance phase and you might be blowing up the phones of your local guitar shops, luthiers, and techs. I’m here to encourage a decidedly old-school approach to preventative guitar maintenance, and yes, it starts now.
Why, you ask? Well, as the lead luthier at Acoustic Music Works, I can tell you that in my nearly 15 years in this position, this was the worst winter ever for preventable repairs on acoustic guitars. Fret sprout, bridge lifts, top sink, soundboard cracks, back cracks, loose binding, general malaise… These hit us very hard in the winter that spanned 2024 and 2025. Am I complaining? On the one hand, no. This is part of how we make our money. On the other hand, yes! Repair schedules related to dryness and humidity issues can stretch into weeks and even months, and nobody wants to be without their favorite instruments for that amount of time. With a little thoughtfulness, however, you might get through next winter (and every one thereafter) without hefty repair bills or time apart from your musical companion.
Our preparation is going to start with an unlikely but very important guitar accessory: the humble notebook. Plain, lined, grid, day planner… it doesn’t matter. We all need to actively participate in our instrument maintenance, and in my experience, fancy apps that track humidity via Bluetooth breed a kind of laziness, a feeling of safety that might prevent us from actually physically looking in on conditions. Better we keep an analog, well, log, so that we know where things stand, and I suggest checking in daily.
“This was the worst winter ever for preventable repairs on acoustic guitars.”
Track your relative humidity, both in the case and in the room where your instruments mostly reside, but also take notes on your action height, top deflection (StewMac has some great tips for measuring this) and anything related to playability that you believe you can observe empirically.
Dryness is the root cause of most guitar issues that manifest in the fall and winter months. Symptoms of dryness include sharp fret ends, falling action and dead frets, sunken top around the sound hole, and cracks and bridge lifts. With your trusty notebook, you’ll get a feel for the sensitivity level of your instrument, and that knowledge is power!
A few other basic implements will not only assist you in your observations, but may also satisfy your need to buy guitar-related things (at least for a minute). Getting quick and comfortable with a fret rocker is a great skill to have, and is invaluable in diagnosing buzzes due to high frets or frets that have come unseated due to dryness. A well-calibrated relief gauge might seem luxurious, but it can prevent you from making unnecessary or extreme truss rod adjustments. A string action gauge, or even a simple machinist’s rule or set of feeler gauges, will help you keep track of your action. Get a three-pack of hygrometers so you can average their readings, rather than depending on one.
Lest we forget: A guitar can not only be too dry, it can also be too wet. By beginning your maintenance diligence in the spring/summer, you’ll also be able to tell if your instrument is the victim of a too-humid environment. The signs of over-humidification are subtle: Your action may rise from a puffed-up top, and in extreme cases, glue joints could begin to fail. In my experience, an over-humidified guitar will suffer from dulled tone, almost like a sock in the sound hole. If you’re sensing a lack of clarity in your guitar all of a sudden, start with new strings. If it persists, it might be due to over-humidification, and you may want to introduce a desiccant to the case for a time. The more lightly built your guitar is, the more sensitive it will be to seasonal changes.
By getting into these habits early, you’ll be empowered by knowing your instrument more intimately. You’ll understand when and why changes in tone and playability might have occurred, and you’ll hopefully save on repair bills year-round. Feel free to reach out with any questions. Who knows? I might just send you a notebook with an AMW sticker on the cover!