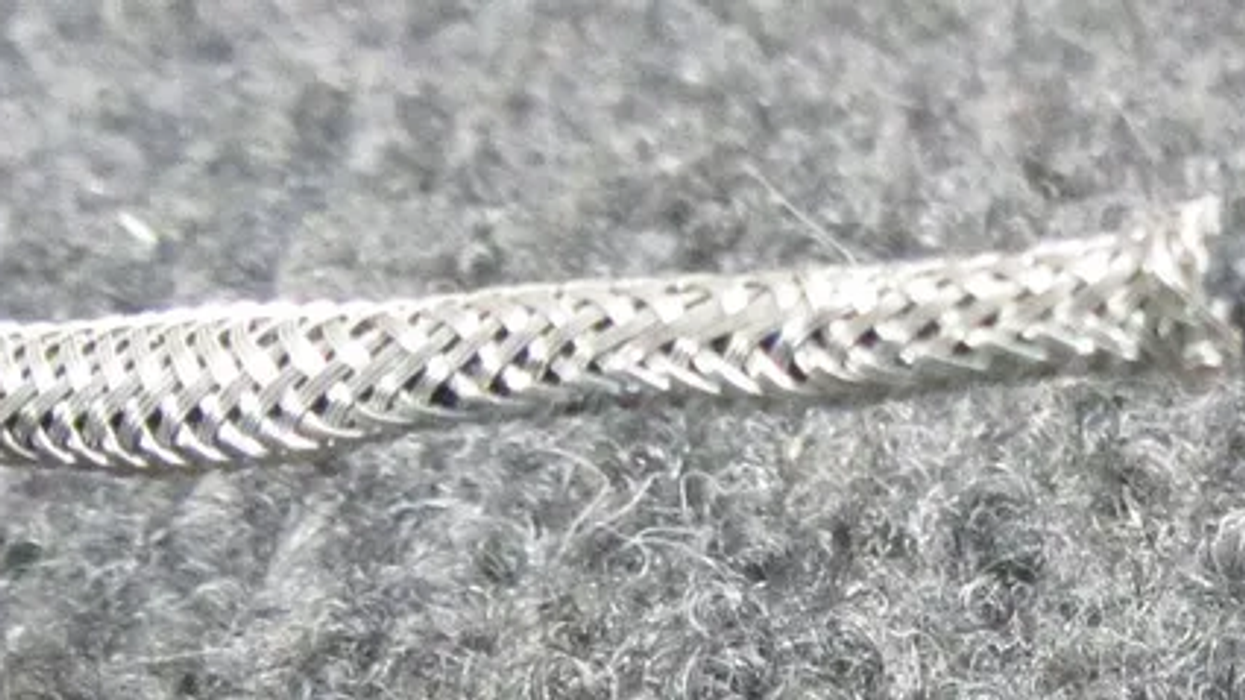

Today we'll explore the type of wire you can find in almost all vintage Gibson guitars. Gibson used it for all wire runs to and from the pickup selector switch and pickups. On models without a selector switch, Gibson used this wire to connect the electronics to the output jack. It's the mother of all shielded cables, and you can visually identify it by its exposed braided-metal shield.
Inside the braided shield is a 22 AWG cloth-covered hook-up wire consisting of seven individually tinned and twisted copper strands. These are enclosed in a woven Celanese overwrap, which is then sheathed in a black braided waxed-cotton jacket (Photo 1).
Along with other companies, Gibson still uses this wire today, and it's available from most luthier and guitar-tech supply stores. You'll find different versions, too: Some manufacturers strictly follow the vintage formula, while others produce cheap look-alike junk with virtually no shielding capability. The best wire costs more, but, in this case, quality really counts.
Working with this wire can be a bit tricky, and you'll want to take some time to get a handle on it. That said, chances are good you won't need any new tools for this. Before we start, there are two things to consider.
First, because the braided-metal shield is conductive, it's often the source of accidental shorts that can cause all kinds of odd, unwanted effects. This is especially true of the long wire run in a Les Paul that goes from the 3-way switch to the output jack. This wire crosses almost all other parts in the electronics compartment, so I highly recommend insulating the braided shield with heat-shrinking tubing or something similar. In our shop, we use PVC, latex, or vintage white cotton tubing that's correctly sized to slip over the braided shield. You can be creative, but don't use any conductive material.
Second, this wire is hydrophilic, which means it attracts and stores moisture, so you'll need to store it carefully. You'll want to keep it dry—ideally in a closed tin or sealed plastic container that prevents the wire from being exposed to air.
If the wire does get exposed to moisture, there's an easy way to dry it out: Simply put it in a kitchen oven (not in a micro-wave oven) and expose it to moderate heat for a little while so the moisture can dissipate. Don't bake it or expose it to high temperature—moderate is the operative word here.
So, what happens if this vintage braided wire gets exposed to moisture? In layman's terms, the wire's resistance rises, and this dampens the high end. That's no good. One a related note, here's an old trick to try if a Les Paul, SG, ES-335, or a similar guitar sounds dull. If all the pots, caps, and pickups are okay, chances are good that the braided wire has soaked up a good deal of moisture over the years, especially in semi-hollow guitars like an ES-335 that have been stored in damp or even wet conditions. Carefully remove all wires and treat them in the kitchen oven as described above, and then resolder them exactly as they were. You'll be amazed at the results! I recently did this on a 1957 Les Paul and the sonic difference was unbelievable.
Okay, let's learn how to work with this type of wire. There are two different scenarios and I'll address both. Here's the big picture: The outer metal braid goes to ground, or it is the ground if it's a pickup wire, and the signal (hot) wire is insulated in the core of the braid. We need to separate the ground and signal wires so we can make the necessary connections on the pickup selector switch, pots, output jack, and so on. And this is important: The metal braid needs to be soldered to ground, otherwise it will simply do nothing, leaving you with no shielding at all.
Our first scenario comes into play when you're wiring up a potentiometer with vintage wire. In this application, the metal braid gets soldered to the pot's case and the signal wire is soldered to one of the pot's lugs. This results in a very clean layout.
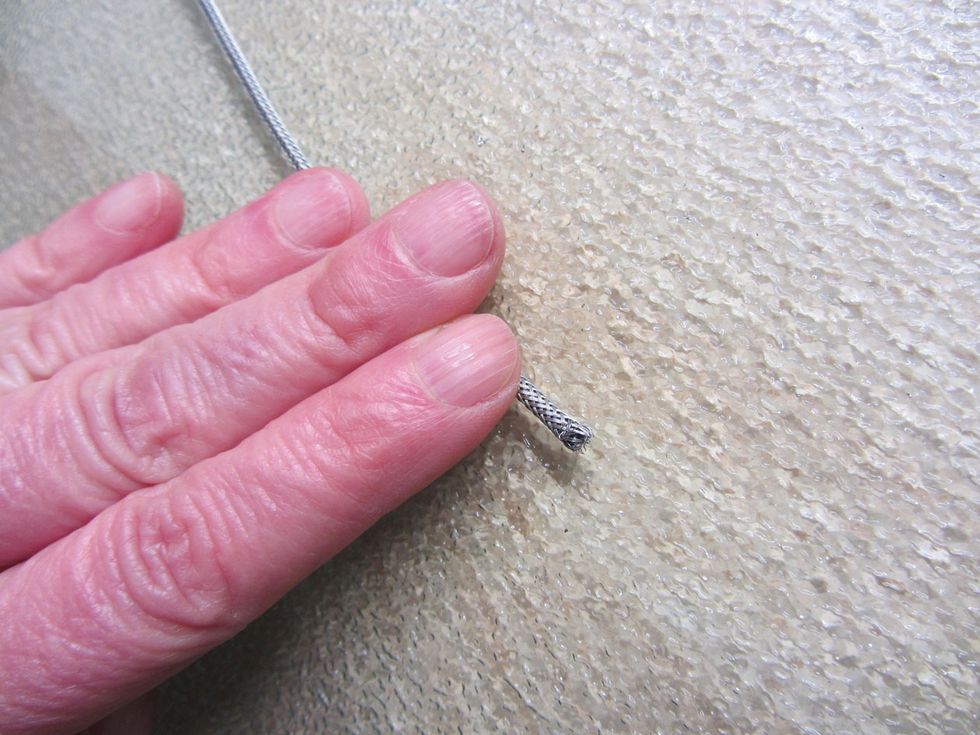
Photo 2 — Photo courtesy singlecoil.com
To accomplish this, you'll need to separate the two elements—the metal braid and the signal wire. Here's how you do it: Put the wire on a smooth surface (a ceramic tile or piece of glass works well) and roll it gently with your fingers, applying moderate pressure (Photo 2). This loosens up the braid a bit.
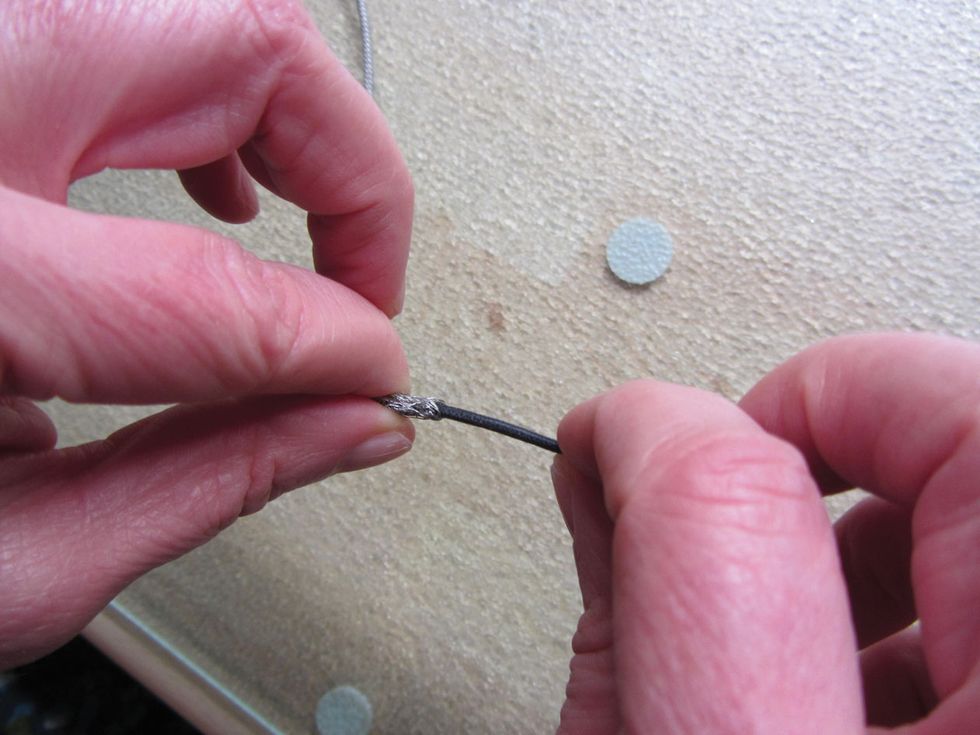
Photo 3 — Photo courtesy singlecoil.com
Now grasp the wire between your thumb and forefinger, about 2" from the end, and then grab the tip of the wire with your other hand (Photo 3). Gently work the metal braid away from the end, while trying not to push back the cloth insulation inside (Photo 4). This requires practice and patience, so don't worry if you don't get it right the first time you try.
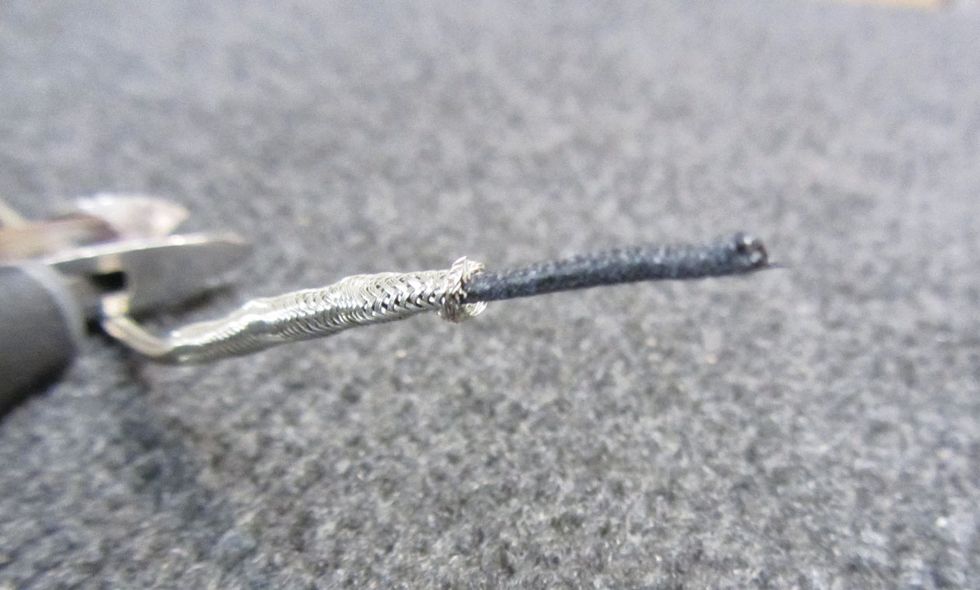
Photo 4 — Photo courtesy singlecoil.com
Once the braid is eased back, push back the cotton insulation to expose the signal wire. Pre-tin the metal braid and the pot's case, then solder them together. Let it cool down for a minute.
Tip: Pre-tinning makes this process much easier. Use about 60 watts of soldering power for this job—our standard 25–30 watts will not be enough. For soldering the signal wire to one of the pot's lugs, 25–30 watts is perfect.
Finally, solder the signal wire to the pot's lug.
Our second scenario involves separating the metal braid from the inner core for soldering the two elements to the output jack, pickup selector switch, or any other part.
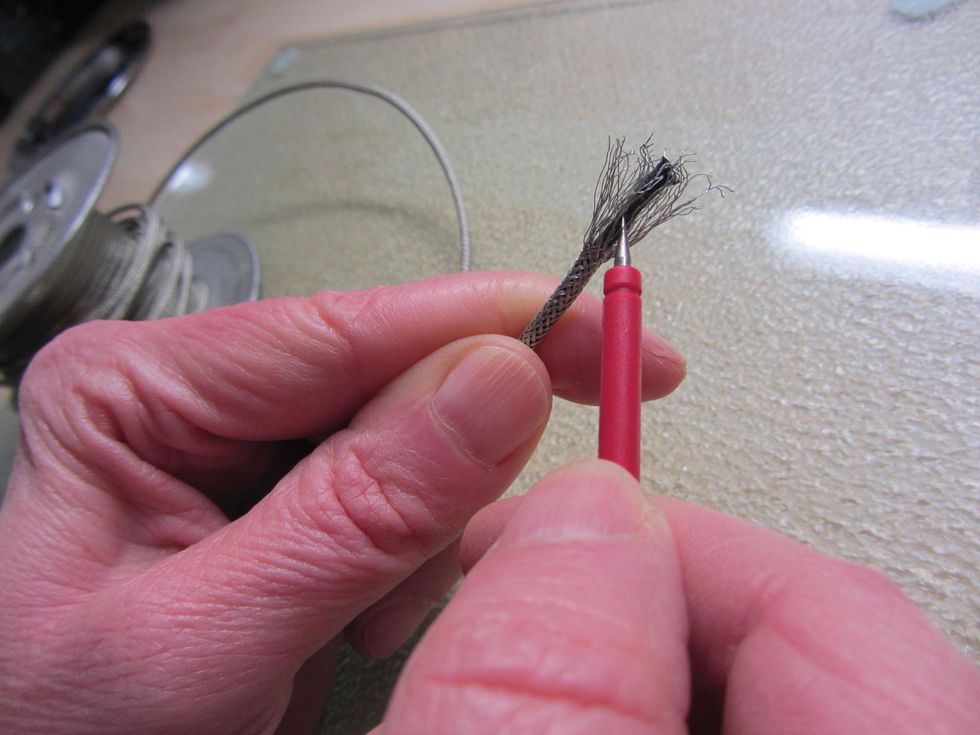
Photo 5 — Photo courtesy singlecoil.com
As before, put the wire on a smooth, hard surface and roll it gently with your fingers, applying moderate pressure. Next, use a small multimeter probe (or a small stitching awl or needle) to unravel the braid. Start at the tip of the wire and work your way down a few inches, using the probe to gently separate the woven metal strands (Photo 5). Take your time and don't pull too hard—you want to avoid damaging the braid.
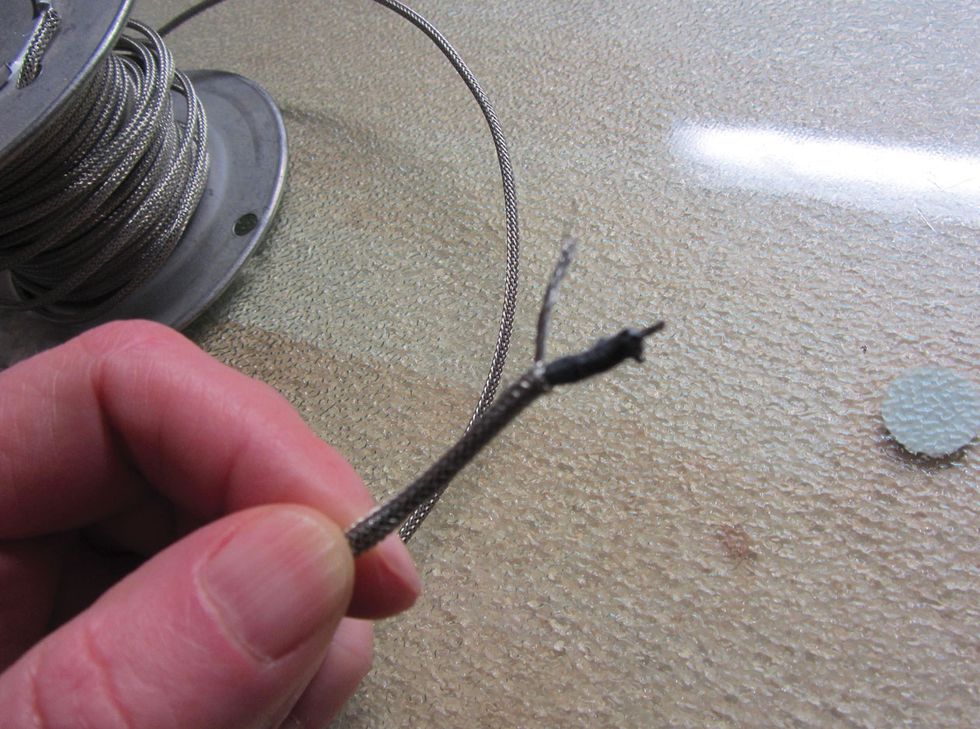
Photo 6 — Photo courtesy singlecoil.com
After unravelling the length of metal braid you need for the job, twist the strands together and tin them with solder (Photo 6).

Photo 7 — Photo courtesy singlecoil.com
Here's an alternative to the “unravelling" technique. As described before, roll the wire to loosen the braid, then gently skin back the braid without pushing back the cloth insulation inside. After you've exposed about 2" of the signal wire, use a very small pair of scissors to cut along the braid until you have enough length for the task at hand (Photo 7). Go easy with those scissors—you don't want to cut into the signal wire or its cotton jacket. Now pull the braid to one side (Photo 8).
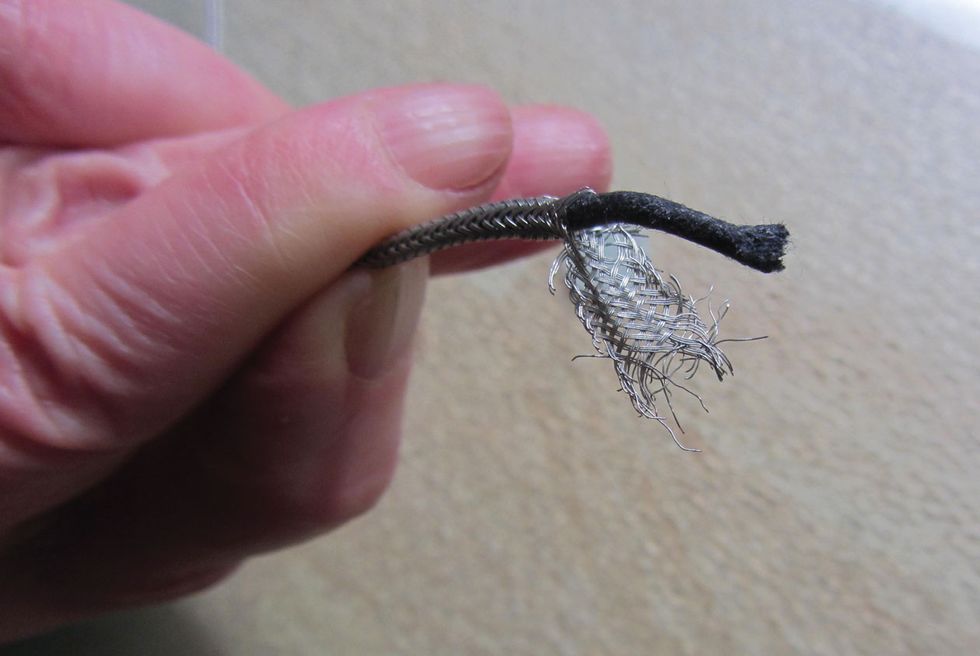
Photo 8 — Photo courtesy singlecoil.com
While cutting the metal braid like this, you'll create lots of very fine, short metal strands, which you'll need to vacuum away so they don't fall into your guitar electronics or land on the pickup magnets or pole pieces. Nor do you want these little rascals in your fingertips!
With these techniques, you'll be able to handle all soldering jobs with this special wire. Working with vintage braided wire is an artform, so don't give up if you struggle a bit as you're learning these skills. There's no special tool or shortcut for this, and you'll have to practice to get it right. And again, always remember to insulate the metal braid wherever possible.
That's it. Next month we'll tackle another guitar project, so stay tuned. Until then ... keep on modding!