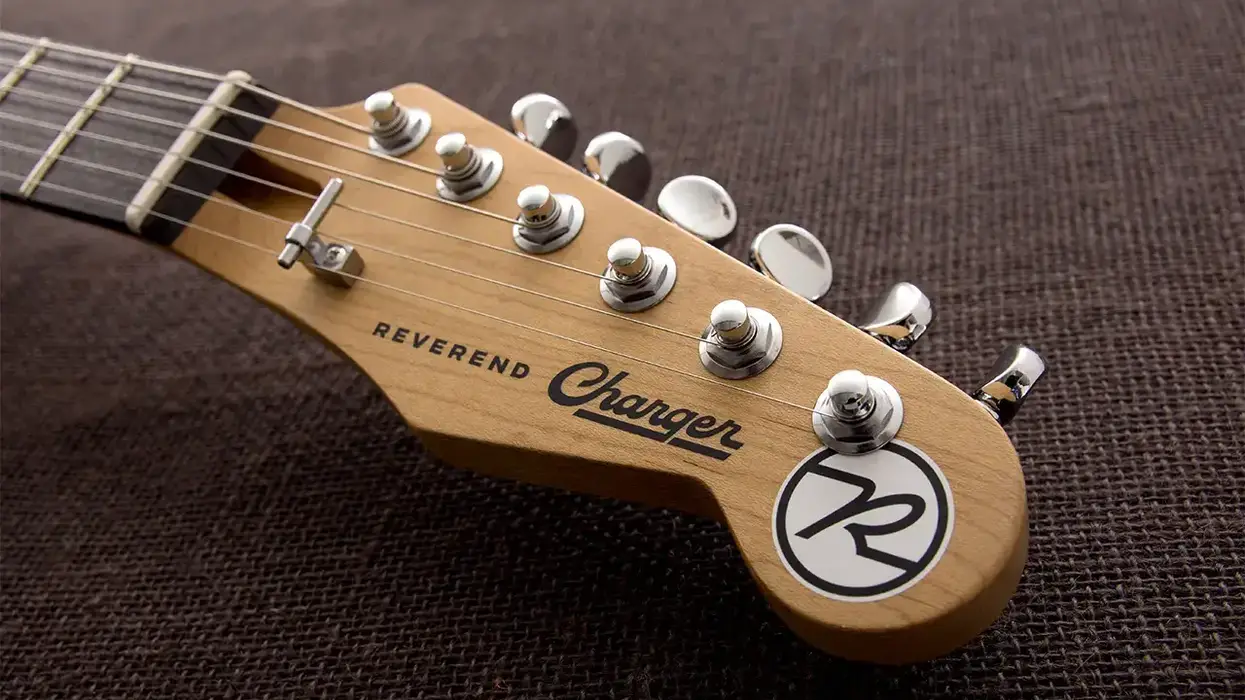
Everything you need to know to easily secure your acoustic or electric.
For most performers, it's essential that a guitar has strap buttons (Fig. 1). Though many guitars come with strap buttons already installed, some don't. If you have a guitar without strap buttons and want to install them, the good news is it's a straightforward jobāif you know the correct procedures.
There are two critical considerations: The first is to find the right location. If strap buttons are installed incorrectly, your guitar won't balance well when you play standing up. The second consideration is to be very careful when installing a button on the neck heelāyou can crack it. So, using both an acoustic and an electric guitar to illustrate the process, let's find out how to do this right and avoid those potential problems.
Our instruments.
Recently, a client brought in two guitars: a LarrivƩe OM-03 Vintage Sunburst and a 2002 Gibson SG Supreme. The LarrivƩe already had an endpin, but it lacked a strap button. The owner wanted me to install one so he could stand when playing onstage. For the SG Supreme, he wanted me to replace the stock buttons with a set of locking devices, so he could safely rock out with his band. For the LarrivƩe, we decided on a standard nickel-plated strap button and felt washer from Allparts; for the SG Supreme, we chose Schaller Security Locks.
One caveat.
My client wondered if adding a strap button would devalue his acoustic. On most modern flattops, a correctly installed strap button won't devalue the instrument (two exceptions are high-end vintage guitars or classical guitars). A strap button is useful for working musicians, and most guitar manufacturers will offer to install one before the guitar leaves the factory. Another reason to add a strap button to an acoustic is that tying a strap around the headstock (the old-school approach) can damage the finish, and in some cases, add unnecessary pressure to the neck joint. There's a lot of debate about this. Most collectors would never want anything installed on a guitar that was not considered original, so if you have a vintage axe keep this in mind.
Selecting the location.
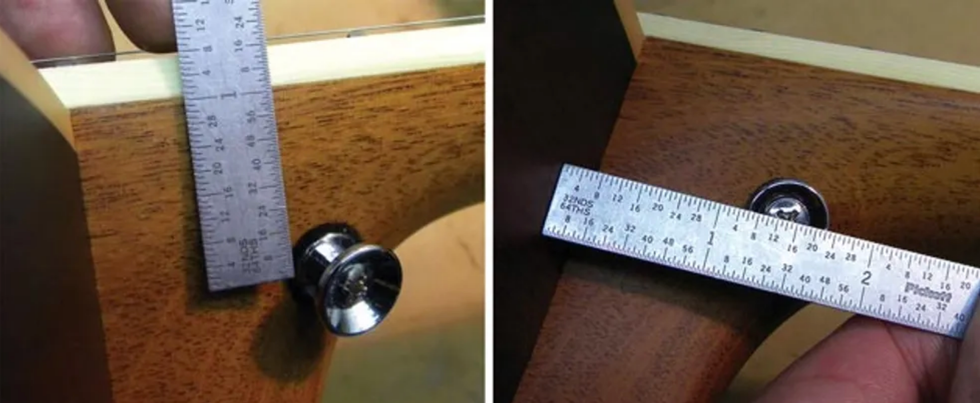
Fig. 2 (left) To install a strap button on the treble side of a flattop's neck heel, you need to take two measurements. One is the distance down from the fretboard. Fig. 3 (right) The second measurement is the distance away from the body.
Let's begin with the acoustic. The first step is to decide where to install the strap button. For the LarrivĆ©e, I determined that the best location was on the treble side of the neck heel about 1 1/4" below the top of the fretboard (Fig. 2) and about 1 1/2" out from the body (Fig. 3). I selected this spot for balance and structural integrity: This placement will keep the guitar from leaning away from you when you play, and this part of the neck heel is very stout, so you won't have to worry about cracking the heelāassuming the button is installed correctly, as we'll discuss in a moment.
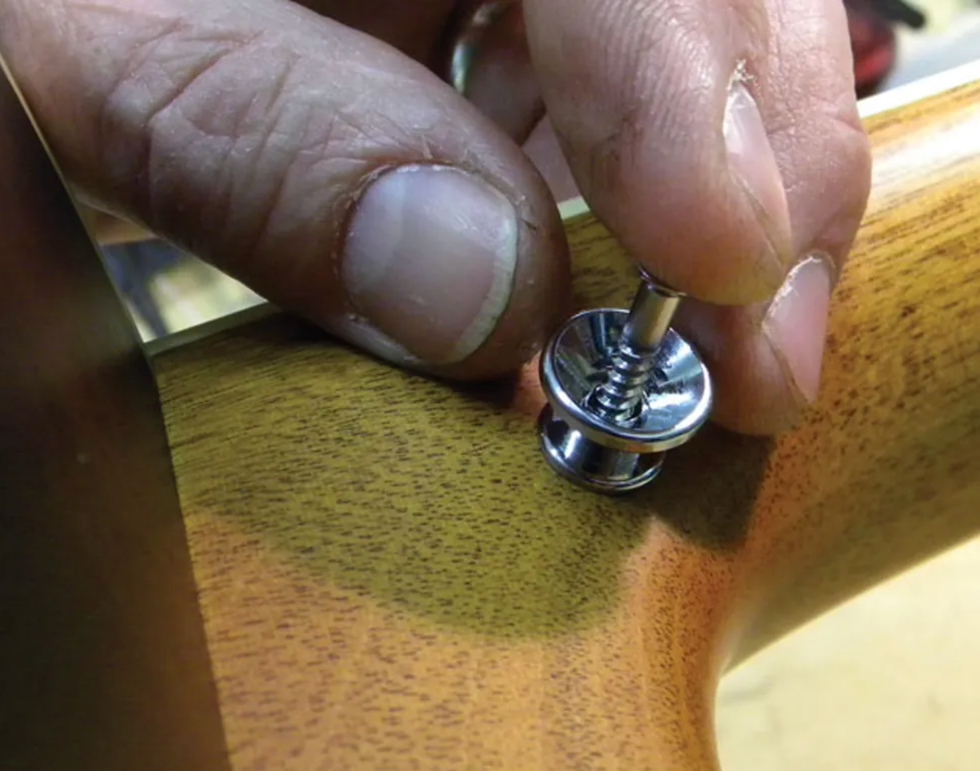
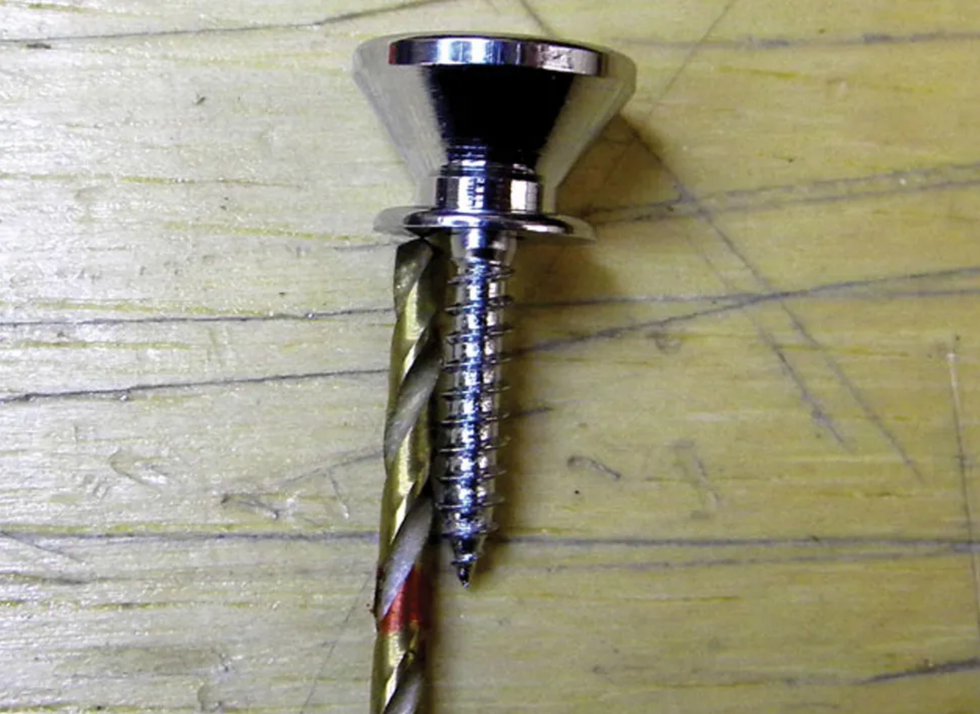
Fig. 4 - Mark the strap button's location by pressing the screw tip into the wood.
Once you've made these two measurements and located their intersection, mark it. You can mark the location using a pencil or gently press the strap button screw into the heel (Fig. 4).
Tip: If you use a screw to mark the drilling location, be careful not to slipāyou could scratch the heel.
Selecting the drill bit.
The goal is to drill a hole that's slightly smaller than the outside diameter of the screw. If you use a drill bit that's too big, the screw will strip the wood and the button will not hold properly. Most strap button screws are relatively close in size, but they do vary depending on the manufacturer. Make sure you measure both the threads and the screw shaft so you know what size drill bit to use.
For example: The outside diameter (including threads) of my strap-button screw was 9/64", and the shaft (without threads) was about 7/64" in diameter. By choosing a 7/64" bit, I left enough wood for the screw to tap (or thread) itself into the heel without damaging it.
āGauging drill bit depth.
Fig. 5: Measure drill bit depth, then mark it with a red Sharpie.
With the screw inserted into the button, measure the depth needed for the screw and mark your selected drill bit with a red Sharpie (Fig. 5). This way, you'll know how deep to drill the hole. If you drill too far, you could hit the neck pocket. But if the hole is too shallow, you could crack the heel when you install the screw. Measure carefully and get it right.
Drilling the hole.
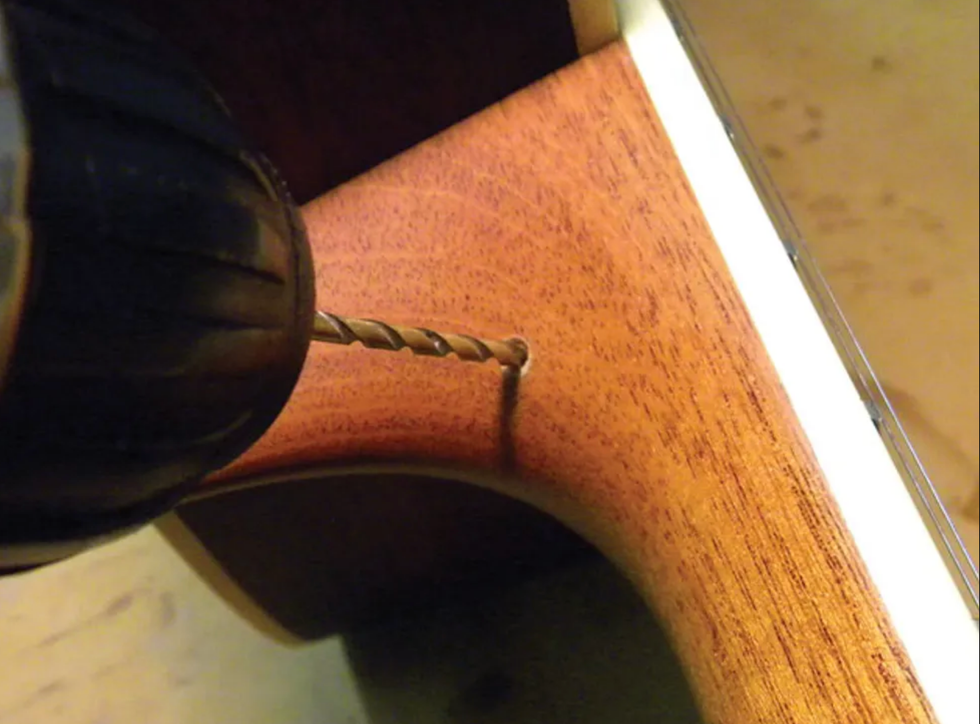
This is where all your measurements pay off. Remember, you don't have to push hardālet the drill and bit do the work. You simply control the process by keeping the bit aligned and watching the depth (Fig. 6).
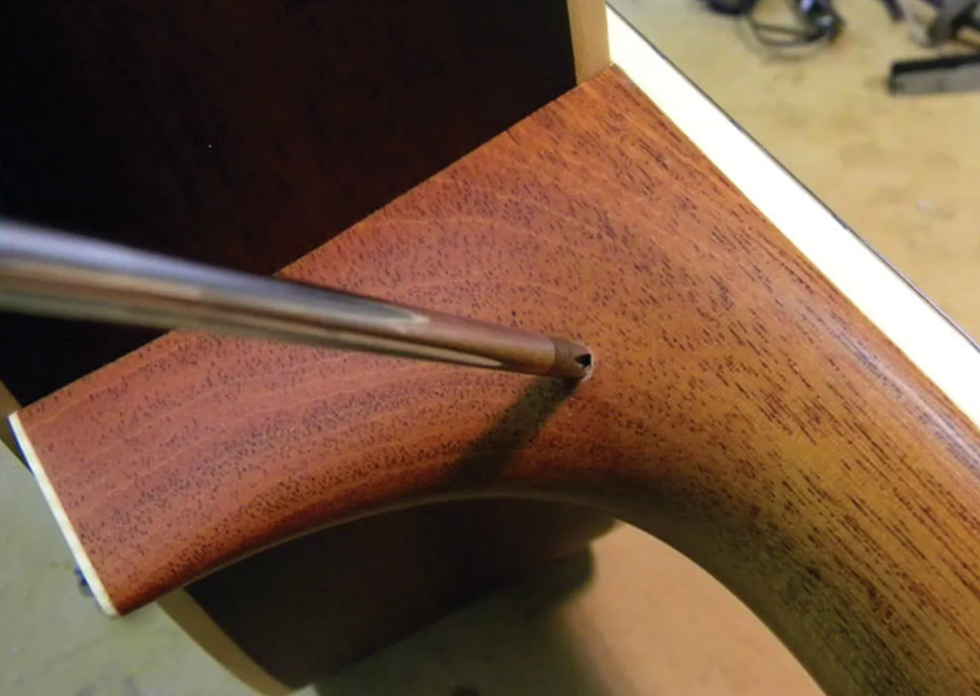
Fig. 7: Countersinking the hole with a Phillips screwdriver.
Before you insert the screw, use a medium-tip Phillips screwdriver to countersink the hole you just drilled (Fig. 7). This prevents the finish from chipping around the hole when you insert and tighten the strap-button screw. After countersinking the hole, install the strap button with a small felt washer between the wood and metal. The washer prevents the strap button from marring or denting the finish and wood, and it looks nice.
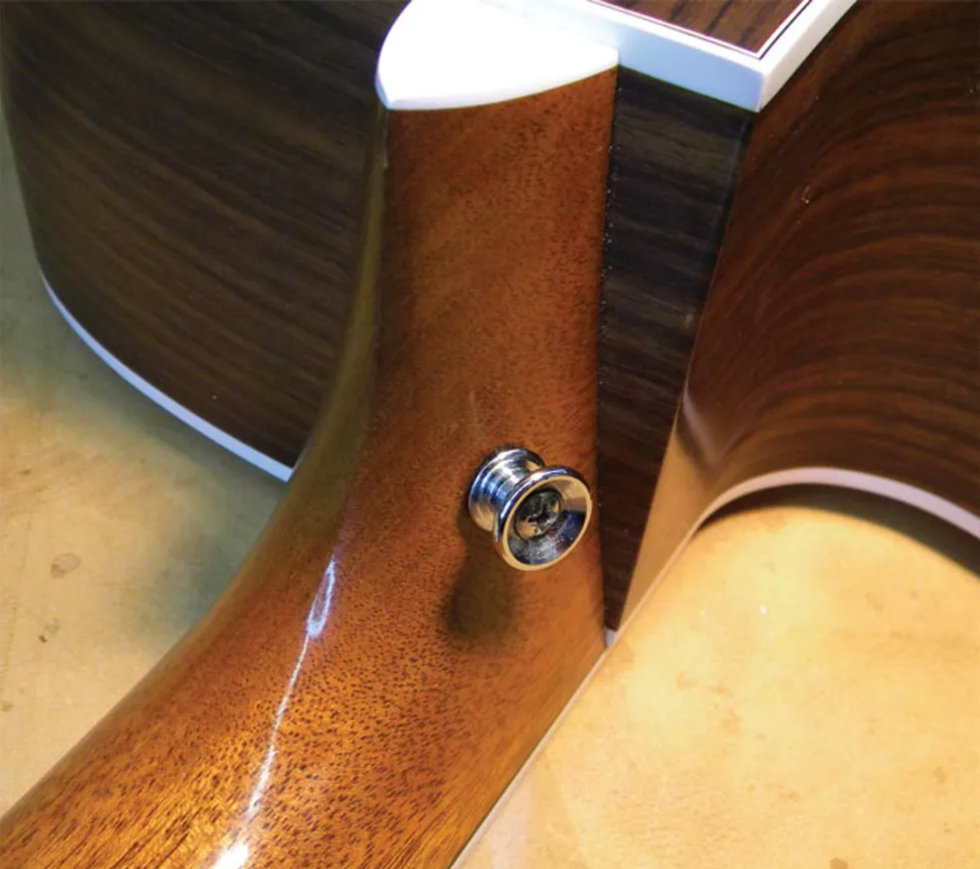
Fig. 8: Place a felt washer between the neck and button, then slowly tighten the screw until
the button is flush to the neck heel.
VoilĆ āa correctly installed strap button can add utility to a steel-string guitar (Fig. 8).
āStrap-locking devices.
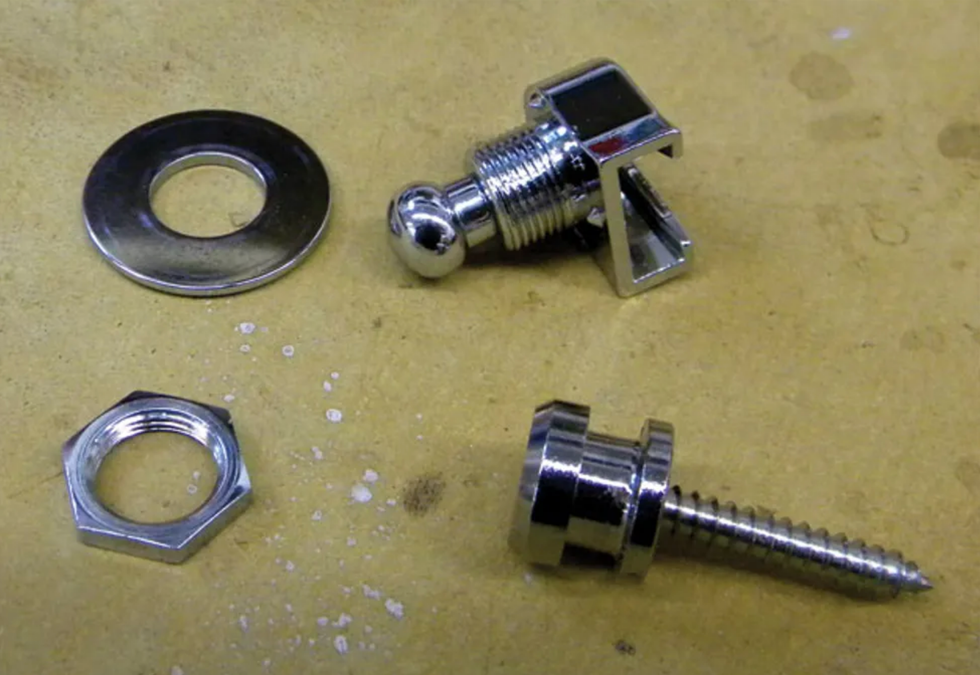
Fig. 9: Each Schaller Security Lock consists of an integrated screw and button, a locking mechanism that attaches to the guitar strap, and a washer and nut used to secure the locking device to the strap.
There are many different types and brands of locking devices on the market, but as I mentioned, my client wanted Schaller Security Locks (Fig. 9) for his SG. Once you've selected your locking hardware, it's crucial you measure the length of the included screws that go into the body and subsequently attach to the locking mechanism. In a moment, we'll see why.
The work begins.
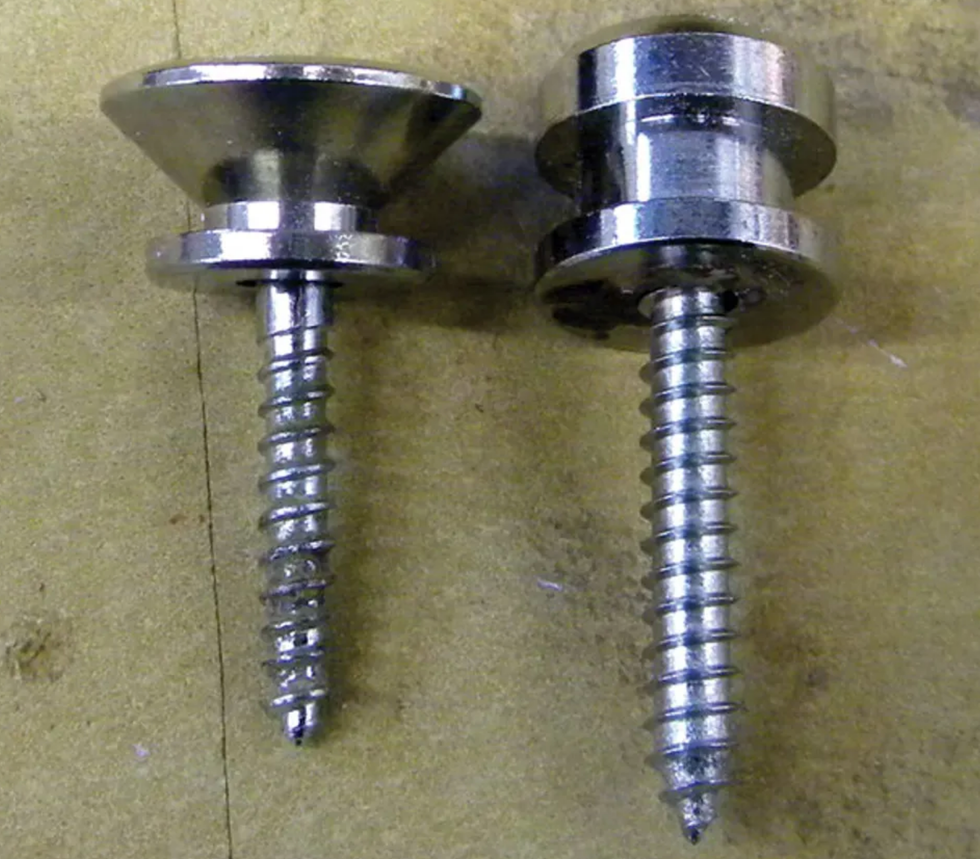
Fig. 10: Comparing the length of the stock SG screw and button (left) with the Schaller screw.
Installing the Schaller button on the SG's lower bout was easy because it was already pre-drilled for the original strap button I'd removed. Because the Schaller screws with their integrated buttons were longer than the original Gibson hardware (Fig. 10), I redrilled the hole to the proper depth using a 7/64" drill bit. So far, so good.
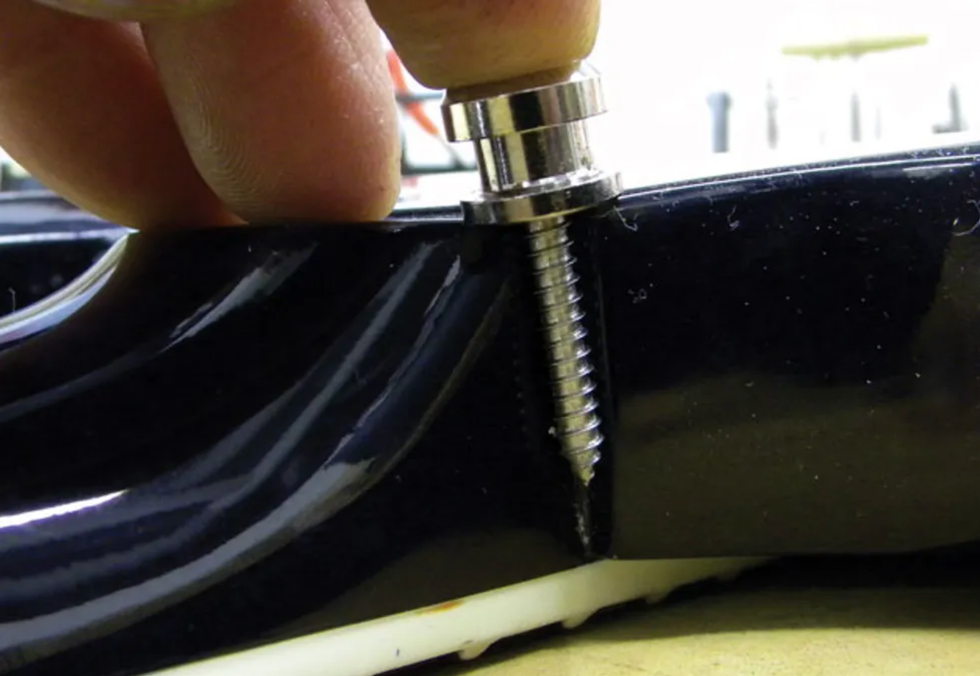
Fig. 11: The Schaller screw is too long for the SG's neck jointāit might hit the truss rod.
Ah, but the other strap button was a different story. On SGs, Gibson typically installs a strap button on the back of the guitar, right behind the neck joint. After I removed the stock button and measured the depth of the Schaller screw against the SG's neck joint (Fig. 11), I realized the screw would penetrate too far and possibly hit the truss rod. Yikes!
This left me with two choices: see if I could use the original hardware, or shorten the supplied Schaller screw and integrated button. Fortunately the Gibson button fit inside the Schaller locking mechanism, so I decided to reuse the original screw and button, rather than shorten and rethread the Schaller screw. Once again, I included a felt washer between the body and button.
āLoading the strap.
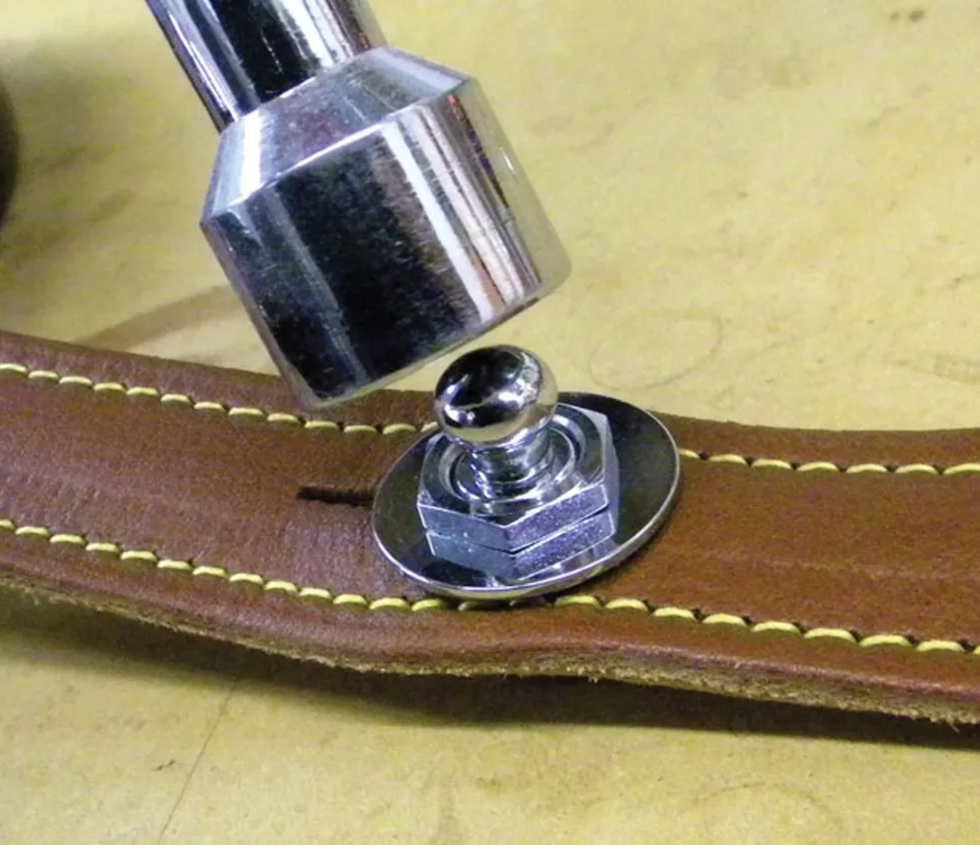
Fig. 12: Attaching the Schaller Security Lock to the strap.
One of the features that makes the Schaller system so secure is that the locking mechanisms attach to your strap. It's simple: Slip the strap-lock base into the strap's slit. Place the included washer over the device's shaft. Using a 9/16" deep-well nutdriver, tighten the nut over the washer (Fig. 12). This makes it nearly impossible for the locking mechanism to slip out of the strap. Rinse and repeat.
To mount the strap to the guitar, simply pull up on each lock's post, slip the lock onto its respective button, and release the post to lock it to the button.
[Updated 10/8/21]
- The ABCs of Output Jacks - Premier Guitar ›
- Guitar Shop 101: How to Install a Soundhole Pickup - Premier Guitar ›
- Tools for the Task: Strap Locks - Premier Guitar ›
- (Acoustic) Size Matters - Premier Guitar ›
- Guitar Shop 101: How to Install a Soundhole Pickup - Premier Guitar ›
Selenium, an alternative to silicon and germanium, helps make an overdrive of great nuance and delectable boost and low-gain overdrive tones.
Clever application of alternative materials that results in a simple, make-everything-sound-better boost and low-gain overdrive.
Might not have enough overdrive for some tastes (although thatās kind of the idea).
$240 street
Cusack Project 34 Selenium Rectifier Pre/Drive Pedal
cusackmusic.com
The term āselenium rectifierā might be Greek to most guitarists, but if it rings a bell with any vintage-amp enthusiasts thatās likely because you pulled one of these green, sugar-cube-sized components out of your ampās tube-biasing network to replace it with a silicon diode.
Thatās a long-winded way of saying that, just like silicon or germanium diodesāaka ārectifiersāāthe lesser-seen selenium can also be used for gain stages in a preamp or drive pedal. Enter the new Project 34 Selenium Rectifier Pre/Drive from Michigan-based boutique maker Cusack, named after the elementās atomic number, of course.
An Ounce of Pre-Vention
As quirky as the Project 34 might seem, itās not the first time that company founder Jon Cusack indulged his long-standing interest in the element. In 2021, he tested the waters with a small 20-unit run of the Screamer Fuzz Selenium pedal and has now tamed the stuff further to tap levels of gain running from pre-boost to light overdrive. Having used up his supply of selenium rectifiers on the fuzz run, however, Cusack had to search far and wide to find more before the Project 34 could launch.
āToday they are usually relegated to just a few larger industrial and military applications,ā Cusack reports, ābut after over a year of searching we finally located what we needed to make another pedal. While they are a very expensive component, they certainly do have a sound of their own.ā
The control interface comprises gain, level, and a traditional bright-to-bassy tone knob, the range of which is increased exponentially by the 3-position contour switch: Up summons medium bass response, middle is flat response with no bass boost, and down is maximum bass boost. The soft-touch, non-latching footswitch taps a true-bypass on/off state, and power requires a standard center-negative 9V supply rated at for least 5 mA of current draw, but you can run the Project 34 on up to 18V DC.
Going Nuclear
Tested with a Telecaster and an ES-355 into a tweed Deluxe-style 1x12 combo and a 65 Amps London head and 2x12 cab, the Project 34 is a very natural-sounding low-gain overdrive with a dynamic response and just enough compression that it doesnāt flatten the touchy-feely pick attack. The key adjectives here are juicy, sweet, rich, and full. Itās never harsh or grating.
āThe gain knob is pretty subtle from 10 oāclock up, which actually helps keep the Project 34 in character.ā
Thereās plenty of output available via the level control, but the gain knob is pretty subtle from 10 oāclock up, which actually helps keep the Project 34 in character. Settings below there remain relatively cleanāamp-setting dependent, of courseāand from that point on up the overdrive ramps up very gradually, which, in amp-like fashion, is heard as a slight increase in saturation and compression. The pedal was especially fantastic with the Telecaster and the tweed-style combo, but also interacted really well with humbuckers into EL84s, which certainly canāt be said for all overdrives.
The Verdict
Although I almost hate to use the term, the Project 34 is a very organic gain stage that just makes everything sound better, and does so with a selenium-driven voice thatās an interesting twist on the standard preamp/drive. For all the variations on boost and low/medium-gain overdrive out there itās still a very welcome addition to the market, and definitely worth checking outāparticularly if youāre looking for subtler shades of overdrive.
Some of us love drum machines and synths and others donāt, but we all love Billy.
Billy Gibbons is an undisputable guitar force whose feel, tone, and all-around vibe make him the highest level of hero. But thatās not to say he hasnāt made some odd choices in his career, like when ZZ Top re-recorded parts of their classic albums for CD release. And fans will argue which era of the bandās career is best. Some of us love drum machines and synths and others donāt, but we all love Billy.
This episode is sponsored by Magnatone
An '80s-era cult favorite is back.
Originally released in the 1980s, the Victory has long been a cult favorite among guitarists for its distinctive double cutaway design and excellent upper-fret access. These new models feature flexible electronics, enhanced body contours, improved weight and balance, and an Explorer headstock shape.
A Cult Classic Made Modern
The new Victory features refined body contours, improved weight and balance, and an updated headstock shape based on the popular Gibson Explorer.
Effortless Playing
With a fast-playing SlimTaper neck profile and ebony fretboard with a compound radius, the Victory delivers low action without fret buzz everywhere on the fretboard.
Flexible Electronics
The two 80s Tribute humbucker pickups are wired to push/pull master volume and tone controls for coil splitting and inner/outer coil selection when the coils are split.
For more information, please visit gibson.com.
Gibson Victory Figured Top Electric Guitar - Iguana Burst
Victory Figured Top Iguana BurstThe SDE-3 fuses the vintage digital character of the legendary Roland SDE-3000 rackmount delay into a pedalboard-friendly stompbox with a host of modern features.
Released in 1983, the Roland SDE-3000 rackmount delay was a staple for pro players of the era and remains revered for its rich analog/digital hybrid sound and distinctive modulation. BOSS reimagined this retro classic in 2023 with the acclaimed SDE-3000D and SDE-3000EVH, two wide-format pedals with stereo sound, advanced features, and expanded connectivity. The SDE-3 brings the authentic SDE-3000 vibe to a streamlined BOSS compact, enhanced with innovative creative tools for every musical style. The SDE-3 delivers evocative delay sounds that drip with warmth and musicality. The efficient panel provides the primary controls of its vintage benchmarkāincluding delay time, feedback, and independent rate and depth knobs for the modulationāplus additional knobs for expanded sonic potential.
A wide range of tones are available, from basic mono delays and ā80s-style mod/delay combos to moody textures for ambient, chill, and lo-fi music. Along with reproducing the SDE-3000's original mono sound, the SDE-3 includes a powerful Offset knob to create interesting tones with two simultaneous delays. With one simple control, the user can instantly add a second delay to the primary delay. This provides a wealth of mono and stereo colors not available with other delay pedals, including unique doubled sounds and timed dual delays with tap tempo control. The versatile SDE-3 provides output configurations to suit any stage or studio scenario.
Two stereo modes include discrete left/right delays and a panning option for ultra-wide sounds that move across the stereo field. Dry and effect-only signals can be sent to two amps for wet/dry setups, and the direct sound can be muted for studio mixing and parallel effect rigs. The SDE-3 offers numerous control options to enhance live and studio performances. Tap tempo mode is available with a press and hold of the pedal switch, while the TRS MIDI input can be used to sync the delay time with clock signals from DAWs, pedals, and drum machines. Optional external footswitches provide on-demand access to tap tempo and a hold function for on-the-fly looping. Alternately, an expression pedal can be used to control the Level, Feedback, and Time knobs for delay mix adjustment, wild pitch effects, and dramatic self-oscillation.
The new BOSS SDE-3 Dual Delay Pedal will be available for purchase at authorized U.S. BOSS retailers in October for $219.99. To learn more, visit www.boss.info.