We’re almost finished with the aging process on our project guitar. Let’s work on the fretboard, nut, and truss rod cover, and prepare the headstock for the last hurrah.
Hello and welcome back to Mod Garage. This month we’ll continue with our relic’ing project, taking a closer look at the front side of the neck and treating the fretboard and the headstock. We’ll work on the front side of the headstock in the next part, but first we must prepare it.
When we talk about a vintage Gibson fretboard from the ’50s, we’re talking about the mystic Brazilian rosewood (Dalbergia nigra) and its certain look and feel. Our Harley Benton doesn’t have a Brazilian rosewood fretboard. If it did, the fretboard material would cost more than the entire guitar because it’s so rare and limited today. Brazilian rosewood trade is restricted by CITES and almost no guitar companies use it anymore, except for some special custom shops. Other rosewoods or alternative woods are common substitutes.
Our Harley Benton fretboard is amaranth (better known as purpleheart), but sadly it was stained or painted black, giving the guitar a different look that’s closer to ebony rather than rosewood. So, there’s no way to get it brown or make it look like rosewood other than getting a new fretboard installed, which isn’t reasonable. Maybe it’s possible to get the black color out of the wood by using chemicals, but we don’t know what we’d find underneath, either. There could be another surprise waiting for us and all the work would be useless. On a budget guitar like this, we’ll have to live with this fretboard, loving it for what it is rather than hating it for what it’s not. The fretwork is surprisingly good and close to excellent, which is far from the industry standard in this price range.
The fretboard edges of well-played vintage guitars feel comfortable and round because the edges receive pressure from a player’s hand over decades.
But to show you the process of aging a fretboard, I chose a guitar with a rosewood fretboard, so you’ll know how to do this on a guitar with this type of fretboard if you want to. It’s not complicated so here we go.
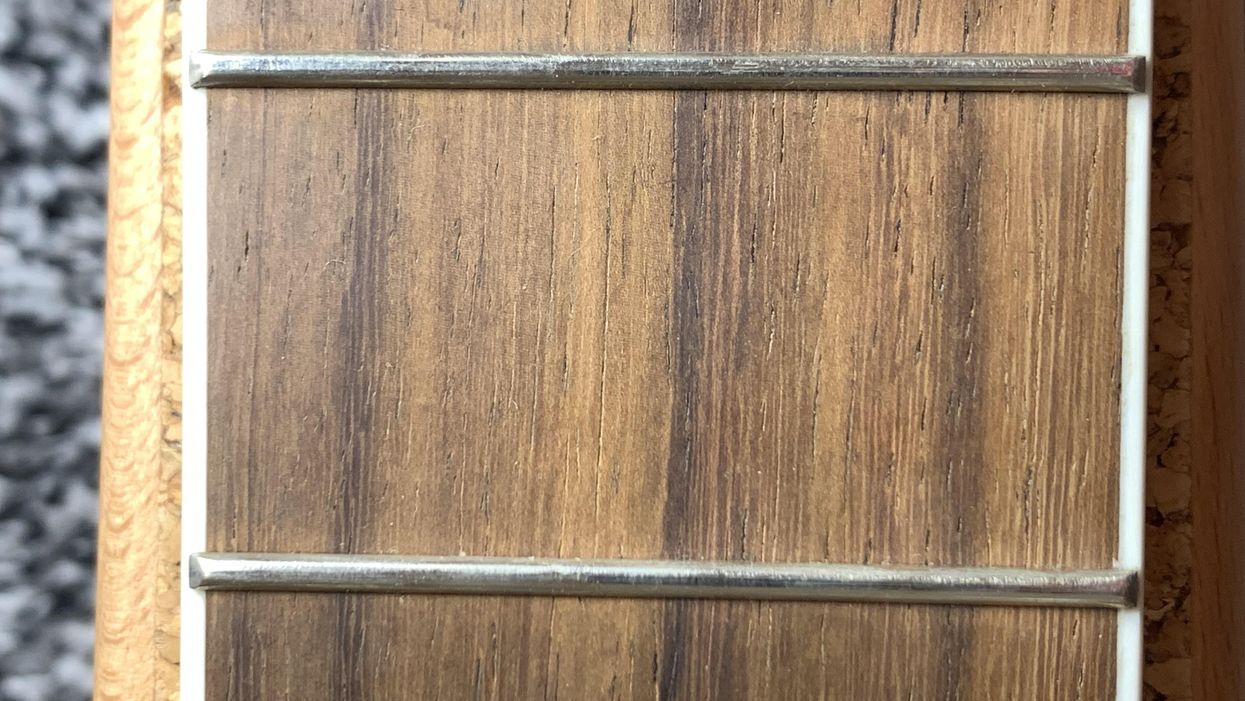
Look at the slightly pale and lifeless color of the rosewood in Photo 1. It has a nice grain but is rather dull. Brazilian rosewood has a rich chocolate brown color, which clearly shows the grain of the wood.
Let’s make it less boring:
Use some fine steel wool or sanding pads to sand the rosewood. Use a soft brush afterwards to get the dust off.
Use some naphtha or alcohol and a cotton cloth to degrease the wood and get all the fine dust and dirt out of it.
Use masking tape to protect the fretboard edges and the binding, if your neck has one. You don’t need to cover the frets. They’re easy to clean after the process. Use a Q-tip and some Vaseline to protect the fretboard dots from the dye.
You need a chocolate brown wood dye and a small soft brush to apply it.
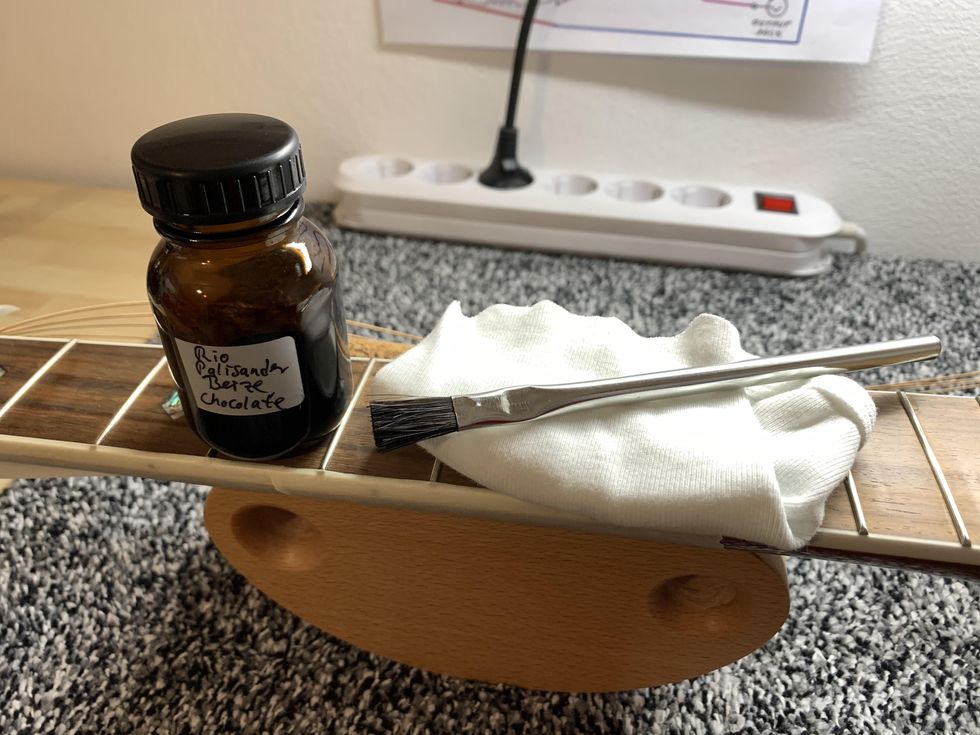
Photo 2
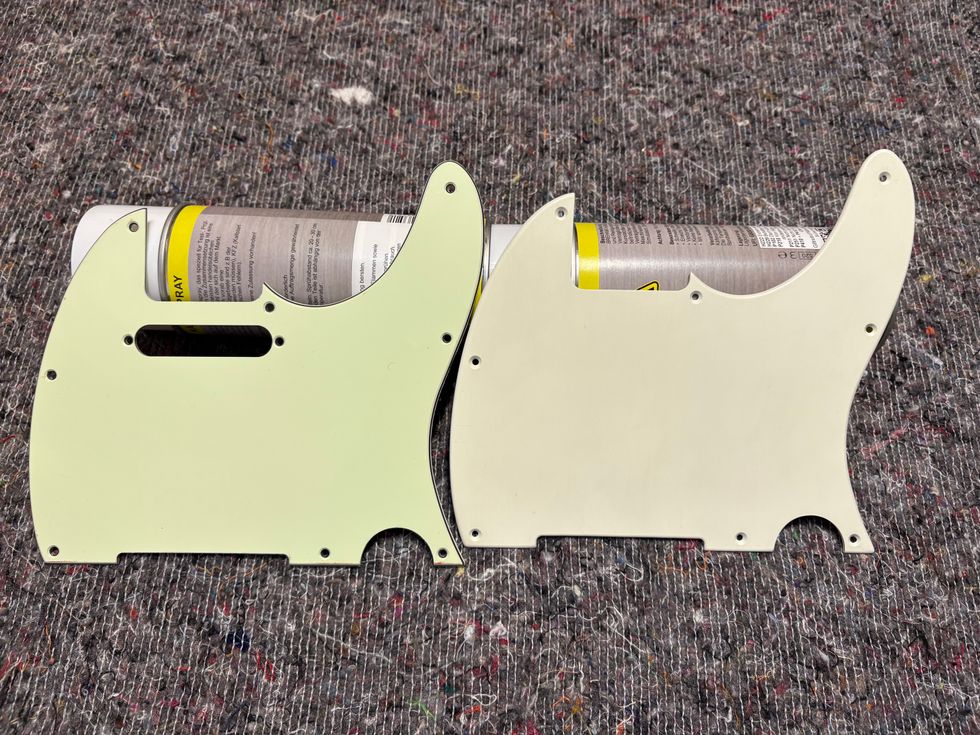
Some luthier supply stores offer special Brazilian rosewood dye in different shades of brown (Photo 2). I decided on a classic chocolate brown color on a solvent base for best results. Apply the dye thin and carefully and let it dry for some minutes.
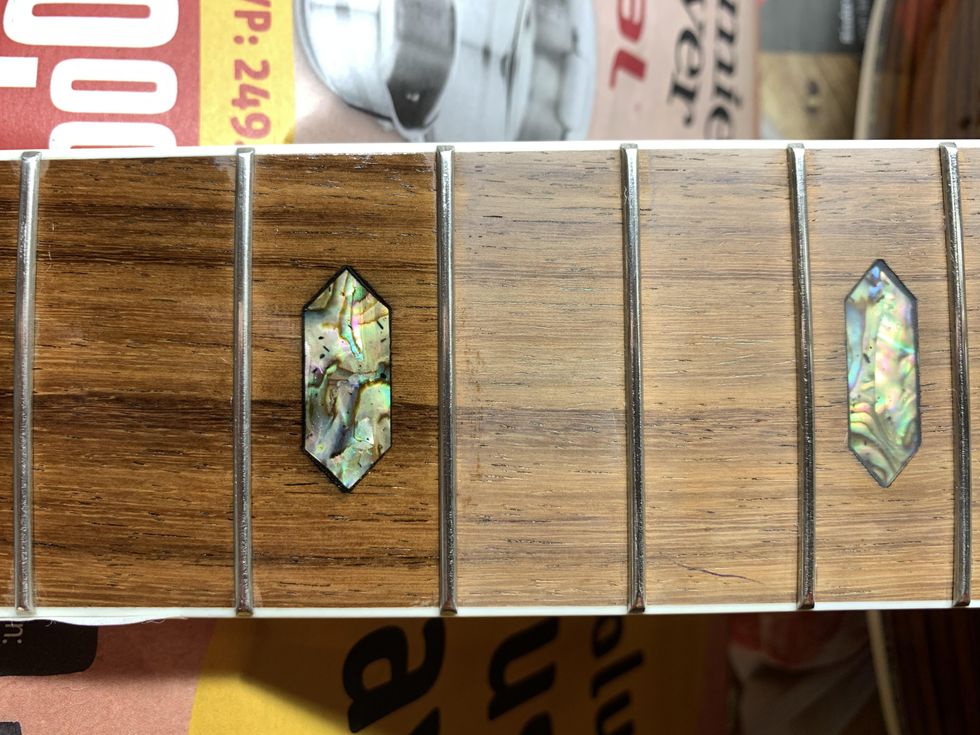
Photo 3
Now look at the difference in Photo 3. It’s easy to see! If you want your fretboard darker, repeat the process until you like it. Cover your workspace with old newspapers and have an old cotton rag nearby just in case. This dye will stain everything permanently and you don’t want it on your clothes or your kitchen table. Let the fretboard dry for a day and take off the masking tape.
Use some very fine steel wool to polish the fretboard and the frets, to get any dye off the fret material easily. Use a soft brush to clean the fretboard afterwards.
Use some naphtha and a Q-tip to carefully clean the fretboard dots from any Vaseline leftovers.
Then use the amber color from the last part of this series [“DIY Relic’ing: Hardware Continued”] together with a fresh Q-tip and apply the amber color to the dots until you like the shade.
Now that we’ve made this rosewood fretboard look much closer to Brazilian rosewood, it’s time to mimic the touch and feel of it. Brazilian rosewood has a certain smell and feel that can be described as greasy compared to most other rosewoods. This is because of the oil content of this wood. We can’t naturally “oil up” other woods, but we can get close to this certain feel by waxing the fretboard rather than oiling it. This is also an easy process so let’s go for it.
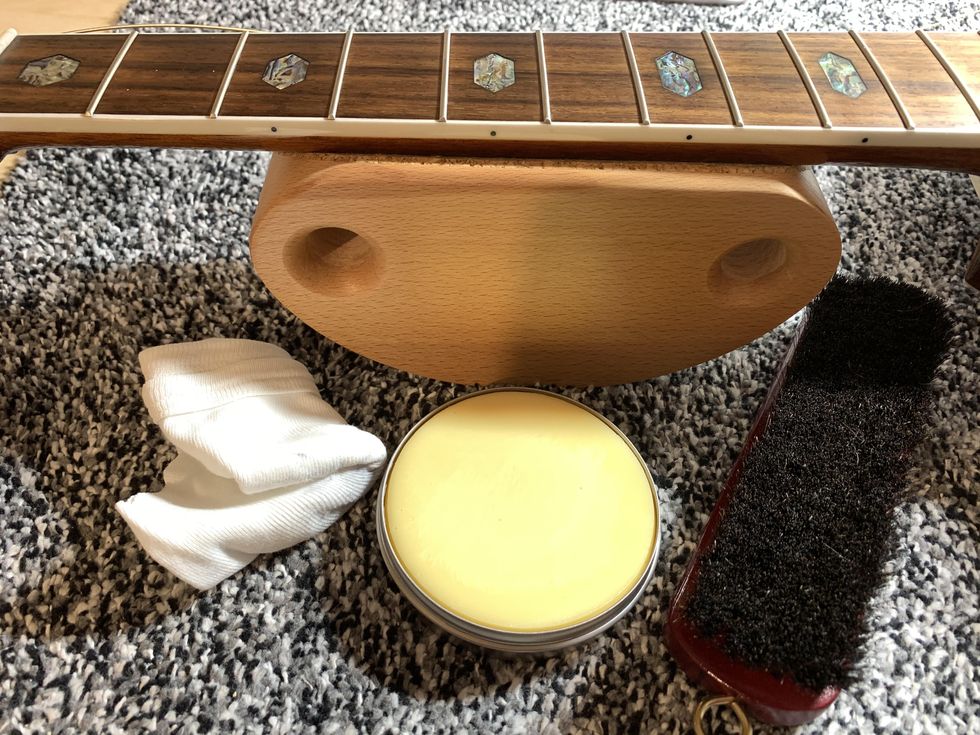
Photo 4
Get a clear, hard wax for fretboards and a soft polishing brush (Photo 4). Apply a thin layer of wax to the fretboard using a cotton cloth to massage it into the wood.
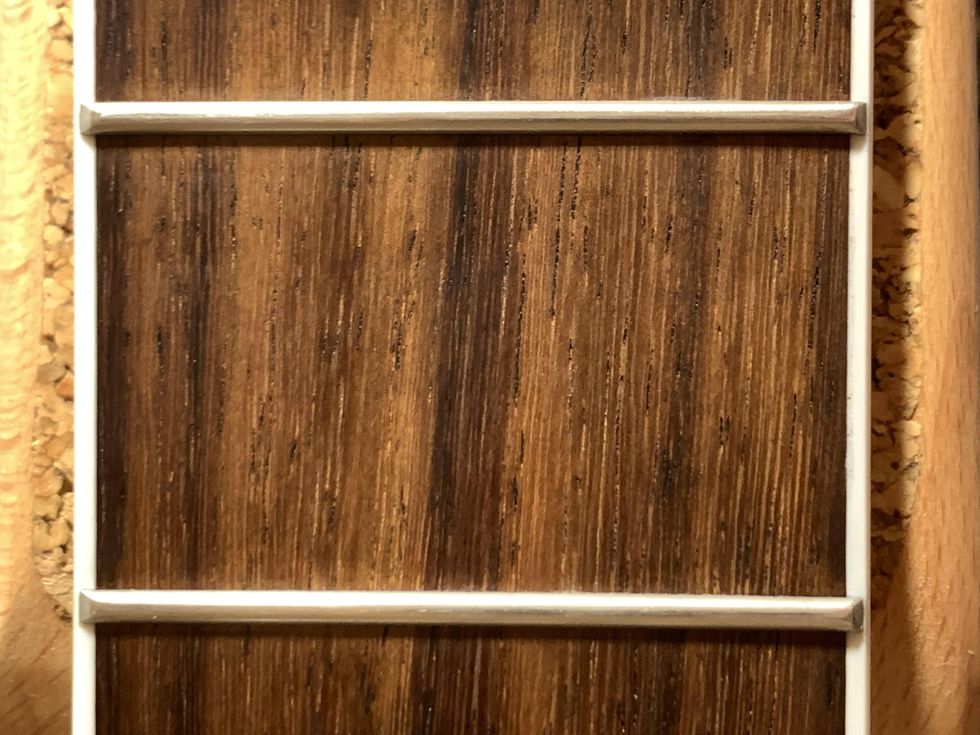
Photo 5
Let it dry for some time, then wipe off any remaining excess wax and use the soft polishing brush to get this greasy look and shine on your fretboard, as seen in Photo 5.
So far, so good. We’ve taken care of the color and the feel of the fretboard but there is another haptic thing to consider when talking about vintage necks: the broken-in feeling of the fretboard edges. The fretboard edges of well-played vintage guitars feel comfortable and round because the edges receive pressure from a player’s hand over decades. This is not what is called “rolled fretboard edge,” which is a common custom shop option, but it goes in the same direction only to a much lesser degree.
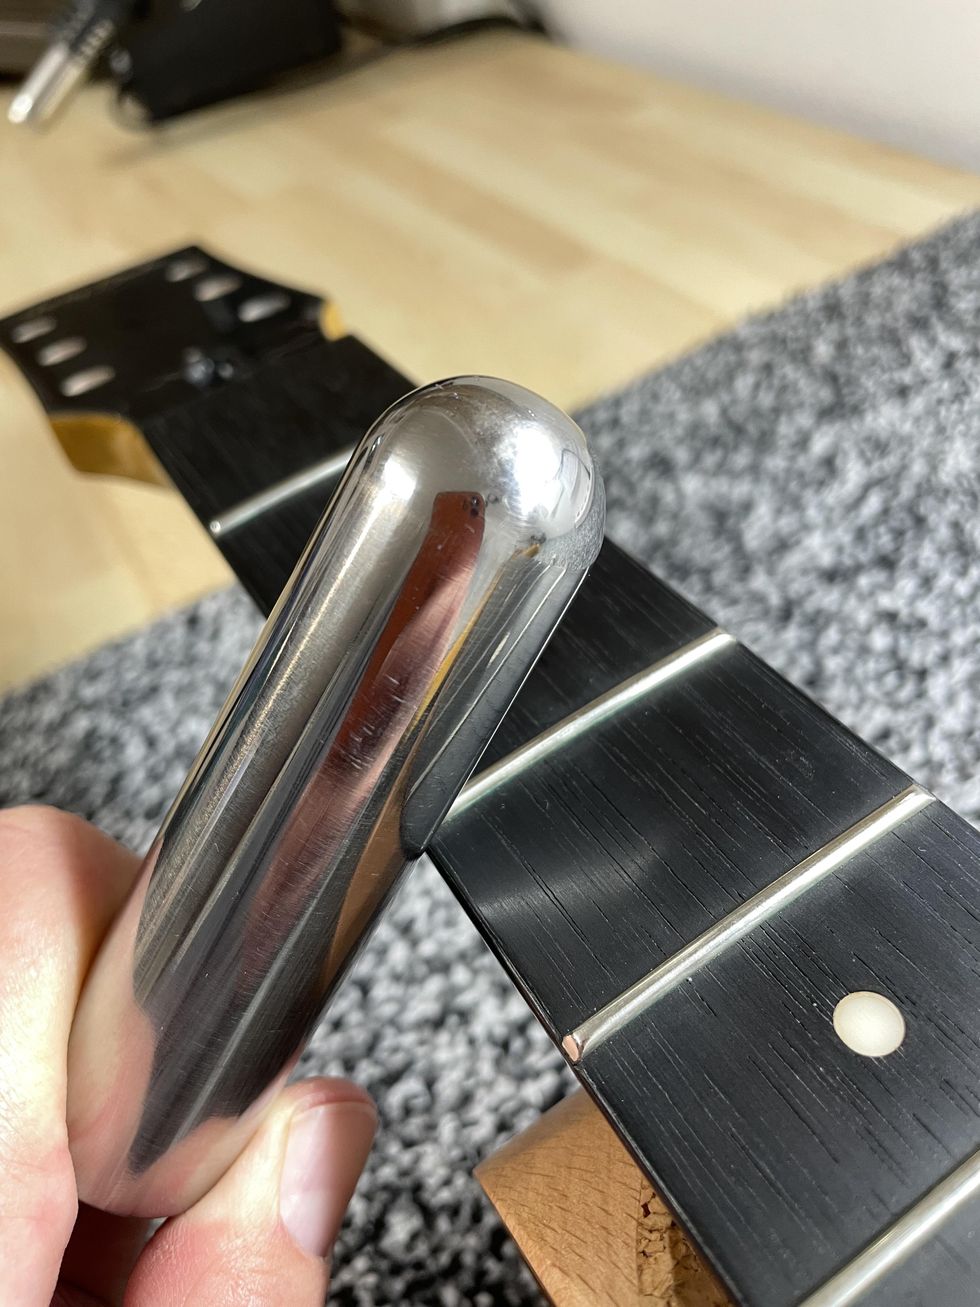
Photo 6
To bring this typical broken-in feeling to your neck, you don’t need much: just a round metal bar and some time. You can do this to any guitar neck. I prefer to use a massive metal slide for pedal-steel players, but you can also use a bigger screwdriver or something similar. If possible, clamp down your guitar and use the steel bar in a 45-degree angle to move it along the edge of the fretboard, applying pressure (Photo 6). What we’re doing with this is not making a rolled edge but compressing fibres, which is exactly the natural process over time. Repeat moving the bar while applying pressure for some time and check the result until you like it. This is not done within a minute, so take your time. With the metal slide, I usually need 10-15 minutes for each edge until I like it, but this depends a lot on how hard your fretboard material is.
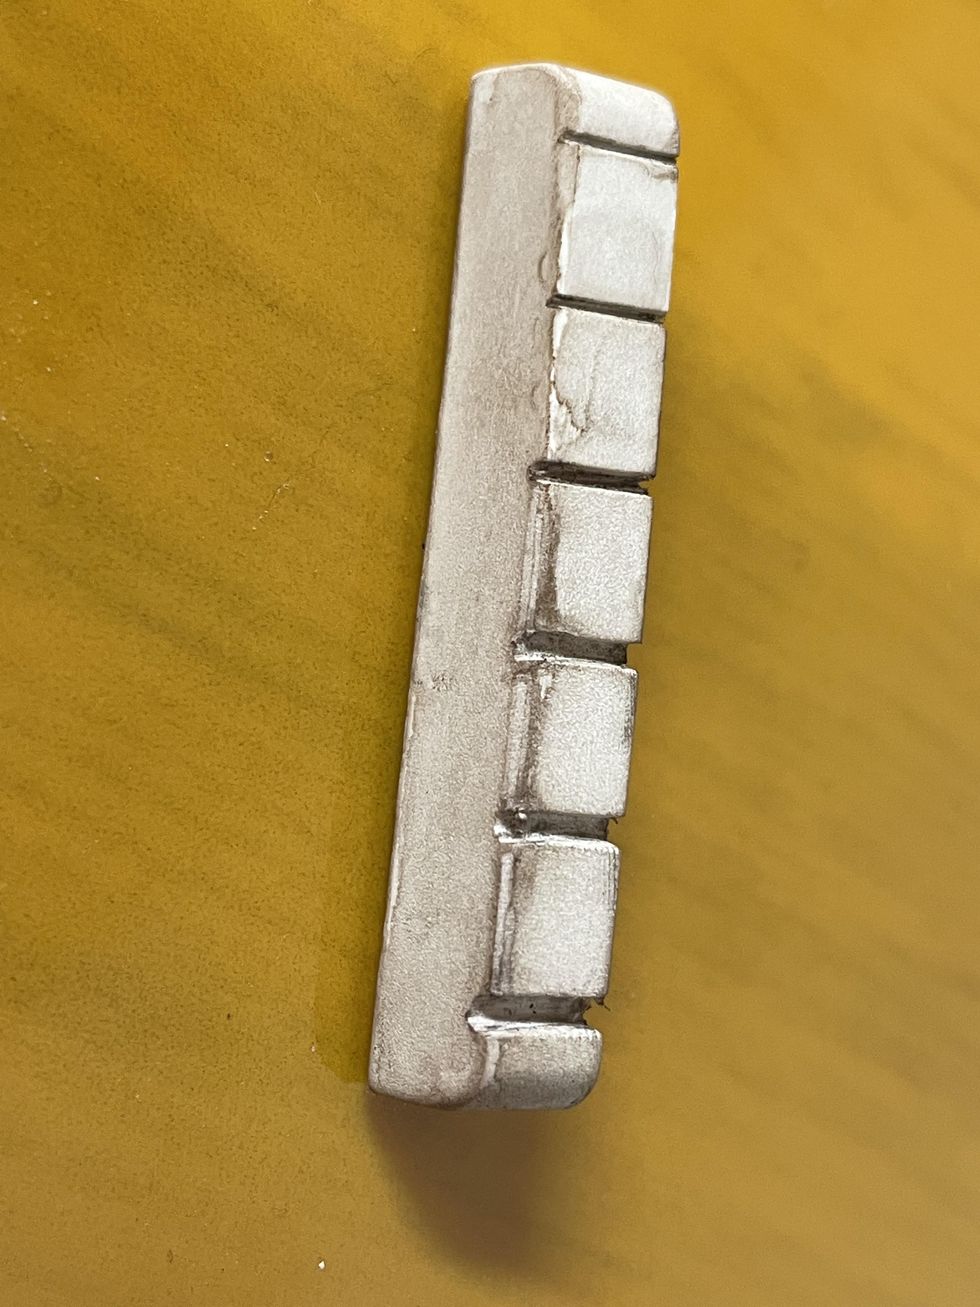
Photo 7
If you’re done with that part, excellent! You just finished your fretboard. Moving up the neck, the nut is our next task. The nut of our Harley Benton is pure white plastic, which not the best choice. If you want to keep it, you can sand it with some steel wool and apply some of the amber color with a Q-tip, followed with some of our mixture of dirt, dust, and ashes we used for the plastic buttons of the tuners [DIY Relic’ing Tuners, Part 2”]. Use your fingers to wipe on some of this mixture and you’re done. If you want to upgrade the nut, nylon is the historically correct material, and such nut blanks are available from numerous luthier supply stores. I decided to use an unbleached bone nut blank and make a new nut. Afterwards, I used some of the amber color and dust to make it look old (Photo 7).
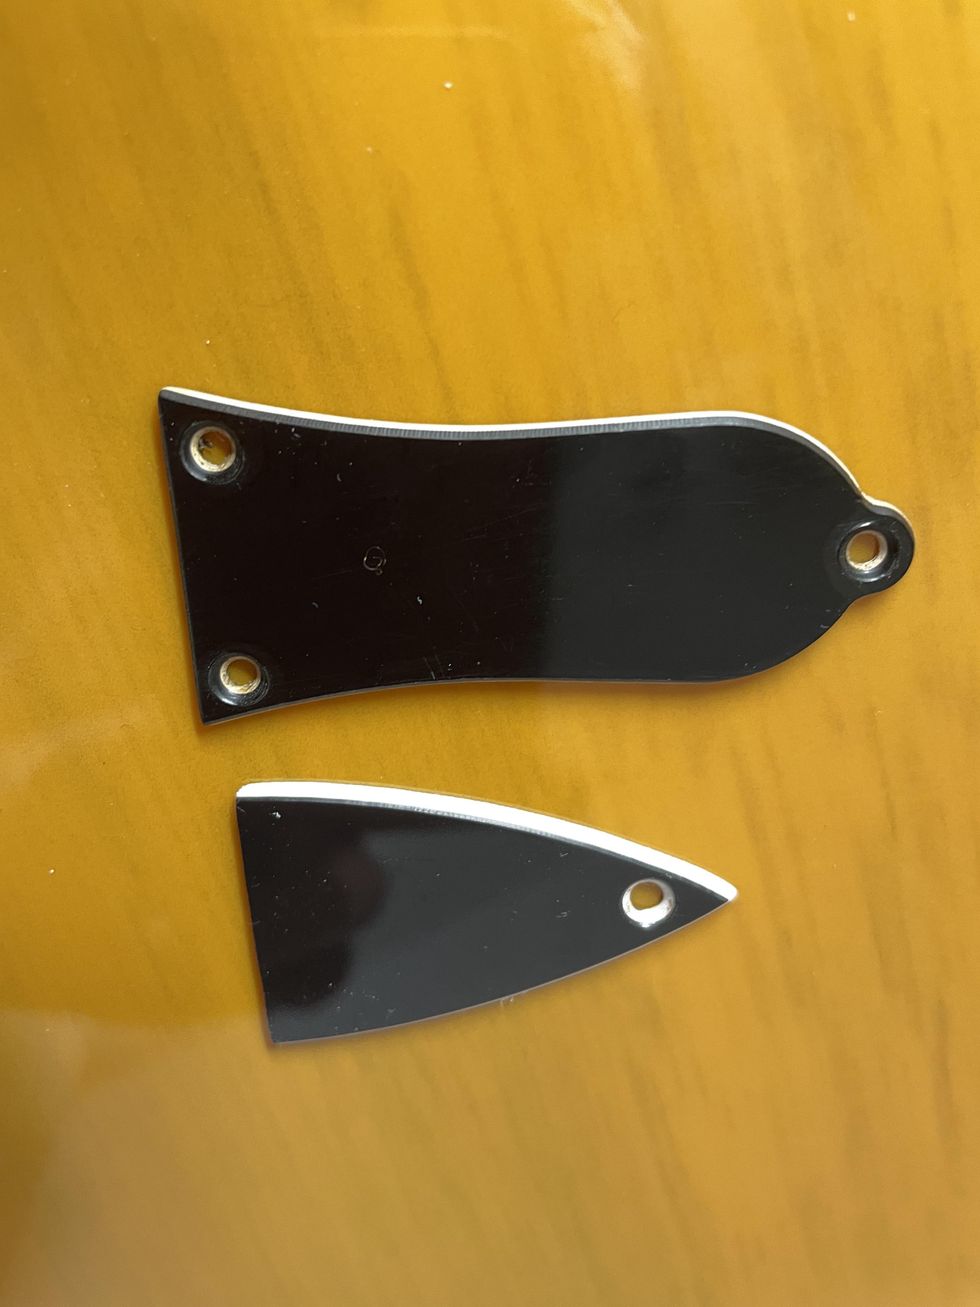
Photo 8
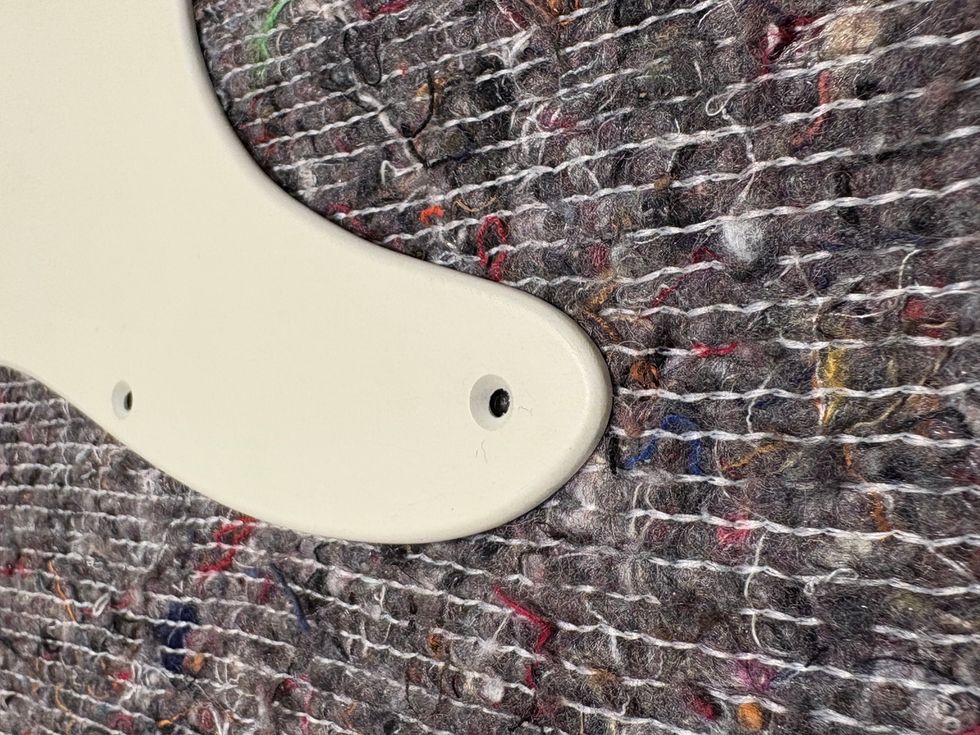
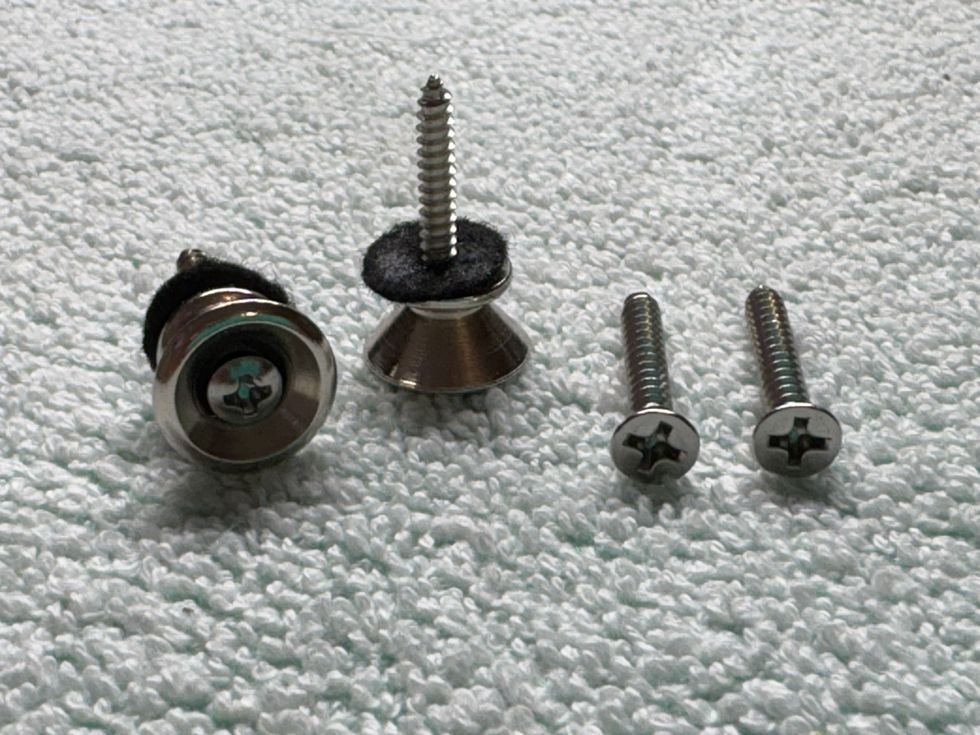
Further up the neck is the cover for the truss rod adjustment screw with its mounting screw. Harley Benton decided to use a modern shape for it, which doesn’t look very good to me. The typical Gibson-style covers with their bell-like shape look much different, so I decided to swap the cover for such a model, modifying it for a flat bottom so it covers the whole opening for the truss rod (Photo 8). To make it look old, you can use the exact steps we used on the jack plate: break the shine with some steel wool, add some light scratches, wipe on some amber color on the white part of the cover, and then rub in some dust and dirt. You already know how to age screws, having done it many times before in the earlier parts of this ongoing project. If you need a refresher on our aging process for screws, refer back to “DIY Relic’ing: Break the Shine” for guidance.
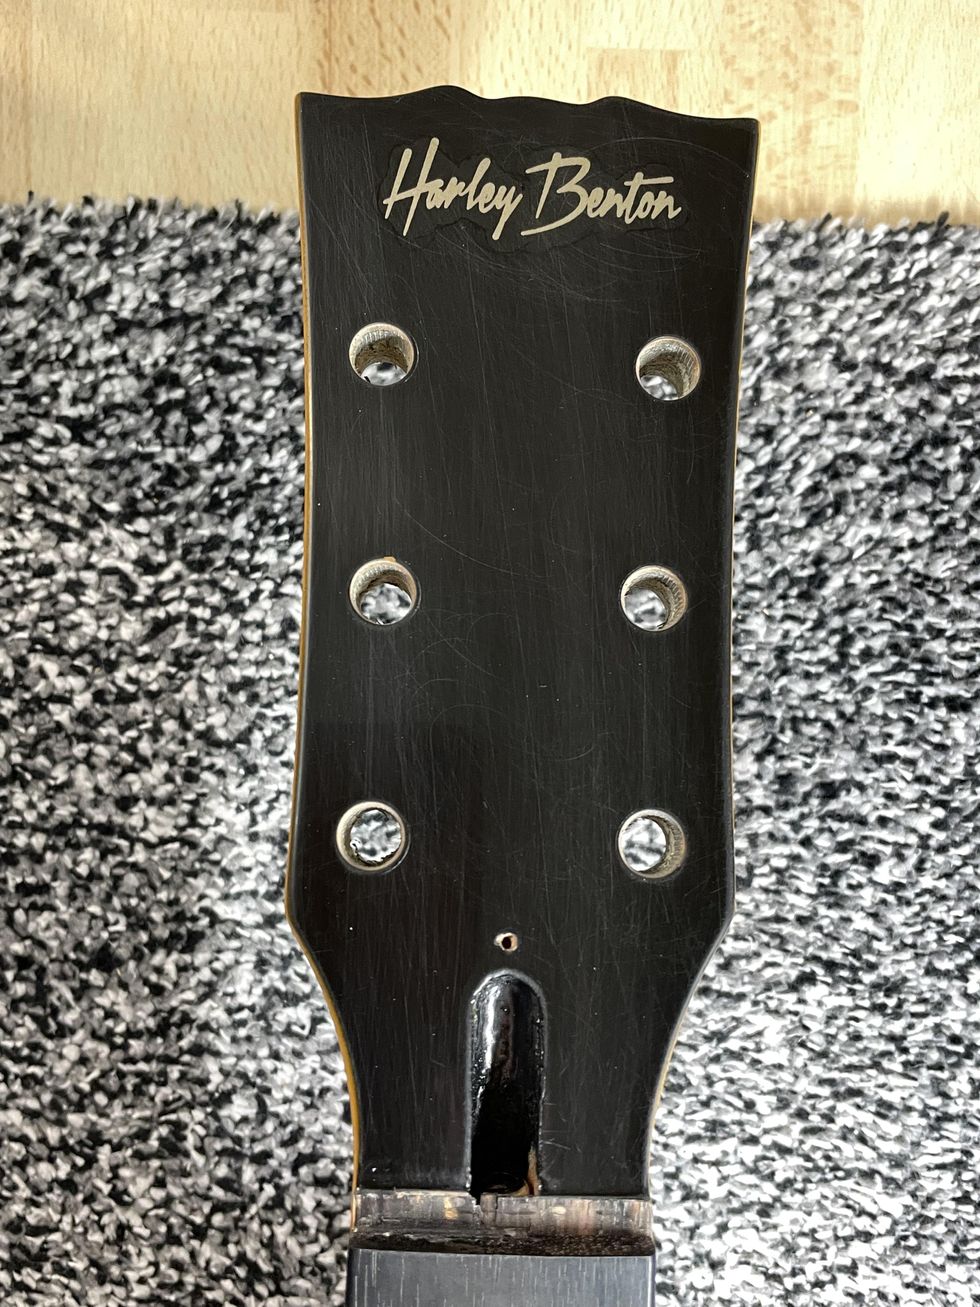
Photo 9
The last thing we’ll do today is begin to work on the headstock of the guitar, which is often a delicate task. A lot of modders try to reshape the headstock so it will look like it’s from a vintage guitar, and, even worse, replace the headstock logo with a fake logo from another company. I would never do that. This project is about aging a guitar and not about making it an exact copy of a vintage original. Personally, I really like the headstock shape of the Harley Benton. It looks at least a little bit Gibson-like, and I also think the Harley Benton logo looks cool the way it is (Photo 9). So, aging it is very easy: Break the shine with some steel wool and wipe off the dust. Use a Q-tip and apply some layers of the amber color to the logo until you like the shade. Adding dings, dongs, and scratches will come later. In the next part of this project, we’ll take care of the backside of the neck and the body by cracking the lacquer to mimic some old nitro lacquer.
That’s it for now. We’re almost finished with this relic’ing project, but before we wrap it up, we’ll return to guitar mods in the next issue. We’ll take a deeper look at putting vintage parts into new electric guitars, so stay tuned.
Until then ... keep on modding!
- Last Call: Someday You'll Regret That Relic Job - Premier Guitar ›
- Mod Garage: DIY Relic'ing—Aging a P-90 Pickup - Premier Guitar ›
- DIY Relic'ing: Break the Shine - Premier Guitar ›
- DIY Guitar Relic'ing: Let's Crack Some Lacquer Finish - Premier Guitar ›
- It’s Rosewood, But What Kind? ›
In collaboration with Cory Wong, the Wong Press is a 4-in-1 Press pedal features Cory’s personal specs: blue & white color combination, customized volume control curve, fine-tuned wah Q range, and a dual-color STATUS LED strip indicating current mode/pedal position simultaneously.
In collaboration with Cory Wong, this Wong Press is a 4-in-1 Press pedal features Cory’s personal specs: Iconic blue & white color combination, customized volume control curve, fine-tuned wah Q range, and a dual-color STATUS LED strip indicating current mode/pedal position simultaneously.
Renowned international funk guitar maestro and 63rd Grammy nominee Cory Wong is celebrated for his unique playing style and unmistakable crisp tone. Known for his expressive technique, he’s been acclaimed across the globe by all audiences for his unique blend of energy and soul. In 2022, Cory discovered the multi-functional Soul Press II pedal from Hotone and instantly fell in love. Since then, it has become his go-to pedal for live performances.Now, two years later, the Hotone team has meticulously crafted the Wong Press, a pedal tailored specifically for Cory Wong. Building on the multi-functional design philosophy of the Soul Press series, this new pedal includes Cory’s custom requests: a signature blue and white color scheme, a customized volume pedal curve, an adjustable wah Q value range, and travel lights that indicate both pedal position and working mode.
Cory’s near-perfect pursuit of tone and pedal feel presented a significant challenge for our development team. After countless adjustments to the Q value range, Hotone engineers achieved the precise WAH tone Cory desired while minimizing the risk of accidental Q value changes affecting the sound. Additionally, based on Cory’s feedback, the volume control was fine-tuned for a smoother, more musical transition, enhancing the overall feel of volume swells. The team also upgraded the iconic travel lights of the Soul Press II to dual-color travel lights—blue for Wah mode and green for Volume mode—making live performances more intuitive and visually striking.
Features
- True Bypass
- 4 in 1 functionality (volume, expression, wah, volume/wah)
- New dual-color STATUS LED strip indicating pedal mode and position in real time
- Cory’s custom volume curve and wah Q control
- Classic-voiced wah tone with flexible tonal range
- Active volume design for keeping lossless tone
- Separate tuner and expression outputs for more connection possibilities
- 9V DC or 9V battery power supply
Introducing the Hotone Wong Press - Cory Wong's signature Volume/Wah/Expression Pedal - YouTube
Check the product page at hotone.com
Big time processing power in a reverb that you can explore for a lifetime.
An astoundingly lush and versatile reverb of incredible depth and flexibility. New and older BigSky algorithms included. More elegant control layout and better screen.
It’s pricey and getting the full use out of it takes some time and effort.
$679
Strymon BigSky MX
strymon.net
Strymon calls the BigSky MX pedal “one reverb to rule them all.” Yep, that’s a riff on something we’ve heard before, but in this case it might be hard to argue. In updating what was already one of the market’s most comprehensive and versatile reverbs, Strymon has created a reverb pedal that will take some players a lifetime to fully explore. That process is likely to be tons of fun, too.
Grinding out impressive DSP power via an 800 MHz tri-core ARM processor with 32-bit floating-point processing, the BigSky MX introduces seven brand-new reverb algorithms, allows users to load any compatible convolution reverb (or impulse response) as well as to use two reverbs simultaneously—in series, parallel, and split—plus it delivers several other mind-bending features. Given this wealth of goodies, it’s impossible to test and discuss every sound and function, but what we heard is exciting.
Infinite Space
The updated MX will look very familiar to those who know the original BigSky. The form factor is nearly identical, though the MX is a bit larger. Its control interface is similar too, albeit rearranged into a single row of knobs that looks more balanced. Rotary controls include decay, pre-delay, tone, mod, parameter 1, parameter 2, and mix. A value knob enables effect-level manipulation on the larger, clearer OLED screen. It also allows you to select between the older or “classic” algorithms from the original BigSky and the seven new ones. Three footswitches allow for preset selection, bank up or down (two switches pressed together), and an infinite hold/sustain switch that’s always available. The rotary “type” knob in the upper-left corner spins between 12 basic reverb voices. As with most things Strymon, many of these controls are multi-function.
Also very Strymon-like are the top-mounted, 5-pin DIN MIDI I/O connections, which come in handy if you want to maximize the pedal’s potential in a MIDI-controlled rig. But you can access more than enough right from the pedal itself to satisfy the needs of most standard pedalboard-based setups. A USB-C port enables computer connection for MIDI control via that route, use of the Nixie 2 editing app, or firmware updates.
There are stereo jacks for both input and output, plus a multi-function 1/4" TRS/MIDI expression jack for use with a further range of external controllers. The standard center-negative power jack requires a DC supply offering at least 500 mA of current draw.
It is utterly hypnotic and addictive once you settle in and work a little more intuitively.
Sky’s the Limit
The BigSky MX was, initially, a bit mind-boggling on account of the seemingly endless possibilities. But it is utterly hypnotic and addictive once you settle in and work a little more intuitively. Suffice it to say, the core quality of the reverb sounds themselves are excellent, and the sheer variety is astounding. Beyond the standard emulations, I really dug several permutations of the cloud reverb, the chorale mode (which adds tenor and baritone harmonizing tones), and bloom mode (which generates deep synthesizer-style pads), and I could have gotten lost in any of these for hours if there wasn’t so much more to explore. Among the highlights: There is now an option to pan reverbs across the stereo field. The MX also uses audio design concepts borrowed from tape delays to create rhythmic pattern-based reverbs, which is an excellent compositional tool.
The Verdict
This latest evolution of the already impressive and super-capable BigSky is the kind of pedal that could cause you to disappear into your basement studio, never to return. The sounds are addictive and varied and can be configured in endless creative ways. The programmability and connectivity are also superb. Additionally, the new algorithms weren’t added at expense of the old BigSky algos. There’s no doubt that it will be flat-out too much horsepower for the guitarist that needs a few traditional sounds and, perhaps, a few more spacious options. And it would be interesting to know what percentage of the pedal’s customers end up being synth artists, engineers, or sound designers of one kind or another. If you’re the kind of guitar player that enjoys stretching the sound and capabilities of your instrument as far as they will go, the BlueSky MX will gladly ride along to the bounds of your imagination. It may test the bounds of your budget, too. But in many ways, the BigSky MX is as much a piece of outboard studio gear as a stompbox, and if you’re willing to invest the time, the BigSky MX has the goods to pay you back.
“The Player II Series represents our continued evolution in design and functionality,” said Justin Norvell, EVP of Product, FMIC. “We listened to the feedback from musicians around the world and incorporated their insights to refine and innovate our instruments. The re-introduction of rosewood fingerboards is a restoration of the ‘original Fender recipe’ and will no doubt be a fan favorite - but we didn’t want to stop there. We’ve also incorporated our rolled fingerboard edges for a broken-in feel, upgraded hardware, and have some new body options as well- which underscores our commitment to providing players and creators with the tools they need to express their unique sound and style. The Player II Series is not just an upgrade, it's a detailed re-imagining of our core silhouettes, highlighting our dedication to quality and the continuous refinement of our instruments.”
Additionally, Player II offers new options for chambered ash and chambered mahogany bodies for the Player II Stratocaster and Telecaster models, which will be available in October. Designed for musicians ready to elevate their craft, the Player II Series sets a new standard for quality and performance in the mid-price range.
Fender Player II Stratocaster HSS Electric Guitar - Coral Red
Player II Strat HSS RW, Coral RedFender Player II Jaguar Electric Guitar - Aquatone Blue
Player II Jaguar RF, Aquatone BlueThis reader solicited the help of his friend, luthier Dale Nielsen, to design the perfect guitar as a 40th-birthday gift to himself.
This is really about a guy in northern Minnesota named Dale Nielsen, who I met when I moved up there in 2008 and needed somebody to reglue the bridge on my beloved first guitar (a 1992 Charvel 625c, plywood special). Dale is a luthier in his spare time—a Fender certified, maker of jazz boxes.
Anyway, we became friends and I started working on him pretty early—my 40th birthday was approaching, and that meant it was time for us to start designing his first solidbody build. If you stopped on this page, it’s because the photo of the finished product caught your eye. Beautiful, right? The 2018 CCL Deco Custom: Never shall there be another.
Old National Glenwood guitars were my design inspiration, but I wanted a slim waist like a PRS and the like. We used a solid block of korina to start, routed like MacGyver to get the knobs and switches where I wanted them. Dale builds all his own lathes and machines (usually out of lumber, y’all), as the task requires. This beast took some creativity—it’s tight wiring under that custom-steel pickguard. Many were the preliminary sketches. Four coats of Pelham blue, 11 coats of nitro. Honduran mahogany neck, Madagascar ebony fretboard with Dale’s signature not-quite-Super-400 inlays. He designed the logo; I just said, “Make it art deco.”
We sourced all the bits and bobs from StewMac and Allparts and Reverb and the like, mostly to get that chrome look I so adore. Graph Tech Ratio tuners, Duesenberg Radiator trem (had to order that one from Germany), TonePros TP6R-C roller bridge. The pickups were a genius suggestion from the builder, Guitarfetish plug ’n’ play 1/8" solderless swappable, which means I have about 10 pickups in the case to choose from: rockabilly to metal. And both slots are tapped, with the tone knobs serving as single- to double-coil switches. I put the selector on the lower horn to accommodate my tendency to accidentally flip the thing on Les Pauls—definite lifesaver.
Reader and guitar enthusiast, Cody Lindsey.
Dale offered to chamber this monster, but I said what doesn’t kill you makes you stronger. It weighs in at 11 pounds, if it’s an ounce. We carved the neck to match a ’60s SG, so it’s like the mini bat you get at the ballpark on little kids’ day. Easy peasy. 1 11/16" nut, 25" scale, jumbo frets, just 2 1/8" at the 12th fret.
Delivery in its lovely, hygrometer-equipped Cedar Creek case actually happened a month or two shy of my 41st, but hey, you can’t rush these things. We ended up with a studio Swiss Army knife; it does a bit of everything and does it effortlessly. A looker, too. Dale didn’t spend his career doing this kind of thing—he was in IT or some such—and I imagine he’s winding this “hobby” of his down these days, enjoying retirement with a bottle of Killian’s and a lawn chair at Duluth Blues Fest. But this guitar will live on as a marker of his skill and otherworldly patience. It sits at the head of the class in my practice room, welcoming any visitors and bringing a smile to my face every day. And Dale, my friend, I’ll be 50 before you know it....
Cody requested that Dale design an art deco logo for the guitar’s headstock.