When aging a project guitar, it’s best to take it apart and start small. First, we focus on the metal.
This month, we'll discuss some basics about DIY aging/relic'ing and I'll explain a project I recently did. I chose a budget electric guitar that retails at €199 including shipping (about $217 USD). A guitar in this price range is perfect for a beginner relic'ing project, because if it's not perfect or you ruin something by accident, it's not the end of the world. Besides this, I was curious about the build quality of such a guitar, plus it gives us a perfect base to enhance and make more individual.
I decided on a Les Paul Junior Double Cut copy, a guitar design that Gibson released in 1958 and that's still in production today. It's a basic design: a single P-90 pickup placed above the wraparound bridge, with a Telecaster-like master volume/master tone configuration. This model is called DC-Junior TV Yellow and is made by Harley Benton, which is the home brand of the German-based Thomann company, one of the biggest guitar retailers in Europe.
A guitar in this price range is perfect for a beginner relic'ing project, because if it's not perfect or you ruin something by accident, it's not the end of the world.
The guitar offers good basic parameters: a solid mahogany body with a glued-in mahogany neck, a dark-stained amaranth (peltogyne) fretboard, aka purpleheart, instead of the classic rosewood material. The rest of the specs are close to vintage. We'll discuss single parts and aging them one by one, and replacing some of them for optical or performance reasons, as part of this project.
When the guitar arrived, I was more than surprised about the overall quality and craftsmanship. I brought it up to tune, plugged it in, and could instantly rock. Fret job, paint job, intonation, and action were excellent. The pickup sounds really good. What else could one expect for this price? Especially the fret job and the use of factory D'Addario strings (.010–.046) are remarkable in this price range.
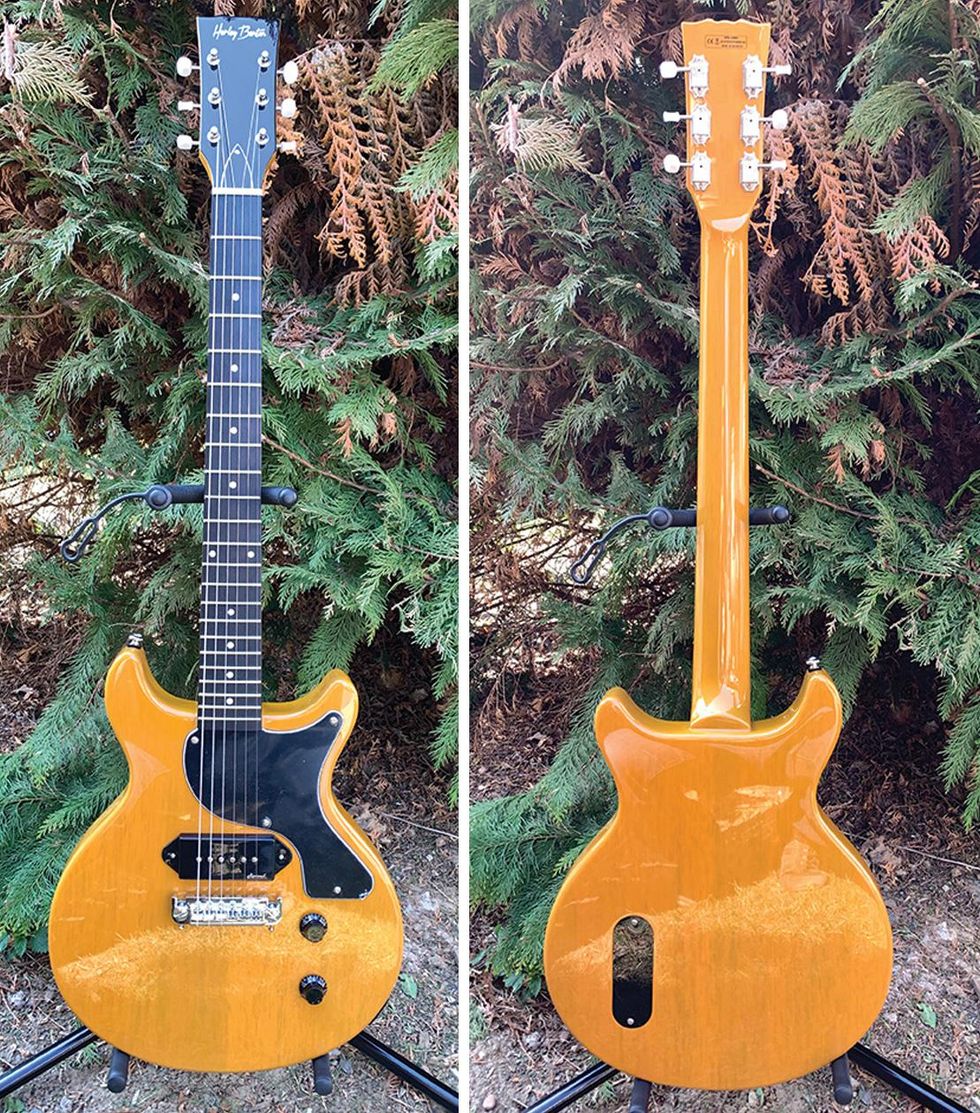
Images 1 (left) and 2 (right)
Courtesy of singlecoil.com
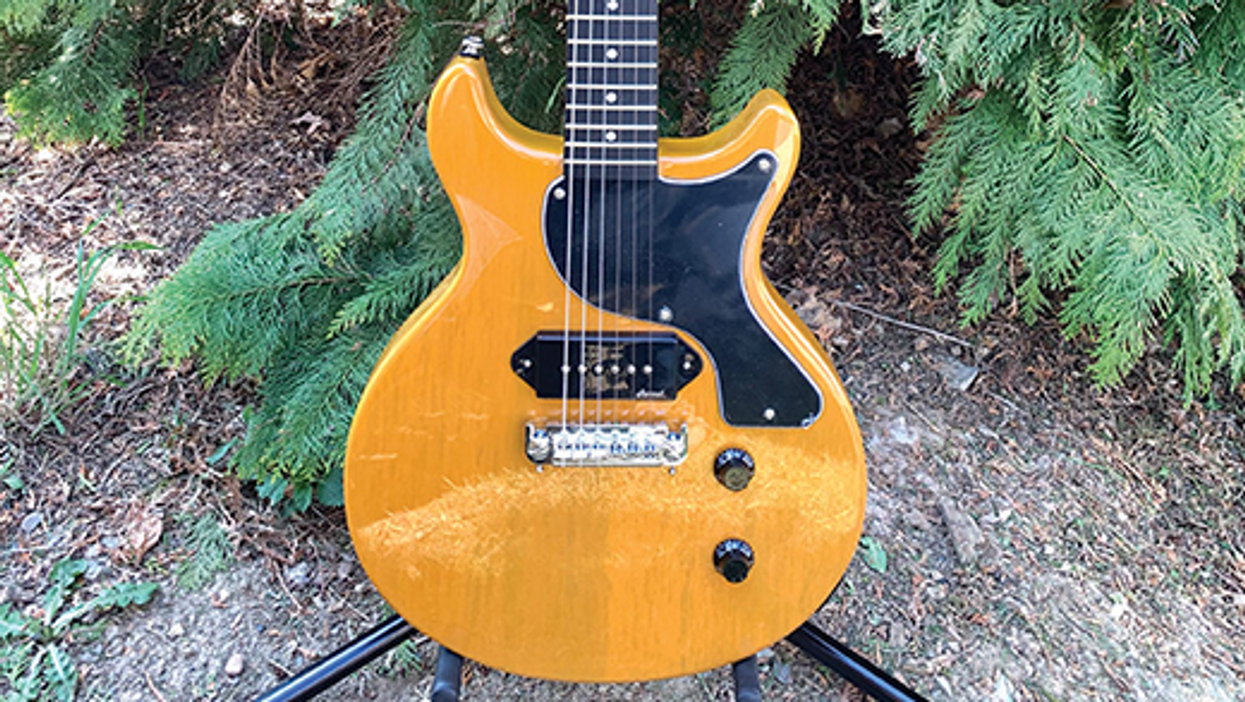
Images 1 and 2 show the guitar as received, so you have a first impression of what I'm talking about. It's not a real TV yellow, and more of a butterscotch/caramel/mustard color, but with a nice transparency so you can see the grain of the wood. We'll come back to this later in the project.
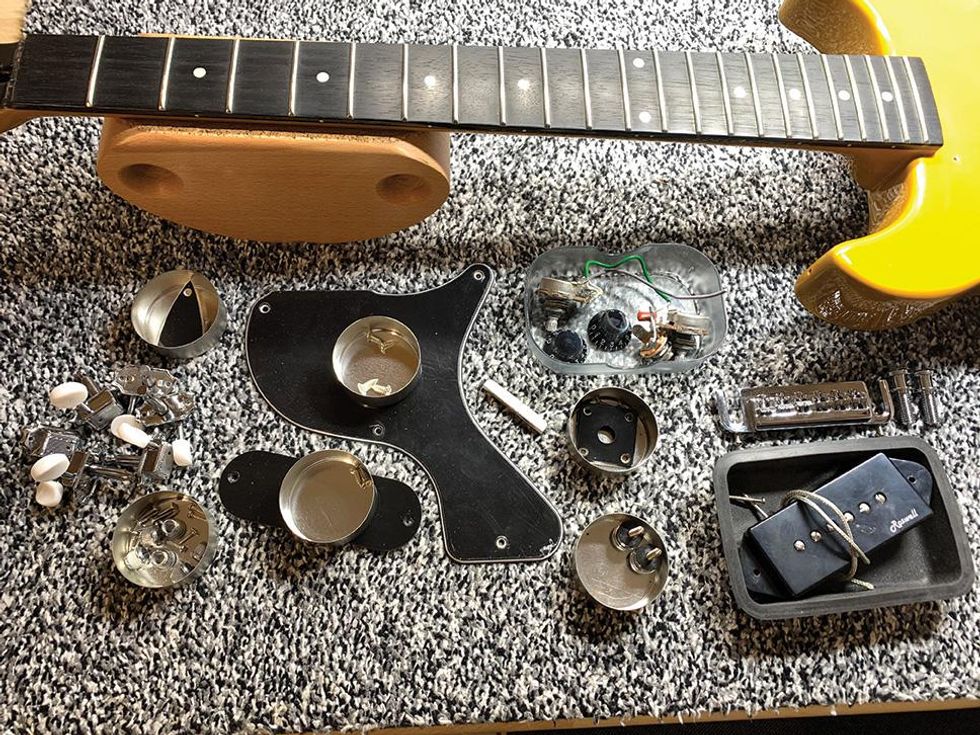
Photo 3
Courtesy of singlecoil.com
The first step is to completely disassemble your guitar, as I did, which you can see in Image 3. It's helpful to separate and label all small parts so you don't have any difficulties putting them back together. Take photos of the whole guitar and the details before you take it apart, and get some small containers (empty cans, boxes, cups, or whatever) to store all parts during the project. Store the screws together with the corresponding hardware, i.e. the screws from the pickguard taped on the back of it ... you get the idea. Also, as the proud owner of several cats and a dog, I speak from experience when I highly recommend using containers with a lid so you can close them, at least when your furry buddies have access to your working space.
I completely took the guitar apart except the bushings (aka "inserts" or "anchors"), because it was obvious that glue was used additionally to secure them. It's not difficult to get them out with the right tools, but in the process you could end up damaging the wood, having to repair the damage by re-drilling the hole and filling it with a wooden plug. There's a lot of debate on the possible tonal influence of the bushings, but my experience is that it's very, very little (if any) as long as it sits tight and can't move. I decided to leave them alone, but it's also possible to slightly age the visible part of the bushings so they won't stand out from the rest.
Let's proceed with an easy-yet-effective aging procedure. We will start with all the screws, followed by the rest of the metal parts.
Your shopping list for this is very small. Here we go:
- Goggles, gloves, surgical mask, and a shop apron to protect yourself. (We'll need this all through this series: safety first!)
- Old newspapers to protect your working space.
- A soft piece of wood like spruce, pine, fir, etc.
- Some Q-tips and paper towels.
- An old cup filled with cold water.
- Steel wool (preferably 0000 grade) or sanding pads (e.g. Micro-Mesh).
- Iron (III) oxide (ferric oxide) liquid.
You don't need much of the ferric oxide; a small bottle will do. This chemical is often used for etching printed circuit boards, so it should be easy to find. Be careful with this stuff! Chemicals can do harm if not used properly. Only use them in well-ventilated areas, always wear goggles, gloves, apron, and a surgical mask—and don't forget to protect your working space with old newspapers.
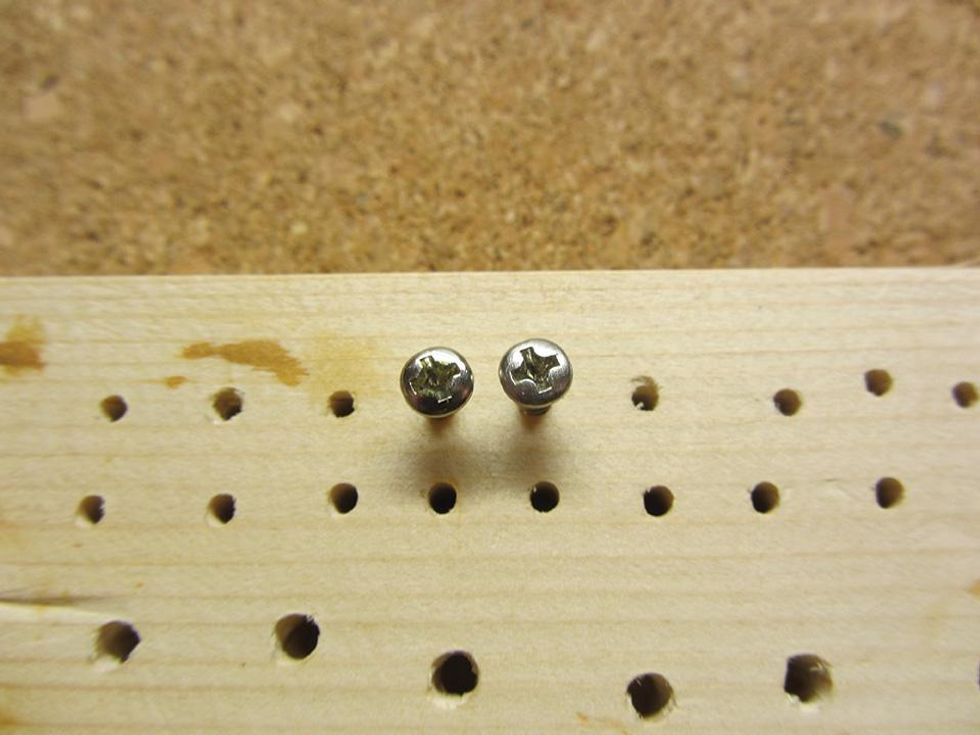
Photo 4
Courtesy of singlecoil.com
So here we go. Remember basic rule #1: break the shine! All screws on this guitar are nickel plated and very shiny. First, lightly rub them with steel wool or a fine-sanding pad until the glossy shine is gone and the color is dulled. Don't forget the edges of the screws. Image 4 is a before/after photo of this process. I used a flexible Micro-Mesh pad with 400 grid.
A lot of people are happy with the optical results after this simple treatment, but for more effect, we'll add some light signs of corrosion in the next step.
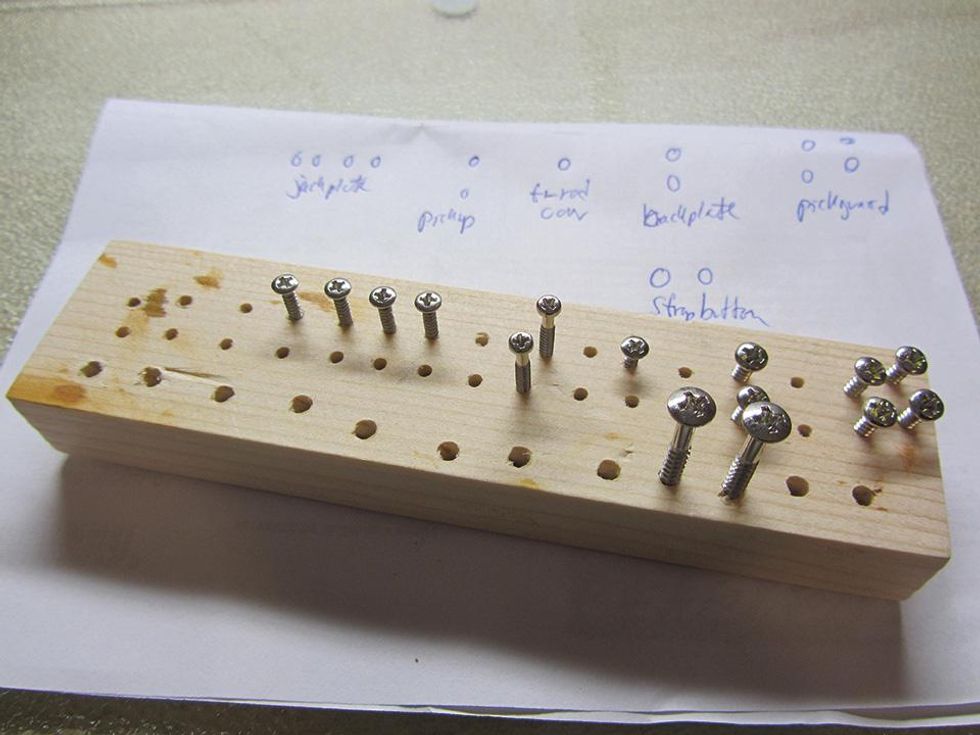
Photo 5
Courtesy of singlecoil.com
Take a piece of soft wood and screw in all of the screws with a screwdriver that matches the head type and size on your screws (Image 5). You don't need to screw them all the way in—just until they can't move or tip over. To keep the overview, arrange them in groups and make a kind of roadmap of what goes where. This way you won't mistake any of the screws as you reassemble the guitar.
Place the wooden piece with the screws on an even surface covered with old newspapers in a ventilated area. Place a cup with cold water within reach. Now dip a Q-tip into the ferric oxide liquid, but remember to use gloves, goggles, etc. to protect yourself. Place the Q-tip on the head of the screws to apply the ferric oxide. The oxidation process will start immediately. Depending on the metal of the screws and your personal taste, this process can range from seconds up to a minute, so it's a good idea to get a feeling for this by first testing it out on a few extra screws. To stop the process, simply dip the screw into the glass of cold water near you and rub it instantly with a piece of paper towel. Caution: Ferric oxide can color the coating of your sink. That's why a cup of water is advised here instead of rinsing screws with running water under a faucet.
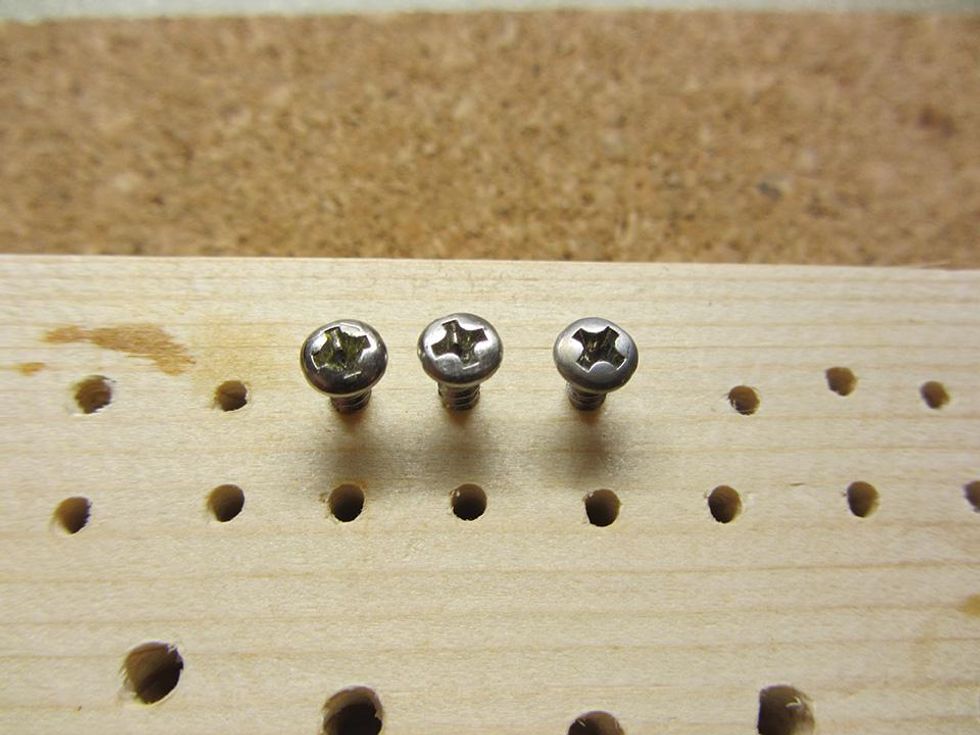
Photo 6
Courtesy of singlecoil.com
You can see the process and all three stages side by side in Image 6. If you feel the oxidation process was too much and you don't like the look, you can use steel wool or a Mesh pad to remove some of the oxidation.
Don't overdo it. I've never seen any rusty screws on a vintage guitar. They're usually a little bit dull, showing some light corrosion, if any. Perhaps breaking the shine will be enough without adding any of the ferric oxide. Simply test it on some extra screws and see what you prefer.
Next month we'll perform a different guitar mod before we return to age more metal parts: the bridge, strap buttons, and the tuners. For this, I'll leave you with a little homework to prepare: Get yourself a small bucket with a lid (larger yogurt buckets work perfectly) and collect a nice mixture of funny things like rusty nails, broken glass, gravel, sand, little stones, basalt, etc. to put in your bucket. Until then ... keep on modding!
[Updated 7/26/2021]
- Last Call: Someday You'll Regret That Relic Job - Premier Guitar ›
- The DIY Relic Job—Fantasy or Reality? - Premier Guitar ›
- Paranormal Guitar Mods That’ll Rock Your DIY World - Premier Guitar | The best guitar and bass reviews, videos, and interviews on the web. ›
- The DIY Relic Job—Fantasy or Reality? - Premier Guitar ›
- DIY Relic’ing: Hardware Continued - Premier Guitar ›
- DIY Relic’ing: Neck Treatment - Premier Guitar ›
- Chibson Announce The Priority Delay Pedal ›
Wampler Pedals releases the Brent Mason signature ReWired pedal.
Brent Mason’s career as a session guitarist spans over five decades, making him one of the most recorded musicians in history. His unparalleled talent has graced more than 1,000 albums, playing with and contributing to chart-topping hits from icons like Alan Jackson, Brooks & Dunn, Vince Gill, George Jones, Dolly Parton, Blake Shelton, Shania Twain, and many others. A Grammy winner and Musicians Hall of Fame inductee, Brent has also earned twelve Guitarist of the Year awards from the Academy of Country Music, two CMA® Musician of the Year titles, and was named one of the top ten session guitarists ever by Guitar World magazine.
Brian Wampler’s journey with Brent Mason began way back around 2004, when he’d make weekend trips to Nashville just to watch Brent play. Inspired by Brent’s incredible talent and effortless touch, Brian set out to craft a signature pedal that would become the cornerstone of Brent’s sound. The Overdrive channel perfectly captures Brent’s iconic rhythm tones, offering everything from crystal-clear light dirt to a punchy, muscular Overdrive. The Distortion channel screams with rich harmonics, making it ideal for solos - whether used on its own or stacked with the Overdrive for maximum impact.
An Iconic Tone, Reimagined
With two fully independent circuits, the ReWired gives you access to both classic Overdrive and powerful Distortion channels that have been tweaked to Brent’s exact specs. The Overdrive side is perfect for rhythm and Chicken Pickin’ - built for warmth and maximum clarity, staying true to Brent's iconic sound. The Distortion channel is a perfect lead tone and offers a weighty “British” Plexi-like punch. The ReWired also features an order switch that allows the stacking direction to be changed on-the-fly without the hassle of changing cables.
Dual inputs and Outputs
The ReWired can be connected with a single mono input and output cable, just like a regular guitar pedal, or you can connect each channel independently (very useful when used with a loop switcher!). You can even connect a pedal in between both channels - try adding a compressor or an EQ if you want to sculpt your tone further.
Fat Blends
The ReWired incorporates our unique “Fat” circuit control onto each channel as separate knobs. This allows you to dial in just the right amount of low end thump and presence into your rig - helping tame big speaker cabs or enhance smaller ones. The Overdrive channel also has Brent’s signature blend control, allowing you to tune the amount of drive to your liking.
ReWired - for ALL players
This is not a guitar pedal to be bought and put in a case and admired - but with its exclusive new Prime Silver finish (a nod to Brent’s infamous ‘67 Telecaster) and custom graphics we wouldn’t blame you if you did. The Wampler ReWired is designed to be at the heart of your rig. It sounds great with every guitar and amp we’ve tried it with and covers so many genres of music with ease. It comes with Wampler’s standard no fuss 5 Year guarantee and is built from the highest grade components to withstand the rigors of practice and gigging for years to come. The Wampler Brent Mason ReWired Signature Overdrive and Distortion - Rewire Your Sound Today Built in the U.S.A. with high-grade components selected for superior sound and response, premium finish and controls Dual Independent Overdrive and Distortion channels Independent Level, Gain, Tone and Fat controls for both channels, Blend Control for Overdrive channel Channel Order switch with two pairs of Input and Output jacks Power draw: 35mA at 9V and 40mA at 18V. 9-18v power jack - DC supply only, do not exceed 18v DC, battery Included Includes Limited 5-Year Warranty Dimensions: 5” x 4.5” x 2.4″ (88.9mm x 114.3mm x 58.0mm)
The Wampler ReWired carries a street price of $279.97. For more information visit https://www.wamplerpedals.com/
The body shape of this 6-string seems surprisingly ergonomic, but that perception changes when you hold its neck!
Originally priced at $25 and tagged for the student market, this guitar built at the Kawai factory sounds surprisingly good, but its neck is a “husky” fit.
Recently, I celebrated a birthday—and let me tell you, after 50 I just feel thankful for a shot at another day. I’m at the point in life where I wake up with injuries, like random bruises or sore joints after a good night of sleep. What the heck! As part of being over 50, I find it necessary to keep up on my vaccinations and health things, and in my recent travels, I was surprised to learn that so many people have a birthday around the same time as me. It started with various phlebotomists, doctors, and nurses. Then it continued with people at work and social media messages. I never really thought about it before, but I did some research and, in fact, more babies are born in September than in any other month! My birthday is October 6, but according to my dear mom, I was two weeks late (as usual).
And so it goes that I pondered this proliferation of Virgos and Libras, and my hypothesis came into focus. Were we all the result of our parents’ Christmas and New Year’s celebrations?! I have to say, there was a camaraderie discovered among my fellow party babies when I presented my findings to them. Now, being born in the early ’70s also had me thinking of the culture of the times. Hippie life was fading as young people started to realize they had to get a job, and alas, long hair and beards were being replaced by staid 9-to-5 gigs that could slowly suck the life out of you. So, given the cultural mores of that era, I thought that this month I should write about the Sorrento Swinger.
“Hippie life was fading as young people started to realize they had to get a job.”
Born around 1967—maybe in September—these Swingers hailed from the “crazy” design period of the Kawai Co. Kawai produced some of the coolest guitar designs from 1967 to ’69, and there were some very creative guitar designers there on the job. Kawai had poached some of the finest employees from the wreckage of the Shinko Gakki factory (Pleasant, Intermark, etc.) and through the purchase of the Teisco brand. In this era, Kawai usually used three different standard pickups and they all sound great, plus the units are always wired in series, which is just awesome.
For a 25-buck, Japan-made guitar from the ’70s, the Swinger has an elite-looking headstock—and, on this example, most of its tuners.
Now, the Swinger (and similar Kawai-made guitars) came from an era where U.S. importers would order small batches of instruments that were often unique and extremely gonzo. The guitars might have been destined for medium-sized music stores or direct-order catalogs, but whatever the case, the importer usually gave the guitars names. In this instance, it was Jack Westheimer who featured this model as an “exclusive” design. In Westheimer Corporation catalogs from the time, the Swinger carried the A-2T model name (there was another one-pickup model called the A-1) and sold wholesale for $25 in 1967! As the catalog mentioned, these were “priced for the teenaged trade.” This particular guitar featured the Sorrento badge, and was sold through some sort of music store that’s probably long out of business, but all the Swingers were the same.
The Swinger’s large mahogany neck (sans truss rod) is robust and beefy in all the nicest ways. Like, when I was a kid, I was considered a “husky” fit. That’s this neck: husky! The striped pickguard is a Teisco holdover and the controls are as simple as it gets. Two knobs (volume, tone) and two pickup selectors is all there is, but the beauty is in the body. That lower bout is shaped like some sort of 1969 lounge chair. The strap pin is totally in the wrong place, but the big bottom swoop is worth it. Yep, the Swinger was ready to bring in the dawn of the 1970s, but alas, the guitar came and went in a blink.
Hand-built in the USA, this pedal features original potentiometer values, True Bypass, and three unique modes for versatile distortion options. Commemorative extras included.
This limited-edition pedal is limited to a 1,974-piece run to commemorate the year of DOD’s start, 1974. The original OD250 put DOD on the map as “America’s Pedal” and continues to be an industry favorite today. Each pedal will have a serial-numbered Certificate of Authenticity, a commemorative laser-etched pedal topper, several commemorative guitar picks, and multiple commemorative stickers.
Hand-built in the USA, the DOD OD250 – 50th Anniversary Edition pedal boasts Gain and Level controls using the original potentiometer values and tapers giving the control knob the feel and range that DOD enthusiasts love. A three-position toggle switch features the OD250’s classic “SILICON” mode replicating that original sound. The “Ge/ASYM” mode uses a vintage Germanium diode for asymmetrical even-harmonic distortion. “LIFT” mode cuts the diode clipping from the signal path allowing for a clean boost or even a dirty boost when the vintage LM741 op-amp is clipped at higher gain settings. The DOD 250 also features True Bypass to maintain the integrity of your guitar tone.
This limited edition OD250 is outfitted in a stunning metal flake gray finish with classic yellow screenprint in a callback to the original OD250 of the 1970s. An etched aluminum badge on each unit commemorates this occasion. The DOD OD 250 – 50th Anniversary is ready to take its place among the historic DOD pedal lineup.
When John Johnson and “Mr. DOD” himself, David O. DiFrancesco set out to make DOD Electronics in Salt Lake City, Utah 50 years ago, they had no idea how enduring their legacy would be. Now 50 years later, DOD Electronics continues to be at the forefront of pedal technology. The DOD OD 250 – 50th Anniversary Pedal is an exceptional testament to DOD Electronics’ long–standing success.
Retail Price: $250.00
For more information, please visit digitech.com.
Want to know how tubes shape your tone? Join PG contributor Tom Butwin as he breaks down preamp vs. power tubes, tone tweaks, and biasing, in this ultimate beginner's guide to tube amps. From Fender cleans to Marshall grit, learn how to unlock the full potential of your amp!
The Tube Store Guitar Amp Tube Packages
Here you will find brands like Fender guitar amps, Marshall amps, Vox amps, Mesa Boogie guitar amps, Orange amps, and many other tube amps listed. You will find replacement tube sets in different option levels ranging from Value to Premium to Ultimate. Purchasing guitar amp tubes couldn't be easier.
Tube Amp Doctor Tube Sets
Go and see the doctor: Find all of our products here: our newest product line of high-end Redbase tubes, our famous premium selected tubes, and the equipment we manufacture like our Class A Converters, the Bias Master or the Silencer. Furthermore our TAD reverb cans, condensers and of course the amp kits on boutique level.