
Hello and welcome back to Mod Garage. This month we continue our relic'ing project, taking a closer look at the pickup and its black plastic cover. Our Harley Benton project guitar has a single P-90 dog-ear pickup at the bridge position, similar to a vintage Gibson Les Paul Junior. The P-90 is a single-coil pickup, but sound-wise, its raw, raunchy, beefy tone is the perfect crossover between a single-coil and a humbucker. No wonder many players prefer this type of pickup to have the best of both worlds.
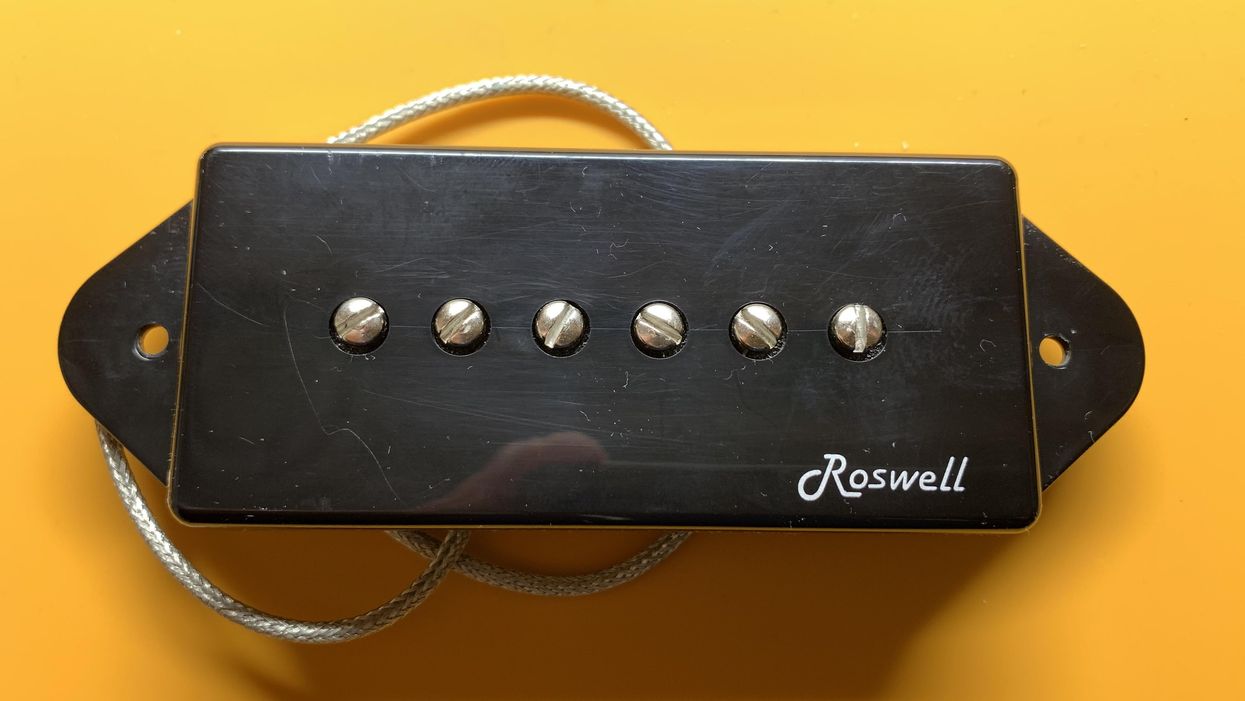
Our guitar is loaded with a pickup from Roswell Pickups. If you've never heard of Roswell, it's one of the biggest pickup manufacturing companies in the world, serving countless guitar companies, including the big guys. Chances are good that you've played their pickups without even knowing it. The company's former name was WSC Pickups before it was renamed in 2014. Our pickup, shown in Image 1, is the "P90D" Dog Ear model with a black dog-ear cover sporting the Roswell logo. Interestingly, it's a neck pickup they put in the bridge position of this guitar, but a bridge version is available as well.
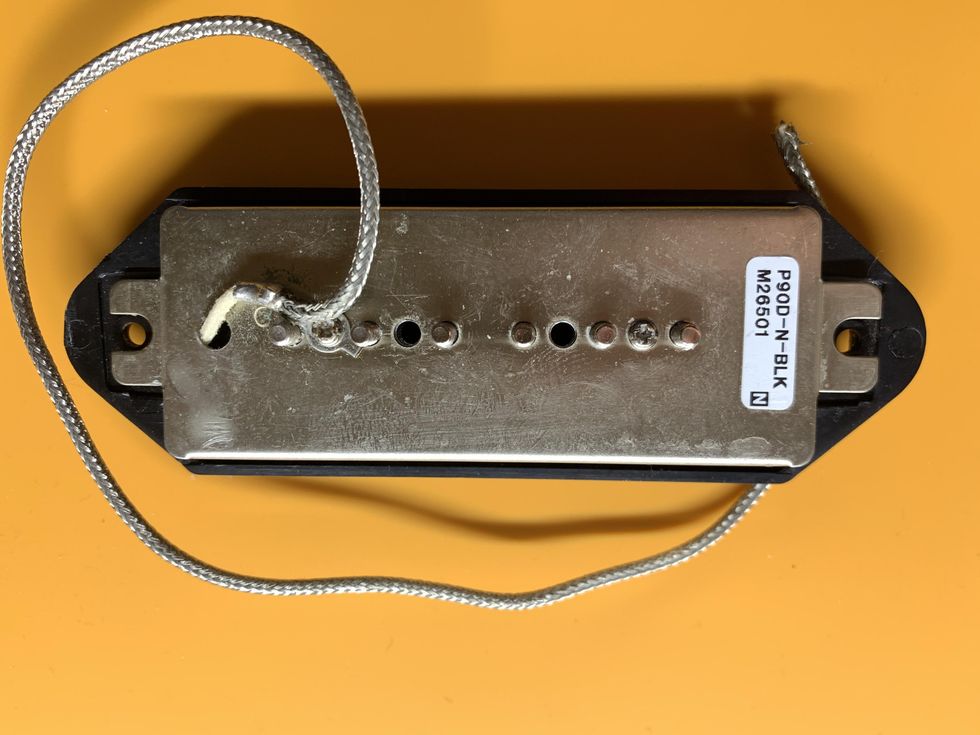
Image 2
The overall construction of the pickup looks very classic. It even features the typical braided shielded wire type that was used in the '50s (Image 2). It's a scatter-wound pickup with degaussed alnico 5 bar magnets, so we can say it's close to an original pickup from the '50s. I was really curious how it would sound. To my surprise, it sounds very fresh and alive, with a good portion of high-end—definitely more on the single-coil side rather than in the humbucker ballpark. It's not the typical P-90 sound we all know and expect, but I really like this pickup.
Personally, I think it's better to have some high-end even if you don't need it, rather than to need it and not have it. I decided to keep it for this guitar, but my brain already worked in the background on how to tweak the electronics to also receive a more typical P-90 tone (more about this in the next part of this series). Anyway, if you want a heavier and darker tone, it's easy to get a replacement pickup and there are many, many P-90 pickups available without breaking the bank.

Image 3
After taking the pickup out of the guitar, I decided to change the cover for a more vintage-looking overall shape. The cover the pickup came with is rectangular and looks too boxy to my taste. The covers from the '50s are rounder and smoother, so I decided to change it because I prefer this aesthetic. A surprise was just around the corner: The cover is glued onto the pickup, so removing it on the fly wasn't possible. I have no idea why they glued on the cover in the factory, but after a minute it was clear there's no easy way to remove the cover without damaging the pickup. The cover was absolutely bonded to the pickup's top. So, I used a simple hairdryer to warm up the cover and, after some minutes, I could remove the cover with my hands (Image 3).
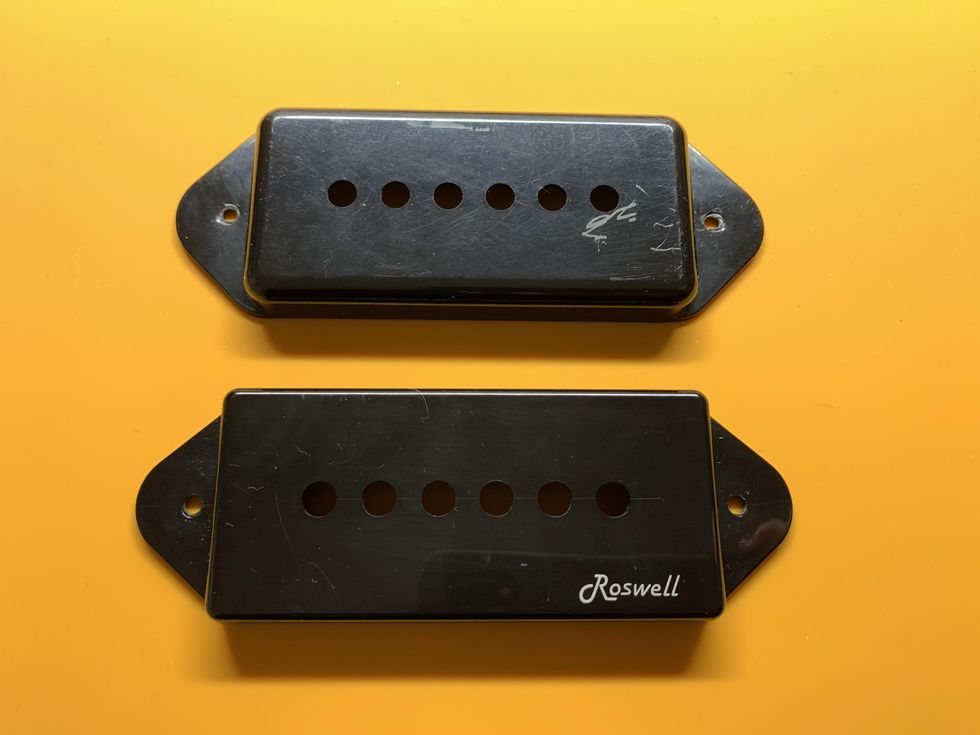
Image 4
It's up to you if you want to remove the glue from the top of the pickup by scraping it away after warming it up with the hairdryer, or simply leave it as is. I decided to leave it because, with the new cover on, you can't see it anyway. A word of warning: Don't use a heat gun for this operation. A hairdryer is all you need. The pickup cover is thin plastic, which a heat gun can melt within seconds.
Comparing both covers side by side (Image 4) clearly shows the different shapes, and you can decide what you like best. The rounded-edge cover I chose is very close to the vintage pickup covers from the '50s, and I had a used one in my parts tray. I didn't care about the scratches and paint on it because we want to relic it anyway.
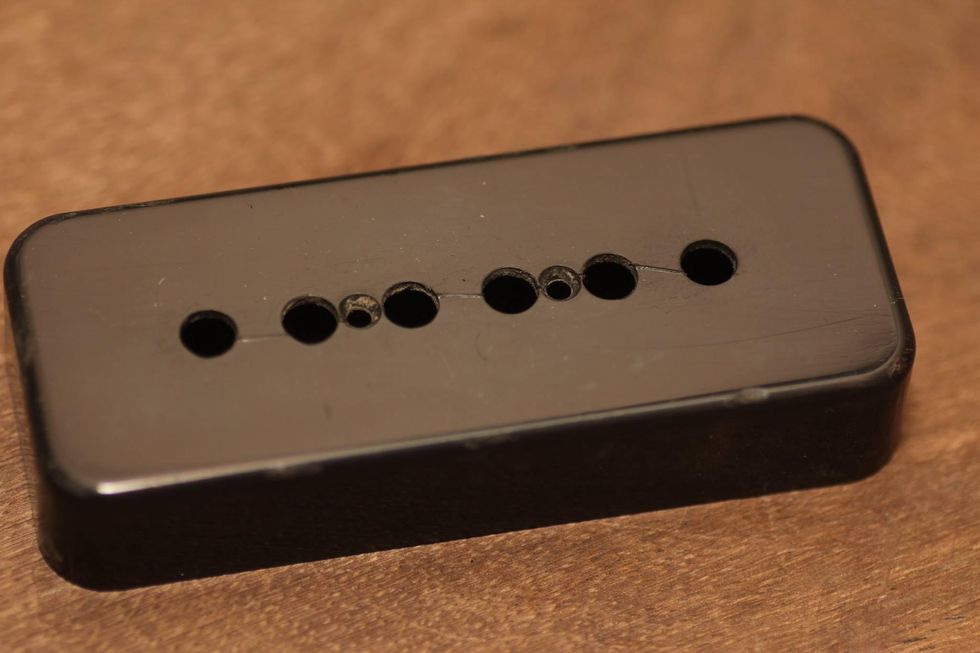
Image 5
Next, I took out the six pole-piece screws of the pickup because we want to age these, too, along with the two screws holding the pickup in place. If you've been following along at home, you know this procedure by now, but if you missed earlier parts of this series, please reference "DIY Relic'ing: Break the Shine," "DIY: Relic'ing Tuners, Part 1," and "DIY: Relic'ing Metal Hardware." We'll use the same relic'ing process here as we did for the other metal parts. As always, first break the shine with fine sandpaper or steel wool. After cleaning the screws with a brush, put them on a wooden board and use the iron (III) oxide (ferric oxide) liquid to create some patina. Don't forget to wear gloves and goggles and to use old newspapers to protect the surface you're working on. Once you're pleased with the result, stop the process with water and dry the screws with a paper towel before putting them back into the pickup.
Now, this is our first time with a piece of black plastic to relic, and, as you can imagine, it's harder to do compared to white plastic because the visible results are more subtle on darker materials. For an idea of what we're going for, Image 5 shows a vintage P-90 soapbar pickup cover from the '50s, which gives an impression of how a pickup may look after 70 years.
Images 6 & 7
As you can see, it's not just about building up artificial dirt marks, so I decided to follow this photo as a pattern for the replacement cover regarding scratches and damages. First, I took some fine steel wool and rubbed off the shine. After cleaning it with a brush, I used a steel scribe to mimic the damages between the holes. You can also use a nail, X-Acto knife, scalpel … whatever you have available. Next, I used a needle to put some fine scratches at the top and a very sharp small chisel to create some chunking damages on the border and the corners. To finish, put the cover inside your box with the mixture of nails, metal parts, broken glass, gravel, sand, little stones, basalt, etc., and shake it around until you like the result.
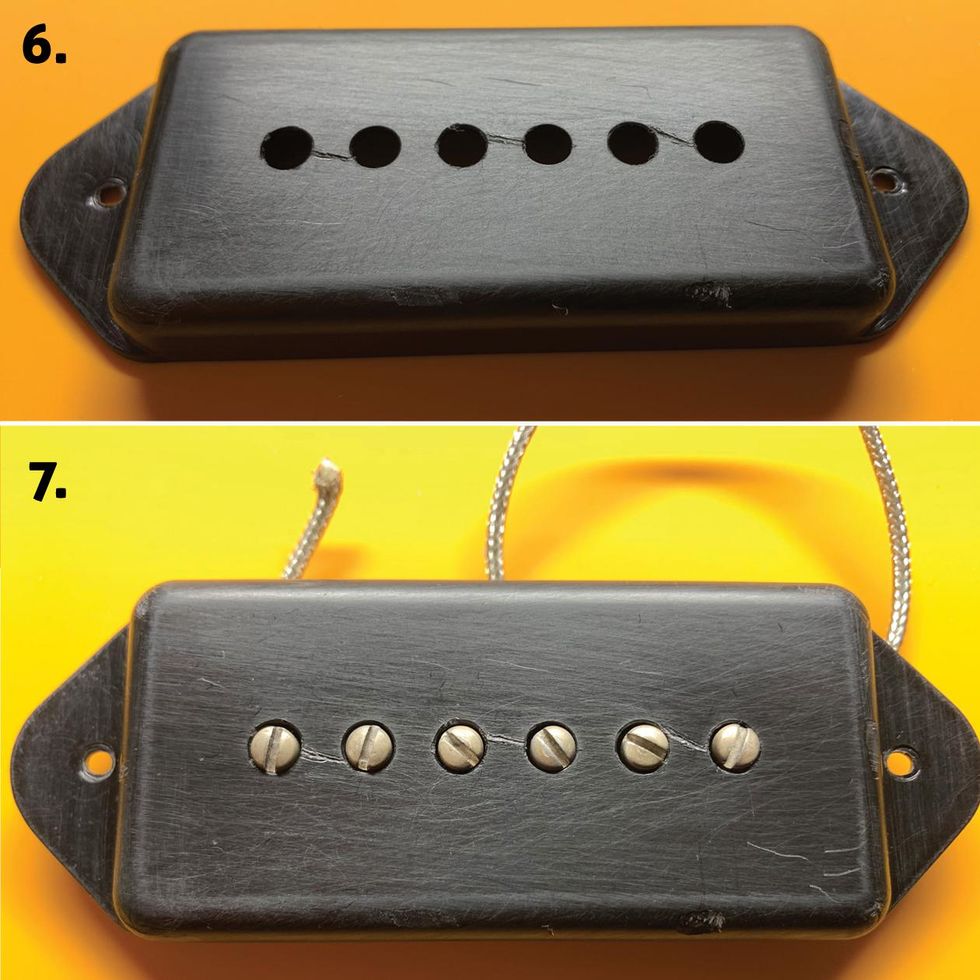
After cleaning the cover, put it on the pickup to see the final result, as shown in Image 6 and Image 7. Voilá!
Images 8 & 9
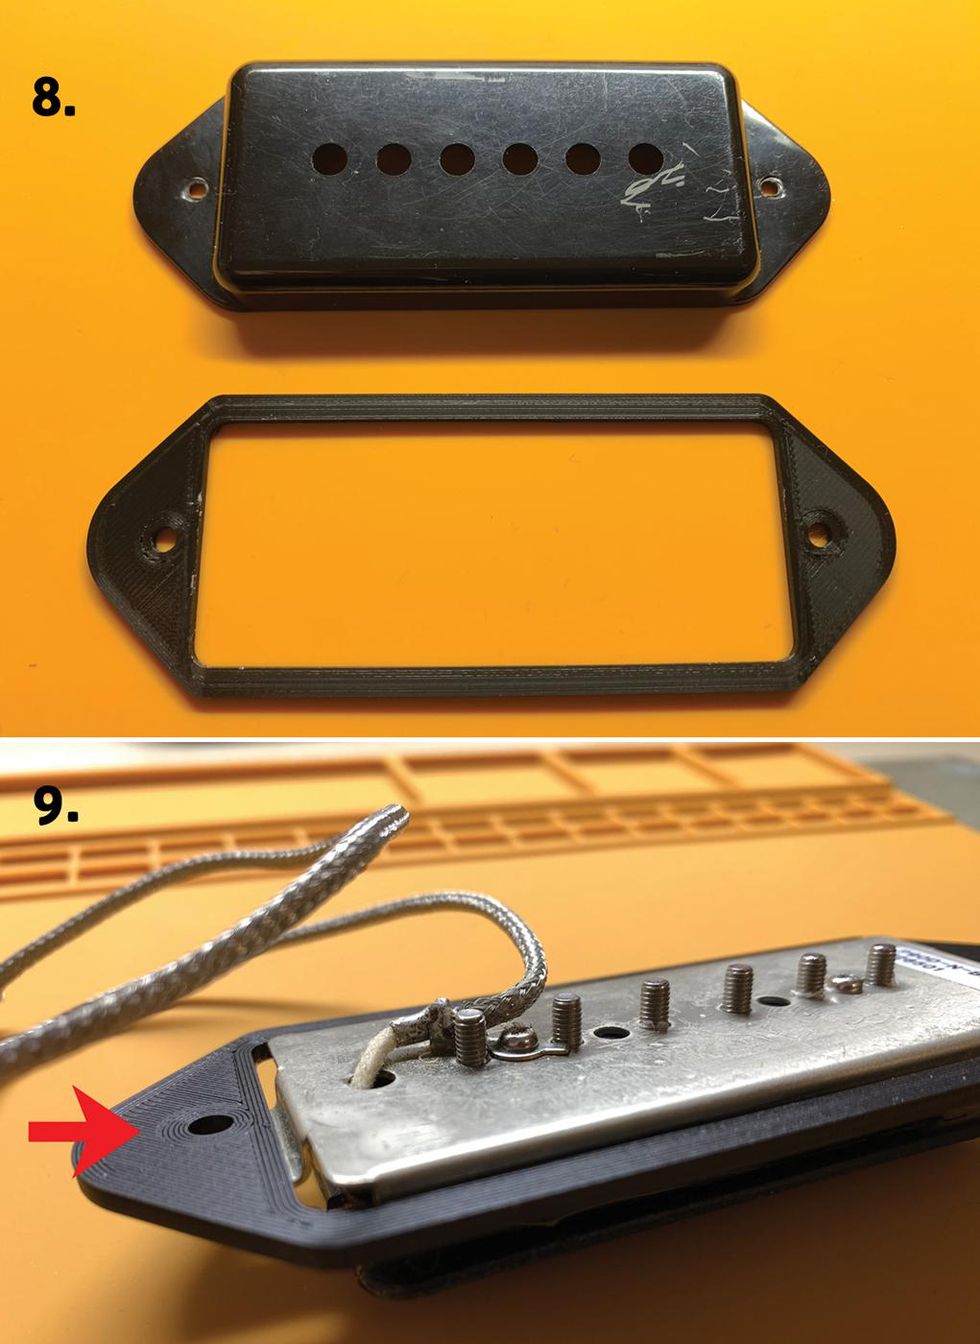
In closing, some words about height adjustment of such a pickup. I like a pickup height adjustment of 1/16" (1.6 mm) for a P-90 at the bridge position, but as you may know, there is no way to adjust the height of such pickups. All you can do is adjust the pole-piece screws to follow the radius of the fretboard, but there is no spring or latex tubing under the attachment screws of the pickup. For this, special shims are available to put underneath the pickup so it will rise. These shims are available in different thicknesses so you can balance your individual pickup height adjustment. I decided to put a 7/32" (2.5 mm) shim underneath the pickup, so it's perfectly balanced to my ears. To keep an optical appearance, I decided to use a shim made of black plastic in the exact shape of the cover (Images 8 and 9).
That's it for this round. In the next part of this series, we'll discuss the electronics for this guitar and start aging the components, including the knobs, the output jack, etc. But before this, I'll close the chapter about grounding next month.Until then ... keep on modding!